What’s up, everyone!
You might have heard about a recent cyber incident where the attackers were reportedly successful in wiping a lot of managed devices. The thing that stood out to me was that the management platform did what is was supposed to do since it was a legitimate command send from a compromised account.
That got me thinking. What are the options that are available to us to prevent this from happening? So in this and the upcoming posts I will explore options that Microsoft has made available to us.
In the first post I focussed on protecting the identity:
Securing the DaaS environment: protecting the identity – dominiekverham.com
In this second post I will cover:
- Scope tags
- Multi Admin Approval
- Clean Source Principle
- Privileged Access Workstation
- Break-glass accounts
Enjoy!
Scope tags
By default all resources in Microsoft Intune are visible to Intune admins. But there are situations where you might want to restrict access and visibility for IT admins. Here are a few use cases:
- create a test & production environment in Microsoft Intune.
- only allow Intune admins access to resources in their own scope (EU admins manage EU devices / US admins manage US devices etc).
- only allow certain Intune admins access to specific resources for one scenario, like a Privileged Access Workstation (PAW).
How do scope tags work?
- Create a scope tag. Base the name on the use case (or scope) like country/location or function (like PAW).
- Create a role assignment.
- Add the scope tag to existing or new resources.
Step 1: create a scope tag
Go to the Microsoft Intune admin center, Tenant administration, Roles, Scope tags. You can see the default scope tag in the overview. Click the + Create button to create your first custom scope tag.

Enter a name for the scope tag and provide a description.
You can have Intune automatically assign the custom scope tag to a group of devices if you want to. If so, enter the group in this step.

Make sure to admire your awesome work and save the custom scope tag. Intune will show the newly created tag in the overview:

Step 2: create a role assignment
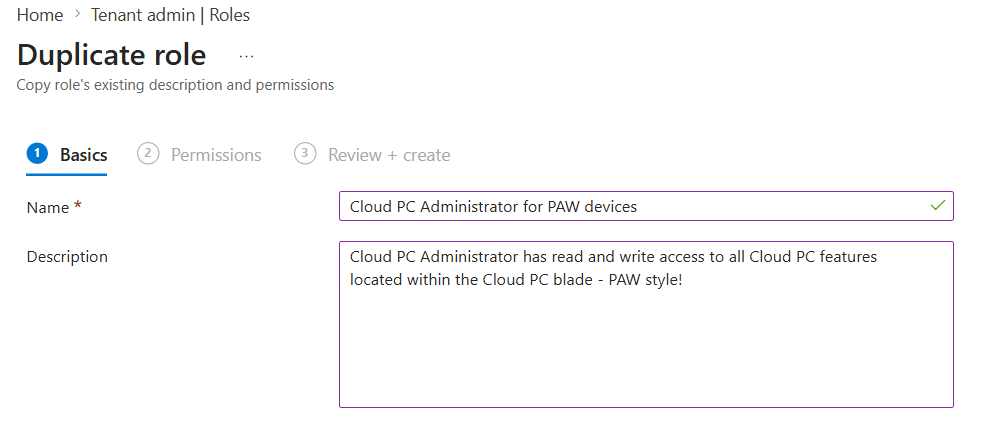
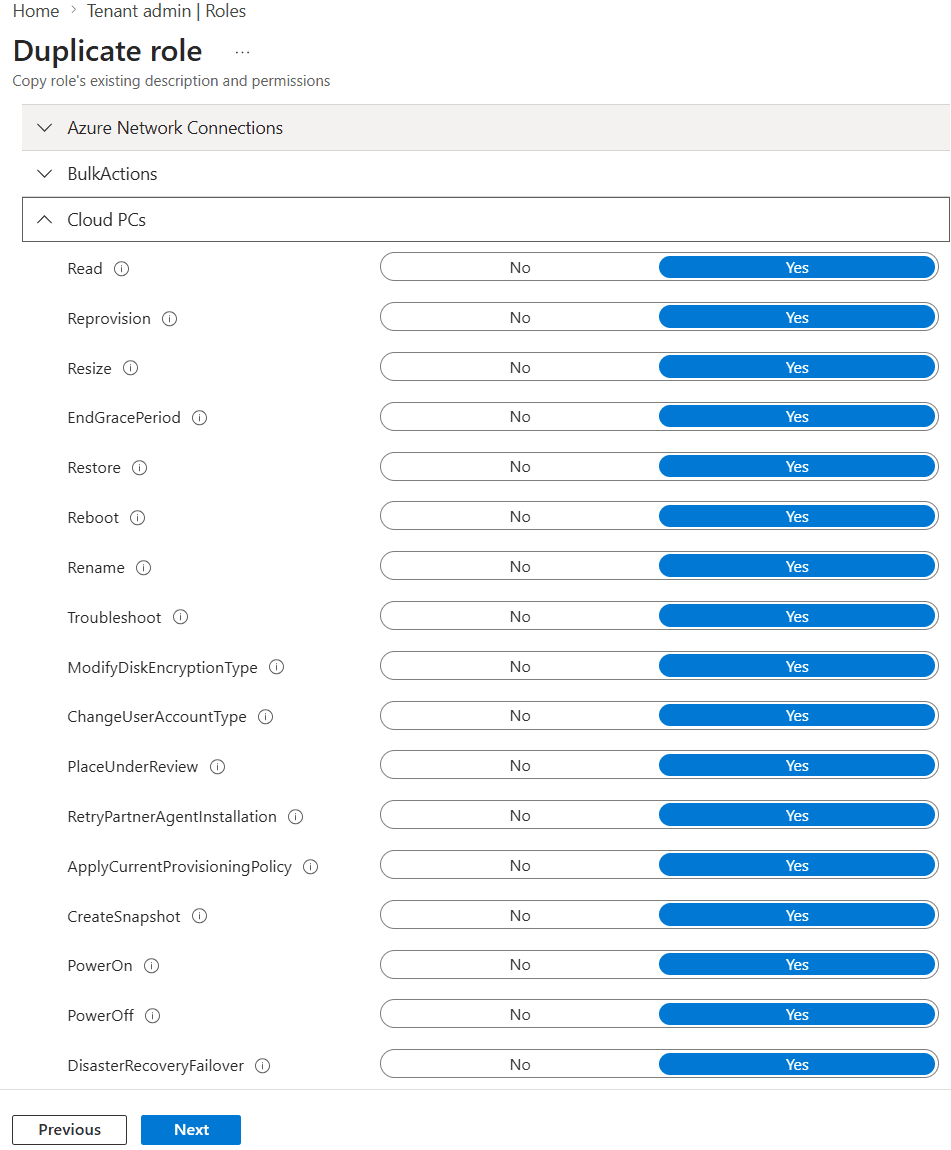
In my demo I will assume that Windows 365 Cloud PCs are used as PAWs. Windows 365 has a role called Cloud PC administrator which has read and write access to all Cloud PC features. This role shows all the resources with the default tag. So let’s duplicate this role and change the tag to our PAW tag.
Select All roles in the menu and search for Cloud PC. Both Administrator and Reader will show up. We are interested in the three dots on the righthand side next to the administrator role. Click them and select Duplicate.

Think of a descriptive name for the custom role and type in a description. Since it’s a duplicate of an existing role, you might want to highlight some specifics about the role.
We already have a nice template of permissions to work with since we are creating a duplicate of an existing role. If you want to customize the role permissions even further, this is the moment to do so.
Finish up by reviewing the custom role and click the create button. The new role will appear in the overview:

We still need to create an assignment for the new role. Guess what we are going to do next?
Click on the newly created role, select Assignments, + Assign.
We still need to create an assignment for the new role. Guess what we are going to do next?
Click on the newly created role, select Assignments, + Assign.

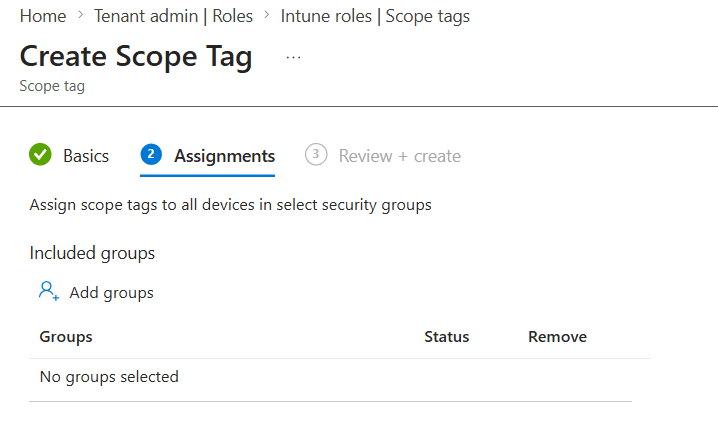
Next we can give the assignment a name and continue to Admin Groups.

The Admin Group step allows us to add a group of users who will be assigned to this role. So in this case I will add an Entra group containing Intune admins who will be able to manage our PAW environment.

Select the groups containing users/devices that you want to manage in Scope Groups.

In scope tags we can add the custom tag that we created earlier to tie it all together. Make sure the default scope tag is not in this list.

Review your configuration and click Create to save the role assignment.
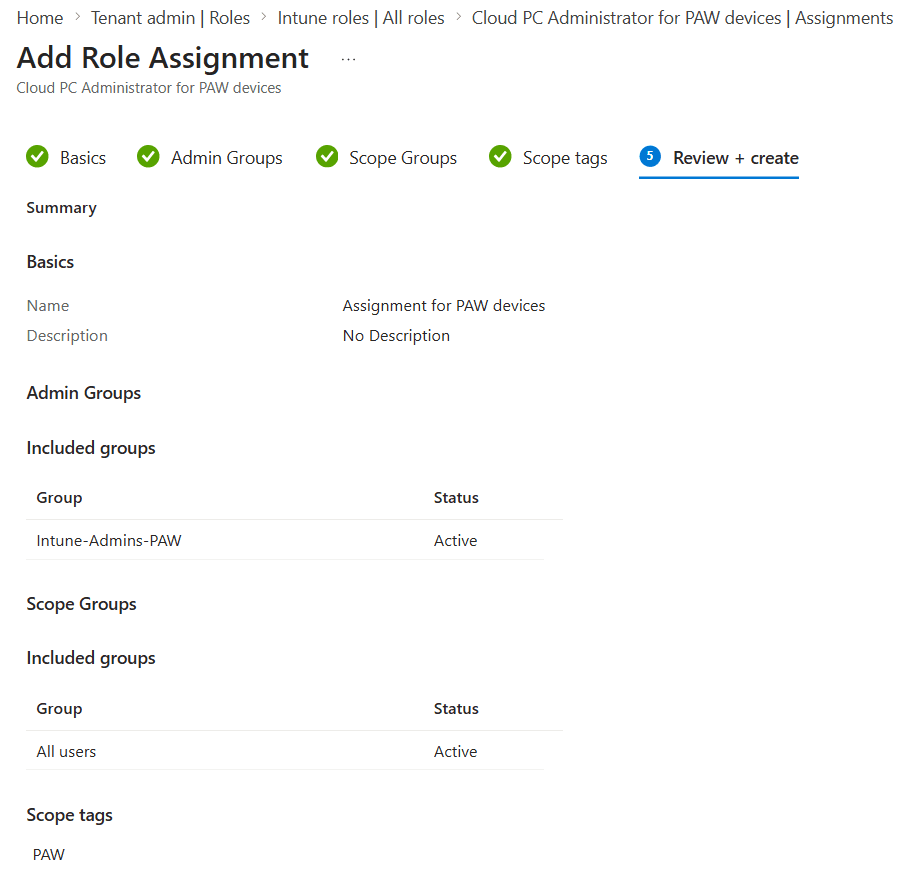
The role assignment is now visible in the custom role.
Step 3: Tag your resources
My demo environment has a couple of provisioning policies and I created one for PAWs. I removed the default tag from that provisioning policy and I added the PAW tag:

How do you know this worked?
I created a new role and role assignment based on the Cloud PC administrator role. The group I assigned the custom role to contains a user name Hulk. So let’s sign into Microsoft Intune admin center as Hulk and find out what access we have.
First test – let’s see if we get an overview of all devices:

And we cannot which makes sense because Hulk is a Cloud PC administrator, not an Intune administrator.
Second test – let’s open up the Windows 365 blade and see what information we get:

No errors and no information! That makes a lot of sense because I only tagged one provisioning policy with the PAW tag and nothing else. So this looks good.
Third test – we only should see the provisioning policy for our PAWs and no other provisioning policies:
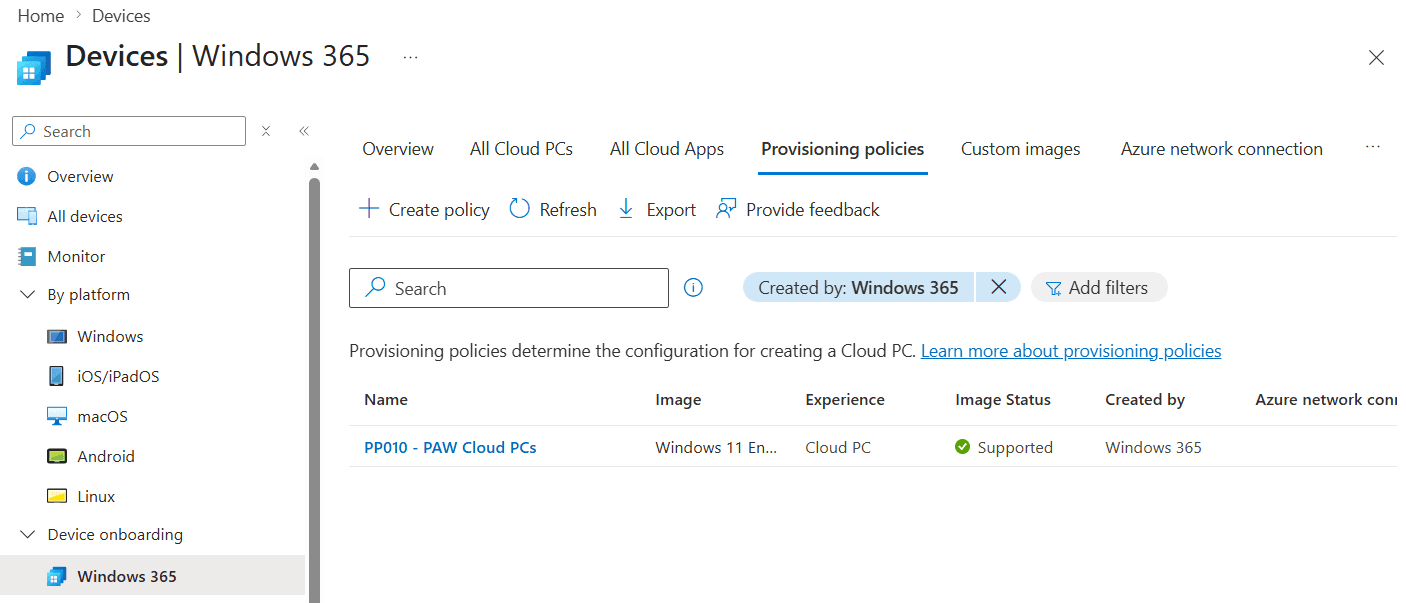
Just as expected we only have access to the provisioning policy with the PAW tag.
Multi Admin Approval

Multi Admin Approval is a feature in Microsoft Intune and is used to verify changes within the Microsoft Intune admin center before they are committed. It’s really useful to implement Multi Admin Approval for destructive actions like Device delete/retire/wipe. But you can use it for other things as well:
- Apps
- Compliance policy
- Configuration policy
- Device delete/retire/wipe
- Role
- Script
- Tenant configuration
The way Multi Admin Approval works is simple:
- Create an access policy. This is where you define what actions should be verified by another admin.
- A request is created once an admin wants to change an objects that is defined in the access policy.
- Another Intune admin has the ability to approve or deny that request.
- The original admin reviews the original request and must complete it before the change is committed.
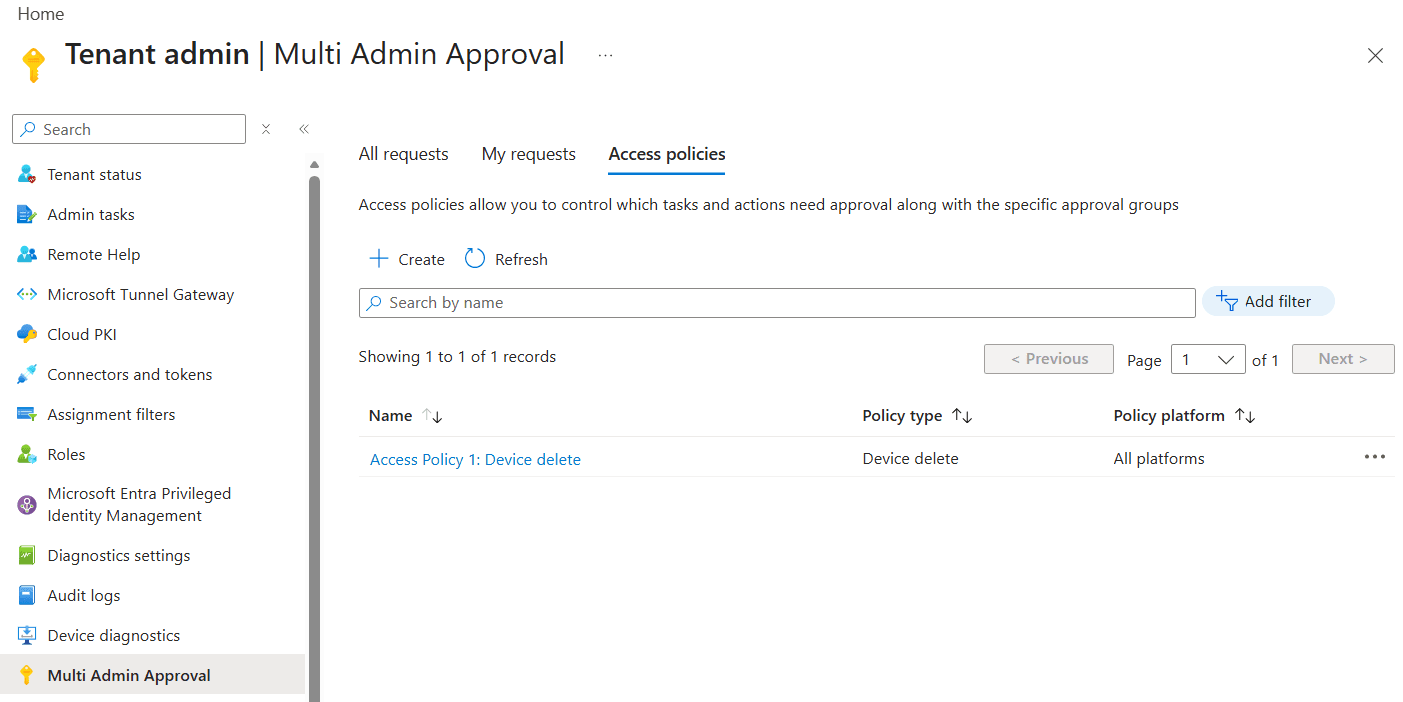
Let’s create an access policy. Sign into the Microsoft Intune admin center, Tenant administration, Multi Admin Approval. Select the Access policies tab, + Create button.

In the Basics step we can select the policy type, like device delete. Make sure to provide a name and description before we continue to the Approvers step.

Add an Entra group that contains Intune admins. These admins will have the ability to process approval requests. In this demo I created a group called MultiAdminApproval-ApproversGroup.

A requirement while implementing Multi Admin Approval is that another admin has to approve the request to create Multi Admin Approval policy.
So in this step we can review the settings and submit our first approval request.

It might take a couple of seconds before the request shows up in the My requests tab. But this is the place where we can find the status of our own approval requests:

You cannot approve your own approval request but you do have the option to open the request to cancel it.
So now I’ve signed in using another Intune admin and navigated to the All requests tab in Multi Admin Approval where I can see the request from the first Intune admin.

The request can be reviewed by clicking on the name. Review the details in the request, decide if you want to approve or reject the request and provide a business justification:

Now I’m heading back to the first Intune admin who created the request. If I open up the My requests tab I can see the status has now changed to Approved.

There is one more step to take before the access policy is actually created. The first Intune admin has to review the original and approved request and click the Complete request button:

It only takes a couple of seconds for that process to complete successfully after which we can find the access policy in the Access policies tab:
Let’s see that in action. Navigate to your Devices and try to delete a device. You should see a nice pop up that looks like this:

Provide a business justification if you want to delete the device. Once you click the Request for Delete button, the process of Multi Admin Approval triggers as we’ve seen before.
Clean Source Principle

The Clean Source Principle is part of the zero-trust concept and focusses on the trust between systems. It tells us that a system can depend on a higher-trust system, but not a lower one or that a higher level system cannot be impacted by a lower level system. A simple example would be that a member computer can depend on an Active Directory domain controller, but that same domain controller can not be impacted by a member computer.
This principle comes into play more than you think especially with modern IT solutions being highly integrated. Just think about Windows 365. If you enable Windows 365 in your environment, you will also use Microsoft Entra, Microsoft Intune and networking resources can live in Azure.
So why is this important? Clean Source Principle violations are often the root cause of attack paths. Here are some examples by Microsoft:
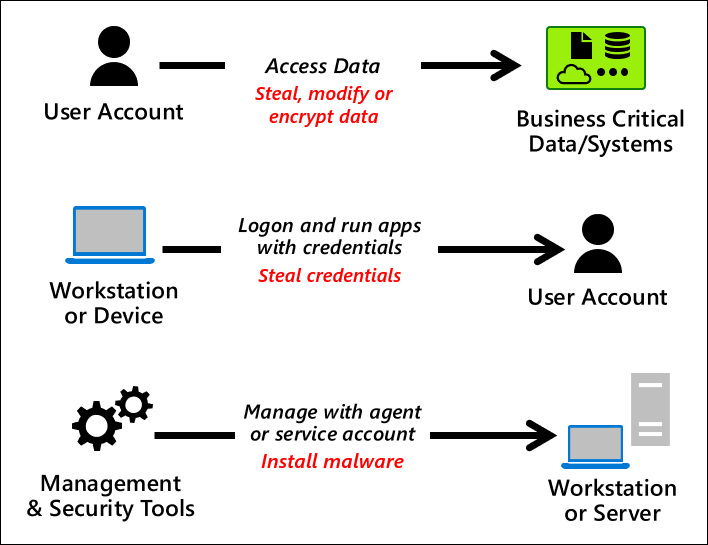
So what’s an example where the Clean Source Principle is used? What about a…
Privileged Access Workstation (PAW)

A Privileged Access Workstation (or PAW) is a highly secure workstation that is used to connect to your management environment. While there isn’t a blueprint to create your own perfect PAW design, you can find a lot of guidance by Microsoft and other parties (like NCSC).
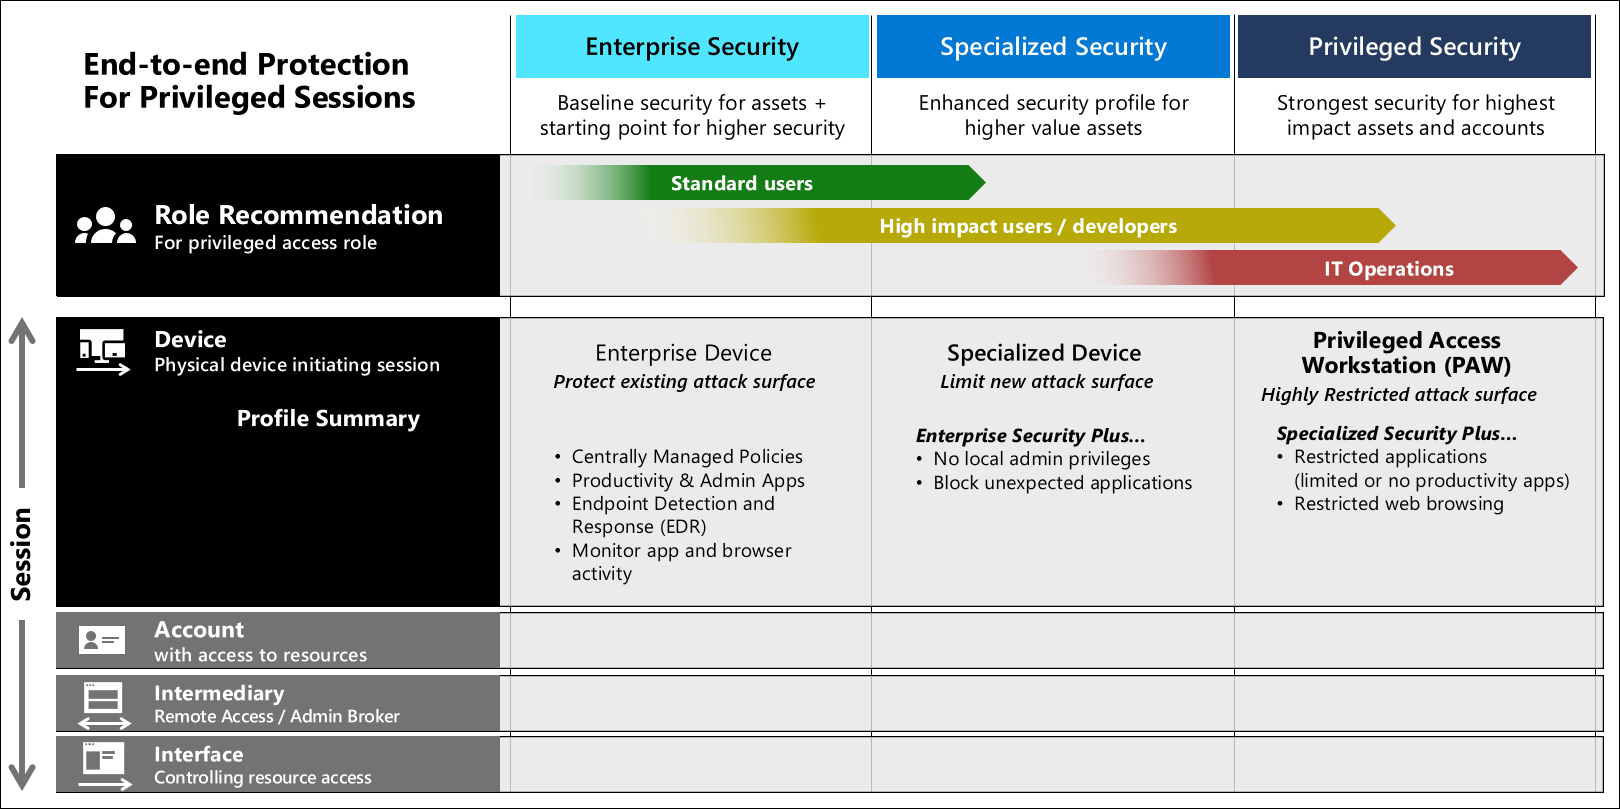
While following these guidelines, you will come across a lot of topics. Microsoft for examples has defined three device roles:
- Enterprise security which is meant for regular users. This device profile provides enterprise security while still being user friendly.
- Specialized security has all the bells and whistles of the Enterprise security role, but layers additional security on top.
- Privileged security is the highest security profile. It uses all the security configuration of the specialized security role and adds even more security on top. Mind you: this device is not suited for your regular day to day tasks as it also blocks access to internet websites for example.
There are a lot of topics to consider when implementing a PAW in your environment.
- Physical vs Virtual PAW: physical devices are preferred for a PAW. That makes a lot of sense because you limit the attack surface by eliminating the hypervisor. But you can still use virtual PAWs. Make sure to read up on the additional recommendations like the ones provided by the NCSC.
- Are you using Cloud PCs as your PAWs? You should have a solution in place for when a reprovision action occurs and the device ID changes. You want to automatically have the device IDs updated in the right locations so the reprovisioned Cloud PC is recognized by Conditional Access policies.
- Network security is an important step in configuring a PAW. Even though internet access is not allowed on a PAW, they will have access to the management portals.
- The operating system needs to be hardened. This can be achieved using a Microsoft (pr 3rd party) security baseline. Make sure to remove unnecessary features and applications to reduce the attack surface.
- Make sure patches are installed for the operating system and available applications.
- Ensure proper logging and monitoring so you have an audit trail when a PAW was used and by who.
- Use separate identities to sign into the PAW. Example: sign into your local device using your regular account. Open the Windows app and sign in with a PAW account. Connect to the PAW Cloud PC. From the PAW, connect to the management portal and sign in (or use PIM to get access to the proper roles first).
Creating a secure PAW design might not be the easiest exercise but it’s well worth the effort since it increases the security and significantly reduces the attack surface of your management portals.
Break-glass accounts

Part of having a secure platform means having proper access to the platform. What happens if there’s an incident where your account cannot sign into the management platform anymore?
That’s where break-glass accounts come in to save the day. They are also referred to as emergency access accounts. These accounts should not be used on daily basis and should adhere to the following requirements:
- The accounts should be cloud only.
- The accounts should use a passwordless authentication method where a passkey is preferred.
- Configure phishing-resistant multifactor authentication for the break-glass accounts.
- Safely store the credentials. This works exceptionally well if you are using FIDO2 (hardware) security keys.
- Implement a monitoring and alerting solution based on the sign-in and audit logs. An example would be using Azure monitor.
- Personal vs Generic break-glass accounts. Usually I see generic break-glass accounts but there is something to be said for personalized break-glass accounts. In this case multiple break-glass accounts are created and assigned to specific users.
- Consider using different authentication methods between regular admin accounts and break-glass accounts.
- Make sure the break-glass account does not expire. Be mindful of automated cleanup processes.
- When using PIM, make sure to make the global admin role permanently active instead of eligible for break-glass accounts.
- Make sure break-glass accounts can only sign into secure desktops like a Privileged Access Workstation (PAW). Also make sure these secure desktops are not removed or cleaned up due to inactivity.
- Implement a recurring task to validate the functionality of the break-glass account(s).
Resources
Steve Weiner – How to use Intune Scope Tags
Use Multi Admin Approval in Intune – Microsoft Intune | Microsoft Learn
Success criteria for privileged access strategy – Privileged access | Microsoft Learn
Why are privileged access devices important – Privileged access | Microsoft Learn
Principles for secure privileged access workstations (PAWs) (NCSC)