What’s up, everyone!
You might have heard about a recent cyber incident where the attackers were reportedly successful in wiping a lot of managed devices. The thing that stood out to me was that the management platform did what is was supposed to do since it was a legitimate command send from a compromised account.
That got me thinking. What are the options that are available to us to prevent this from happening? So in this and the upcoming posts I will explore options that Microsoft has made available to us.
I have divided the various solutions into separate posts based on the topic. The first topic is protecting the identity. In this post I will cover:
- Passkeys
- Conditional Access with passkeys and token protection
- RBAC and custom roles
- Just-in-Time access using PIM
Enjoy!
Passkeys

Using a passkey is a secure and user friendly alternative to using a simple username & password combination for authentication purposes. The fidoalliance.org website has a really good explanation on passkeys:

The text mentions it’s a great way to sign into a website or an application but the same thing holds true for signing into desktops as well:
- You can use Windows Hello for Business to sign in with a passkey and use biometrics like face recognition or a PIN code to authenticate.
- On macOS you can use iCloud Keychain to enable passkeys.
There is also a difference between device-bound passkeys and synced passkeys.
Device-bound passkeys live on a single device and they cannot be copied or moved making them a great option for high security environments. An example: FIDO2 security keys.
Synced passkeys can be used on one device but can be synced with cloud services. This might be considered less secure but they come with the advantage of being used on multiple devices.
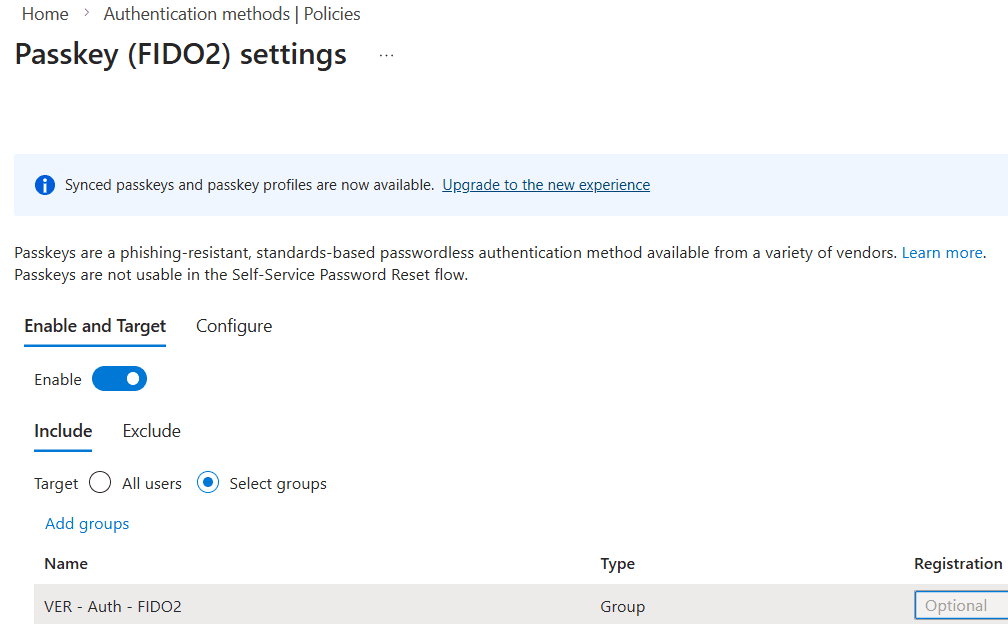
Passkeys can be enabled in the Microsoft Entra admin center, Authentication Methods, Policies. Select passkey (FIDO2) to enable and configure the authentication method:
- Enable the authentication method
- Target All users or a group of users.
- You can exclude groups if you want to.
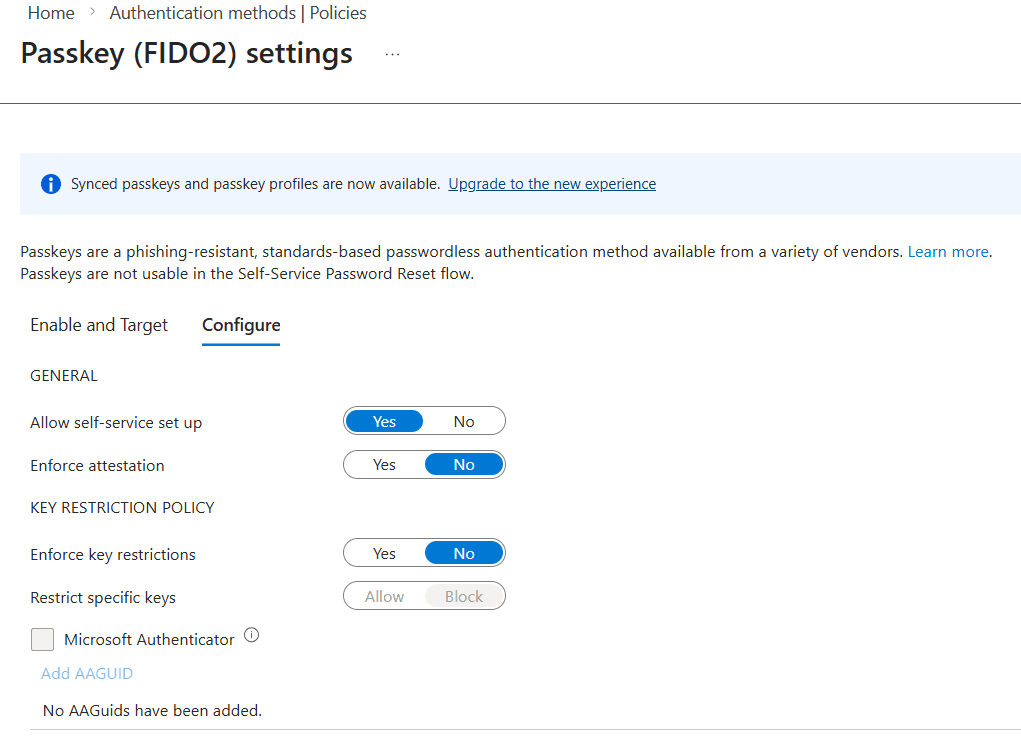
There are a couple of configuration options available. Most things are pretty straightforward but I want to highlight a couple of things:
Enforce attestation and AAGuids
Once enabled you require Entra to check the device attestation data as well as the passkey. The device attestation data can contain AAGuids which is basically the type and model of the authenticator. IT admins have the option to add the AAGuids of approved security keys from this pane:
What about synced passkeys in Microsoft Entra?
That opt-in based process starts with the notification in the top of the last screenshots: “Synced passkeys and passkey profiles are now available”.
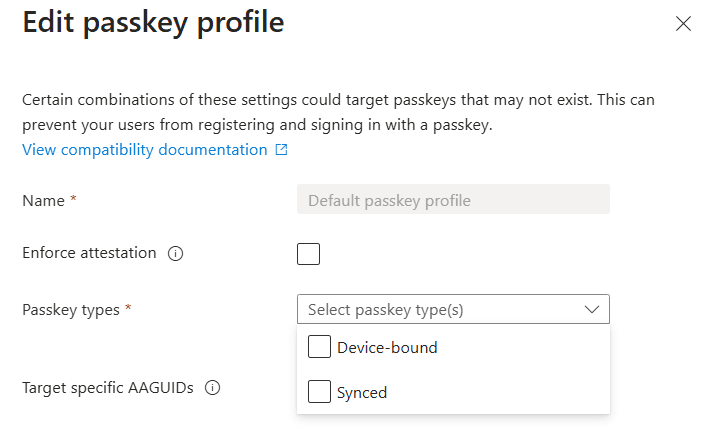
Click the Upgrade to the new experience link and Entra will give you a nice new window that looks like this:

Now it’s time to create the passkey profiles that you want to use for your scenarios. Click the Edit default passkey profile button.
Select the option(s) you want to the profile and save it. Then repeat the process for another profile if you want to.
Did you know that you can also use passkeys in Conditional Access policies?
To do so you need to make use of an authentication strength. You can either use the default named Phishing-resistant MFA or create a custom authentication strength using FIDO2 passkeys.
Create a new conditional access policy, assign the policy to a group of test users before going live and make sure to exclude breakglass accounts. Add target resources and select Require authentication strength under the Grant section. Select the Phishing-resistant MFA authentication or use the custom one you created earlier.
An example of using a passkey
Using a PIN (or biometrics) with Windows Hello for Business to sign into Windows 11 is a really good and well-known example. But let me also provide you with another example by signing into my Windows 365 Cloud PC using the browser. This also means I had to create a conditional access policy as described before for the resources Azure Virtual Desktop, Windows 365 and Windows Cloud Login.
The first authentication attempt automatically wants to use Windows Hello for Business with the PIN. And the cool thing is, a passkey is already being used in this method.
I do have other passkeys available and I can select these:

The user experience is different for each type. Here is a quick overview:
- Windows Hello for Business: this method will challenge me with a PIN. Once the correct PIN is entered, the authentication succeeds and the browser will continue to the Windows 365 webclient.
- Authenticator App: this method will give you a QR code that the user has to scan from the Microsoft Authenticator app. In the app you’ll find a round blue circle with an icon that resembles a QR code. Once the sign in completes, the browser will continue to the Windows 365 webclient.
- Security key: this method present a prompt to the user to connect the FIDO2 key either via USB or NFC. The user needs to verify their presence by physically pressing on the key. Once that is done, the browser continues to the Windows 365 webclient.
Here are screenshots of the user experience:


Conditional Access

Conditional Access will not prevent destructive actions being executed like in the example, but it does help to limit access to management portals by layering on additional security before an account:
- can access a resource like a management portal (Intune, M365 admin, Entra, Azure or 3rd party management solutions like Nerdio Manager).
- make sure that management portals can only be accessed from certain networks.
- make sure that the management portals are accessed from a managed device.
- limit access to management portals to trusted devices, like privileged access workstations.
- introduce risk based policies (user risk vs sign-in risk). Keep in mind not to mix-and-match both in the same conditional access policy.

The policy consists an assignments section and access controls section.
Use the Assignments section to select users and groups and provide exclusions to this policy, like break-glass accounts. Next make sure to select one or more target resources. In this demo I want to enforce passkeys for access to Cloud PCs, so I need to add the following resources:

Optionally you have the power to include / exclude access from certain networks or add conditions like risk, device platform, location, client apps or device state.
There are two access controls to configure: Grant and Session.
The Grant section is used to allow or block access to the selected resource in this policy. In this case I want to allow access but I want to make sure selected users use a passkey to sign into Windows 365. Select Require authentication strength and the built-in Phishing-resistant MFA authentication strength or a custom authentication strength that requires FIDO2 security keys:

There’s one section left: Session. It offers session controls like persistent browser session, Customize continuous access evaluation, sign-in frequency and more.
Save the conditional access policy and make sure to test it out. Remember the default behavior is report-only. It will take effect once it’s switched to On.
Token Protection
Let’s assume that your are signing into a resource living in the cloud. After a successful sign in you would receive an authentication token by Microsoft Entra and that token is stored locally on the device from which you are signing in. Now ask the question: what if malware is capable of stealing the token? We don’t want that!
That’s where token protection comes in. It requires you to register your device to Entra and in doing so it will create and store a Primary Refresh Token. This token is bound to the specific device and is used when signing in to supported apps to request access tokens. This ensures protection against token theft.
Make sure to read the deployment guide of token protection if you want to implement this feature so you know which applications are (un-)supported and learn about the known limitations.
As for licensing, you only need to have Entra ID P1 which means you are already covered if you have an M365 Ex license plan.
You can enable token protection in a conditional access policy that targets one of the supported apps, like Windows 365 or Azure Virtual Desktop. It will require you to select a supported operating system in Conditions, Device platforms:

Then select Session and check the box for Require token protection for sign-in sessions:

So how do you know this worked?
Sign into the Microsoft Entra admin center, Monitoring & Health, Sign-in logs. Locate the sign-in attempt, select the Conditional access tab and click on the conditional access policy that requires token protection:

Scroll to the bottom section of Session Controls, you should see that Require token protection for sign-in sessions (preview) is enforced.
RBAC and custom roles

A Role Based Access Control (RBAC) strategy aims to simplify the management of permissions by grouping permissions together into a role. Users will inherit these permissions once they become a member of the role. RBAC is pretty common nowadays and can be found in enterprise software and cloud platforms. Microsoft introduced RBAC in all of their modern solutions like Entra, Azure, Intune, Azure Virtual Desktop, Windows 365 and more.
The principle of least privilege
Would you really need the power of the one ring to swat a nagging fly, or would a simple flyswatter do the trick just fine? Understandably you want to go full Sauron but it’s probably a lot better for the rest of the world to go with the flyswatter option instead.
The same goes for performing tasks in the world of IT. You could use the Global Admin role in all it’s glory to manage desktops in Microsoft Intune but it makes a lot more sense to use a role with less permissions like Intune Administrator (which gives read/write access to all Intune data) or go even more granular with Cloud PC Administrator if you only need access to Windows 365.
Custom roles
You can decide to get creative and create a custom role based on the requirements a certain admin needs. Let’s take Microsoft Intune for example. Go to Tenant Administration and select Roles. This will present you with a nice summary of all existing roles in Intune:

Click the Create button and decide if you want to create an Intune, Windows 365 or Autopatch role. In this example I will create a Windows 365 custom role.
Step 1: Give the new role a name and description.

Now select the permissions the new role needs. An example would be to create a role to manage Cloud Apps. Just open the category and select the permissions:

Finish up by adding scope tags if you like and save the new role. The newly created role will appear in the previously mentioned list.
You can also duplicate a role and edit the copy. From the All roles blade, click the three dots on the righthand side next to the name and select Duplicate:

This is a great way to start out with existing set of permissions and just add/remove permissions to customize the role.
Privileged Identity Management (PIM) and Just-in-Time access (JIT)

Let’s change the question from what roles and permissions we need to when we need them. Ideally we need to have the roles and permissions only for the time it takes to perform certain actions and have the permissions removed again once they are no longer required.
That’s where Privileged Identity Management (or simply PIM from now on) comes in. PIM allows just-in-time access to Azure resources and Entra groups and it includes monitoring for auditing purposes. PIM does come with an Entra ID P2 or Microsoft Entra ID Governance license requirement.
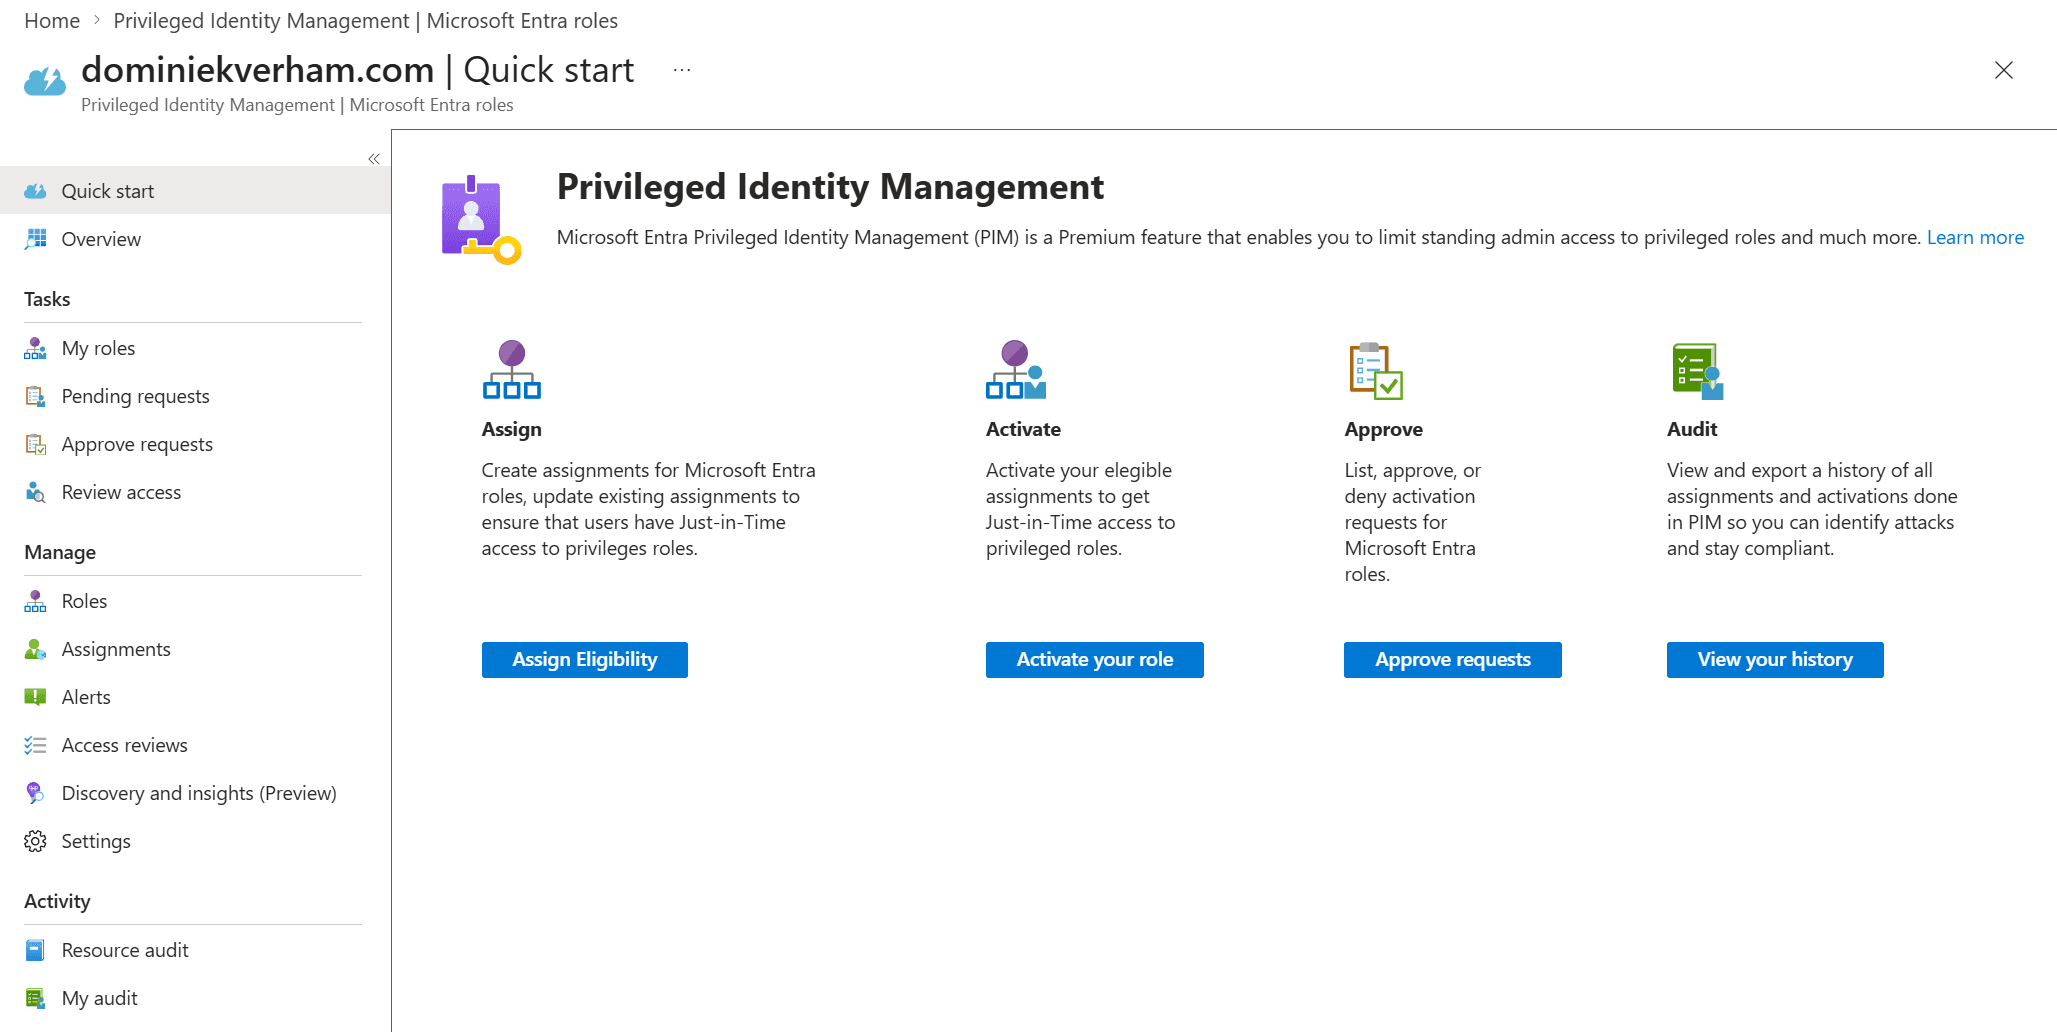
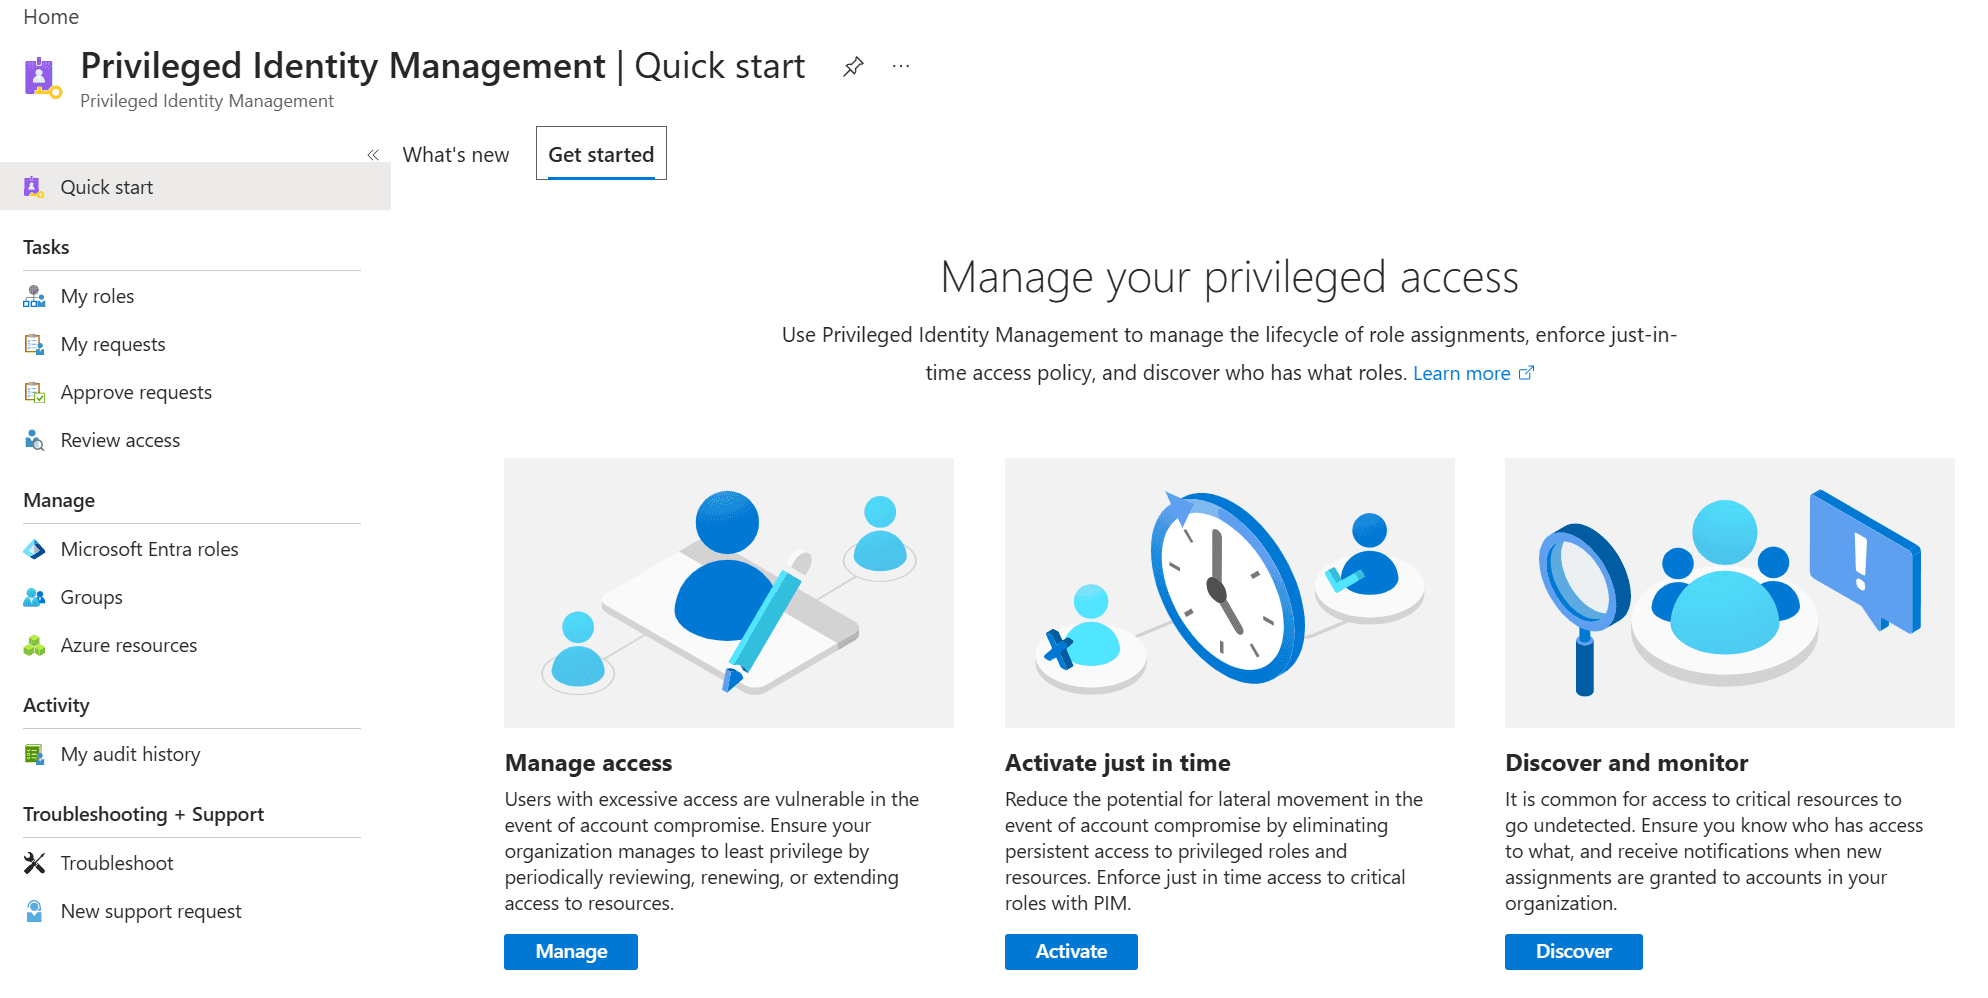
I won’t go into detail on how to protect Azure resources using PIM, instead I will focus on the Intune Administrator role. First sign into the Microsoft Entra admin center, find the ID Governance section and select Privileged Identity Management. You should see something like this:
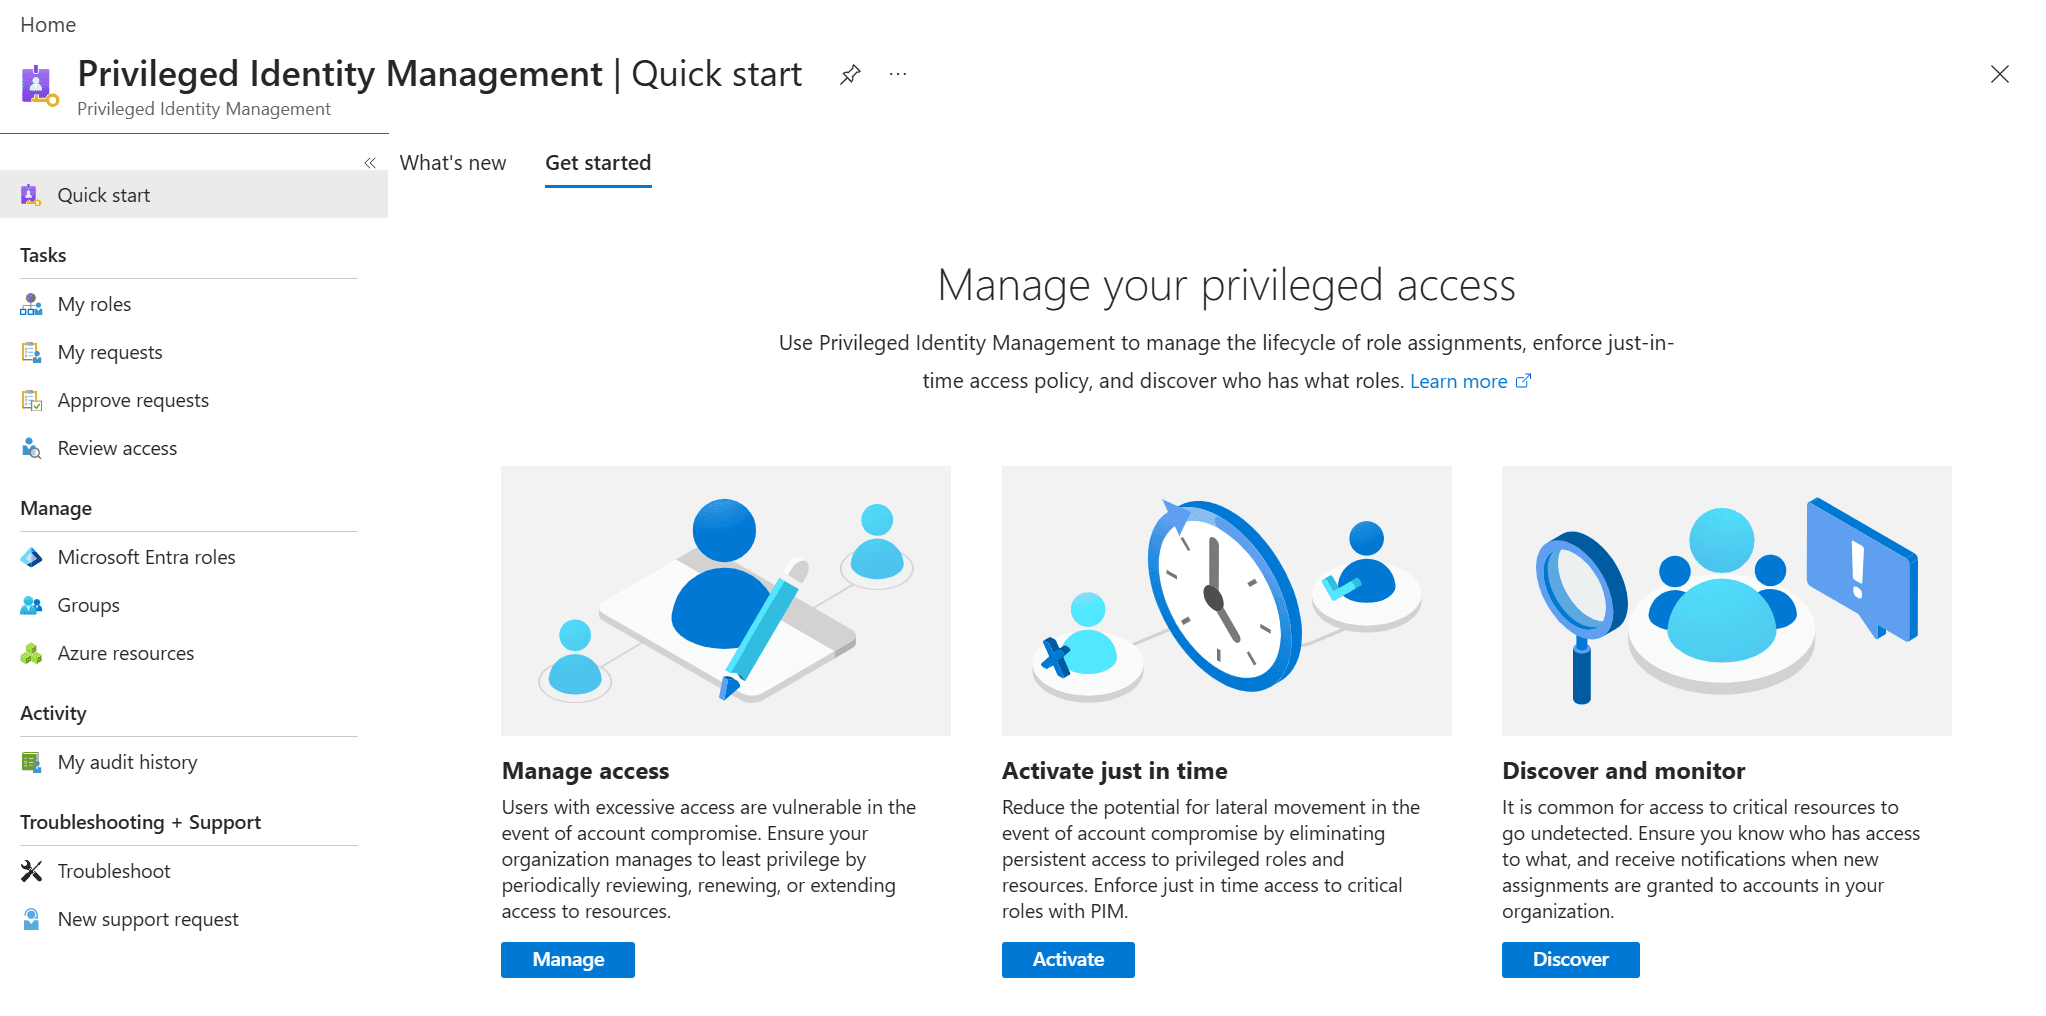
Setting up PIM is done using the Manage section with the Microsoft Entra roles, Groups and Azure resources options.
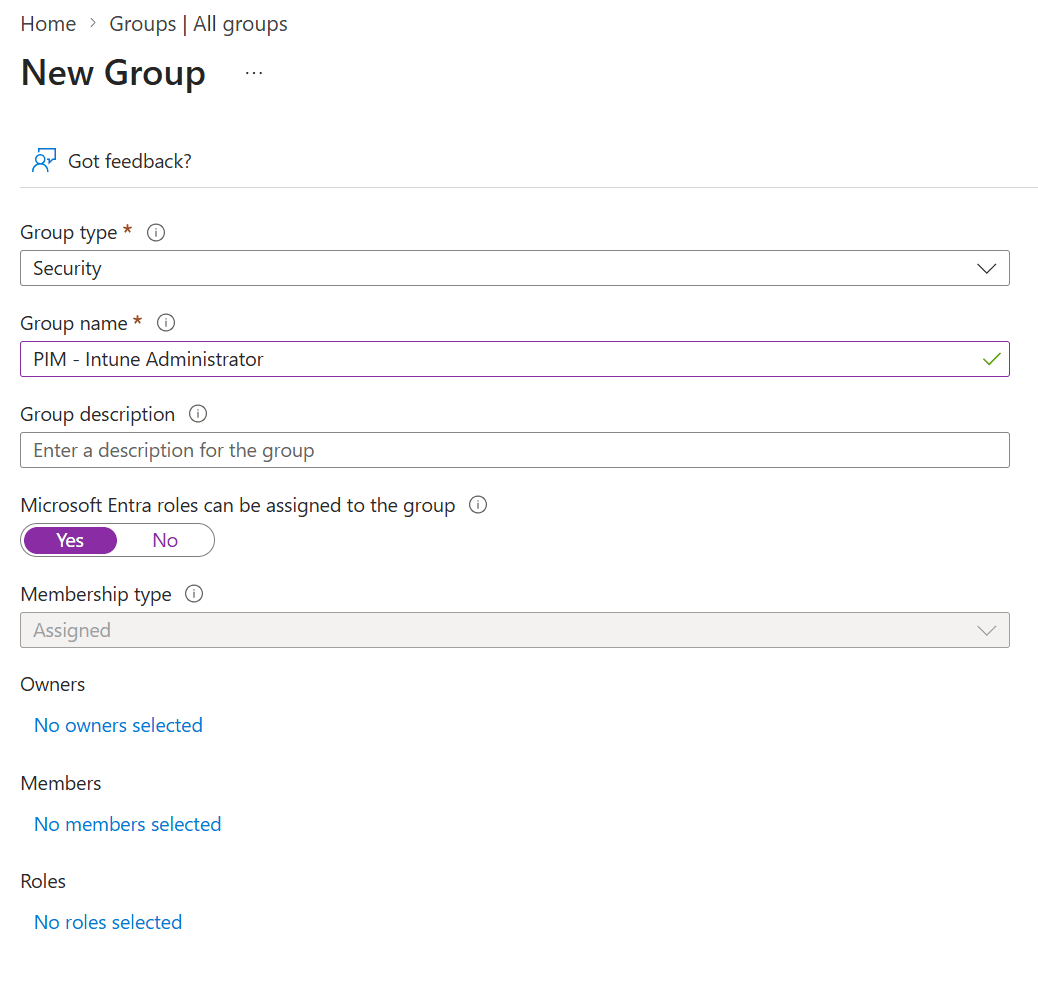
First we need to create a group and make sure that we can use it in PIM. I created a security group called PIM – Intune Administrator and make sure to select Yes next to Microsoft Entra roles can be assigned to the group. The group will not appear in PIM if you forget this setting.
Now it’s time to head back to Manage, Groups. The newly created group should appear automatically.

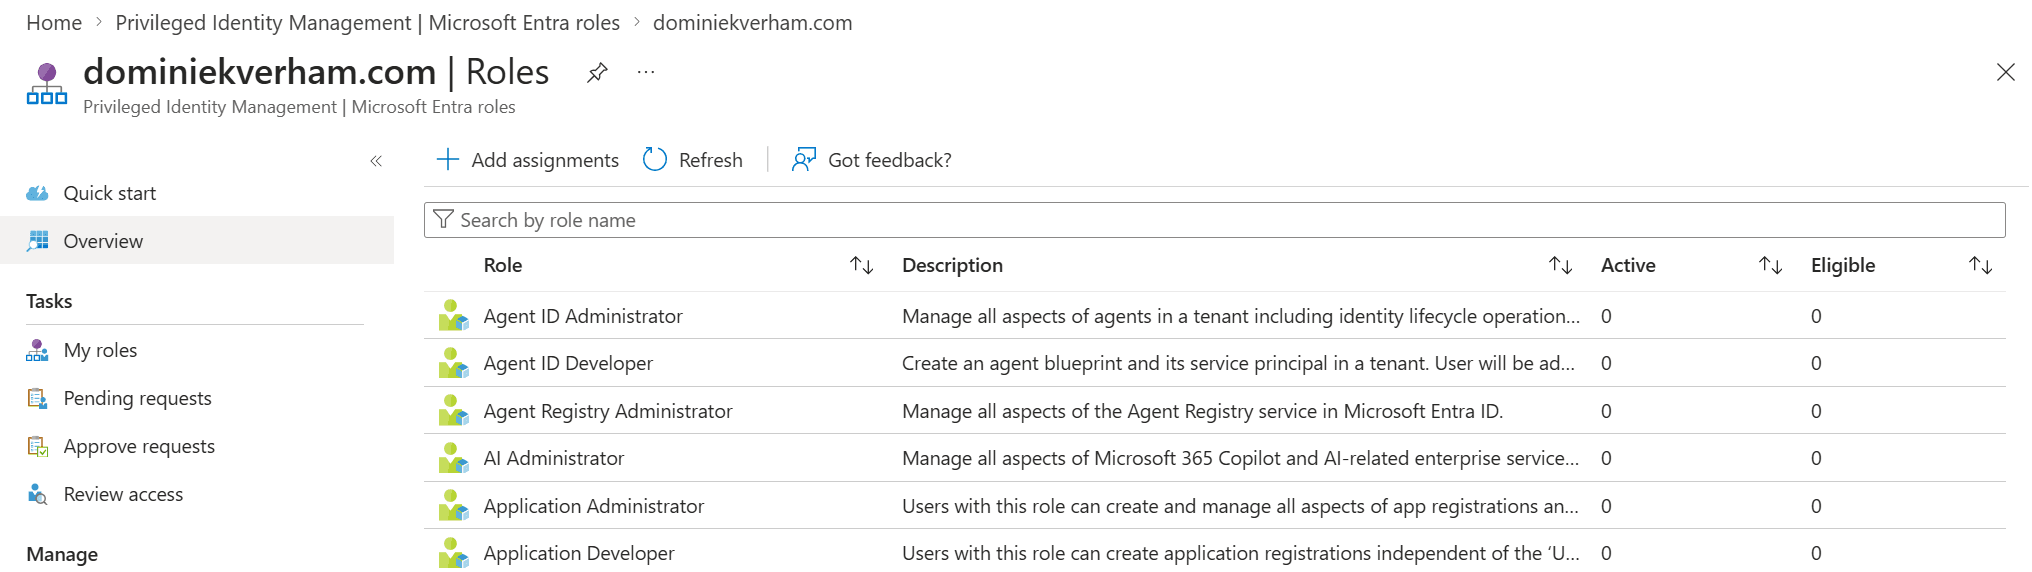
Now it’s time to configure eligibility (Read: who can request this role). Select Microsoft Entra roles and Assign Eligibility:
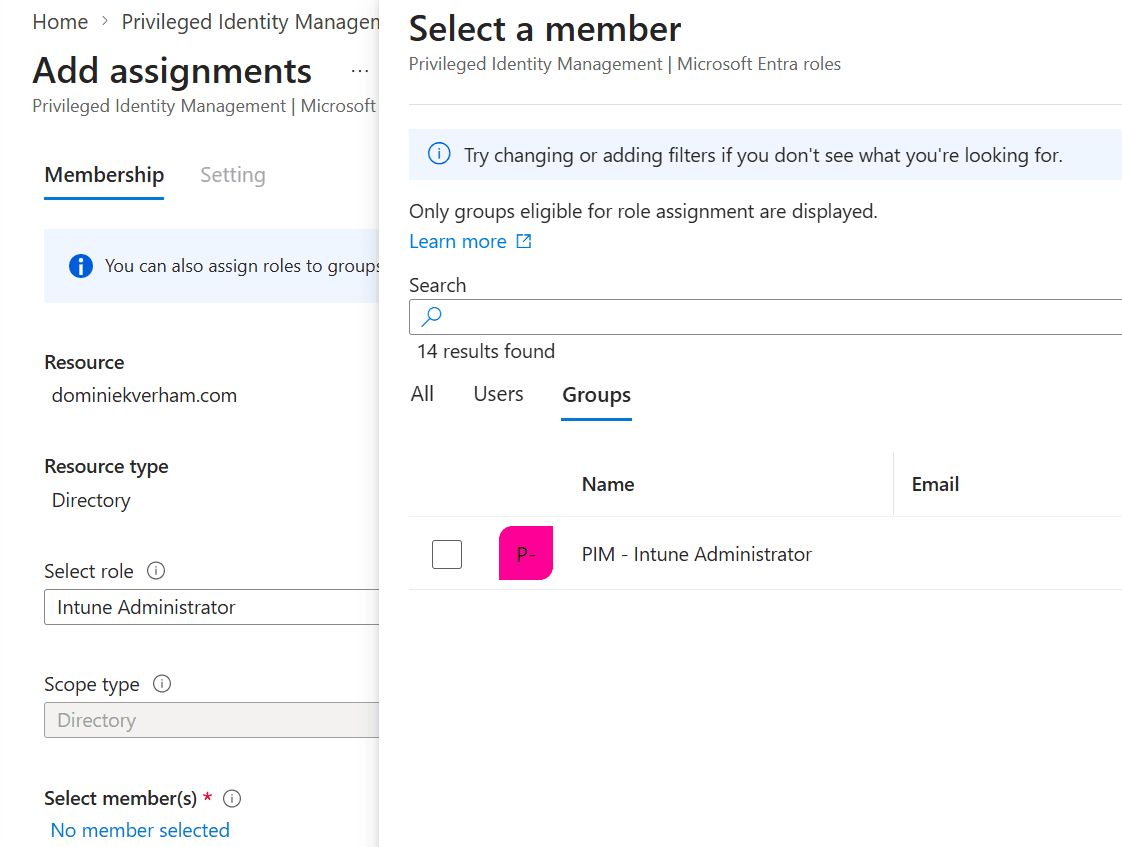
You will be presented with a nice overview of all the Microsoft Entra roles but we are interested in the + Add assignments button on top:
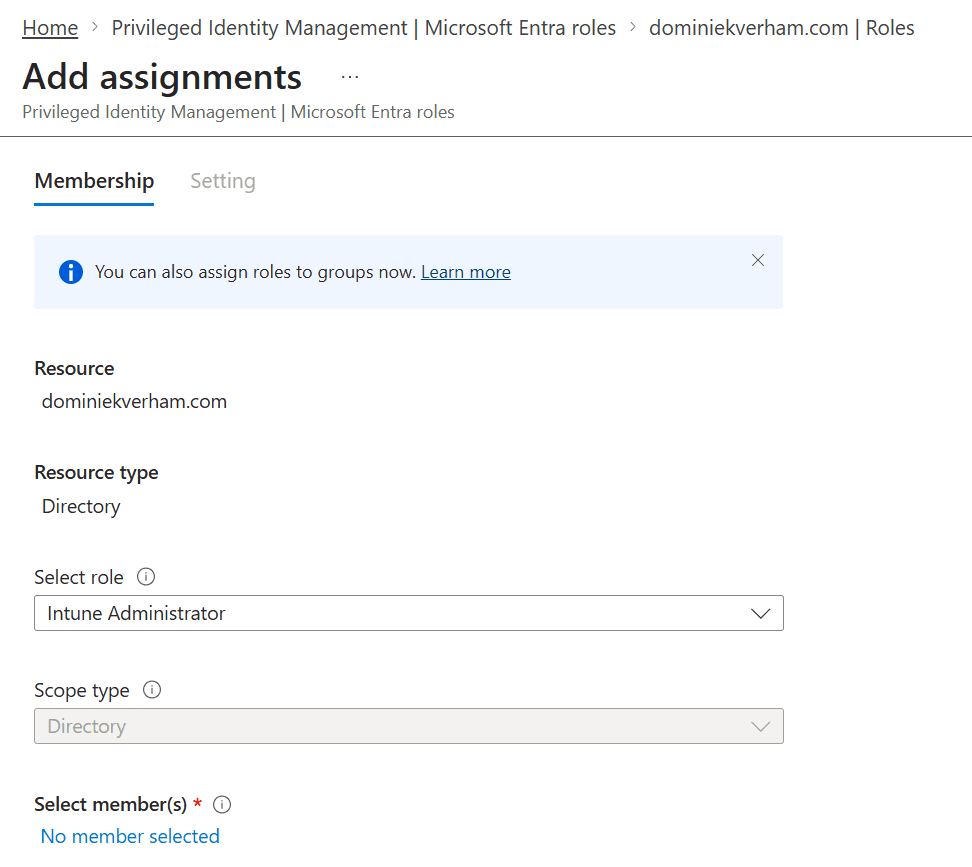
Search for the desired Entra role, in this case I used Intune Administrator. Finish up by adding users or eligible groups to this assignment.
Just as a configuration, notice that only one group shows up in this list which is the one we enabled for role assignments. And yes, the filter is clear 🙂
The Setting tab allows us to configure the eligibility type. There are two options:
- Eligible means users can ask to have the role assigned to them.
- Active means users will have the role automatically activated.
This assignment can be permanent or it can be time-bound with a start and end date., which makes sense when roles are only needed for a set duration, like the duration of an IT project. The choice is yours!

Finish up by saving the assignment.
I already added the Hulk user to the PIM – Intune Administrator group which means we should see that Hulk is now eligible to to request the Intune Administrator role. And it’s pretty easy to check. Find the user in Entra ID and click on Assigned roles. The active assignments tab opens up by default and is empty. The Intune Administrator assignment is found under the eligible assignments tab.

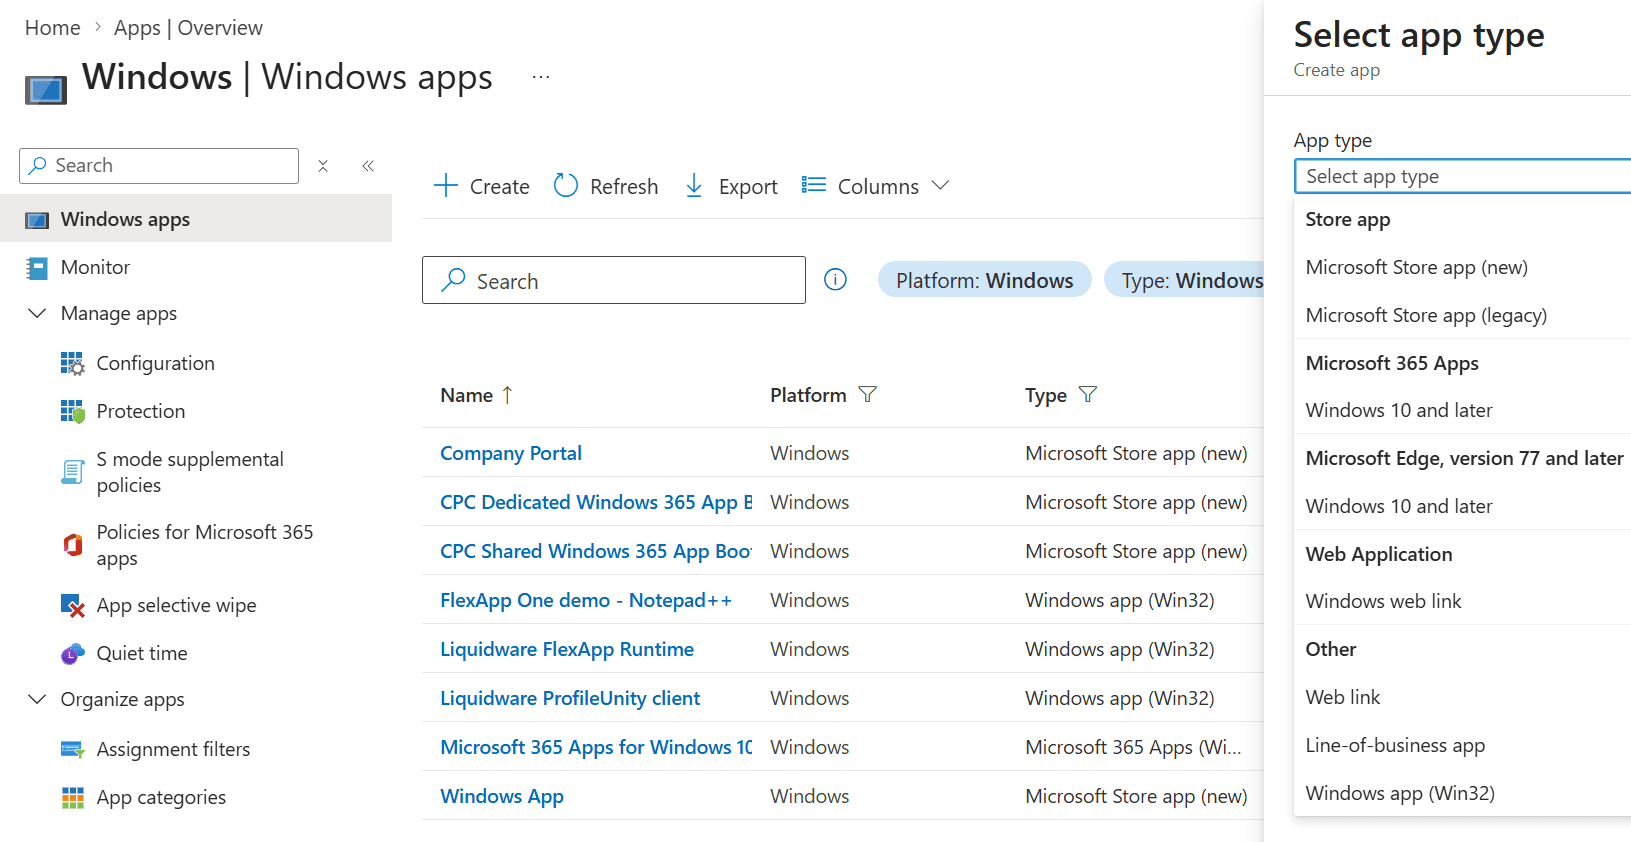
At this point our friend Hulk is still a regular user with no admin permissions in Microsoft Intune. The following screenshot shows the Windows apps screen in Microsoft Intune:

Activating the Entra role
Sign into the Microsoft Entra admin center as the regular user and go to ID Governance, Privileged Identity Management. Select Activate in the Activate Just-in-Time section.
Hulk now sees the role assignments he is eligible for. Click the Activate action next to the Role name.

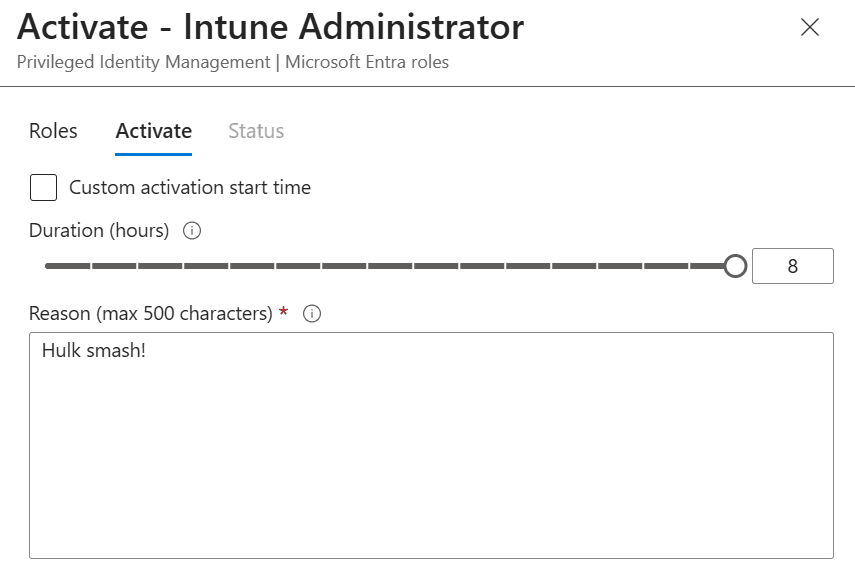
The Activate tab allows Hulk to select a custom activation start which is nice if you want to have prepare the permissions in advance and select the number of hours when the role should be active.
Also type in a nice reason.
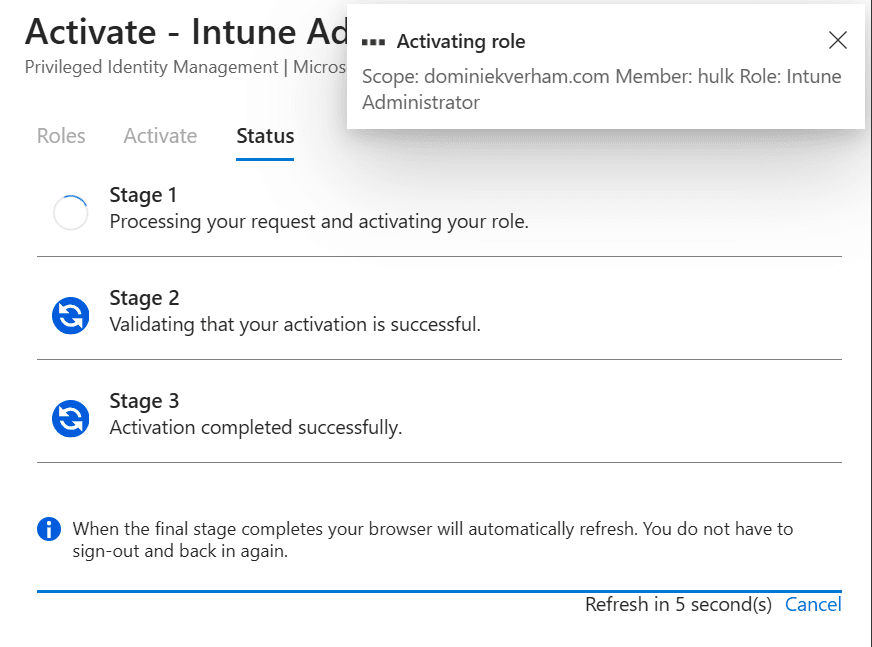
The request is now processed and if everything is configured correctly Hulk will have the Intune Administrator role assigned. The portal will reload and the Intune Administrator role will show up under the Active assignments tab:

Now Hulk has the ability to manage devices using Microsoft Intune as long as the role is assigned using PIM:
Hulk will automatically return to a regular user losing access to the Intune Administrator role after 8 hours.
Automatic approval vs delegated approval
The example shown above shows an automatic approval workflow which is a good solution for many roles. But would you want to use an automatic approval flow for every role, especially for a role like Global Admin?
The good news is that you can assign delegates who will review each request and approve or deny the request. So how can we enable delegated approval?
From the Microsoft Entra admin center, find ID Governance, Privileged Identity Management, find Manage and select Microsoft Entra groups.
Now select Roles in the menu bar and search for the role and click on the role for more options.

By default the approvers will be set to None (or automatic for that matter). Click the Edit button on top.
The third checkbox called Require approval to activate is the setting we want. Make sure to add approvers (in a production environment you probably want to add more than one admin) while you are in this window:

Make sure to check the notification tab and find out how you can notify admins of requests and finish up by clicking the Update button. The change is now reflected in the Role settings section of the role:

The flow and user experience change a bit. Hulk now sees a nice notification that the request is submitted for approval instead of the three phases we have seen before.

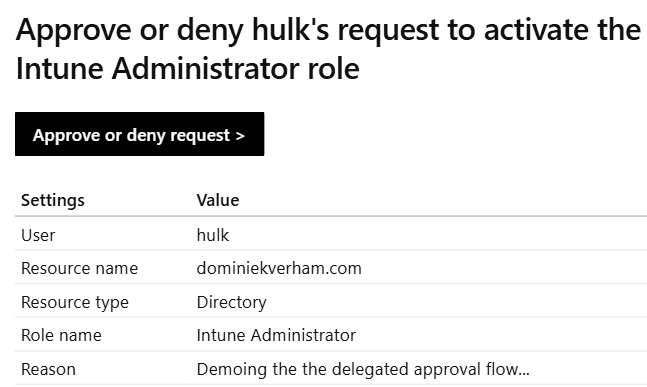
The delegated admin will then receive an email from Microsoft Security with the details about the request:
The delegated admin can find the requests in Tasks, Approve requests:
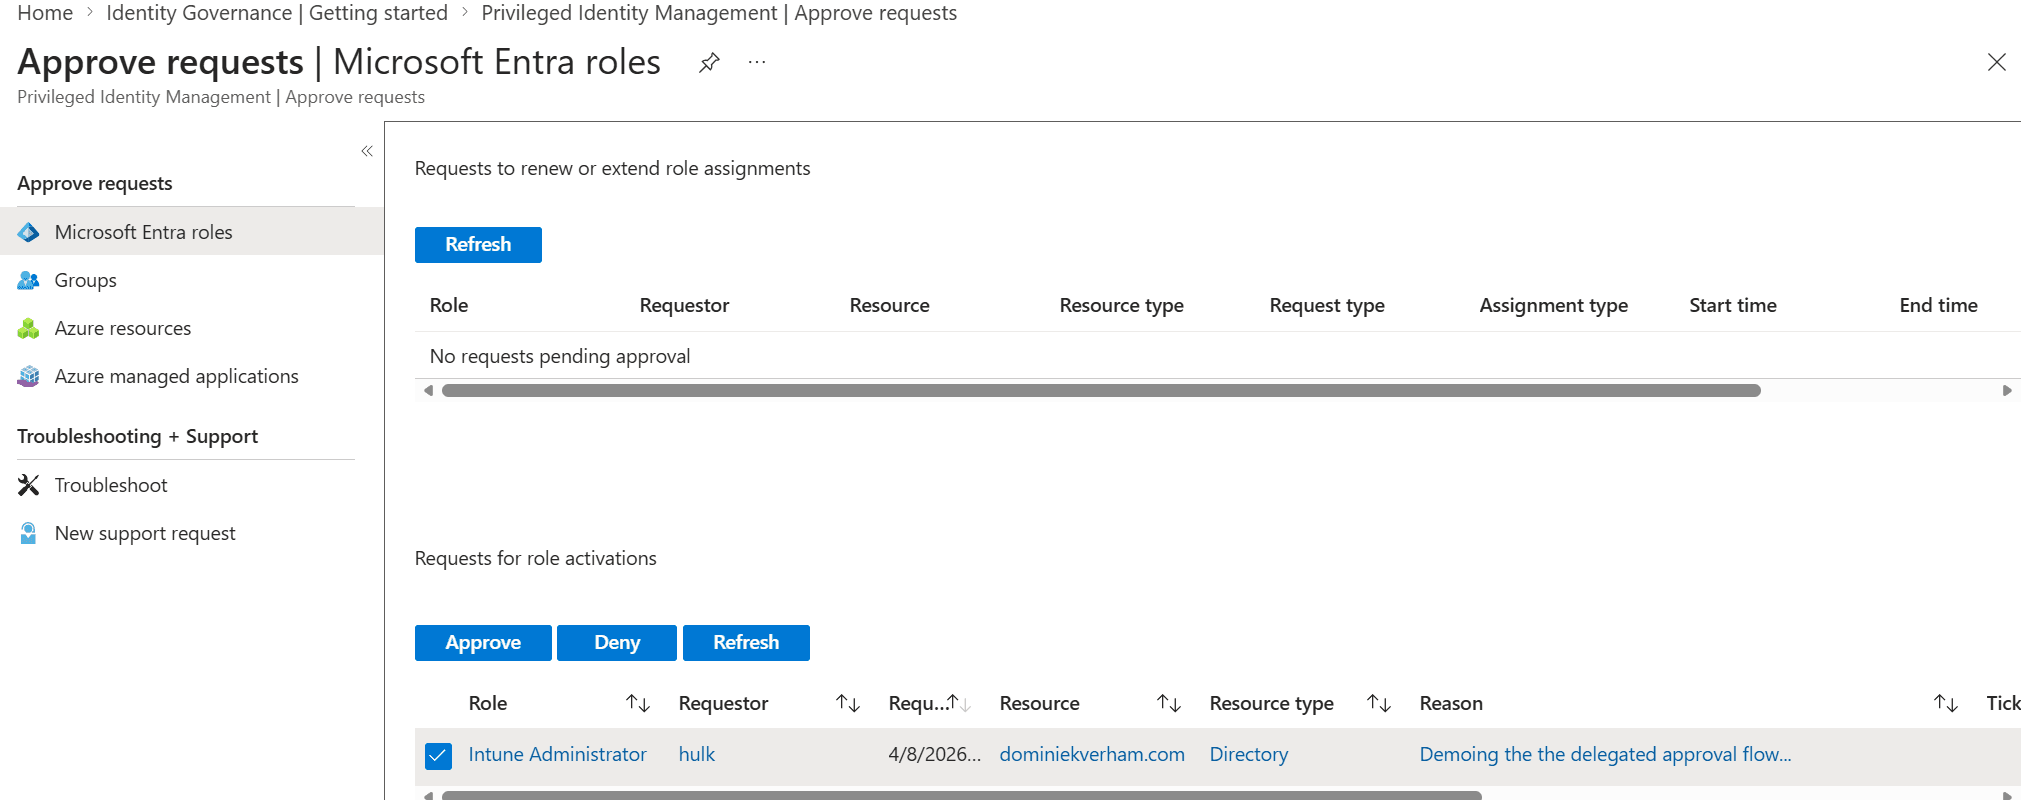
All that is left to is to review the role assignment, duration and reason. Simply click select the request (checkbox) and Approve or Deny to process the request. The delegated admin will also have to provide a justification for approving or denying the request. You know, audit trail and other very important reasons…
Resources
Passkey (FIDO2) authentication matrix with Microsoft Entra ID – Microsoft Entra ID | Microsoft Learn
Passkeys overview – Microsoft Support
https://fidoalliance.org/passkeys/
What is Azure role-based access control (Azure RBAC)? | Microsoft Learn
How Token Protection Enhances Conditional Access Policies – Microsoft Entra ID | Microsoft Learn
Token Protection Deployment Guide – Windows – Microsoft Entra ID | Microsoft Learn