What’s up, everyone!
Welcome back to the Nerdio Manager for MSP mini-series! In my previous post I showed the differences between Nerdio Manager for MSP and Nerdio Manager for Enterprise and when it’s the right fit for your use case.
Let’s continue that journey and look at the individual components that make up NMM and how you can install it in your own environment.
Enjoy!
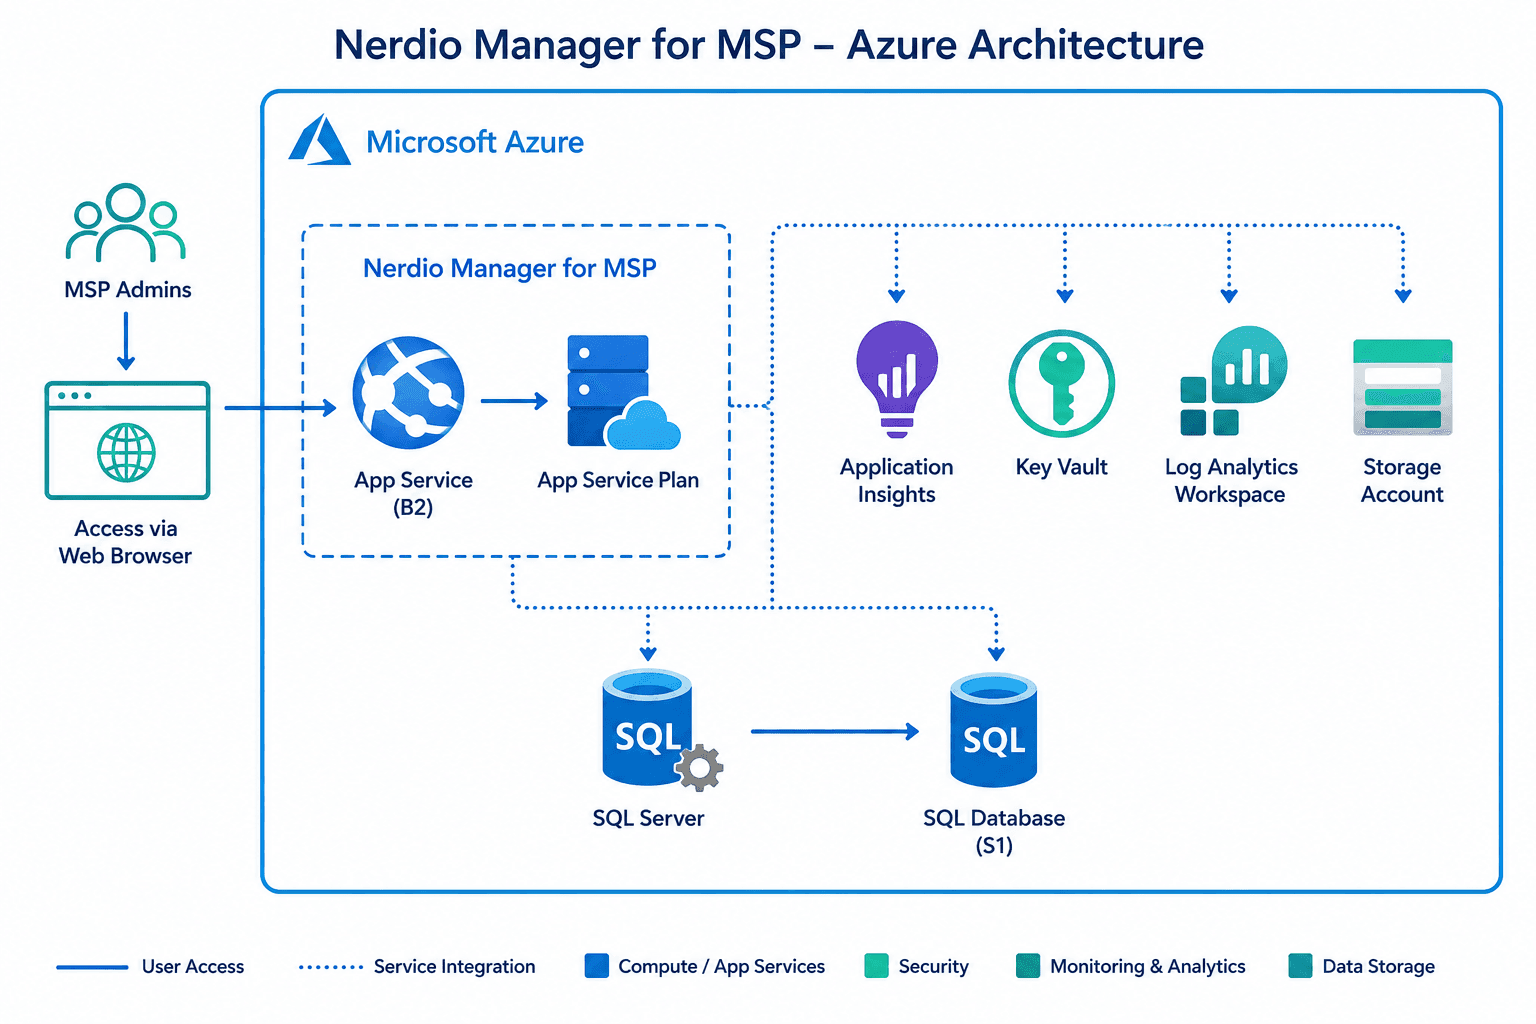
NMM architecture
Nerdio Manager runs in Azure and is installed via the Azure Marketplace. Let’s take a look at the various components that make up Nerdio Manager:
Installing Nerdio Manager for MSP
Installing NMM should be pretty easy since we can deploy NMM from the Azure Marketplace:
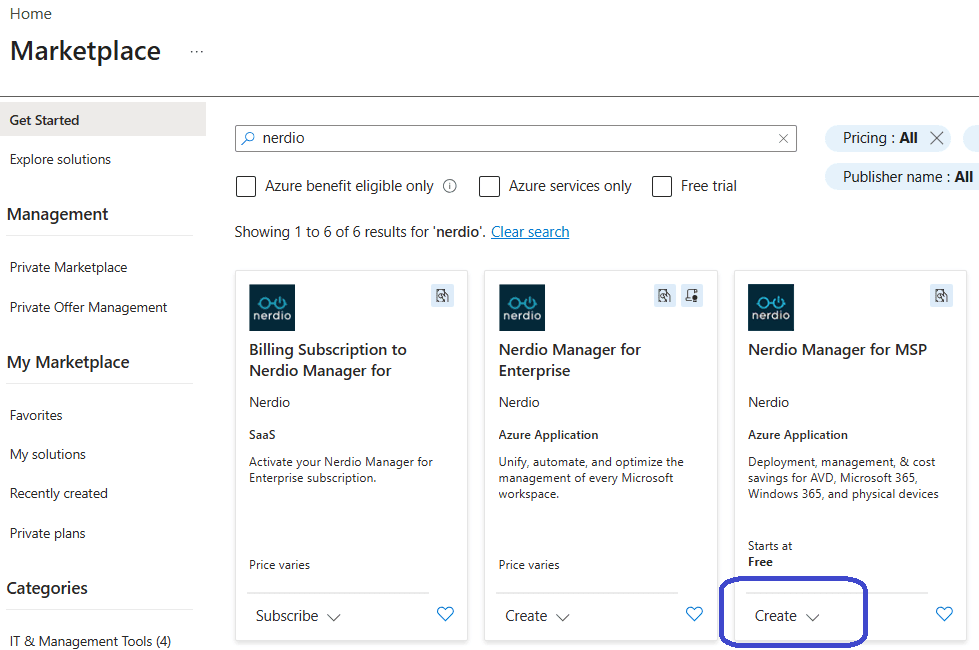
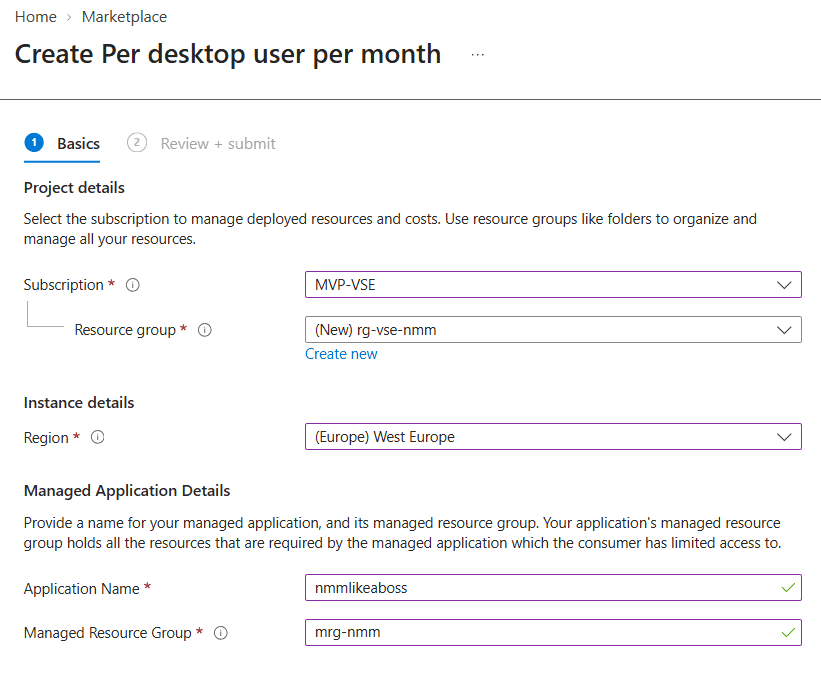
Click the Create button and follow the process from there. Provide the requested information for:
- The subscription
- The resource group
- The Azure region
- A name for the managed application
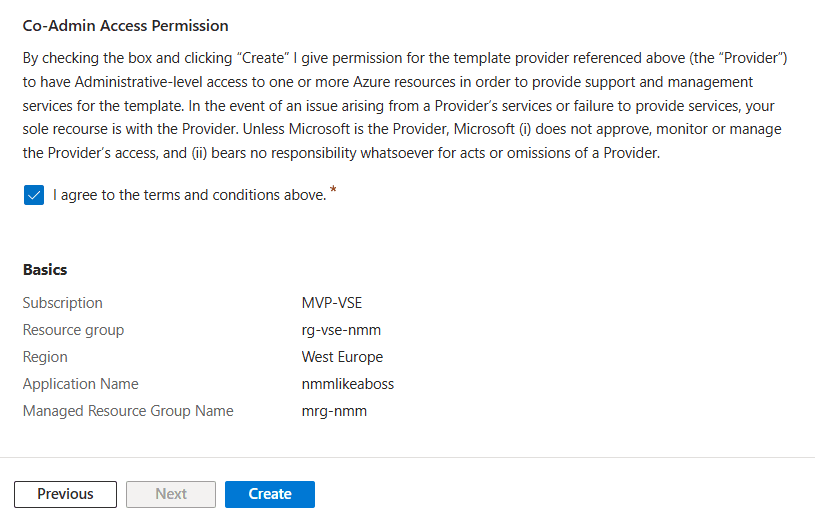
Finish up by reading through the pricing details and check the box next to Co-Admin Access Permission.
In a perfect world we only would have to wait until the deployment completes before we can sign into NMM, but unfortunately we do not live in a perfect world…
Nowadays there’s a real chance that the deployment will fail simply because regions do not have enough capacity. Take West Europe for example, it’s probably more likely to see pigs fly than to deploy an SQL server in that region:
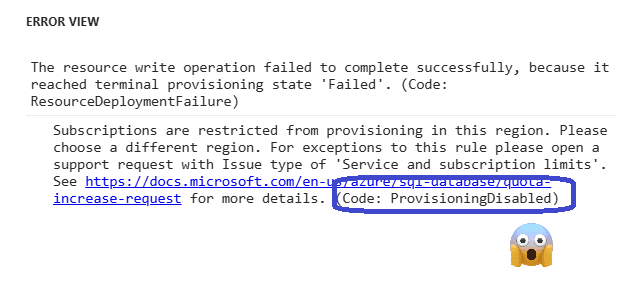
It would be nice to have a check of some sort that let’s you know the deployment can actually complete successfully instead of waiting and then see the ProvisioningDisabled notification, right?
That’s what Nerdio’s own legend Marcos Artiaga must have thought before enabling genius mode and creating a script that checks resource availability. It performs the following steps:
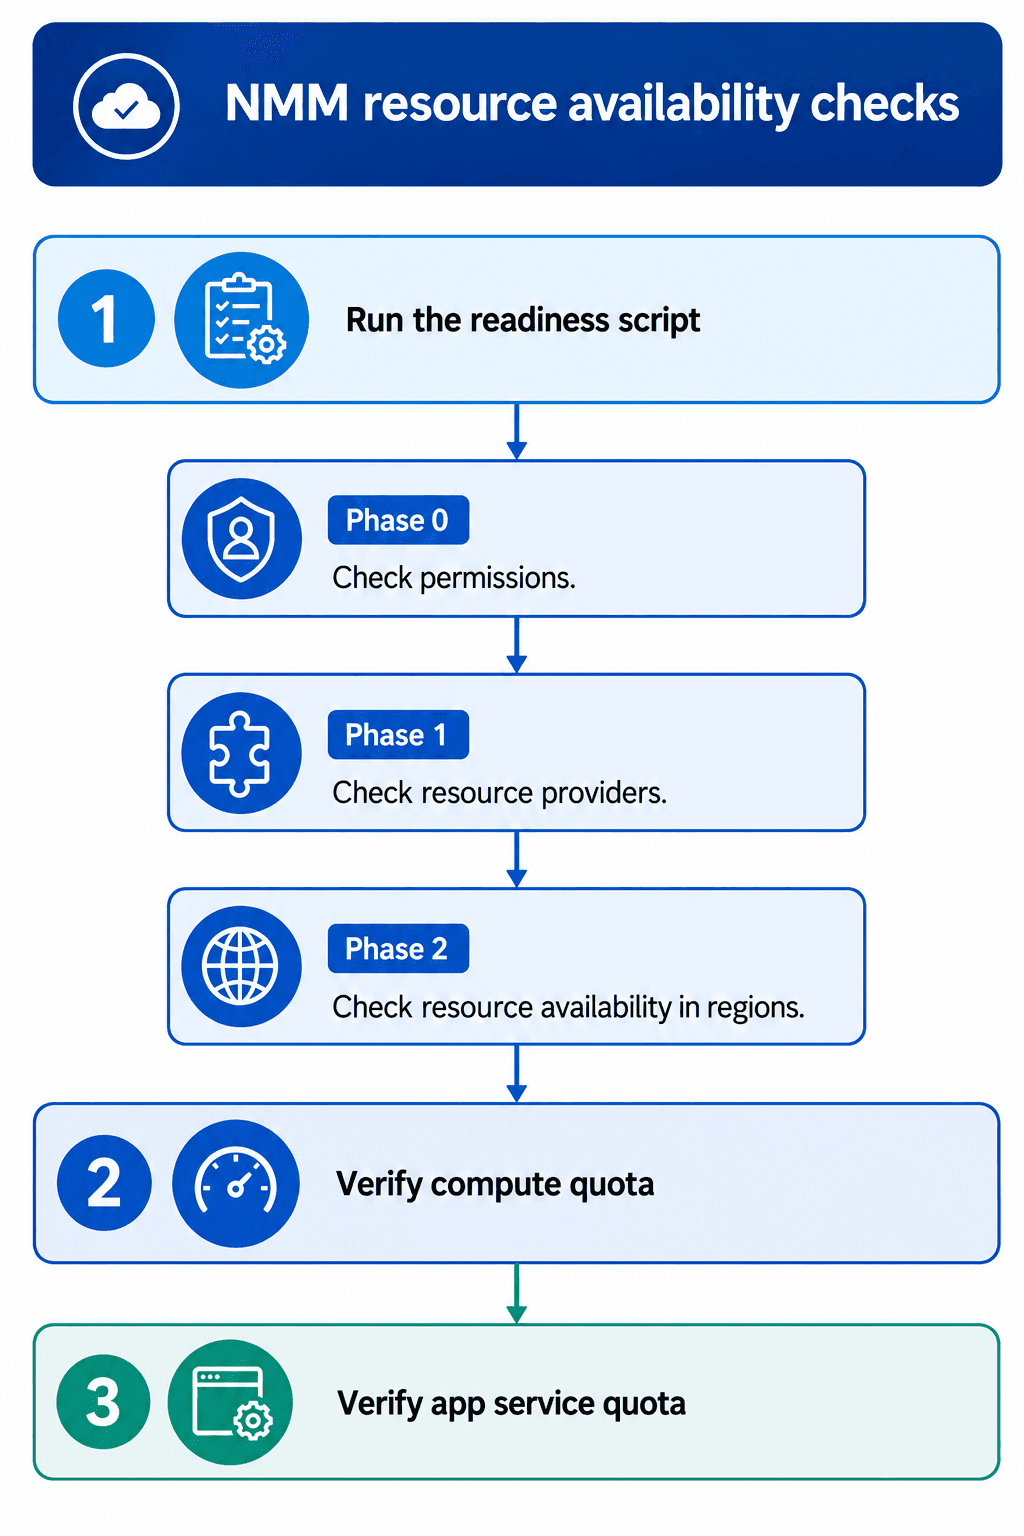
Let’s run the script and see what it looks like. Open up an Azure Cloud Shell and paste in the following code:
irm https://raw.githubusercontent.com/MSP-Sales/nmm-preinstall-checker/main/preinstall_install.ps1 -OutFile nmm.ps1; ./nmm.ps1 -CheckOnlyStep 1
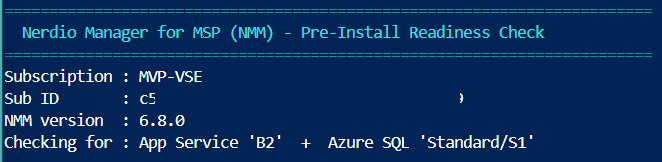
The script will check for existing Azure subscriptions and it will ask you in which subscription you want to deploy NMM:

The output looks like this:
Step 1 – Phase 0 & 1
- Permission check
- Resource provider registration (Yes, it will offer to register missing resource providers!)
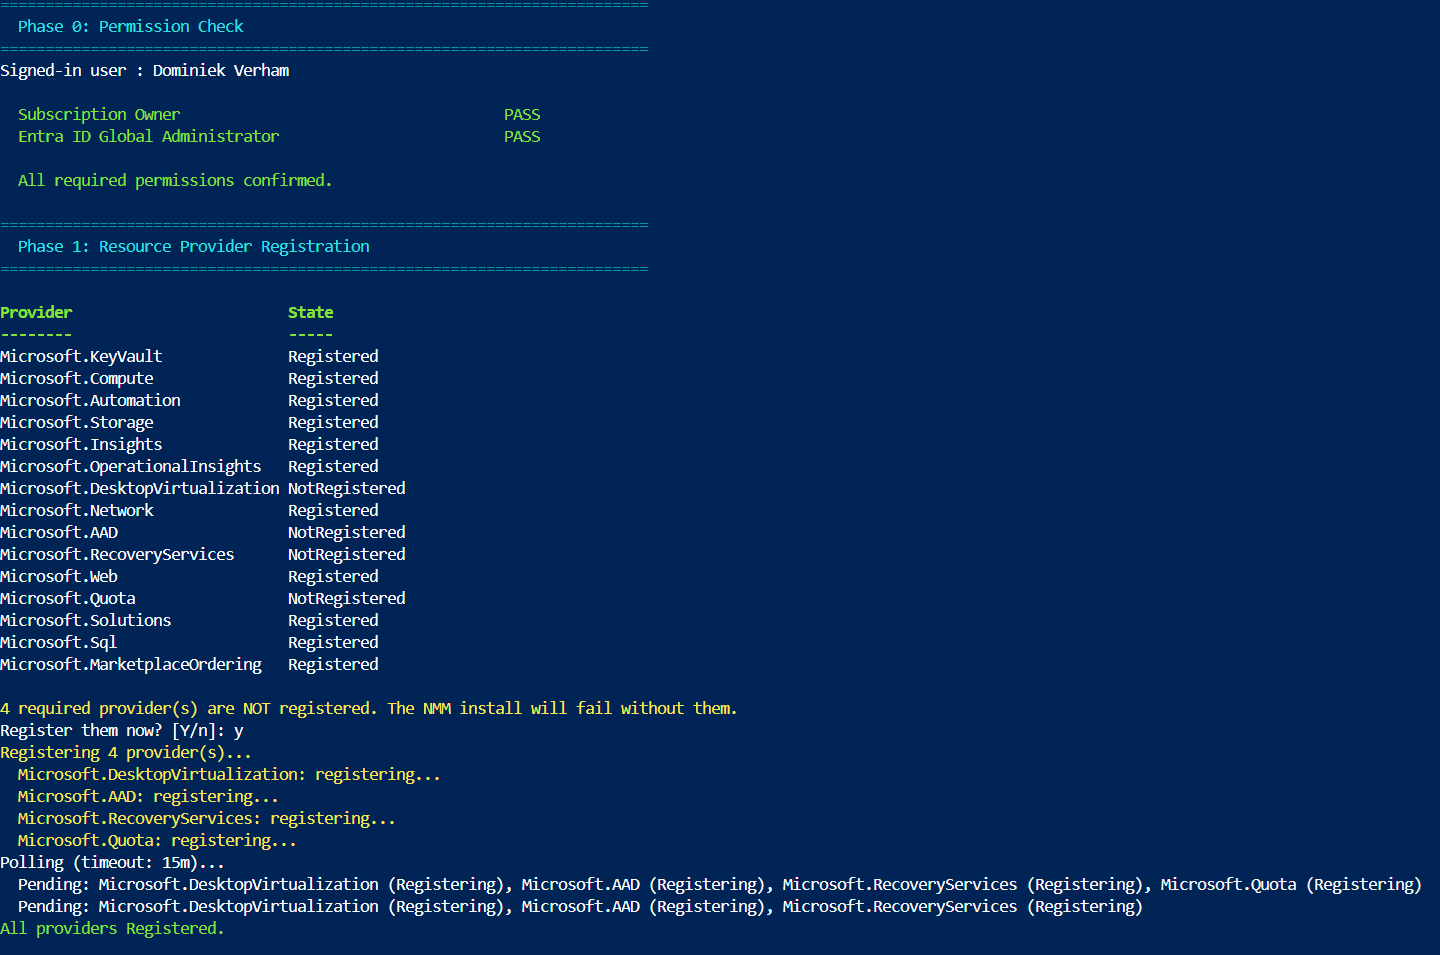
This check revealed that 4 required resource providers were not registered and I let the script take care of that for me.
Phase 2
Time to check where we can deploy the required resources. Select the desired region, or all regions for that matter, and watch the magic happen:
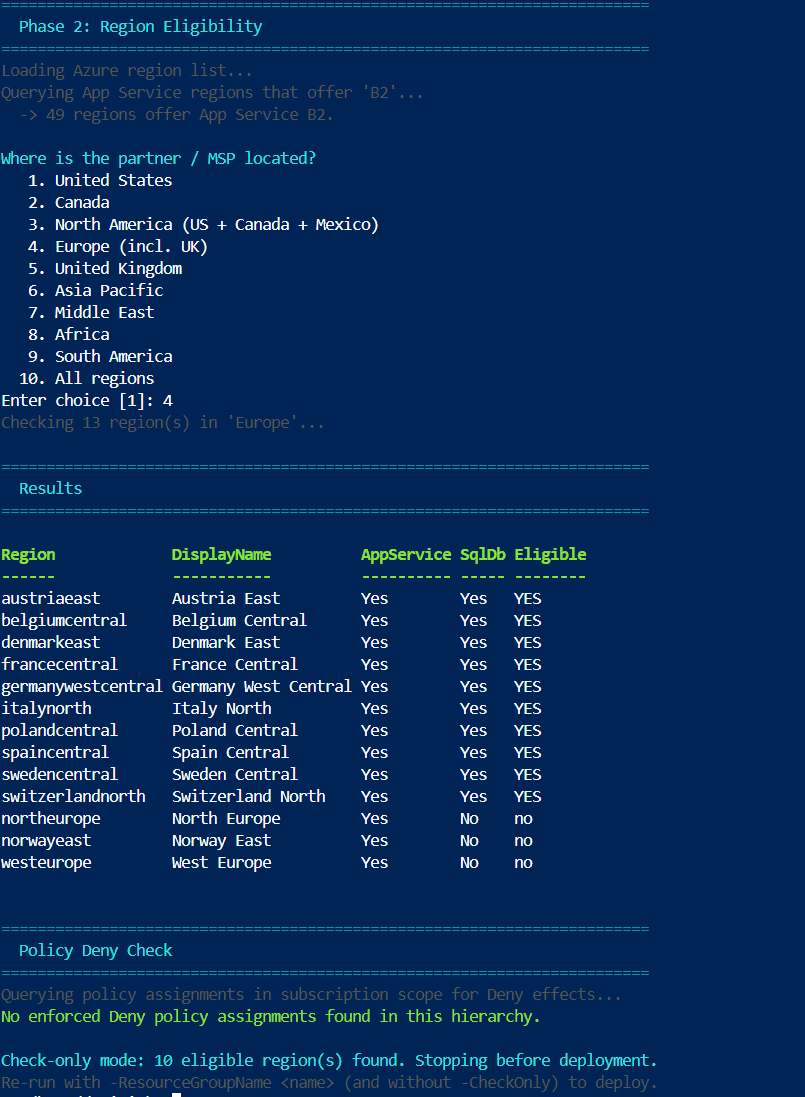
The script will end with a nice table showing regions where I can deploy NMM and for now it stops since I used the -checkonly parameter.
As expected westeurope returns a nope while other regions have enough capacity.
Let’s run the script again and select all regions, you know, for research purposes:
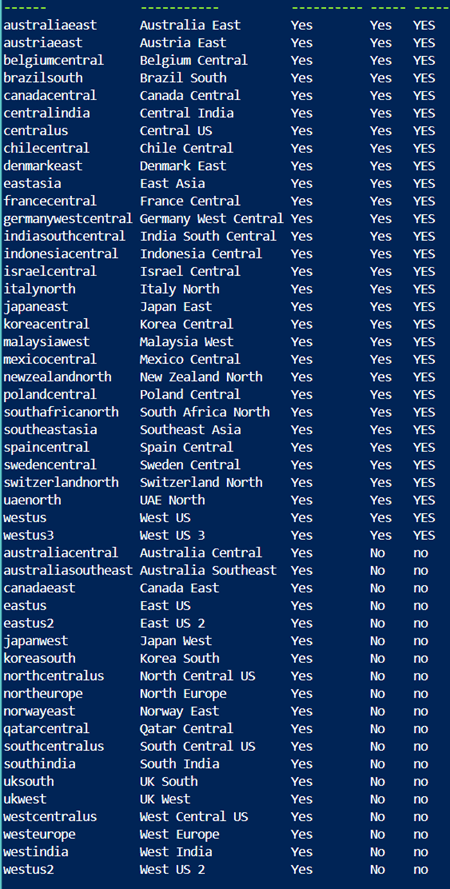
Scripts like these are really nice. They perform basic tasks that end up saving you as an admin a lot of time, either by just checking resource availability or by simple things like registering required resource providers.
Thumbs up for that, Marcos!
Resources
I used the following resources for this post:
Default deployment resources and costs – Nerdio Help Center
Fore more information:
NMM Pre-Installation Readiness Checklist document