What’s up, everyone!
Welcome back to the Nerdio Manager for MSP mini-series! By now you know which editions Nerdio offers and the advantage each edition brings to the table. If you followed along, you probably have a community edition up-and-running and are ready to kick the tires!
Before we continue with adding customers to the tenant, we might want to take a moment to further configure Nerdio Manager for MSP and make it look and feel like our own. Enjoy!
Configure a custom URL for NMM
Once Nerdio Manager is deployed, it will use an automatically generated URL. You can lookup the URL in the Web App in the Azure portal. Just look under Overview, Default domain.
We can change this URL to something else. We would need the following:
- determine the new URL in your own domain. Like https://nmm.customdomain.com
- Access to your DNS environment of your custom domain. We will need to add a CNAME record and a text record.
- Optionally: create a certificate that is valid for the new URL or use a (potentially free) certificate from the App Service.
Step 1 · Sign into your DNS environment
Sign into your hosting provider and make sure you have sufficient rights to add records to your DNS zone.
Step 2 · Add your custom domain to the web app
From the Azure portal, open the Web App and go to Settings, Custom Domains. Click the + Add custom domain button.
A new window appears and we will need to configure the following settings:
- Domain provider: select App Service Domain or All other domain services if you registered the domain at another registrar.
- TLS/SSL certificate: select App Service Managed Certificate if you want to create and bind the certificate from the App Service or add the certificate later. I’ll use the App Service Managed Certificate for this demo (which is also free if you want to following along).
- TLS/SSL type: select SNI SSL or IP-based SSL
- Domain: enter your custom domain (nerdio.customdomain.com)
- Hostname record type: select A record or CNAME.
Once selected, you will get a nice overview of the required DNS records. I went with the CNAME option:
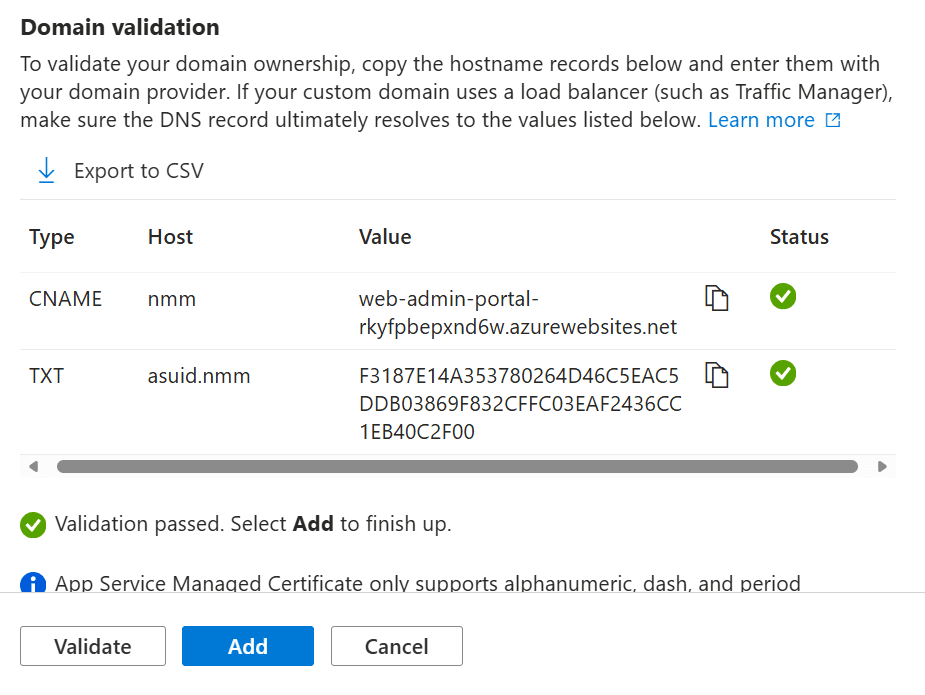
From our hosting provider, navigate to your DNS zone and add a CNAME record:
- Type: CNAME
- Name: add in your custom name. Examples: nerdio, manager, nmm
- TTL: your preferred default value
- Value: paste in the URL from the Web App, Default Domain value.
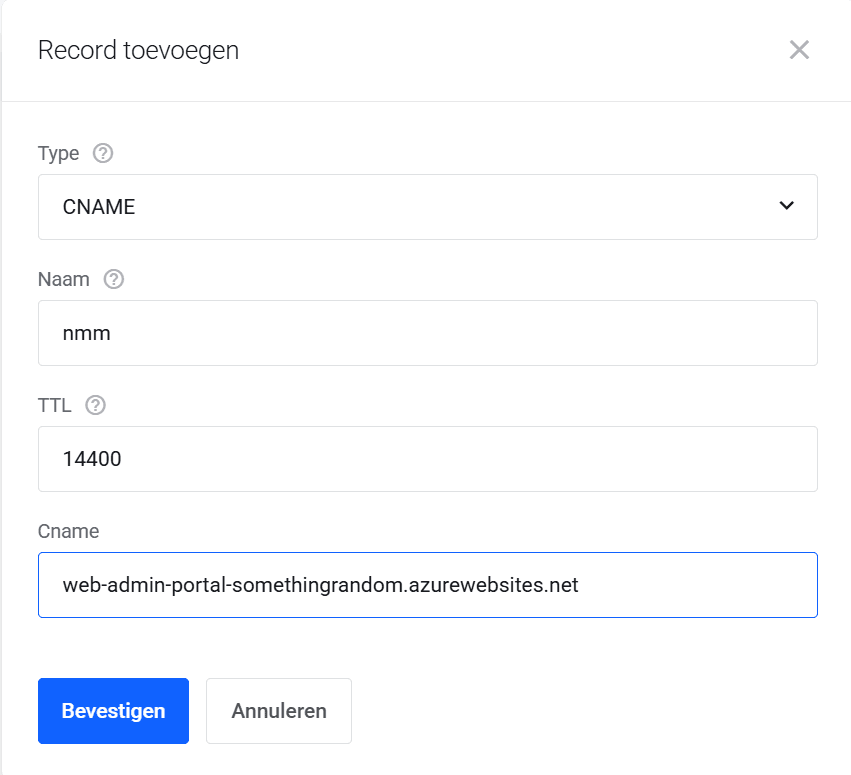
Now I need to add a text record (asuid.nmm) to validate the domain in the App Service. Once everything is configured, make sure to click Validate and finish up by clicking the Add button.
Don’t freak out if the status is red! Give the App Service a couple of moments to do it’s behind the scenes magic and wait until the portal automatically refreshes:
Give the App Service a couple of moments to do it’s behind the scenes magic and wait until the portal automatically refreshes:
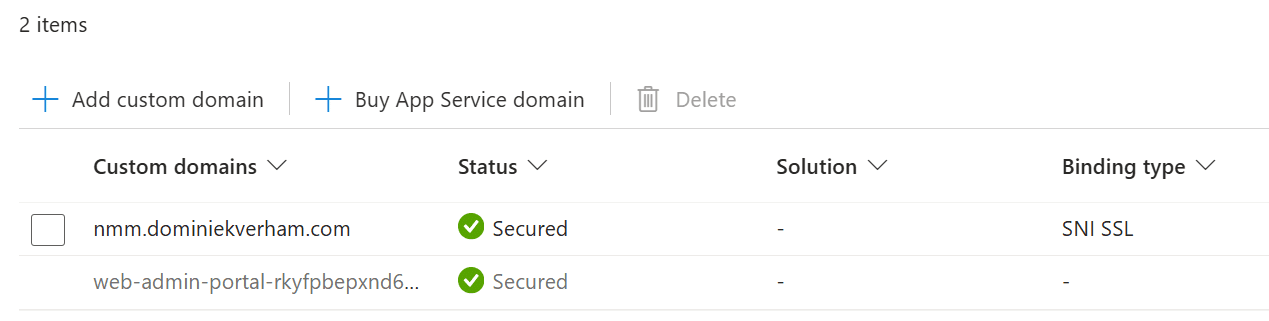
Step 3 · Update the app registration for Nerdio Manager for MSP
Now we need to update the app registration for NMM. Sign into the Azure portal and search for app registrations. Search for an app registration that starts with “web-admin-portal-” and open that app registration.
Go to Manage, Authentication. You will see a list of redirect URI’s:
- https://web-admin-portal-somethingrandom.azurewebsites.net/
- https://web-admin-portal-somethingrandom.azurewebsites.net/add-account
- https://web-admin-portal-somethingrandom.azurewebsites.net/settings/environment
- https://web-admin-portal-somethingrandom.azurewebsites.net/signin-oidc
- https://web-admin-portal-somethingrandom.azurewebsites.net/user/oauth2
Make sure to keep these existing redirect URI’s in place. Do not delete them!
Instead we need to add these URI’s again but then with our own custom domain;
- https://nmm.dominiekverham.com/
- https://nmm.dominiekverham.com/add-account
- https://nmm.dominiekverham.com/settings/environment
- https://nmm.dominiekverham.com/signin-oidc
- https://nmm.dominiekverham.com/user/oauth2
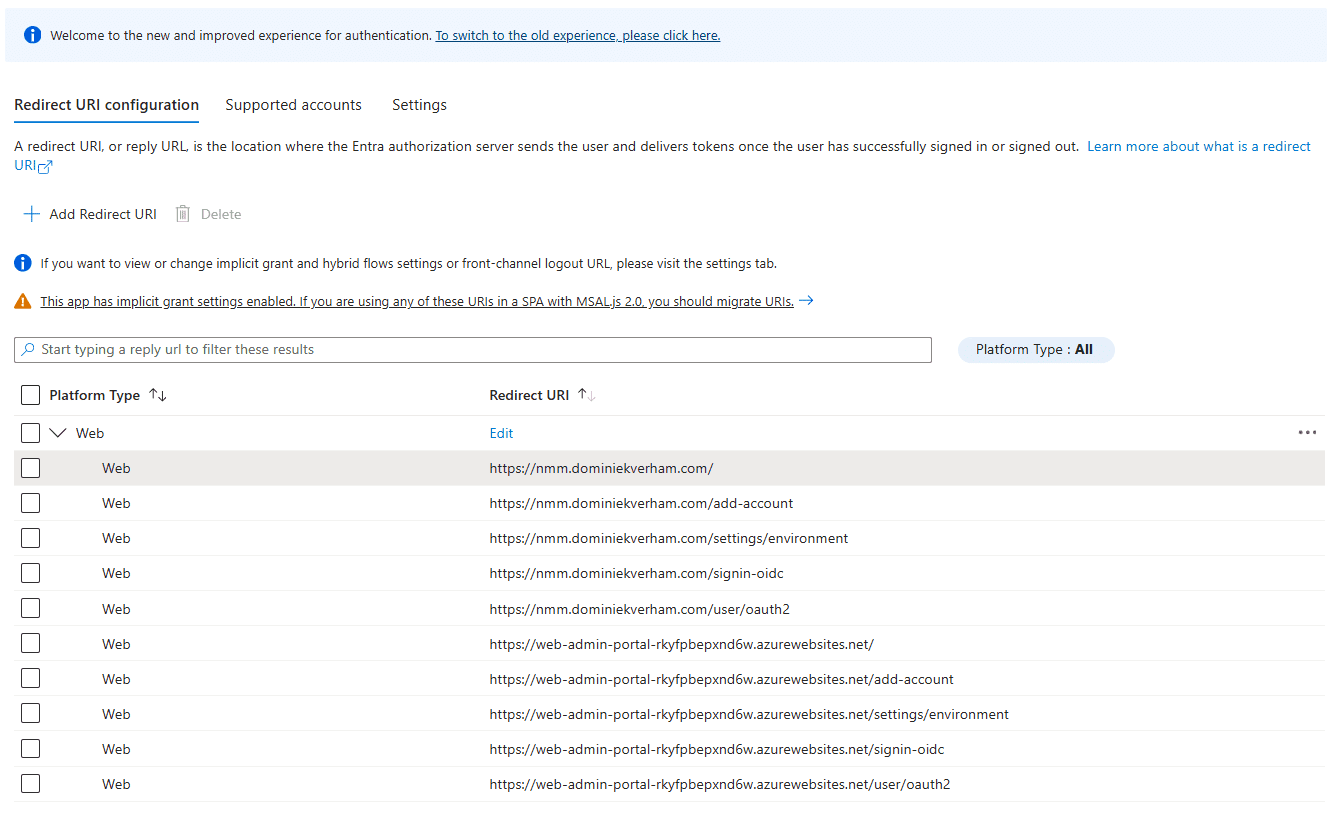
Step 4 · Update the environment variable in the App Service
From the App Service, select Settings, Environment variables. Search for the environment variable called Deployment:WebAppUrl.
Update the domain to reflect the custom domain you want to use.
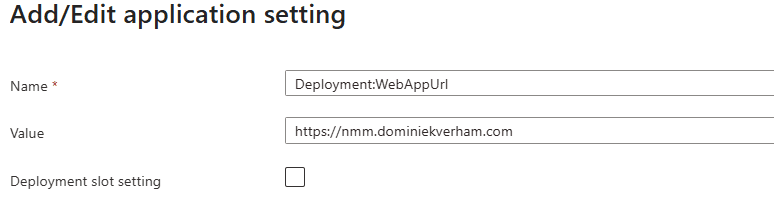
Click Apply, Save and Confirm. Confirming the action will automatically trigger a restart of the App Service.
Did you already add accounts to NMM?
Optional step · Update app registrations for existing accounts
For each account you will need to ADD the following redirect URI:
https://customdomain/account/user/oauth2
Securing access to Nerdio Manager
Nerdio Manager for MSP is now available to you with the automatically generated URL and the custom domain. Nice right?
But do you really want NMM to be available from anywhere in the world? Or just by simply providing the username and password? Or can we do better:
- Only from a trusted location
- Enforcing passkeys instead of allowing usernames and passwords
- Requiring a compliant device
You guessed it! That’s all available to us using Conditional Access. From the Microsoft Entra Admin Center, select Conditional Access and prepare the following:
- a trusted location: could be the office location or home office
From Policies select + Create policy and create the allow policy with the following:
- Name: provide a descriptive name
- Assignments · Users: select the group of Nerdio admins or go with all users but remember to exclude your break-glass accounts.
- Assignments · Target resources: add the App registration for NMM.
- Assignments · Network: select networks and locations and add the trusted location you prepared earlier.
- Access controls · select the required controls like Require authentication strength to enforce passkeys and/or Require device to be marked as compliant.
- Access controls · Sign in frequency: You can enforce a policy that Nerdio admins have to sign in each time when they access NMM. You could argue that this is pretty intrusive, but if you are using passkeys I think this isn’t all that intrusive at all.
If you want to block access from anywhere else in the world, just create another Conditional Access policy that will serve as the block policy:
- Assignments · Users and Groups: All users and exclude your break-glass accounts.
- Assignments · Target resources: Add your NMM app registration.
- Assignments · Network: Include any network or location. Make sure to exclude the trusted network, otherwise it will block every connection since, you know, block wins!
- Access controls · Grant: Block access
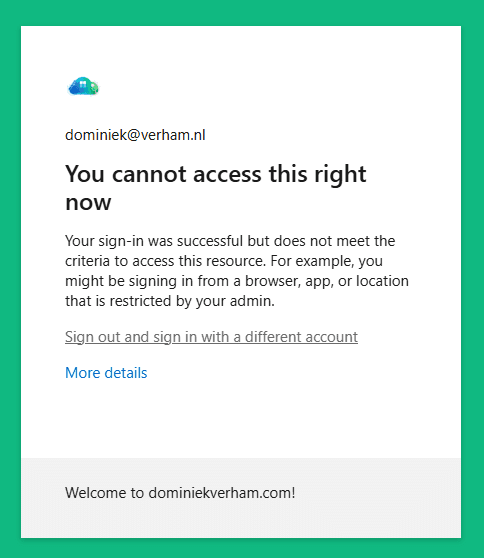
Testing the Conditional Access policies is simple process. Just try to sign in from a corporate (trusted) network. It should work and require Nerdio admins to use passkeys.
Also connect your device to a hotspot (and disable WiFi to make sure you are still not connected over a trusted network) or try to sign in from a non-compliant device, that shouldn’t work.
Do you have any issues?
- Make sure to use break-glass accounts
- Set the conditional access policies to report mode and validate before enforcing
- Make use of the conditional access what if tool. Find it in the Entra Admin Center, Conditional Access, Policies, What if button. It will tell you exactly what policies apply and do not apply. It will also tell you why its being applied (or not!).
Applying company branding to Nerdio Manager
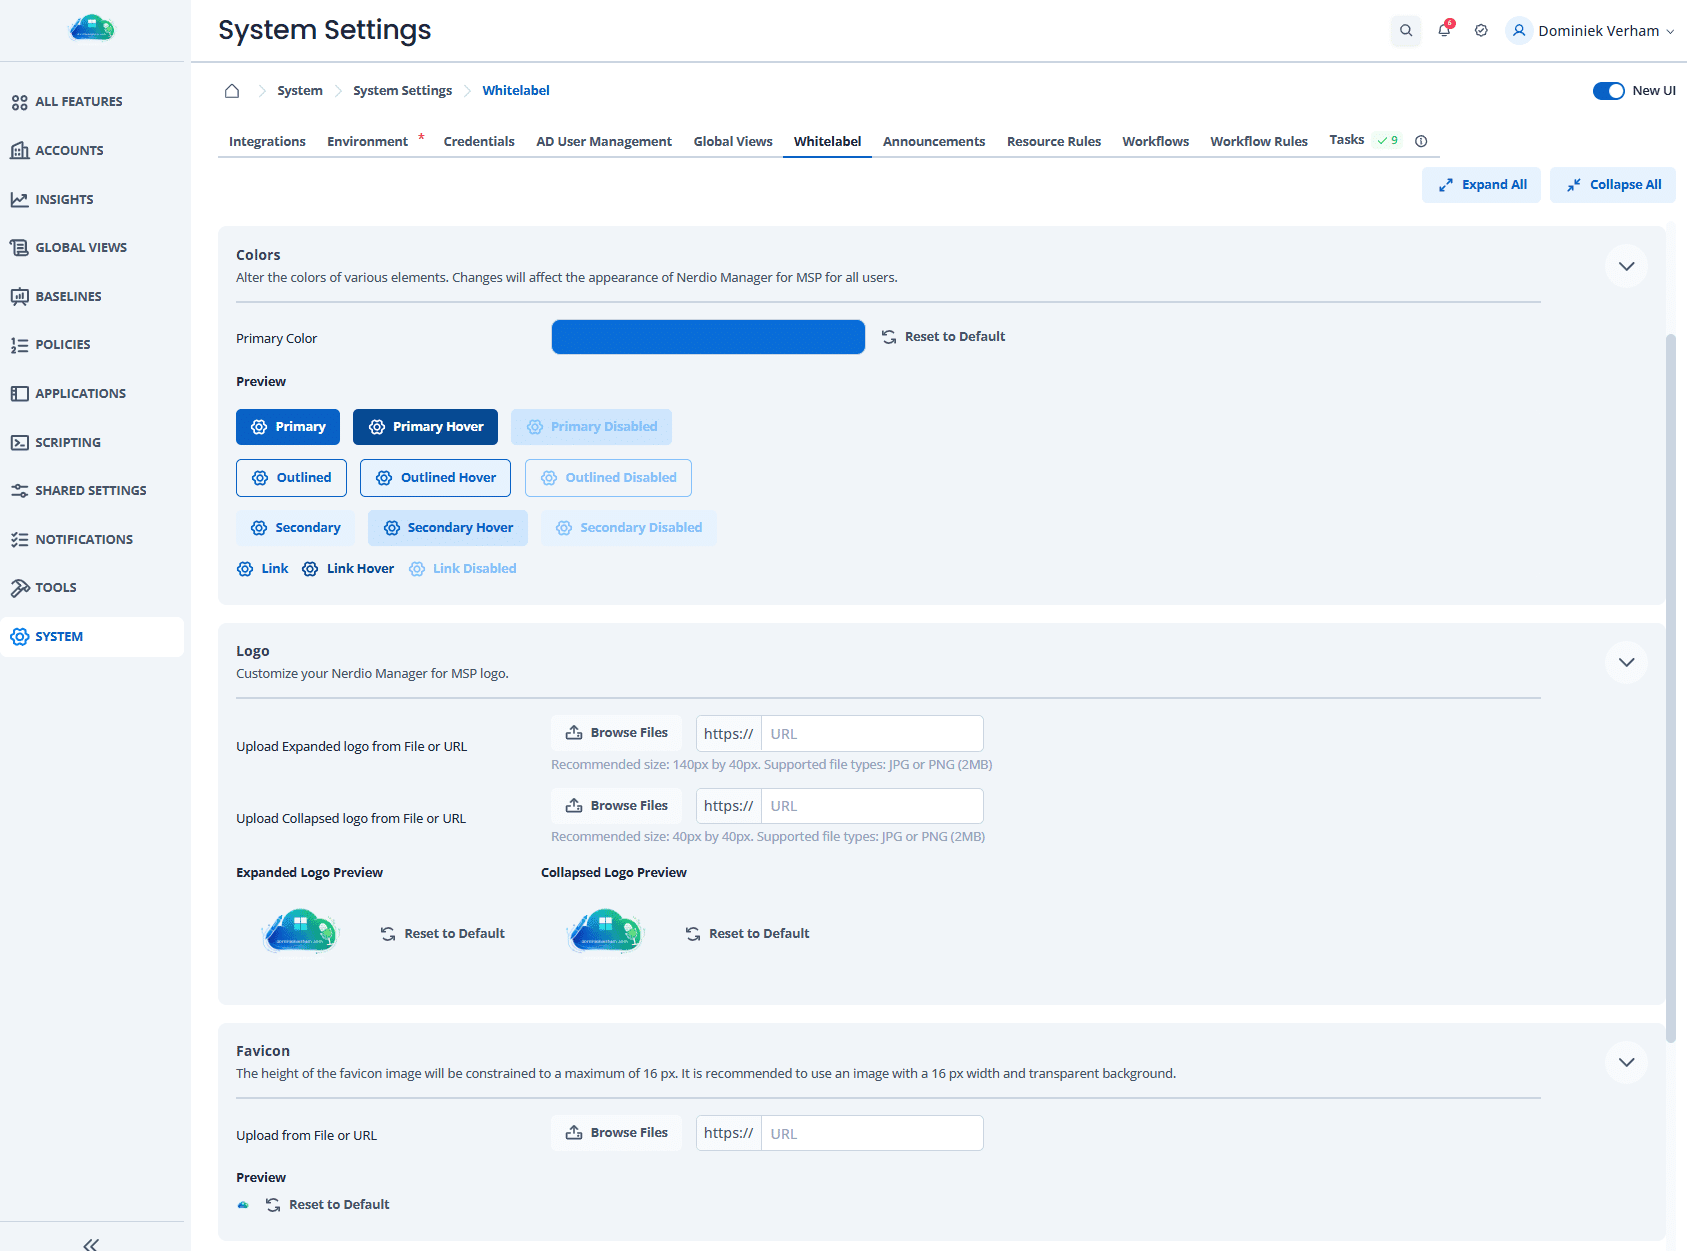
Did you know you can customize the way that Nerdio Manager for MSP looks and feels? Using the whitelabel feature you have the ability to change the:
- Color theme · Choose the light or dark side… uhm theme.
- Colors · Think of this like your custom color scheme. Select the main color of your branding as the primary color. All other colors will automatically update accordingly.
- Logo · Change the logo that is displayed in the top left corner of the window.
- Favicon · Because browsers love logos too!
- Help center URL
- App name · Change the name of Nerdio Manager in email notifications and other areas of the application. So if you want your own Jarvis, here’s your chance!
Go to System, System Settings, Whitelabel and change the desired settings accordingly:
Monitor and optimize NMM components
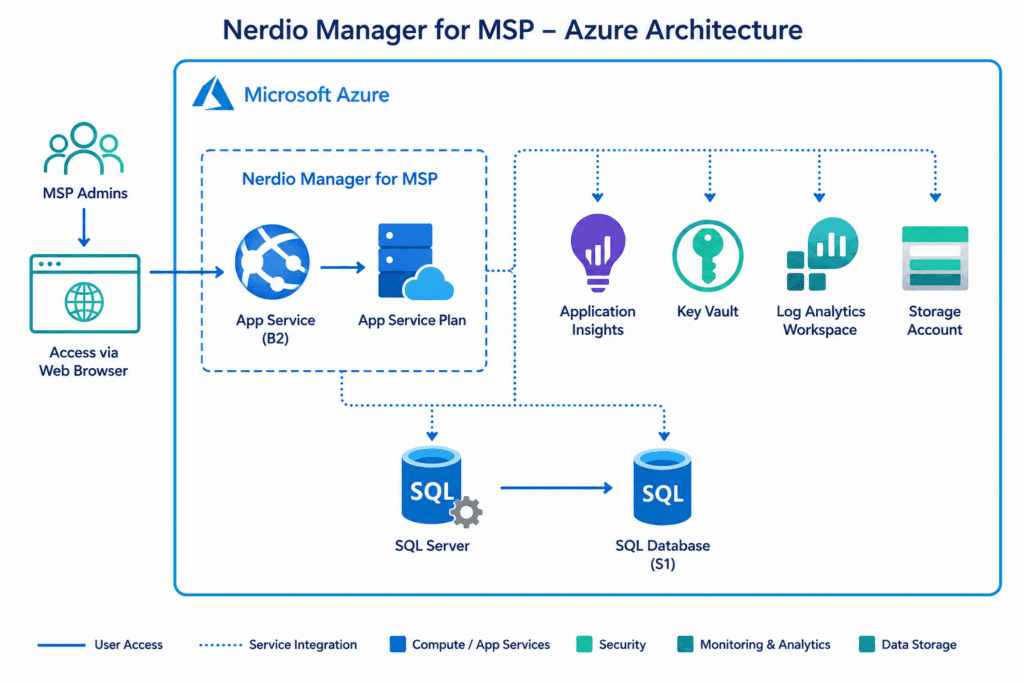
When you deploy Nerdio Manager for MSP, you deploy various components in Azure. But you might want to verify if these components are sized correctly and giving enough performance. And Nerdio will actually help you do that!
From Nerdio Manager for MSP, select Insights, Dashboards, Portal Health:
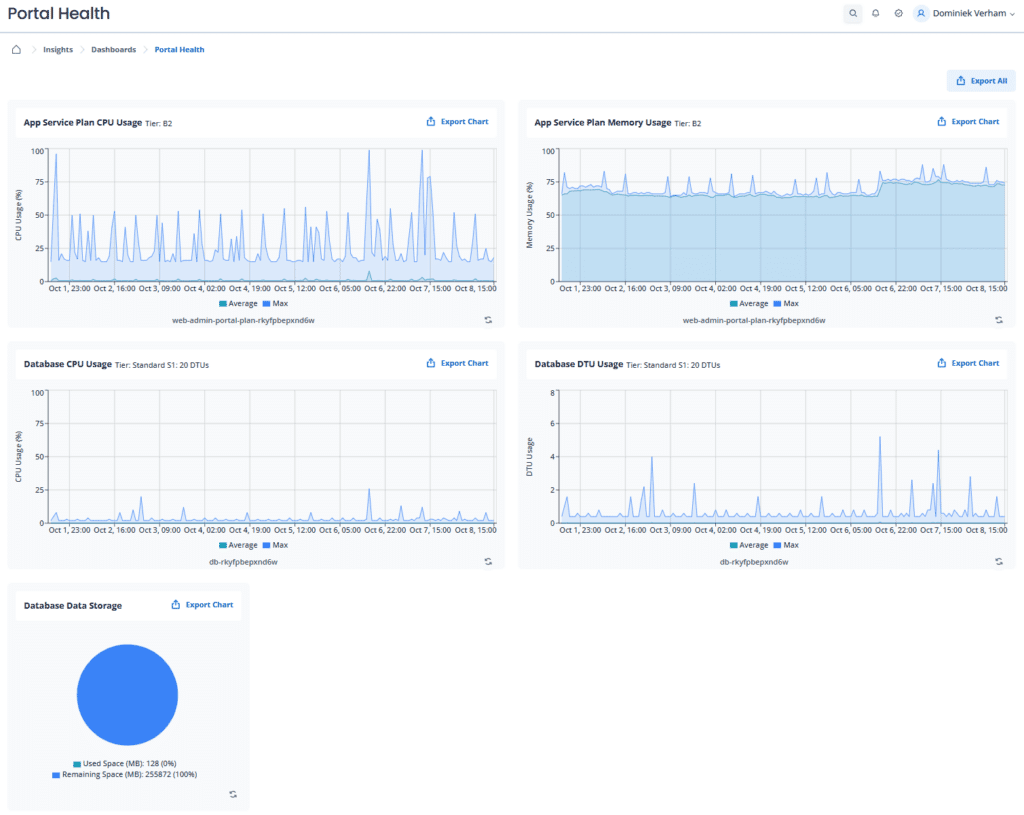
This dashboard gives you vital information on usage, but also if you need to upscale one or more components. It also shows the chosen tiers for the App Service plan and Database tier.
Configure email notifications
Nerdio Manager uses Azure Communications Services to send out email notifications. Did you know you can change that to a linked mailbox and use a custom email address?
From Nerdio Manager, select System, System Settings, Environment and scroll down to Notifications. From here, select the Link Mailbox button and link your Exchange Online mailbox:
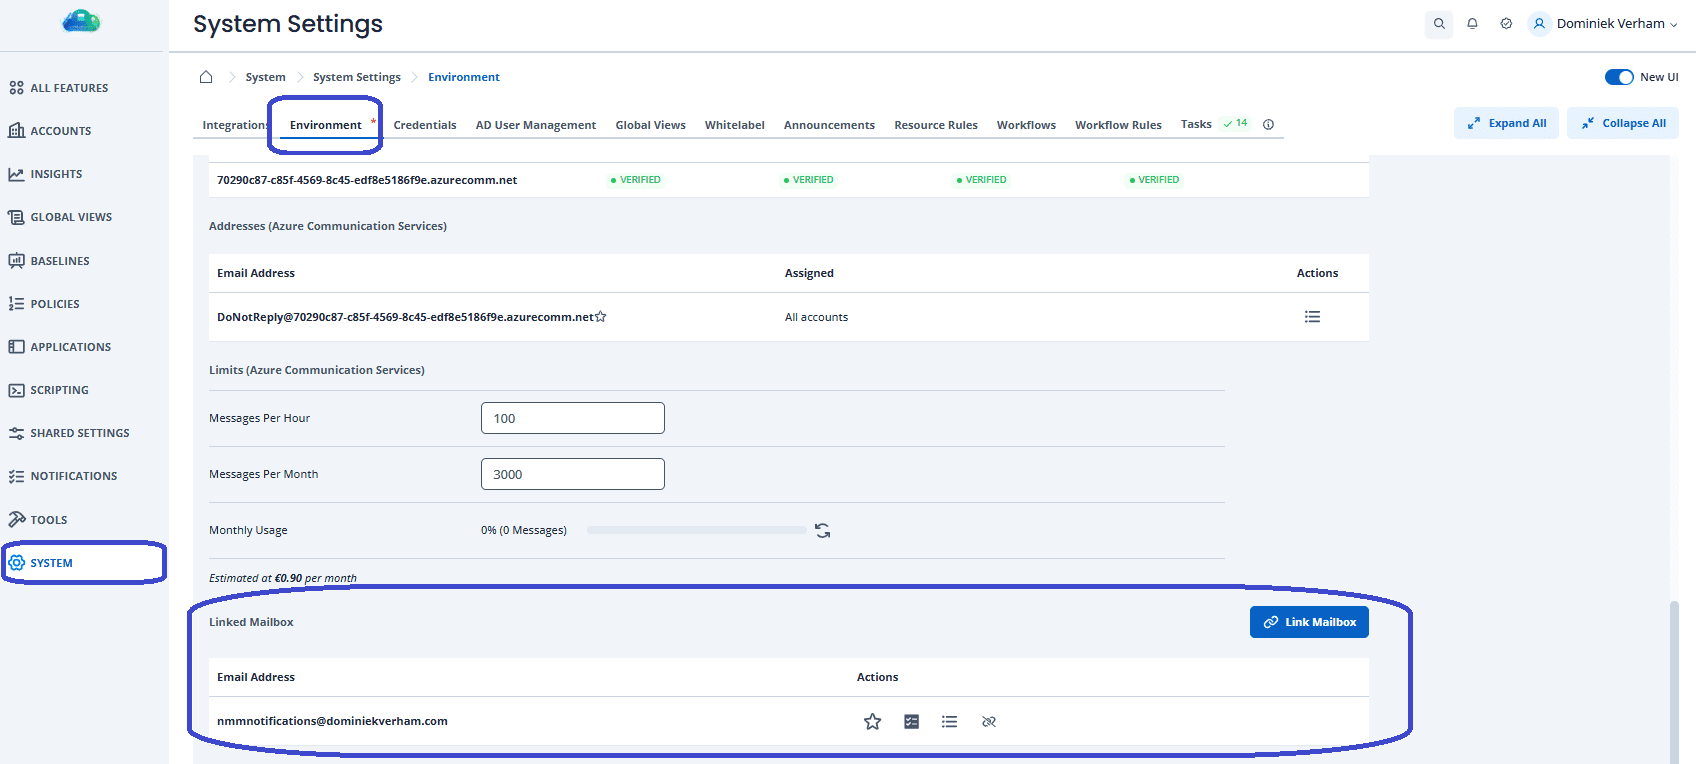
With your mailbox connected, now you can assign this mailbox to one or multiple accounts within NMM.
Just in case you are wondering, yes you can add multiple mailboxes.
Monitoring the availability of Nerdio Manager
Speaking of notifications, it might be a good idea to enable monitoring and alerting for Nerdio Manager’s Web App, that way you are notified if Nerdio Manager becomes unavailable. Azure Monitor and action groups can help us with that.
First we need to know what we need to monitor and the good news is that the legends at Nerdio provide URLs that give an indication of the platform health:
- for Nerdio Manager for MSP: https://yoururl/api/v1/healthStatus
- for Nerdio Manager for Enterprise: https://yoururl/public/health/status
We can leverage Application Insights to create monitoring tests and to make things simple, Nerdio Manager already uses Application Insights. So sign into the Azure portal, navigate to the resource group containing NMM, select Application Insight, Investigate, Availability, + Add Standard Test.
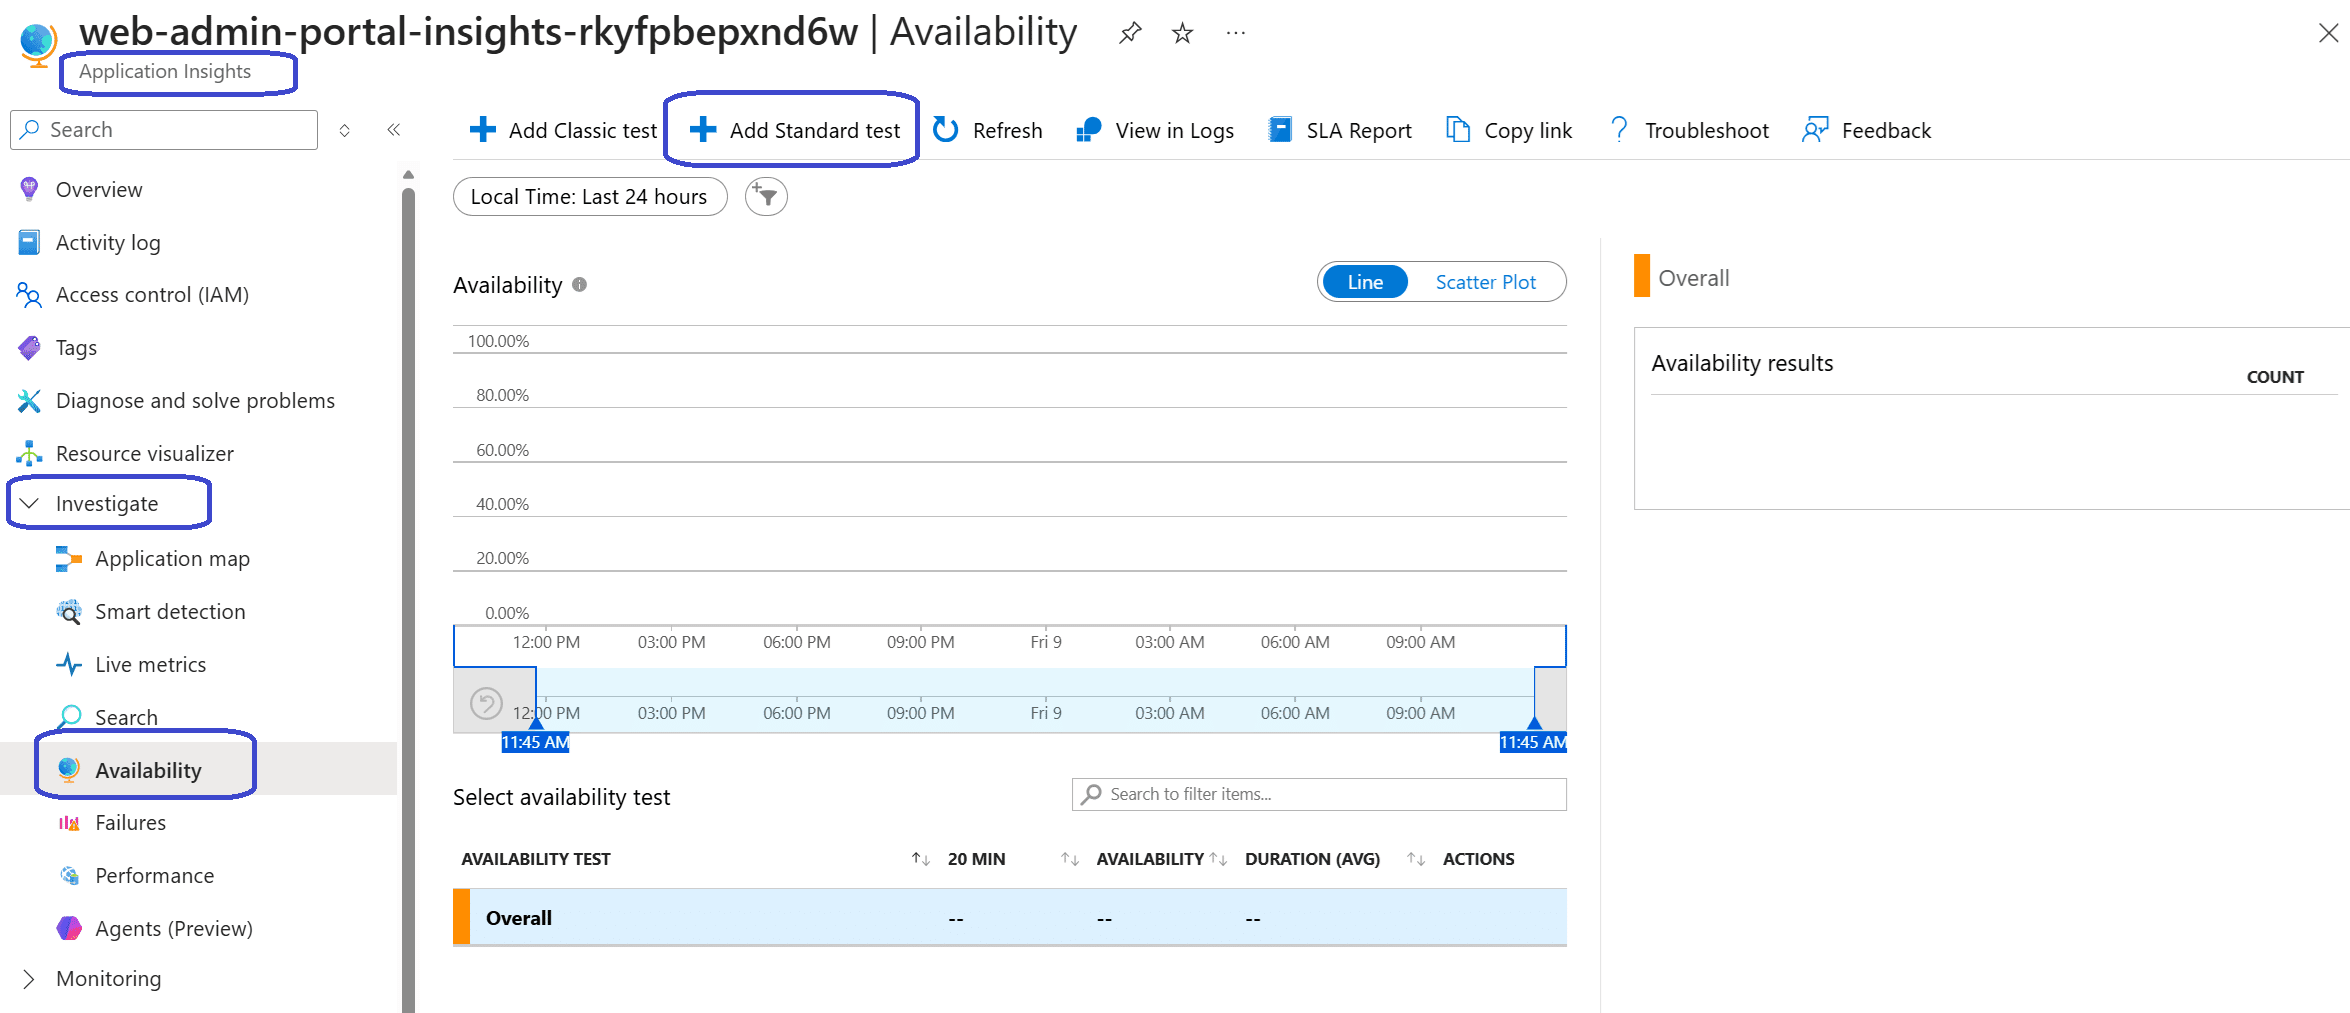
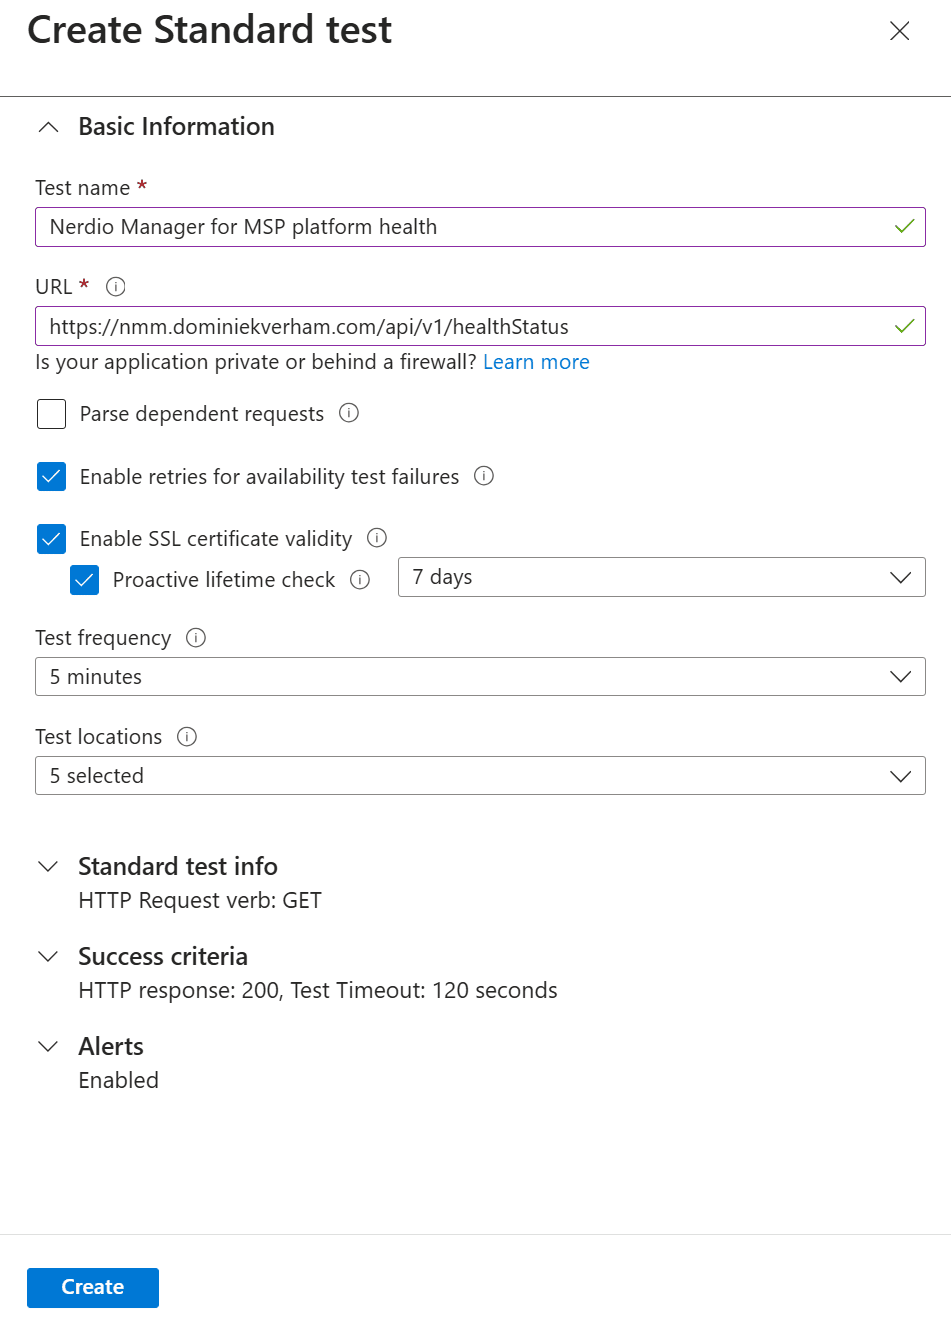
A new window will appear and we can configure the following settings:
- Test name · Provide a name for the test, like Nerdio Manager for MSP platform health.
- URL · Provide the URL that corresponds to either NMM or NME depending on your use case.
- Enable retries for availability test failures · Prevents false positives if a single test fails and because Nerdio admins also require sleep.
- Enable SSL certificate validity · In real-world environments you probably have a certificate management process in place, but I still like this test.
- Test frequency · Default set to 5 minutes and that corresponds with the Nerdio documentation.
- Test locations · Uses 5 test locations by default. Azure will rotate the test between these regions. Make sure to tone this down to a single location or the rate limiter will become angry at you.
I ended up with something like this:
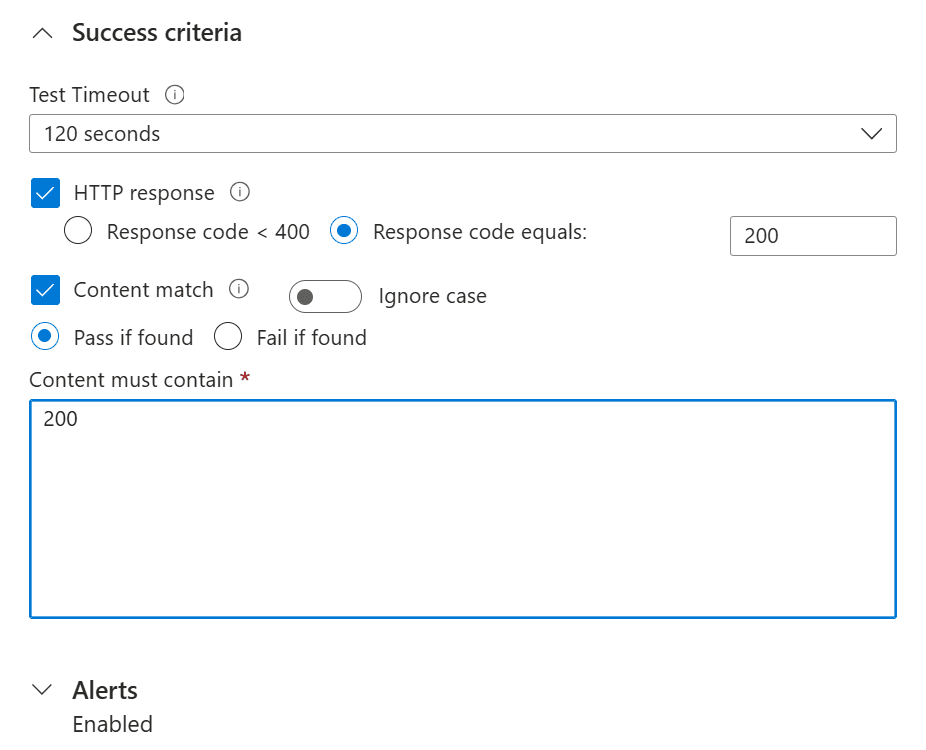
You can finetune this process a bit more by specifically require response code 200 which means all good. Any other code will be considered a failure. To do so, unfold the Success criteria section and check the box next to Content match, select Pass if found instead of Fail if found and type in 200 in the content must contain text box:
Now it’s time to admire your awesome work and click the Create button to save the test.
The monitoring part is now in place and we still need to configure the alerting part. To do so, click the ellipsis (… 3 dots) next to your newly created test and select Open Rules (Alerts) page. This will take you to the Alert Rules page and shows an overview over available tests.
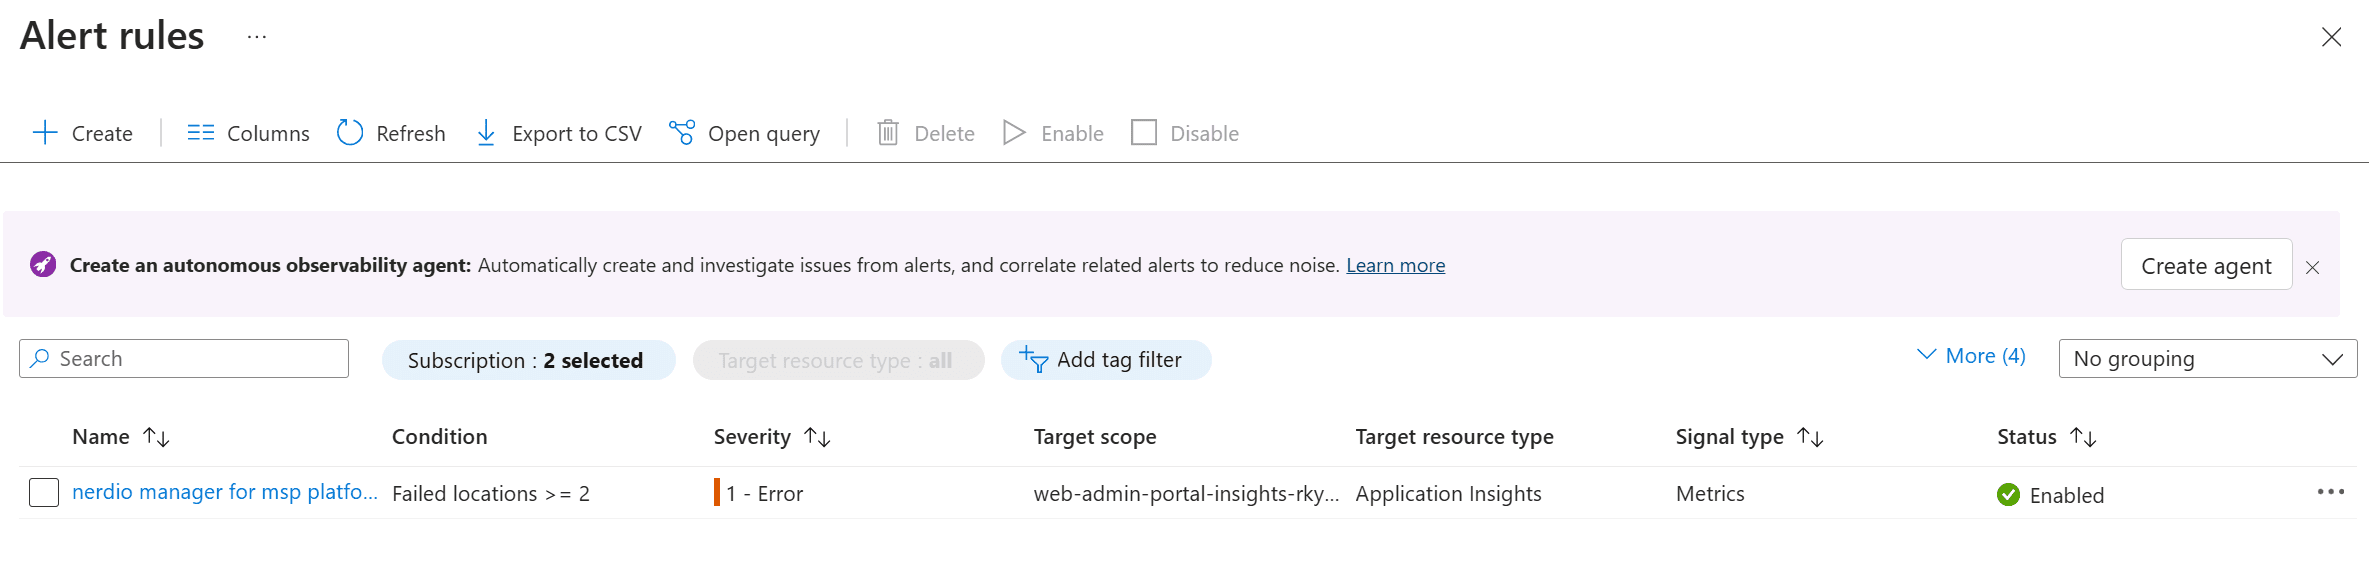
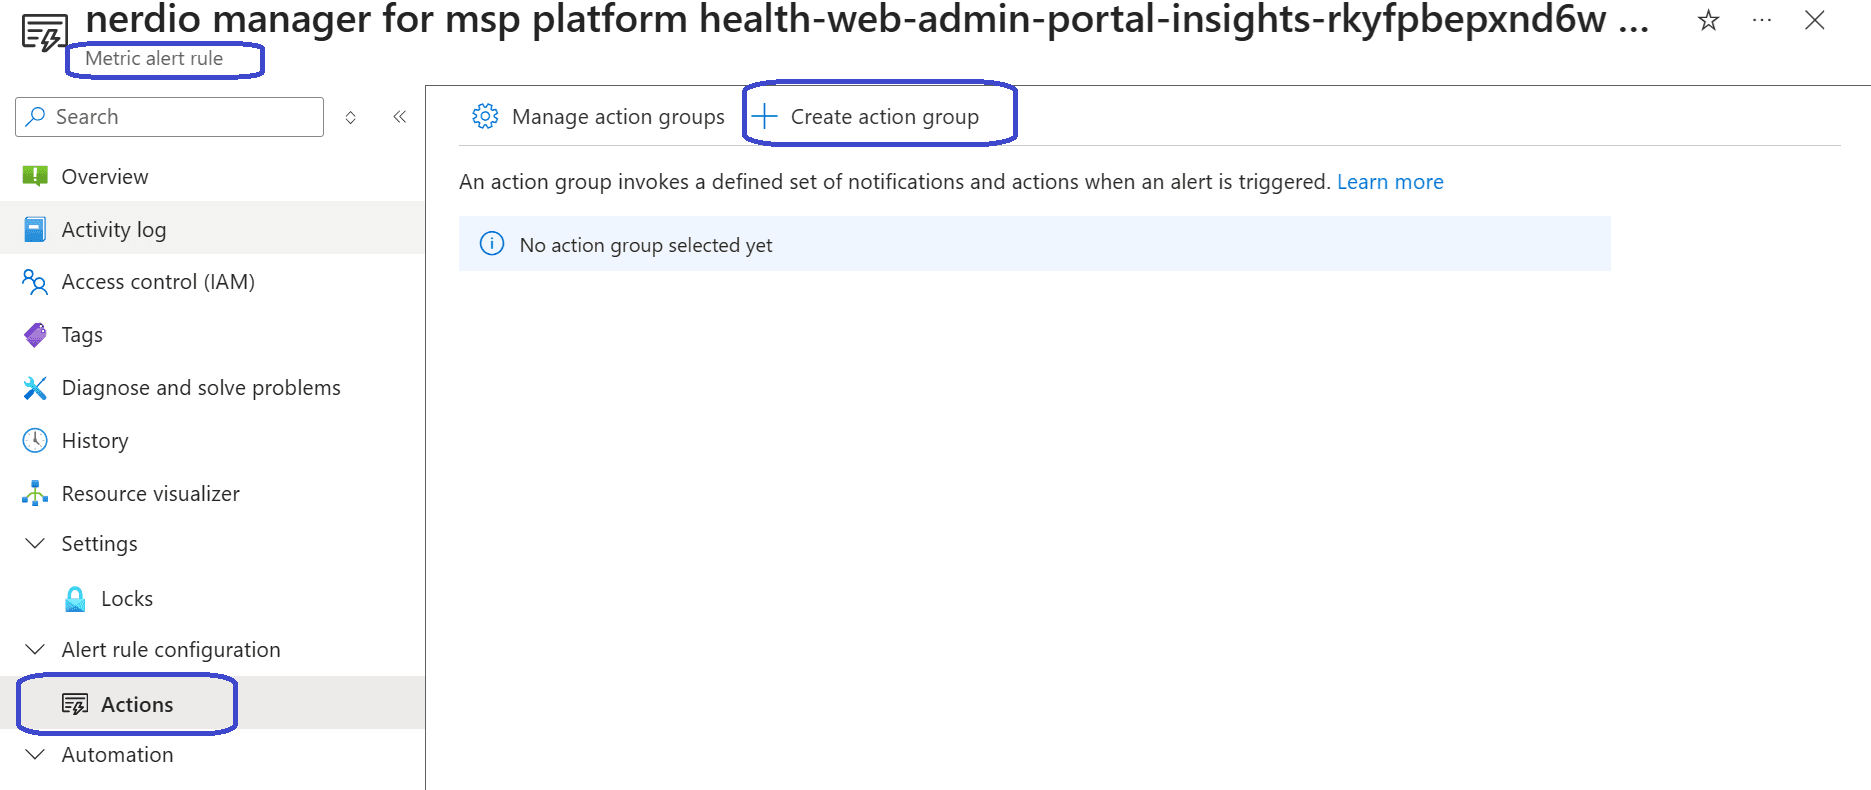
Click the Nerdio Manager for MSP platform health test, go to Alert rule configuration and select Actions. Click on the + Create action group button.
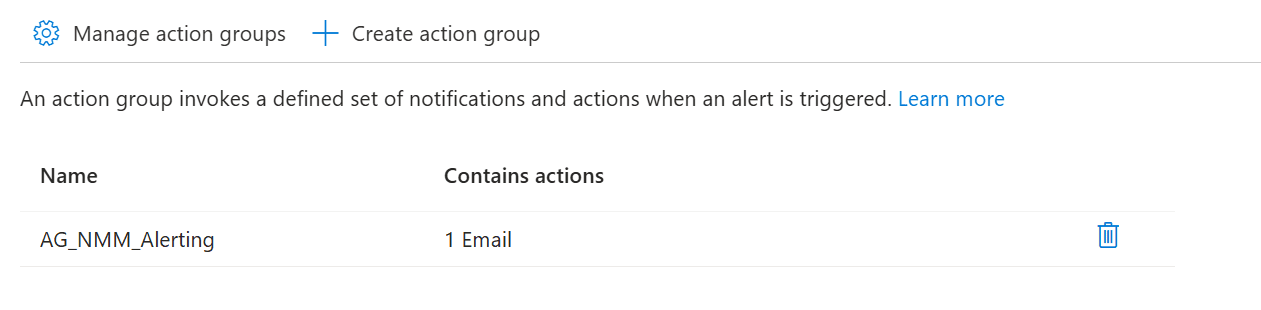
In the Notifications step, select Email/SMS message/Push/Voice as the notification type and provide the email address. Also provide a name for the selected email address.
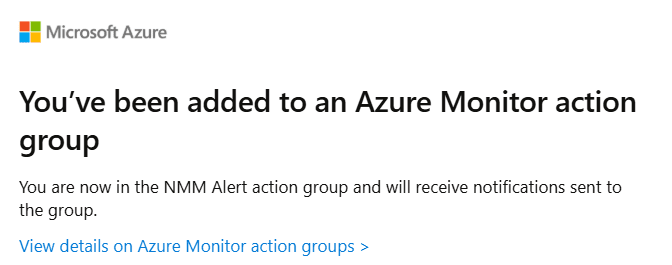
Make sure to check the mailbox because you might need verify this email address. If you completed this step, you will receive a confirmation like this:
With all of that work done, I was surprised to see that my availability check was failing (and miserably to be honest). So what happened?
The symptom
The checks from the selected regions were all failing.
Troubleshooting steps
Using a browser and navigating to the endpoint URL now gave me the following message:
{"status":429,"traceId":"00-5599fcd53f33051ce1234abc5219b3bf-c7f692b4a284890a-00"}Another way to troubleshoot is to look at the availability results from the availability test. It will show the failed and successful attempts:
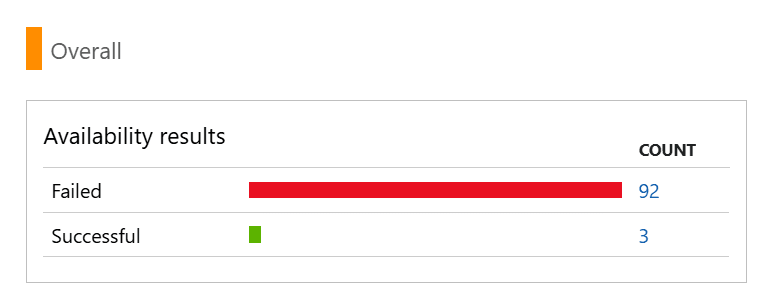
Click on the failed attempts and filter on one of the more recent ones. It will give you a detailed explanation:
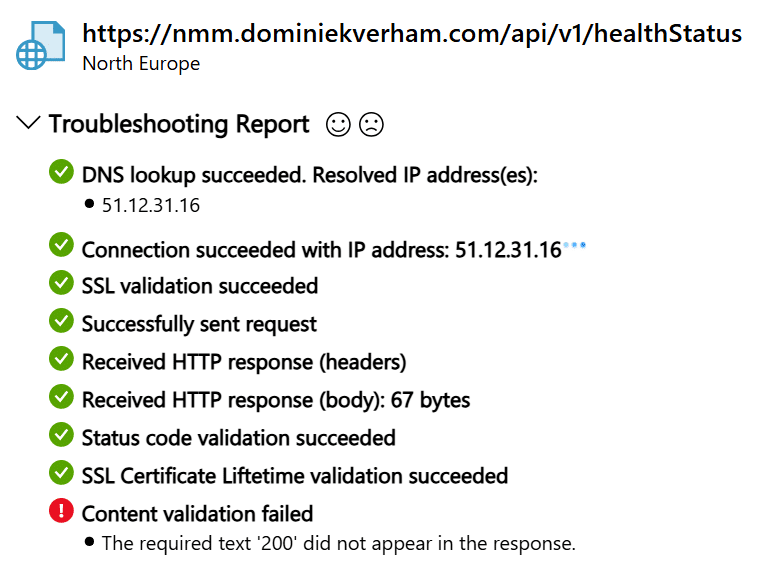
So we are requiring status code 200 and we are getting a 429 which, after a quick search, means stop hammering the API… Yep, sorry about that!
Remember the 5 locations I selected? Well, that just increases the number of checks. It becomes even more fun when a check fails because it will retry which doesn’t help if the API is protected with rate limiting preventing connections in the first place.
The solution
Remove 4 of the Azure locations in the availability check and pause the check for a moment. Then re-enable after a while and you should be good to go!
Keeping Nerdio Manager up-to-date
With all that out of the way, you just levelled up Nerdio Manager before you even onboarded your first customer (or account). But you might want to keep an eye out on keeping Nerdio Manager up-to-date so you can make use of all the new features that are being introduced by the legends at Nerdio.
So how does that work from within Nerdio Manager for MSP?
Go to System, Updates. This window will give you relevant information on the current deployed version, your installation ID and health status.
It also shows a list of the last version and their release notes. If you want to update to a later version, just click the rocket icon next to the version you want to deploy. This will ask you to:
- Open up Azure Cloud Shell
- Copy and paste a Powershell script that updates Nerdio Manager for MSP
Once the update completes, which you can check via the Azure Cloud Shell, you just need to refresh the screen and verify the new version number.
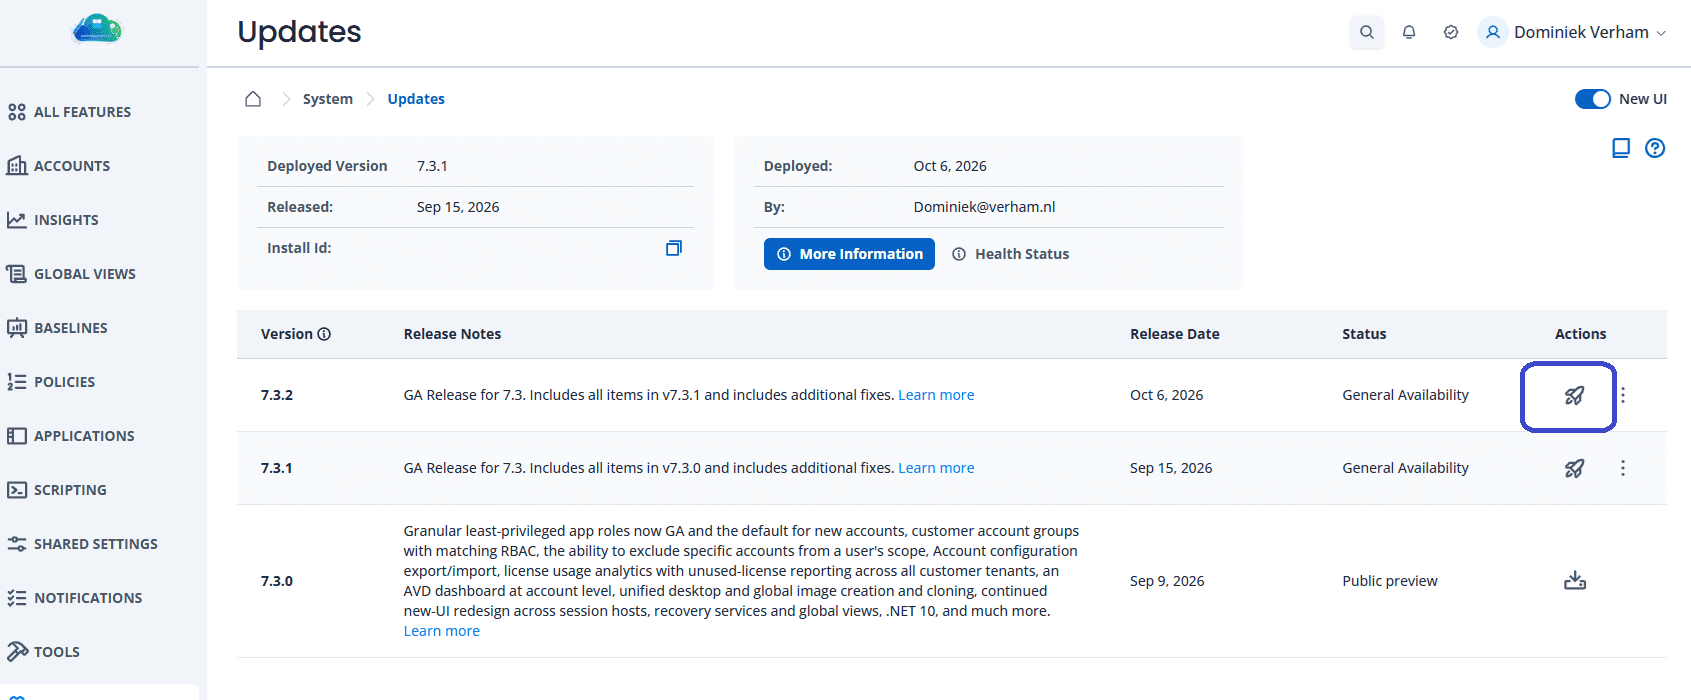
With that you levelled up Nerdio Manager and you’re all set to onboard your first account.
Resources
I used the following resources for this post:
Сustomize the Nerdio Manager URL – Nerdio Help Center
Alerts and notifications – Nerdio Help Center
Monitor the Health of App Service Instances – Azure App Service | Microsoft Learn