What’s up, everyone!
Welcome back to the Nerdio Manager for MSP mini-series!
Each customer of an MSP is unique, but many of their configurations don’t have to be. Policies and settings that are common across customers can be defined as a baseline and applied to individual customer tenants. Keeping these policies and settings aligned with the latest approved version can quickly become a challenge without a centralized management solution like Nerdio Manager for MSP.
In this post I will dive into the world of policy baselines, solution baselines and group templates. All features to standardize configurations, reduce repetitive work and maintain consistency across your customer environments.
Enjoy!
Mini-series overview
- Nerdio Manager showdown: Enterprise vs MSP – dominiekverham.com
- Installing Nerdio Manager for MSP – dominiekverham.com
- Configuring Nerdio Manager for MSP: post-installation checklist – dominiekverham.com
- Nerdio Manager for MSP: Adding accounts – dominiekverham.com
- Consistent Management Across Customers with Nerdio Manager for MSP – dominiekverham.com
Enjoy!
The story of the baselines
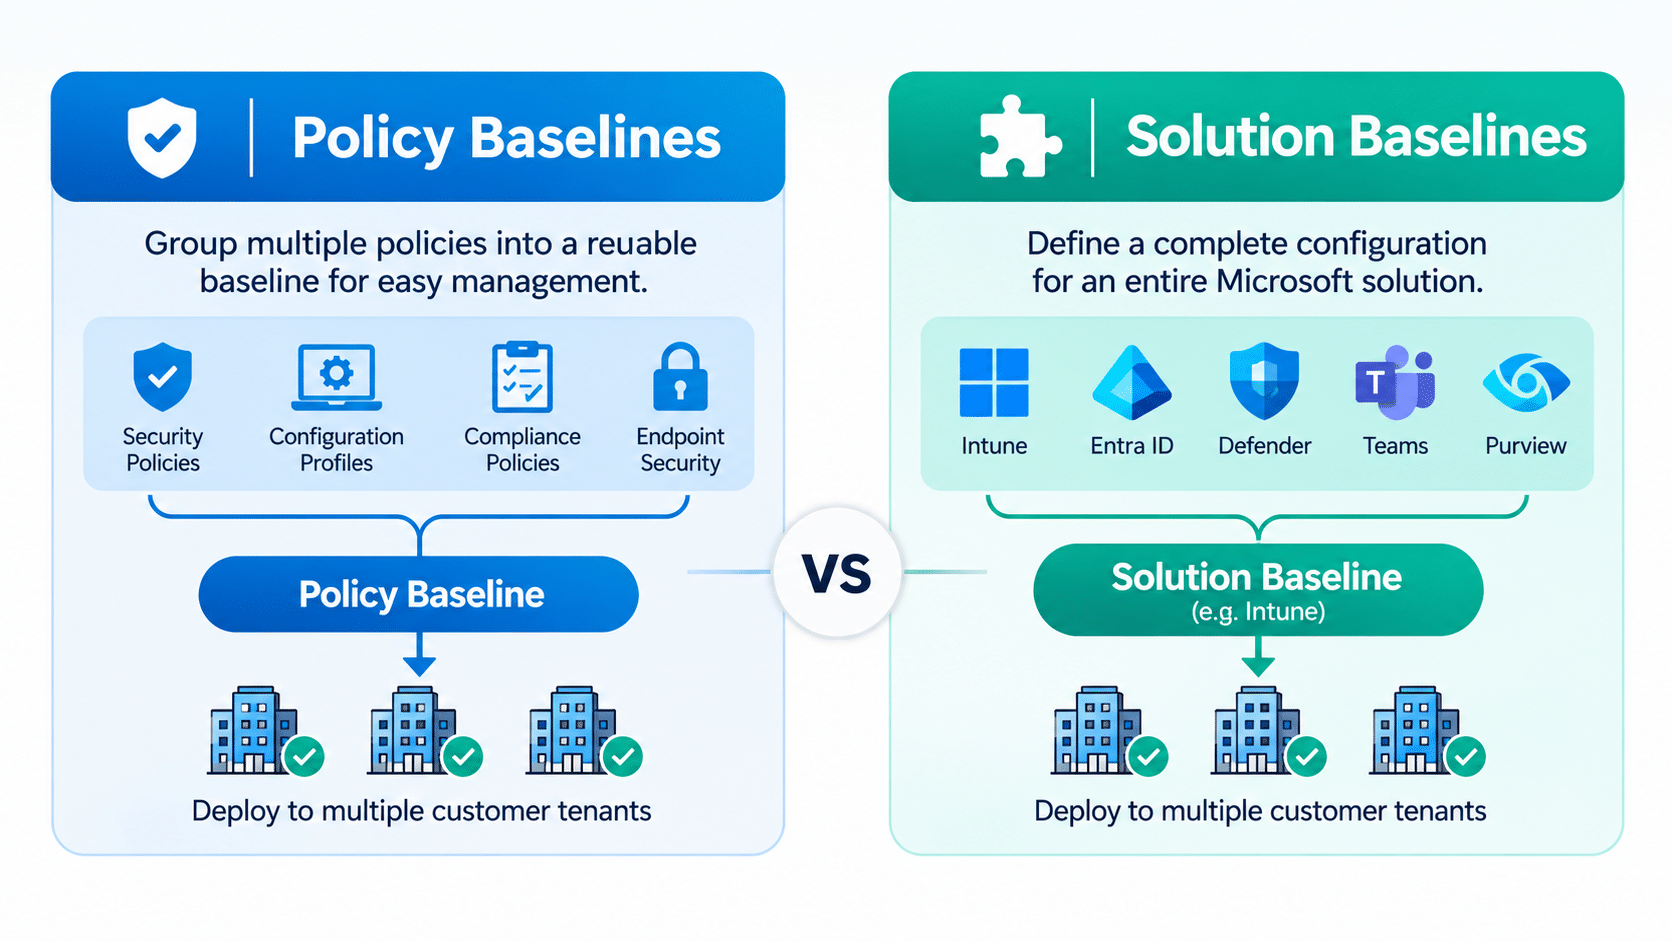
Let’s start off with a quick comparison between policy baselines and solution baselines. Hopefully this will help you to determine what the goal of each baseline is and when to use them:
Introducing Policy Baselines
Policy baselines in Nerdio Manager allow MSPs to group related policies and settings for a specific solution into a reusable baseline. This makes it easier to standardize configurations, deploy them across multiple customer tenants and monitor drift (settings that are configured differently).
Did you know that the legends at Nerdio have some really good guidance on how to implement policy baselines? I will leave a link to that article to make your life a bit more easy: KB article
There are three steps to creating a policy baseline of your own:
- Make sure that your desired policy is available in Nerdio Manager or make use of built-in policies.
- Create a policy baseline and add policies.
- Assigning the policy baseline to an account.
Let’s look at an example to import a conditional access policy from the source tenant and reuse it in a policy baseline. That brings us to…
Step 1: Adding an existing Conditional Access Policy
From the MSP level, select Policies, Entra, Conditional Access:
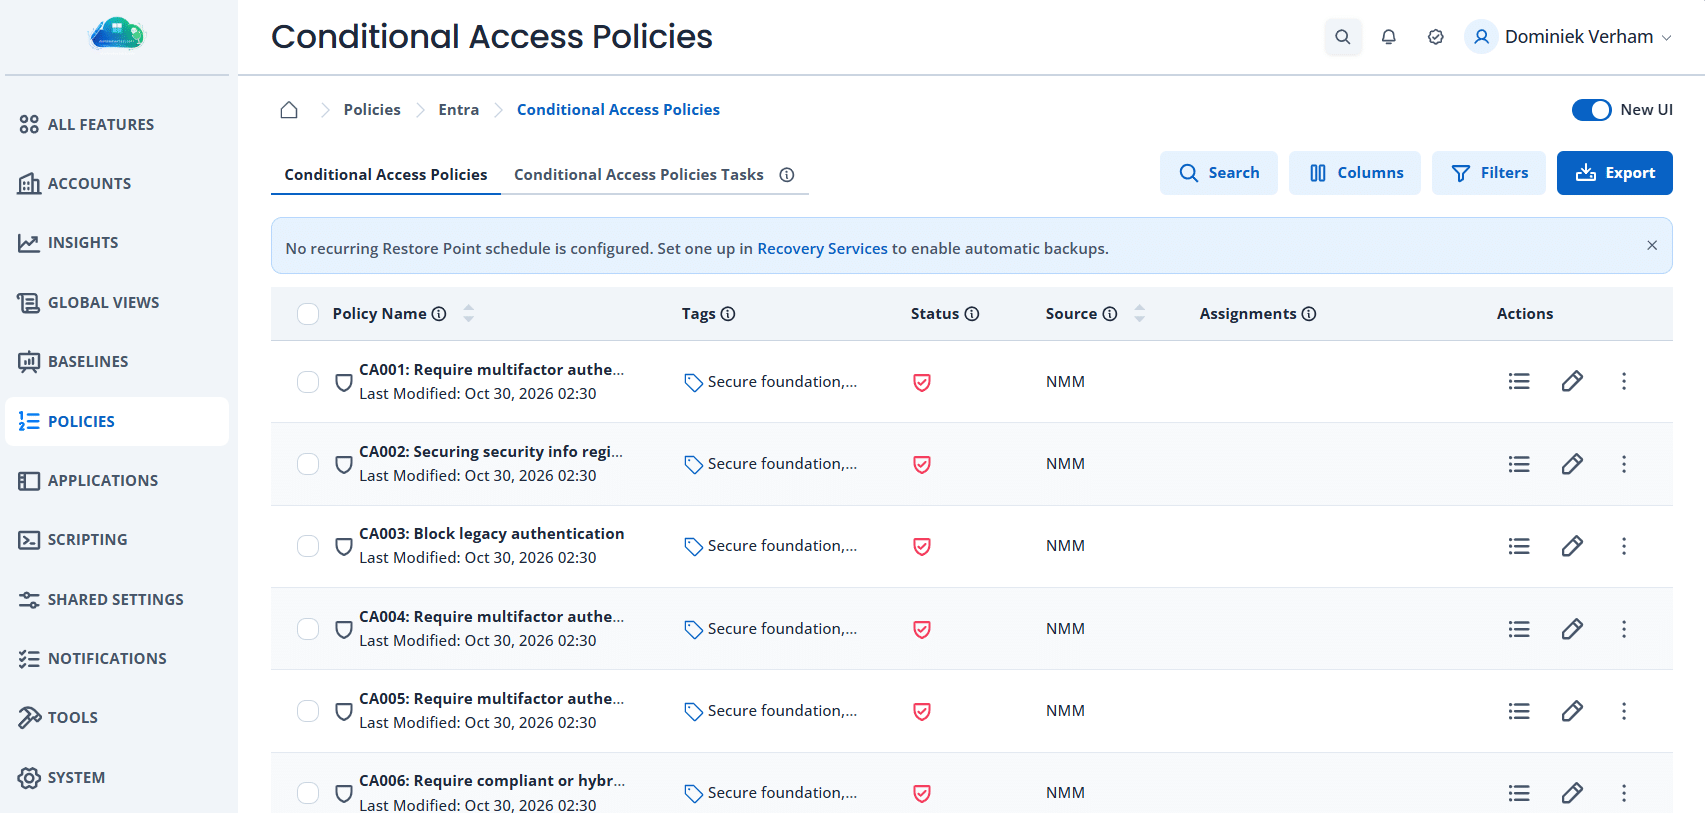
I got a little bit thrown off when I saw this overview for the first time. I recognized the first part of the policies but they all had different purposes. It turns out, Nerdio Manager has some built-in policies to get us started and as it happens, they use the same naming convention that I am using in my own environment as well! So if you are using the same naming convention too, make sure to check the Source field for easy reference:
- NMM · A built-in policy in Nerdio Manager
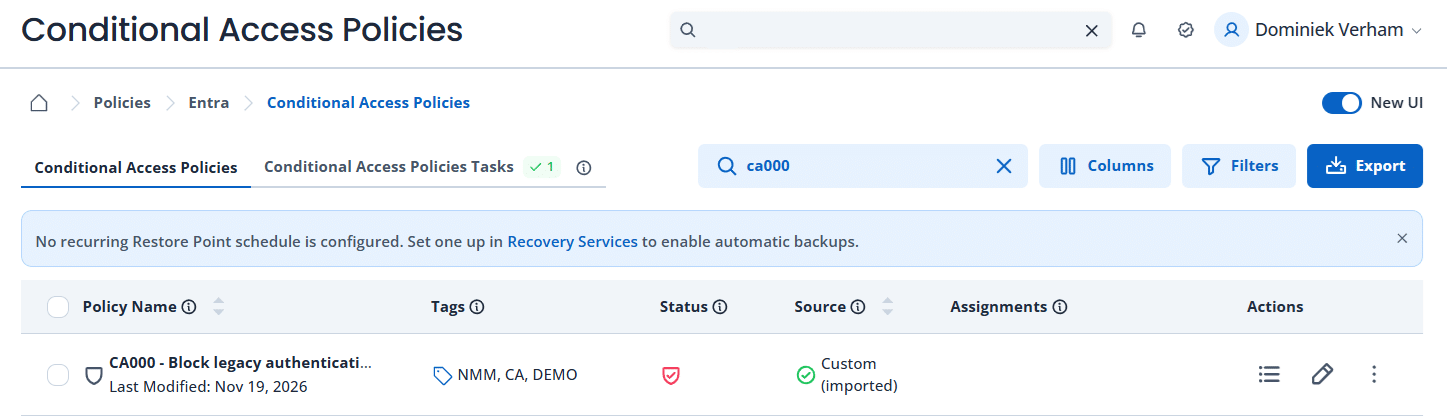
- Custom (imported) · Imported policy from a source tenant
Importing an existing policy starts with selecting the Import Actions dropdown box followed by Import:
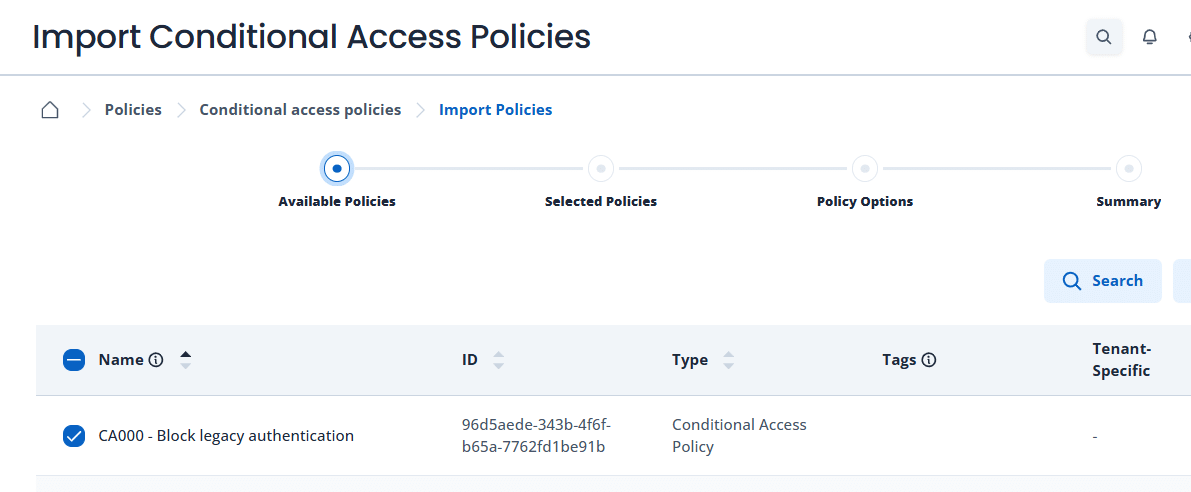
Select one or more policies that you want to add to the baseline and select Next.
This brings us to Selected Policies and display an overview of the policies you have selected. You can still remove policies if you selected a policy that you don’t need.
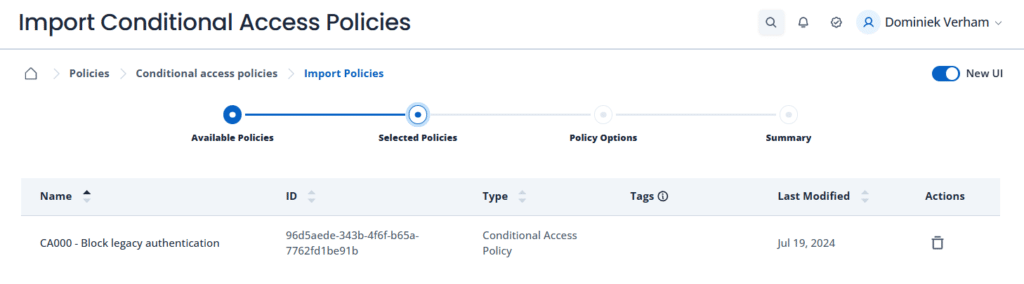
Next up is Policy Options:
- Add tags if required.
- Add information that will be added to the changelog.
- (un)Check Evaluate user/group assignment · checking the box will make sure that Nerdio Manager displays user and group assignments in the Summary page.
- (un)Check Overwrite Authentication Context if already exist · checking the box will overwrite the authentication context in Entra in case it’s already being used in the customers tenant. Beware; this might break things!
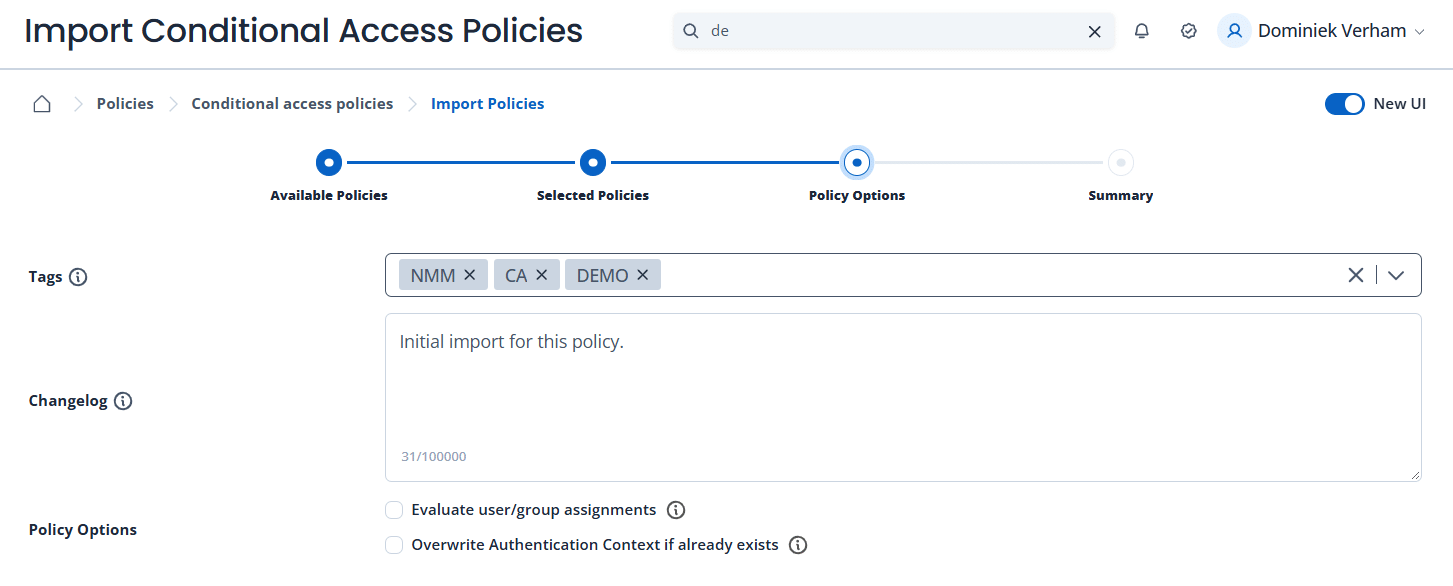
The last step is the Summary page. Make sure to review your awesome work and select the Import button.
We can simply verify if the import was successful by using the search bar. Also note that the Source now displays Custom (imported):
Step 2: Create a policy baseline and add policies
Let’s create our first policy baseline and add the imported conditional access policy . From the MSP level, select Baselines, Policy Baselines:
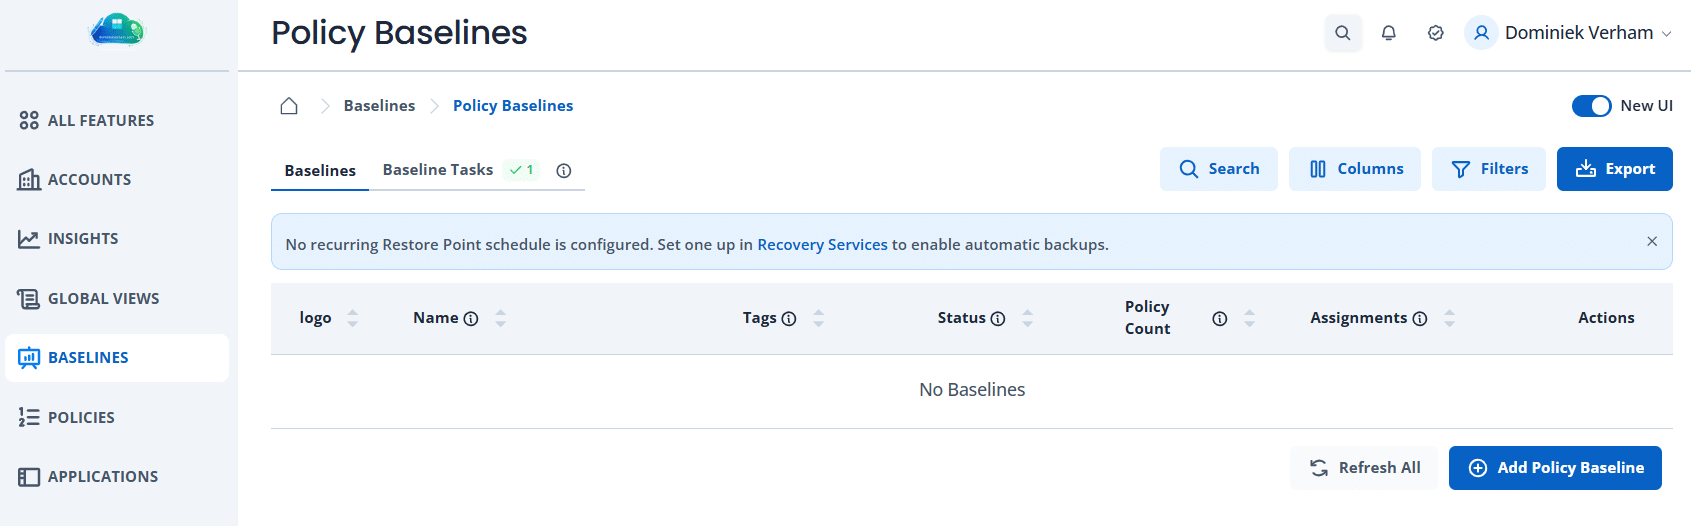
Click the blue + Add Policy Baseline button. All we need to do is to give the policy baseline a name, description, add tags and decide if it will get the MSP logo or if you want to add another logo:
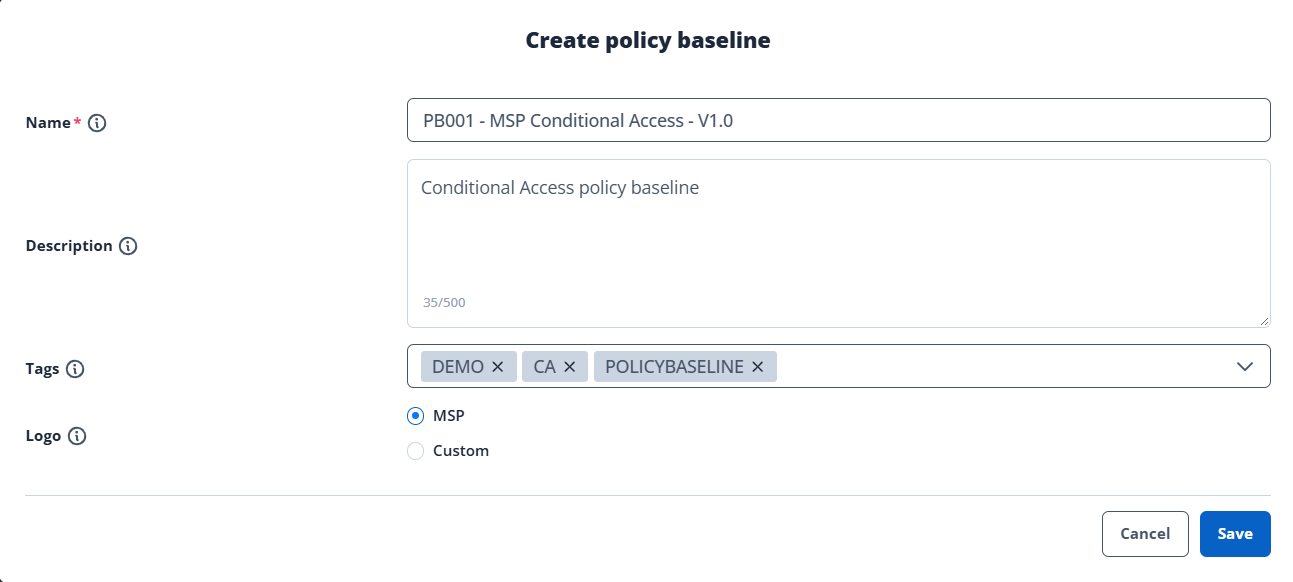
The newly created Policy Baseline will appear after a couple of seconds. We still need to add policies to the baseline and assign the policy baseline to accounts.
Let’s start by adding policies and click on the pencil icon in the actions tab:
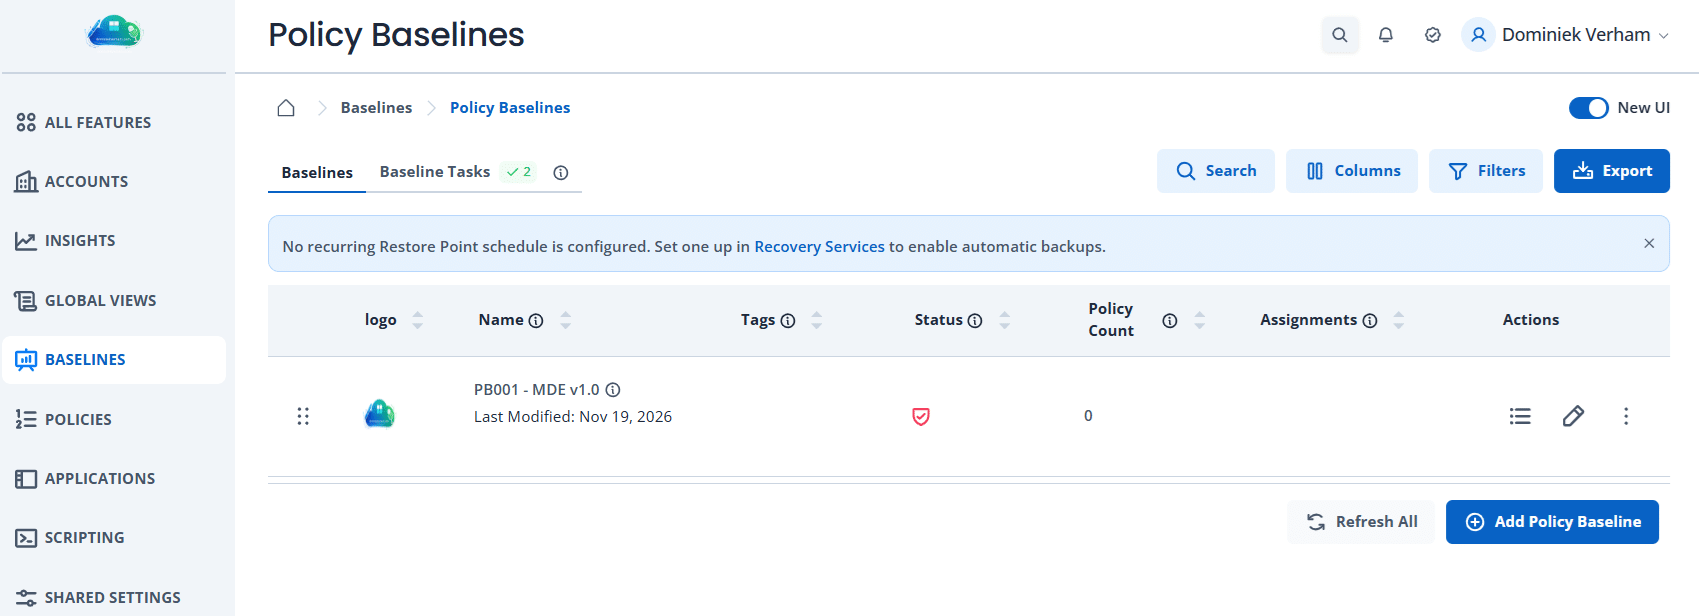
We still need to add policies to the baseline, assign the baseline to one or more accounts and preferably make backups of our policy baseline.
Let’s start by adding the policies and click on the pencil icon in the actions tab:
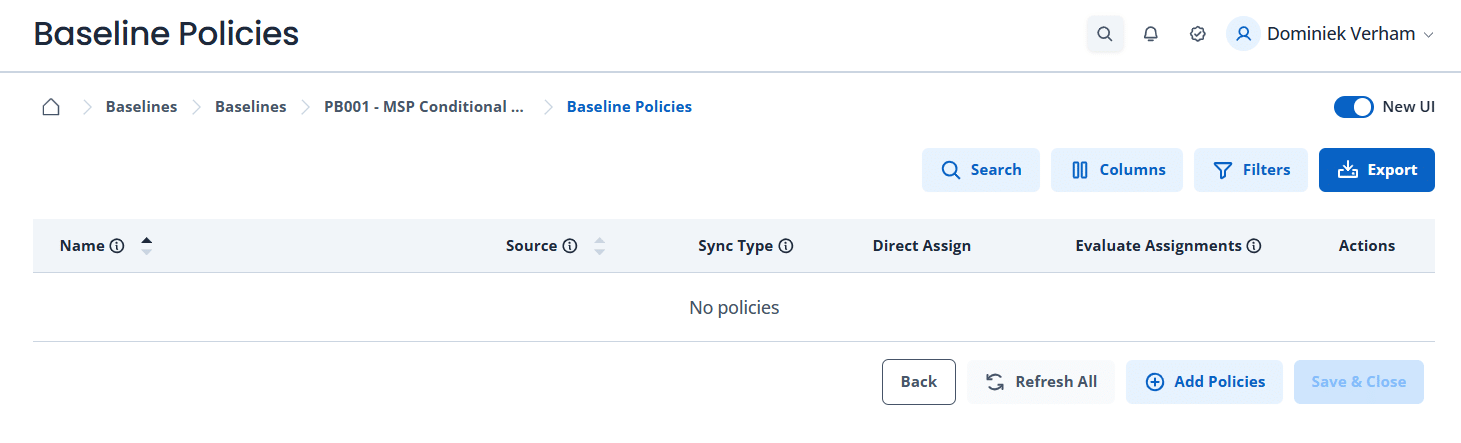
We can add one or more policies to this baseline. Select + Add Policies and:
- Search for the desired policies.
- Make sure the check the box in front of each policy you want to add.
- Review the versions of each policy. Do you want to add the latest version or a previous one?
- Click the Add button once you are finished selecting the policies.
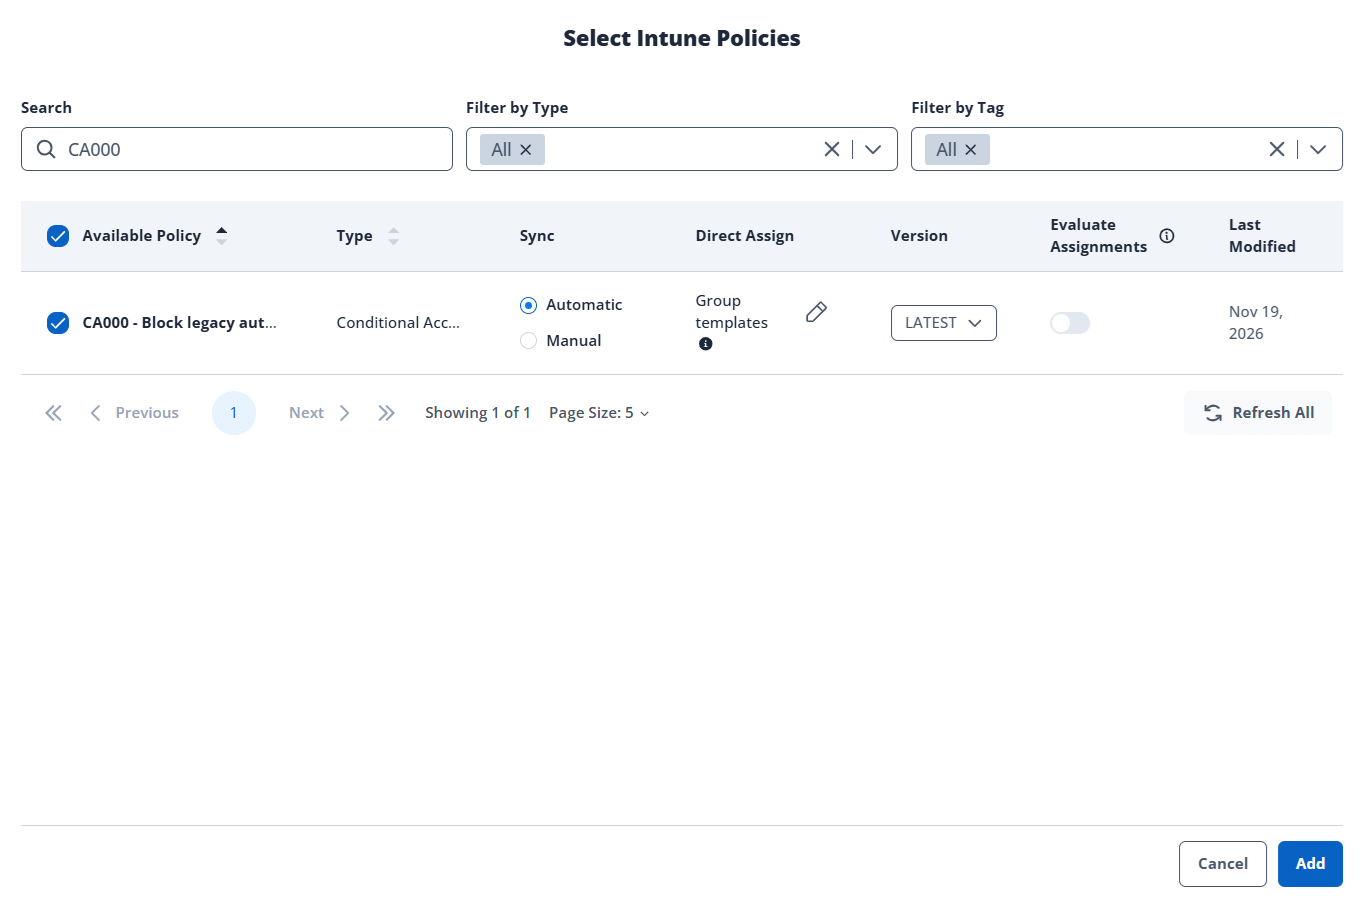
I’ll keep things simple and just add my CA policy. Once added, it will show up in the policy baseline:
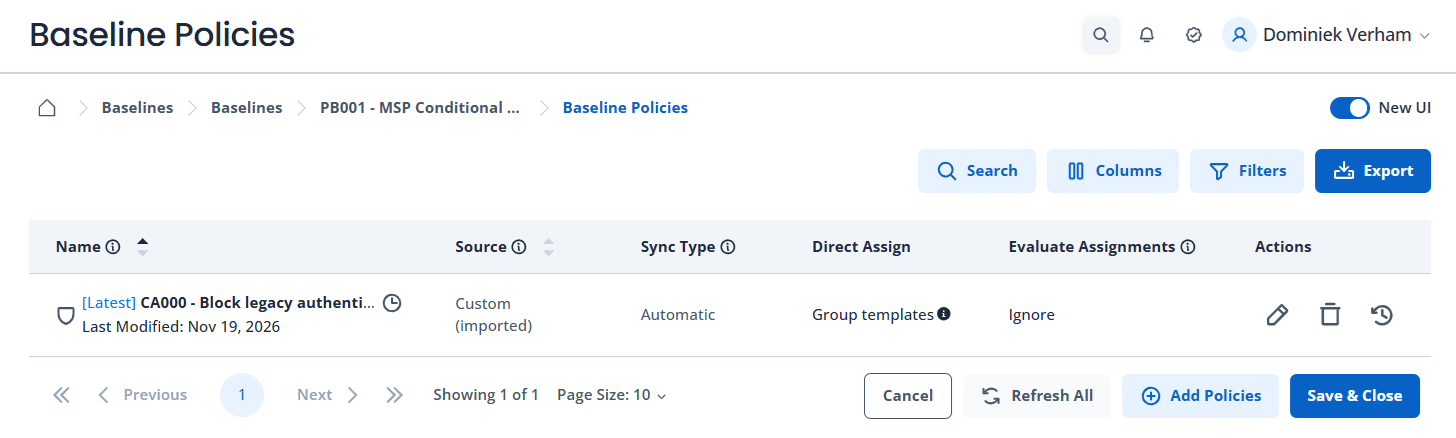
Select the blue Save & Close button to save the policies in the policy baseline.
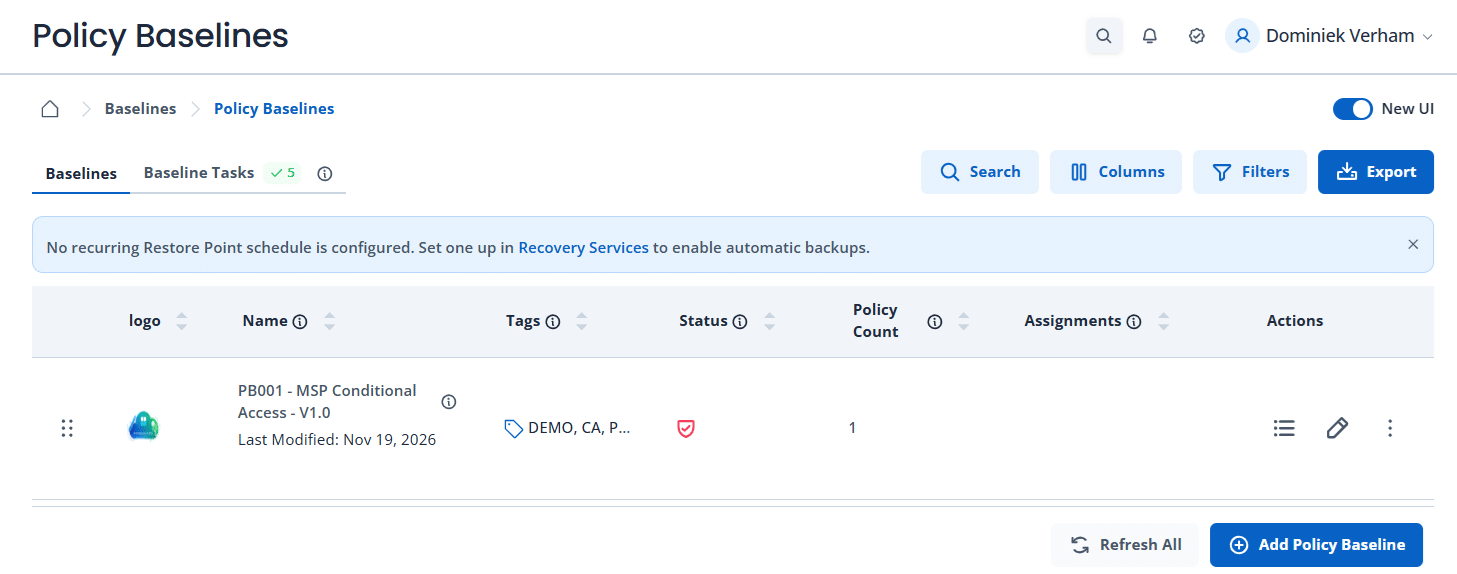
The Baselines overview shows our newly created policy baseline and how many policies are added.
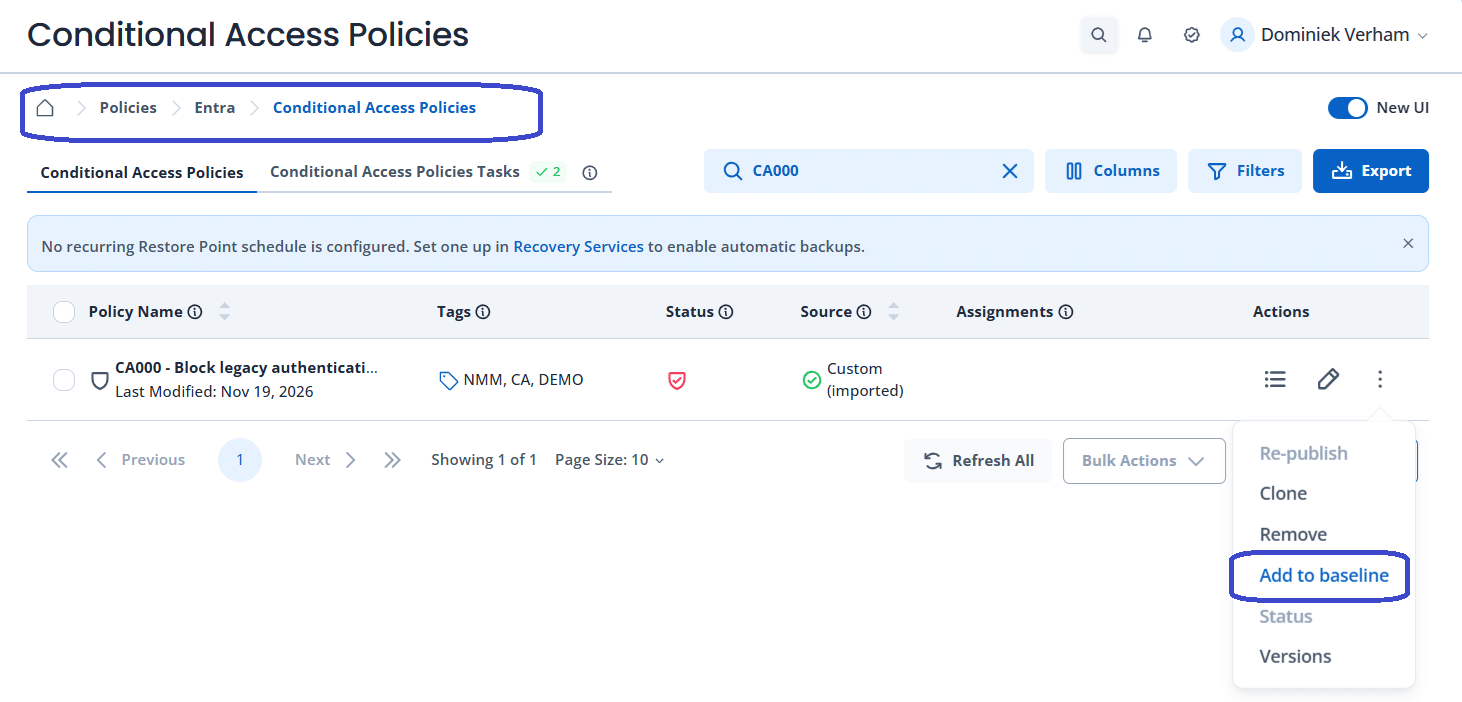
But wait! There’s also an alternative to adding policies to a policy baseline and that’s directly from a policy in NMM. An example would be from the MSP level, Policies, Entra, Conditional Access. Select the three dots next to the CA policy and select Add to baseline.
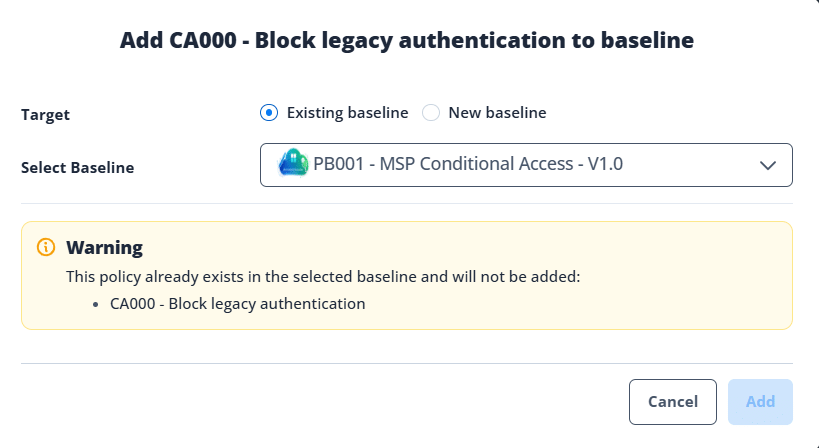
From here, you can either create a new policy baseline or add the policy to an existing policy baseline. And yes, there’s some intelligence here. NMM will tell you if a policy is already added to the selected policy baseline:
Step 3: Assigning the policy baseline to an account
We can assign the policy baseline to an account manually from the policy baseline itself. At the MSP level, Baselines, Policy Baselines, select the policy baseline and select the blue + Add assignments button.
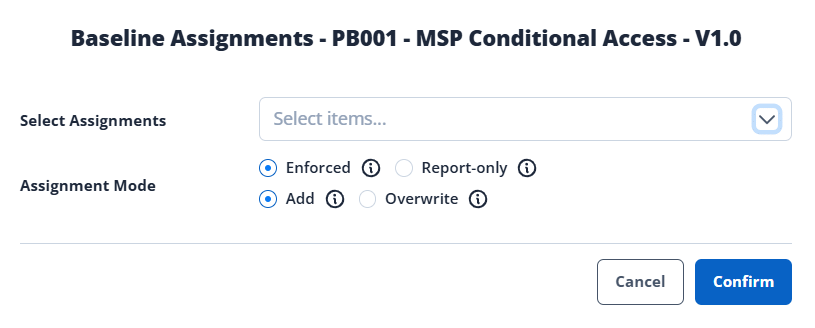
Select the account you want to assign the policy baseline to and finish up by selecting Confirm.
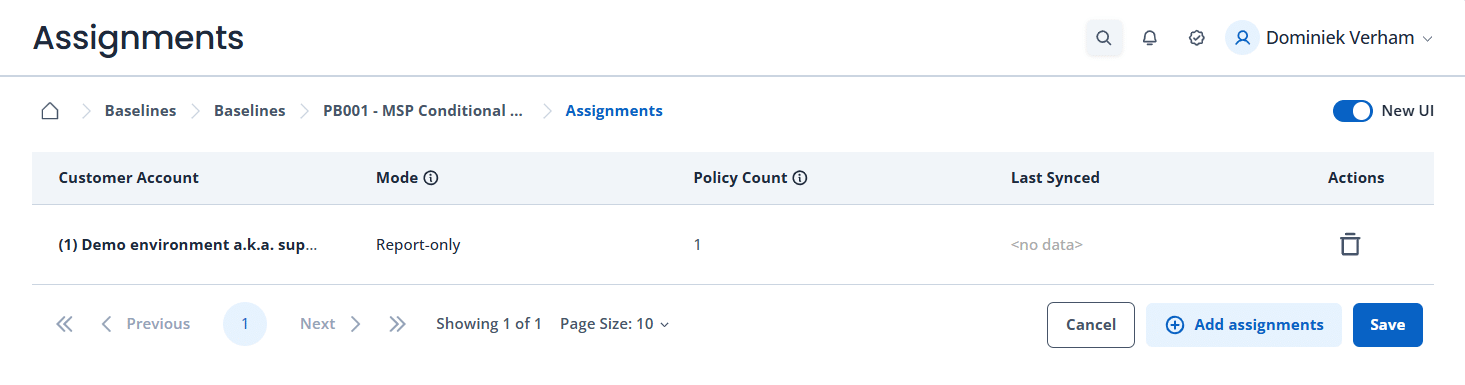
The Assignments overview shows the active assignments and if they are enforced or in report-only mode.
Introducing Solution Baselines
Solution baselines in Nerdio Manager are managed at the MSP level. They allow you to define a collection of settings for a specific Microsoft solution, like Microsoft Intune, and apply that configuration across multiple accounts. The settings in the solution baseline can start with a template provided by Nerdio or one of their partners. You can change settings to match the organization’s standards or security requirements.
Nerdio Manager currently supports solution baselines from three providers:
- Nerdio · The solution baseline is developed by the Nerdio team.
- CIS · The solution baseline is developed by the Center for Internet Security (CIS)
- Huntress · The solution baseline is developed by Huntress.
The following categories in Nerdio Manager are currently supported in solution baselines:
- Defender for Endpoint (Nerdio · CIS)
- Microsoft Intune (Nerdio · CIS)
- Defender for Office 365 (Nerdio · CIS)
- Purview (Nerdio)
- Entra ID (Nerdio · CIS · Huntress)
- Sharepoint & OneDrive (Nerdio · CIS · Huntress)
- Exchange Online (Nerdio · CIS · Huntress)
- Teams (Nerdio · CIS · Huntress)
So how can you as a Nerdio admin configure and apply a solution baseline?
Configuring and applying a solution baseline
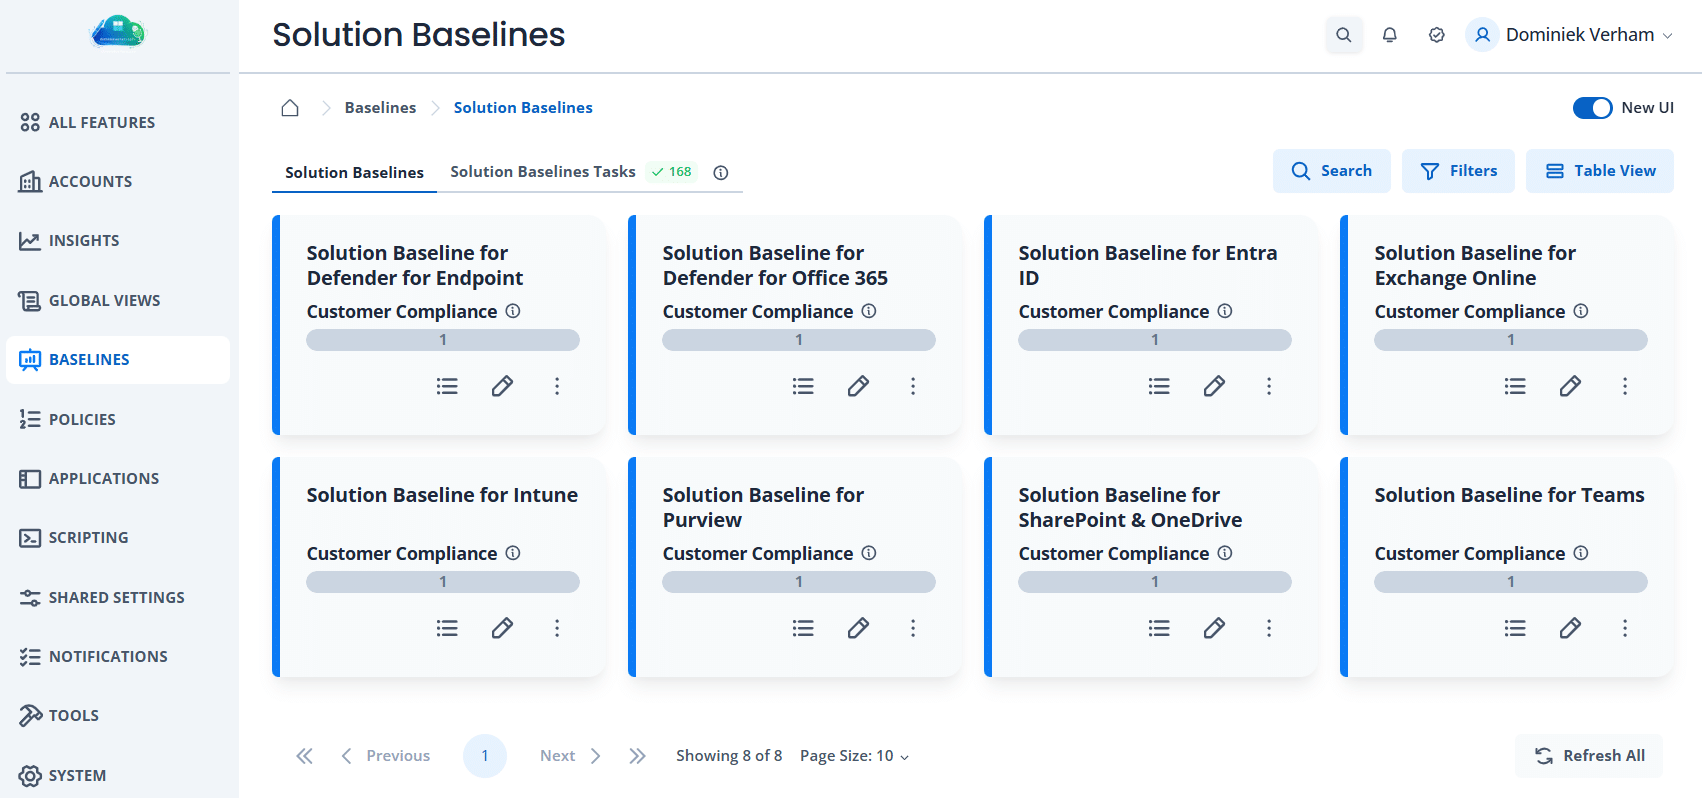
We start at the MSP level, select Baselines, Solution Baselines. This will give an overview of the solution baselines in NMM. Each solution baseline comes with three icons. From left to right:
- Assign · Used to assign the solution baseline to one or more accounts.
- Configure baseline · Used to edit individual settings or apply a template from Nerdio, CIS or Huntress.
- More actions · Reset to default, Reprocess, Clone, Disable, Status overview.
Let’s do a demo with the solution baseline of Microsoft Teams. You can either start to configure the solution baseline directly or start with creating a copy. I think creating a copy makes sense when you need to group accounts together, like a group of accounts that require the CIS solution baseline and another group of accounts that require the Huntress solution baseline.
Let’s clone the Microsoft Teams solution baseline and apply the Huntress solution baseline template.
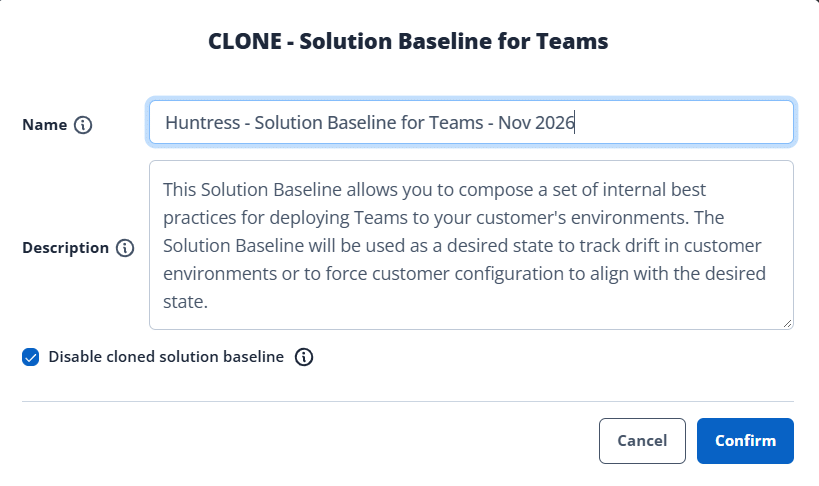
Select the three dots in from the solution baseline square, select Clone. Then:
- Change the name. This one is meant for accounts that require the Huntress template so I added that in.
- Enable or Disable (default) the cloned solution baseline. Disabling the solution baseline on creating allows you to apply the desired changes without applying them or assigning them to accounts.
Take a moment to admire your awesome work and select Confirm.
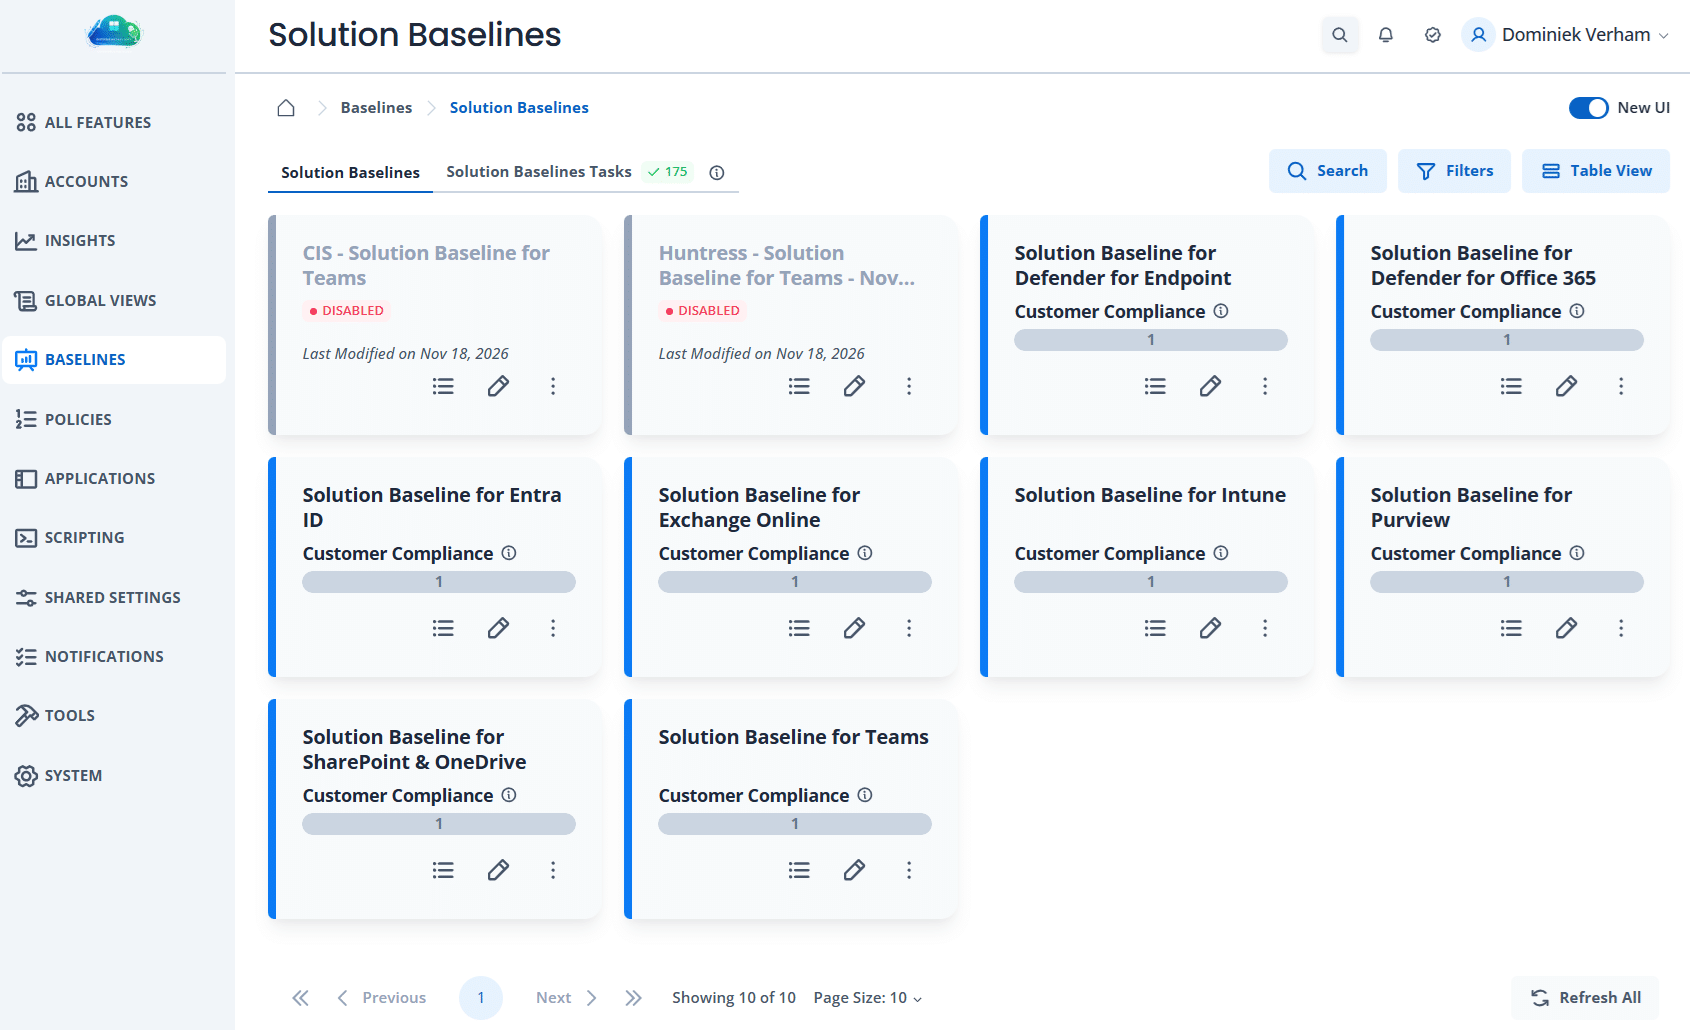
It will take Nerdio Manager a couple of seconds to create a copy of the solution baseline and it will popup in a disabled state:
Now it’s time to apply the solution baseline template. So click the second icon (pencil). A wizard appears and will take you through the various components of the solution baseline. These components vary between the different solution baselines.
In the General section:
- I added report-only to the name since I will assign the solution baseline in report-only mode.
- Selected the Huntress (Report-Only) template for Microsoft Teams and click the blue Apply Template button.
- Left the prerequisites at the default Report-Only setting.
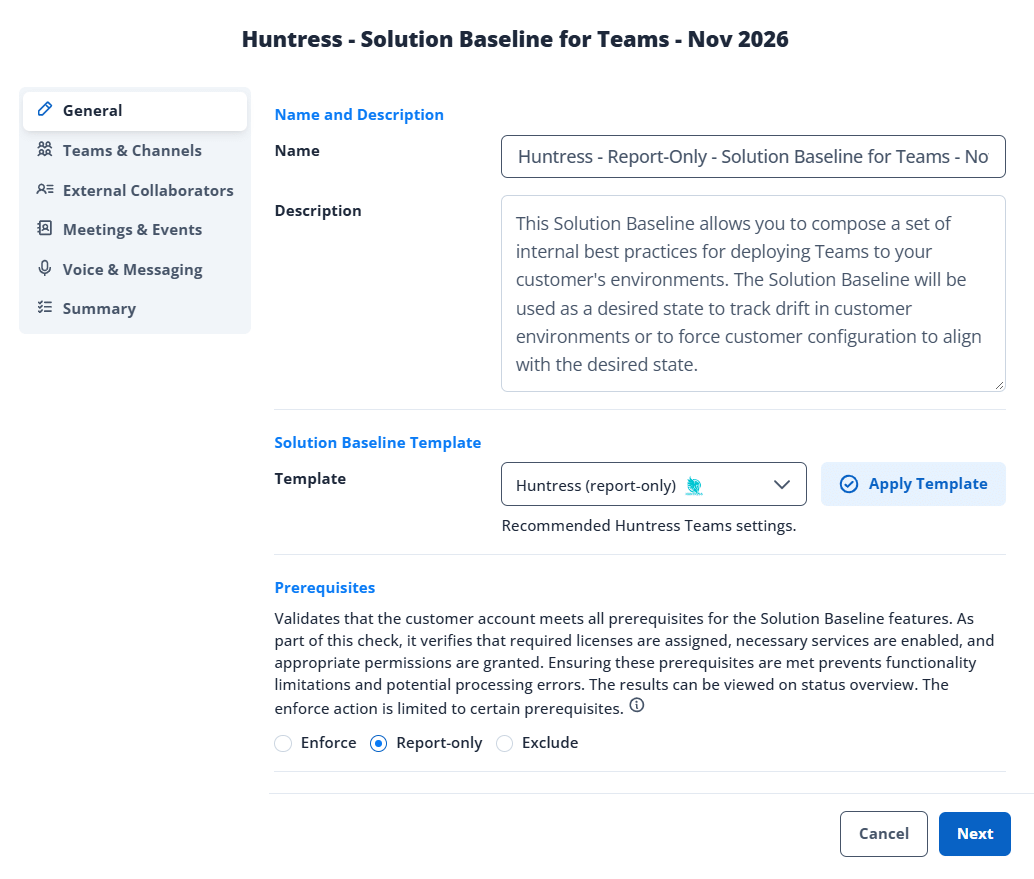
Selecting Next will take me through the individual sections and will allow me to enable or disable specific settings and set the assignment type to Enforce, Read-Only or Exclude.
The settings already reflect the Huntress settings since I applied the Huntress template earlier.
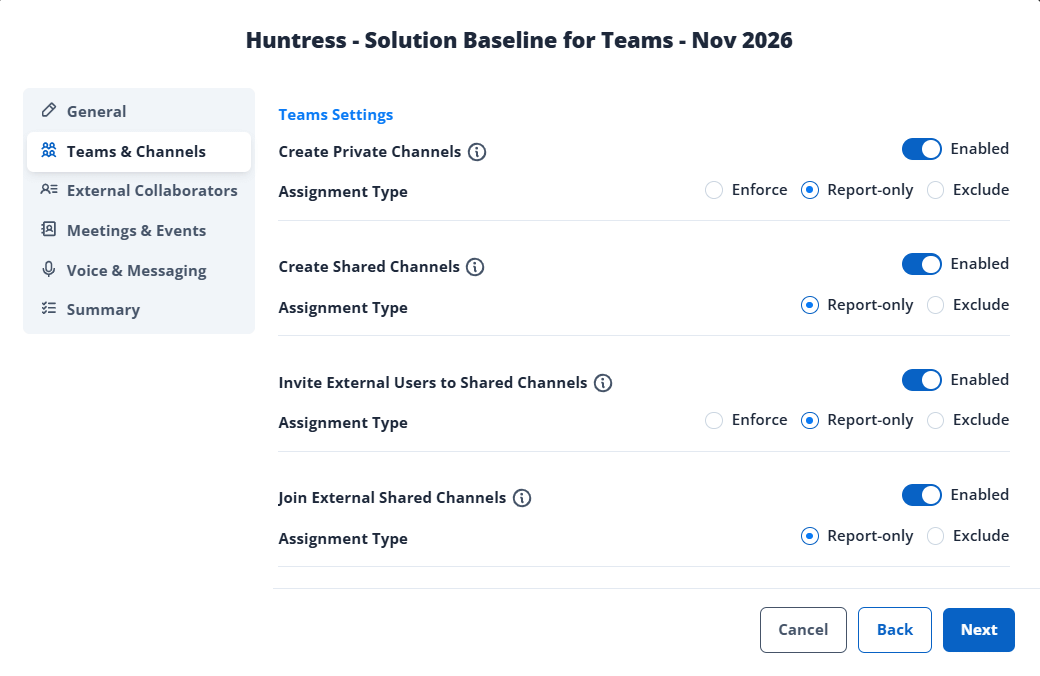
Let’s not focus on each individual setting because that would be an entire blog series on itself, and fast forward to the Summary.
This overview shows the number of settings in each mode via a color (like Report only in yellow or Excluded in grey) per component of the solution baseline.
If you wonder why Voice & Messaging is excluded, well that section has as tag called coming soon.
Finish up by clicking Save & Close.
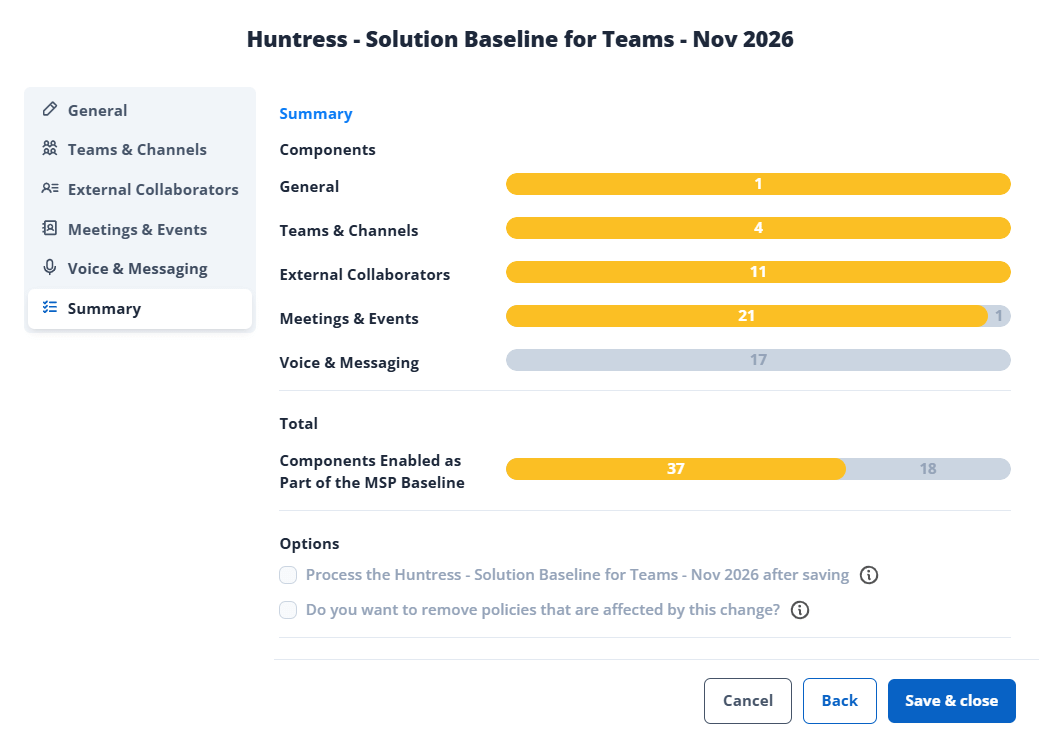
We now have a solution baseline for Microsoft Teams using the Huntress template in report-only mode.
Before going live, you’ll need to enable it and assign it to accounts.
Introducing Group Templates
Another really cool feature in Nerdio Manager is the ability to create groups at the MSP level with the additional benefit that they adhere to your shiny naming convention.
Currently there are three types:
- Standard group template · Deploy standardized groups with consistent naming conventions across multiple customer environments. Support assigned and dynamic membership for users and devices.
- Policy management group templates · Define groups of users or devices at the MSP level and use them directly when assigning policies across multiple customer environments. This enables MSPs to standardize policy assignments without manually creating and maintaining groups in each customer tenant.
- License management · Create standardized license groups across customer enviroments. When a template is assigned to a customer, Nerdio Manager automatically creates the group and assigns the configured licenses and service plans to its members. It will not create the group if the required licenses are not available in the customer environment.
Creating a group template is done in the Shared Settings, Microsoft 365, Group Templates:
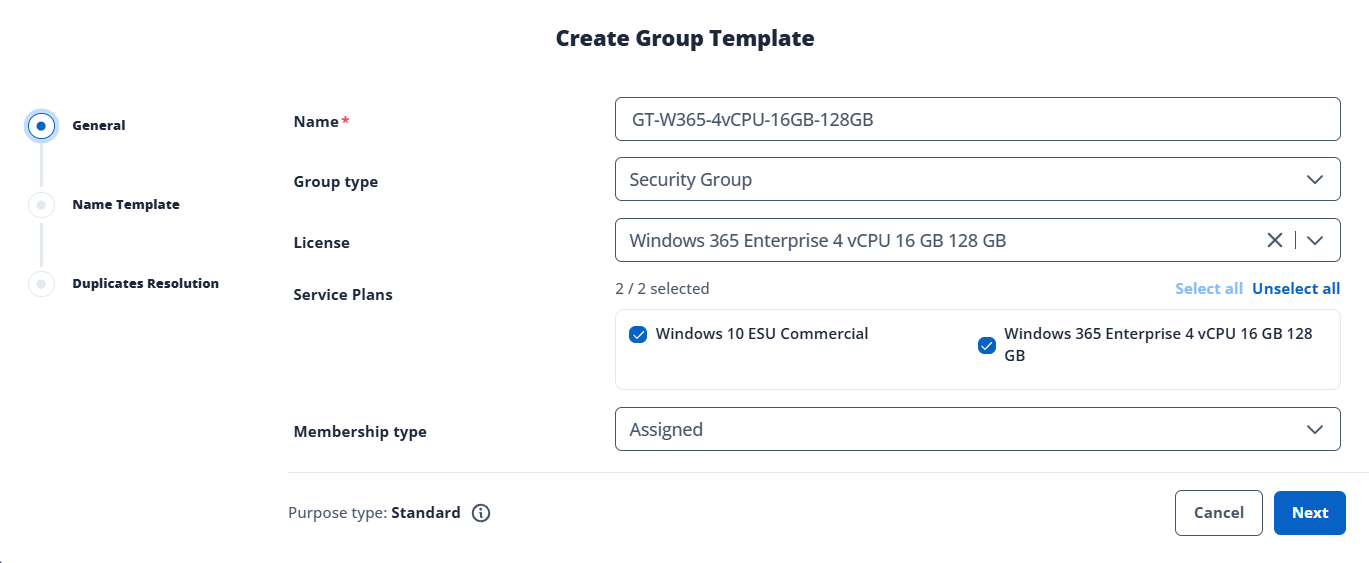
This example shows a group template that will create a security group in the environment of each customer, and it will use group-based licensing to assign a license to members.
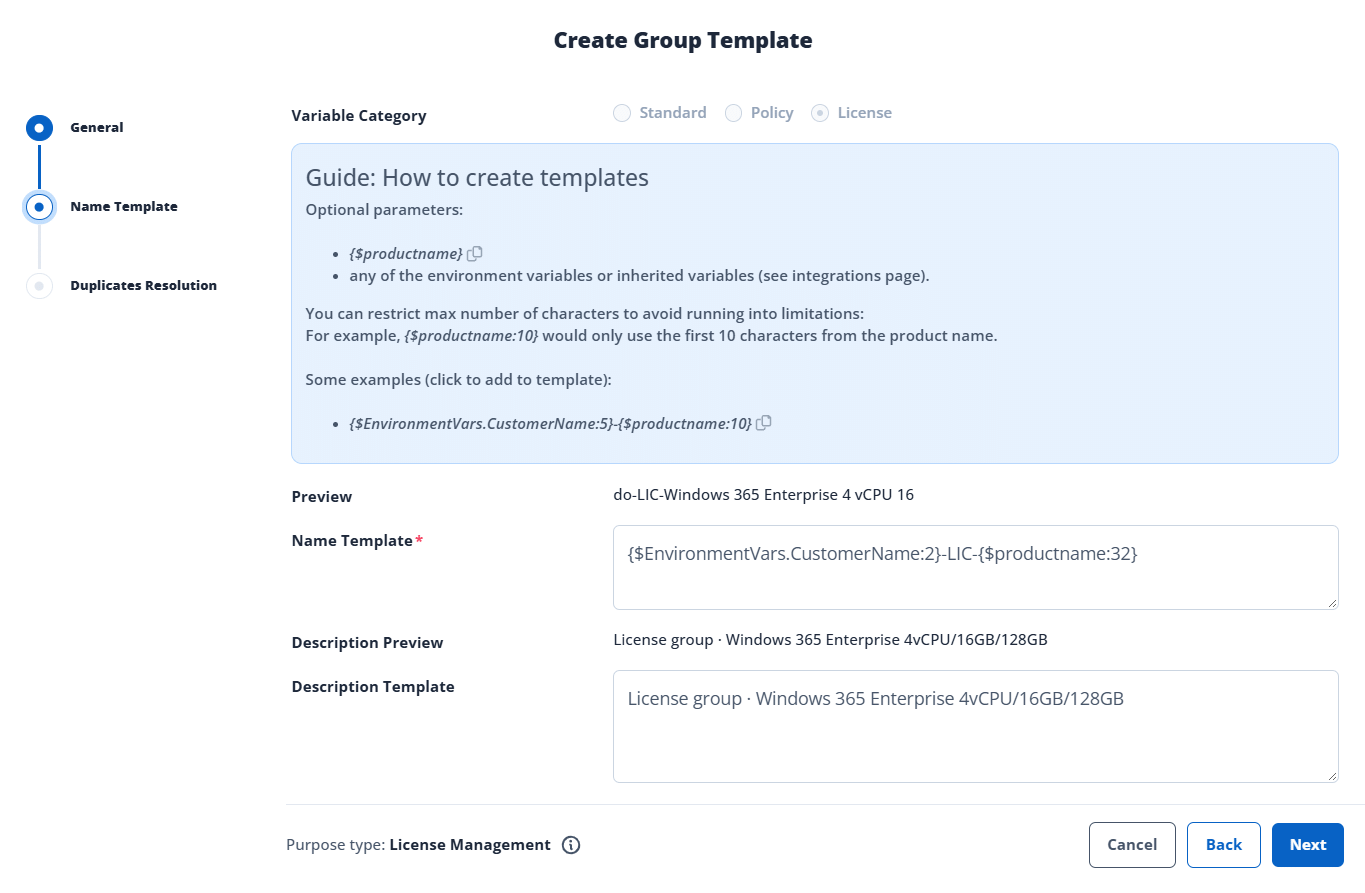
You can make use of environment variables to define the perfect naming convention for your groups. Nerdio Manager also makes suggestions for each group type. In this case I am fiddling around with a license type and no variables are required. If you select standard, then you need to watch out for the required variables or you cannot create the group template.
In the final step we let Nerdio Manager know how it should resolve issues when a duplicate group already exists. Select one of the three options:
- Automatically add suffix to group name
- Abort creation and report failure
- Take control
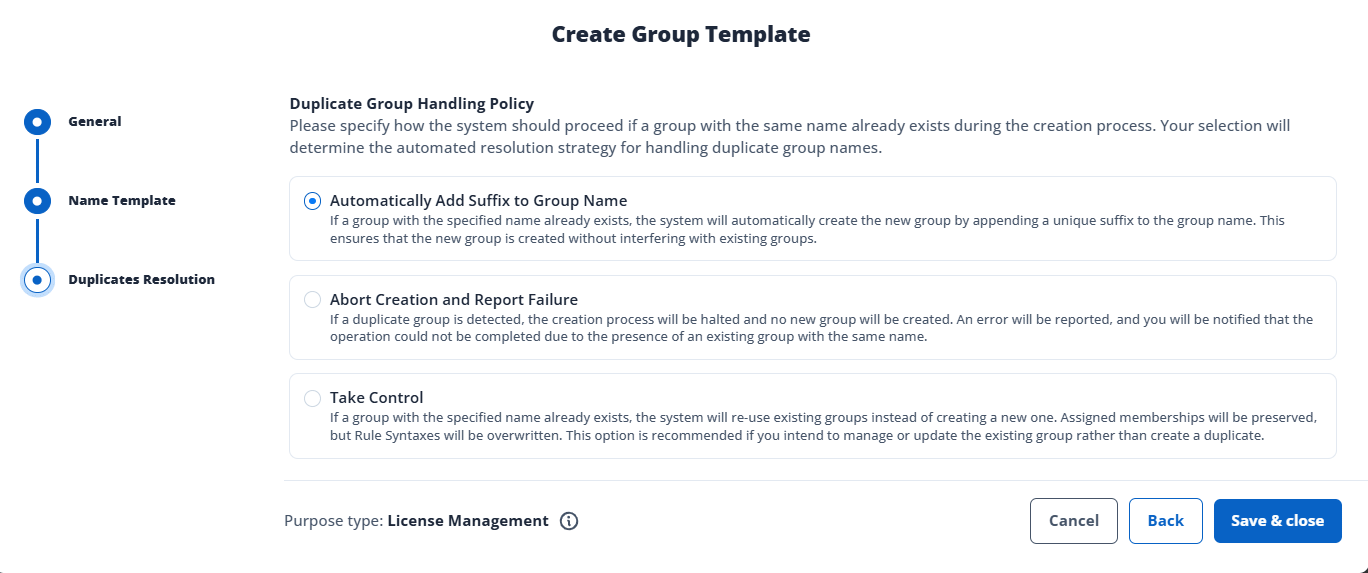
So I went ahead and saved the group template. It did give me an error, letting me know that the customer name variable needs more than 2 characters. Easy fix, I just went back and changed it to three.
Now I met all the requirements, the group template was created successfully:

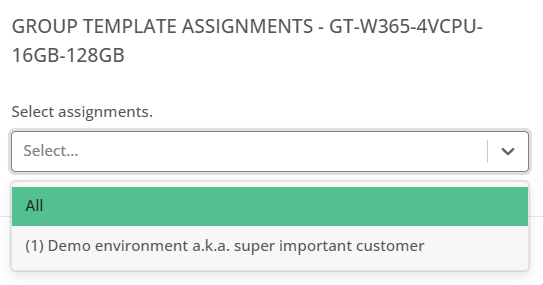
Do not forget to assign the group template. This can be done to:
- One account
- Multiple accounts
- All accounts
Make sure to select the blue + Apply and Close button to save the assignment.
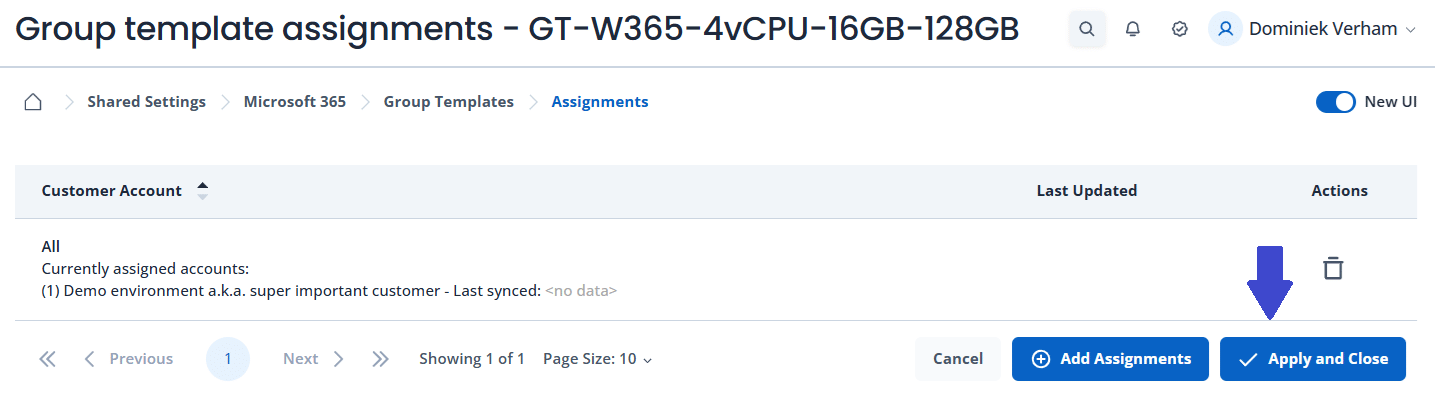
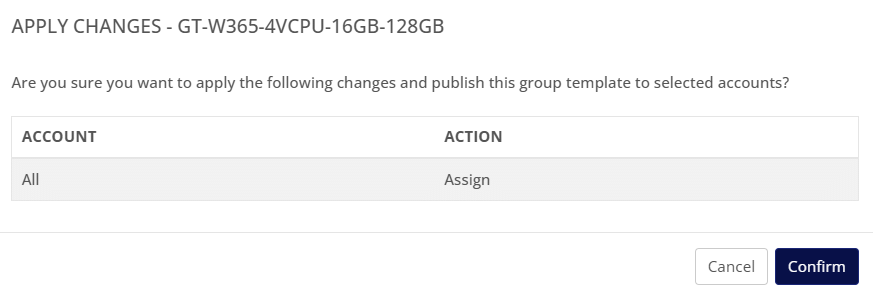
Nerdio Manager will display a confirmation and show which accounts have been selected:
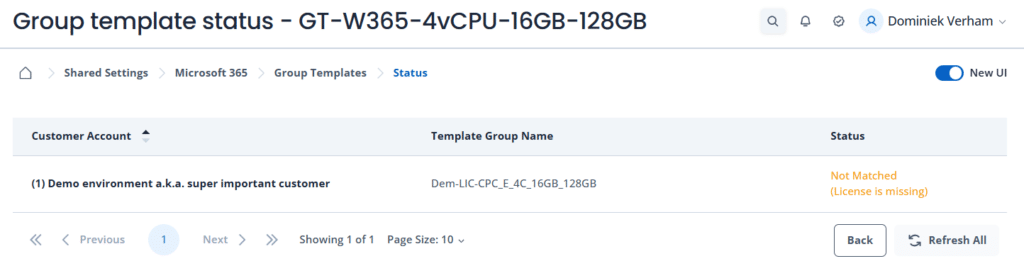
You can check the status of the group deployment to the customer environments by clicking on the three dots, select status. Nerdio Manager will show the name of the group and if it’s detected in the customers tenant. In case of license groups, it will also display an error when the tenant doesn’t have the correct licenses available:
Group templates can be republished once they have been assigned. This will resynchronize its configuration across all assigned accounts. Depending on the type, this will synchronize the group and associated policies or license assignments.
I really like the idea of using group templates. Creating groups with a naming convention in customers environment is a strong tool in a Nerdio admins toolbox. The previous demo was meant to show how to assign licenses to users, but there are a lot of other use cases. Just think about creating a group in each customers environment and use to assign a policy baseline or a solution baseline!