What’s up, everyone!
I’ve been looking forward to this one! Did you know that Microsoft released yet another awesome feature for Windows 365 only into public preview? Of course I am talking about the Windows 365 Switch feature! Once configured it’s an awesome way to connect to your personal Cloud PC and switch back and forth without any delays.
So why is this a big deal?
First of all I’m all for ideas and features that improve user experience. And I can definitely see a benefit for companies as well. I’ve talked with companies that give new employees a device budget and they can buy their own device. It doesn’t even need to be a high end device if users just use this device to sign into their Cloud PC where they can securely access all of the company apps and data. Or perhaps a user is madly in love with their currently owned device, why not let them use it and have them sign into a Cloud PC? To me that is just a great use case for bring-your-own-device scenarios.
Requirements
These are the requirements;
- Windows 11 (Pro or Enterprise) endpoints.
- Enrollment in the Windows Insider Program (Beta channel is preferred, but Dev is also supported).
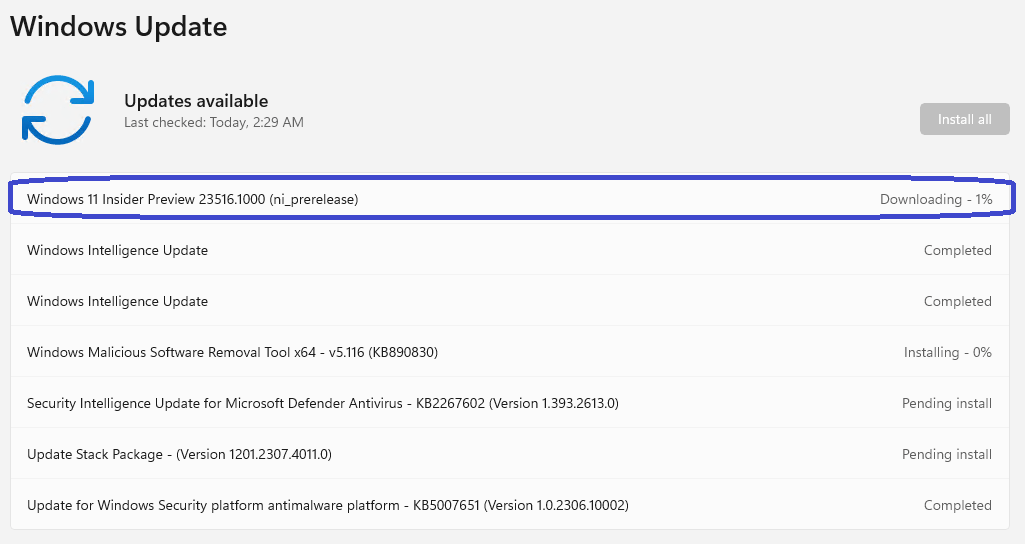
- Run Windows Update and install the most recent Windows Insider build.
- A Windows 365 Cloud PC license.
Configuring Windows 365 Switch
At this stage there are only a couple of steps we need to take before we can use Windows 365 Switch. We need to enroll into the Windows Insider Program and make sure that both the local endpoint and the Cloud PC use the Beta channel. You can also use the Dev channel but keep in mind that Beta is preferred since it should be a bit more stable. Run Windows Update and install all the available updates. The last step is to install the Windows 365 App and we should be good to go.
Windows Insider Program
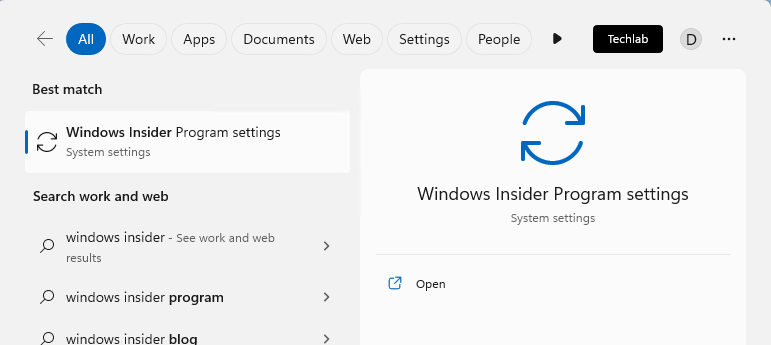
You can manually configure the endpoint to use the Beta channel or you can use Microsoft Intune. If you want to go ahead and configure the setting manually, just open the start menu on the local endpoint. Search for Windows Insider and click on the Windows Insider Program settings result.
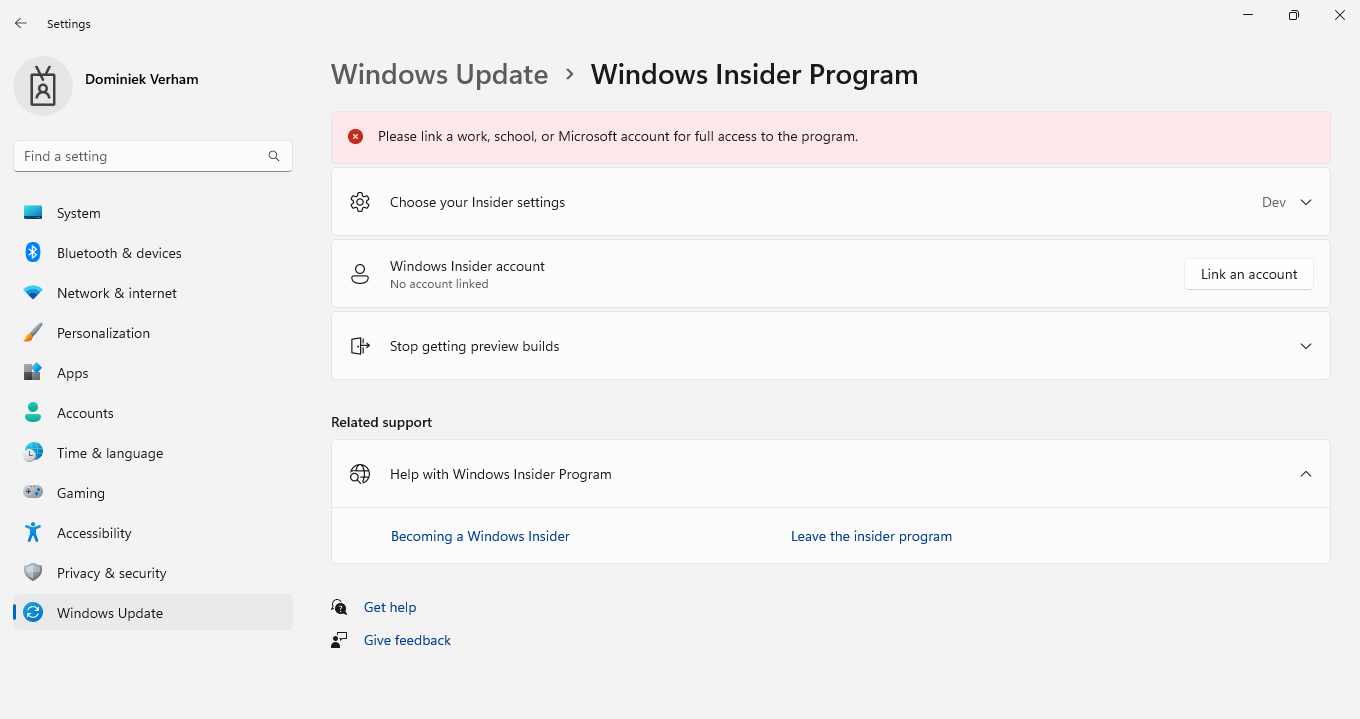
Link your Windows Insider Program account. If you don’t have a Windows Insider Program account yet, you can simply signup here:
Getting started with the Windows Insider Program (microsoft.com)
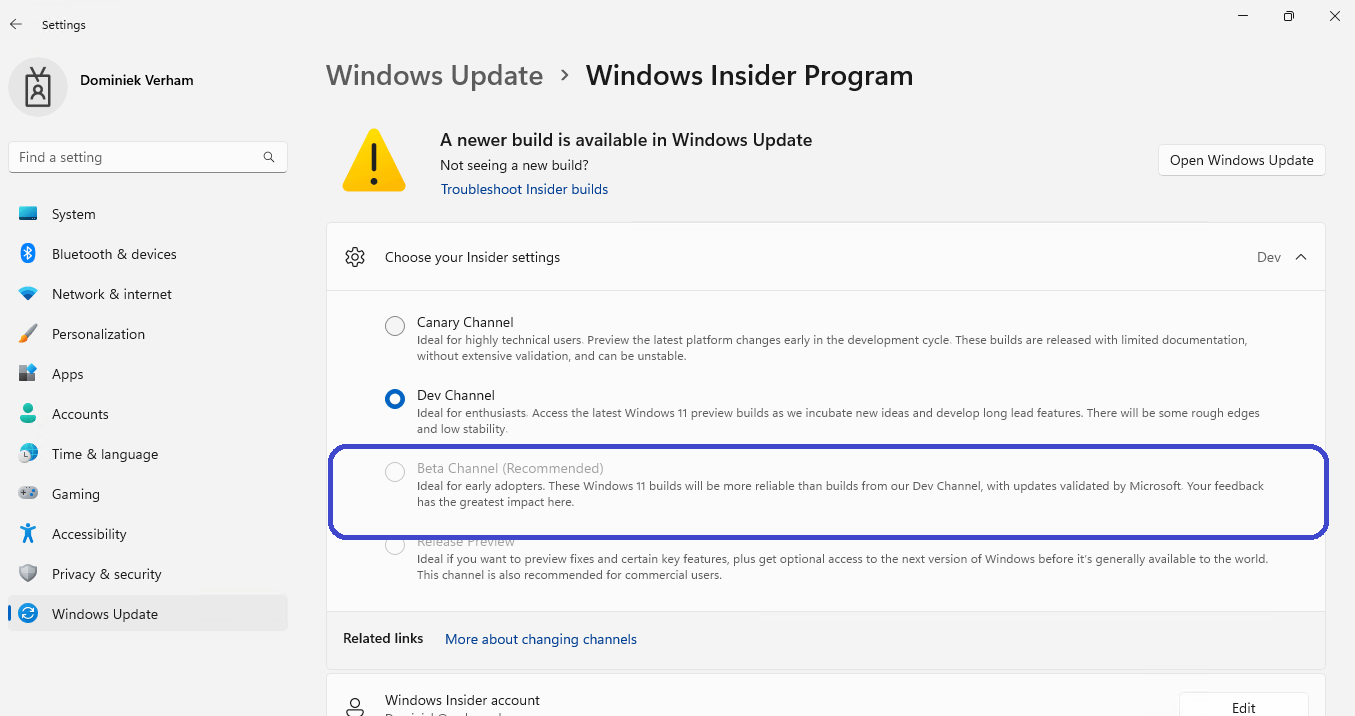
Now it’s time to select the channel we want to use. Microsoft recommends to use the Beta channel. I’ve already configured the channel via Microsoft Intune and chose the Dev channel. The Dev channel is also supported and I’m feeling a bit rebellious today so I’ll stick to it.
Did you notice that notification on top? The endpoint has access to Insider builds now that it is enrolled. The next step for us is to update the endpoint to the latest available build. Click the Open Windows Update button and go through that process.
Just make sure to search for new Windows updates until there are no new updates.
All of there steps have been taken on the local device. Remember to do the same on the Cloud PC!
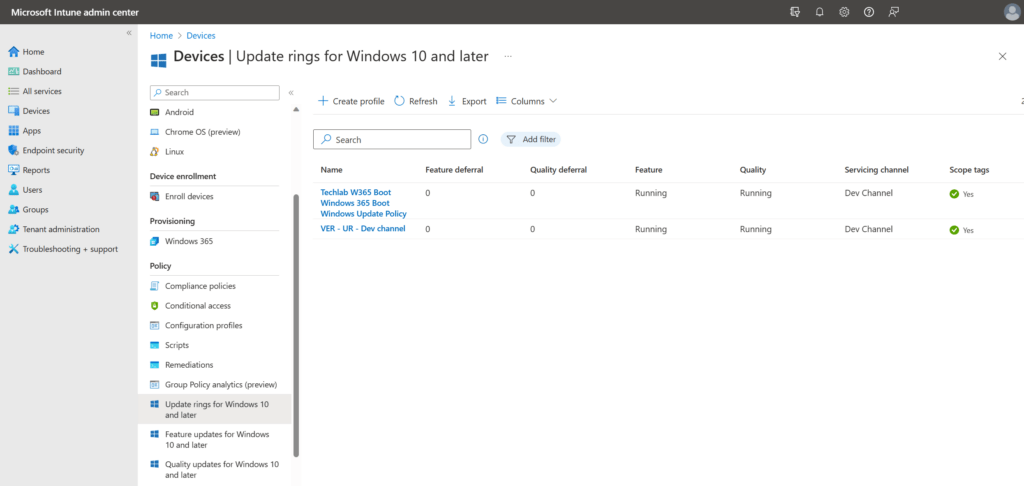
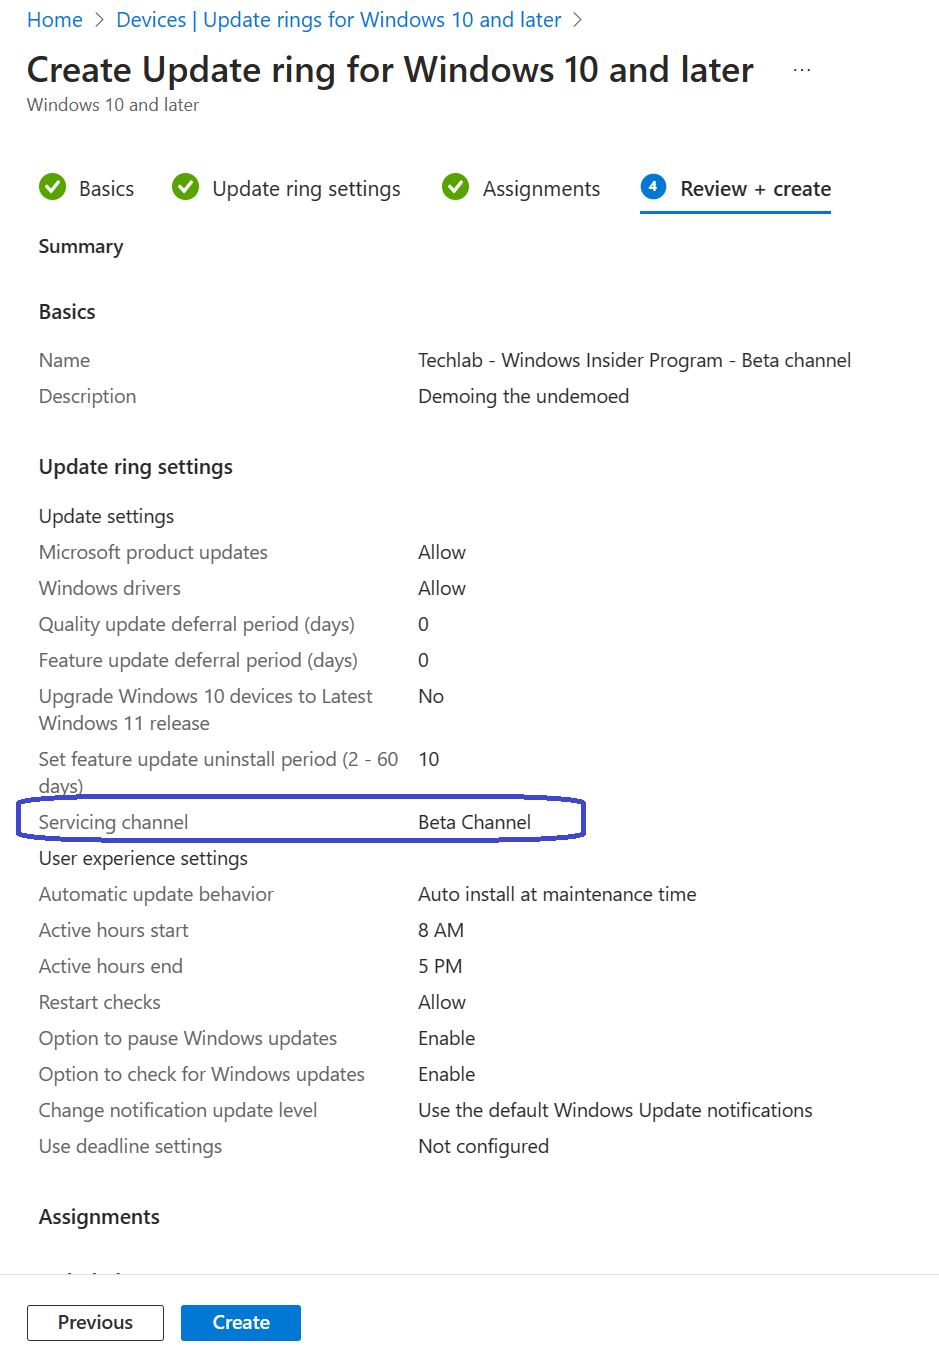
You can also use Microsoft Intune to configure the desired channel. Sign into the Microsoft Intune admin center, Devices, Policy, Update rings for Windows 10 and later.
Click on the + Create profile button in the ribbon to get started. Give the update ring a name and optionally a description.
Click Next to continue to the update ring settings.
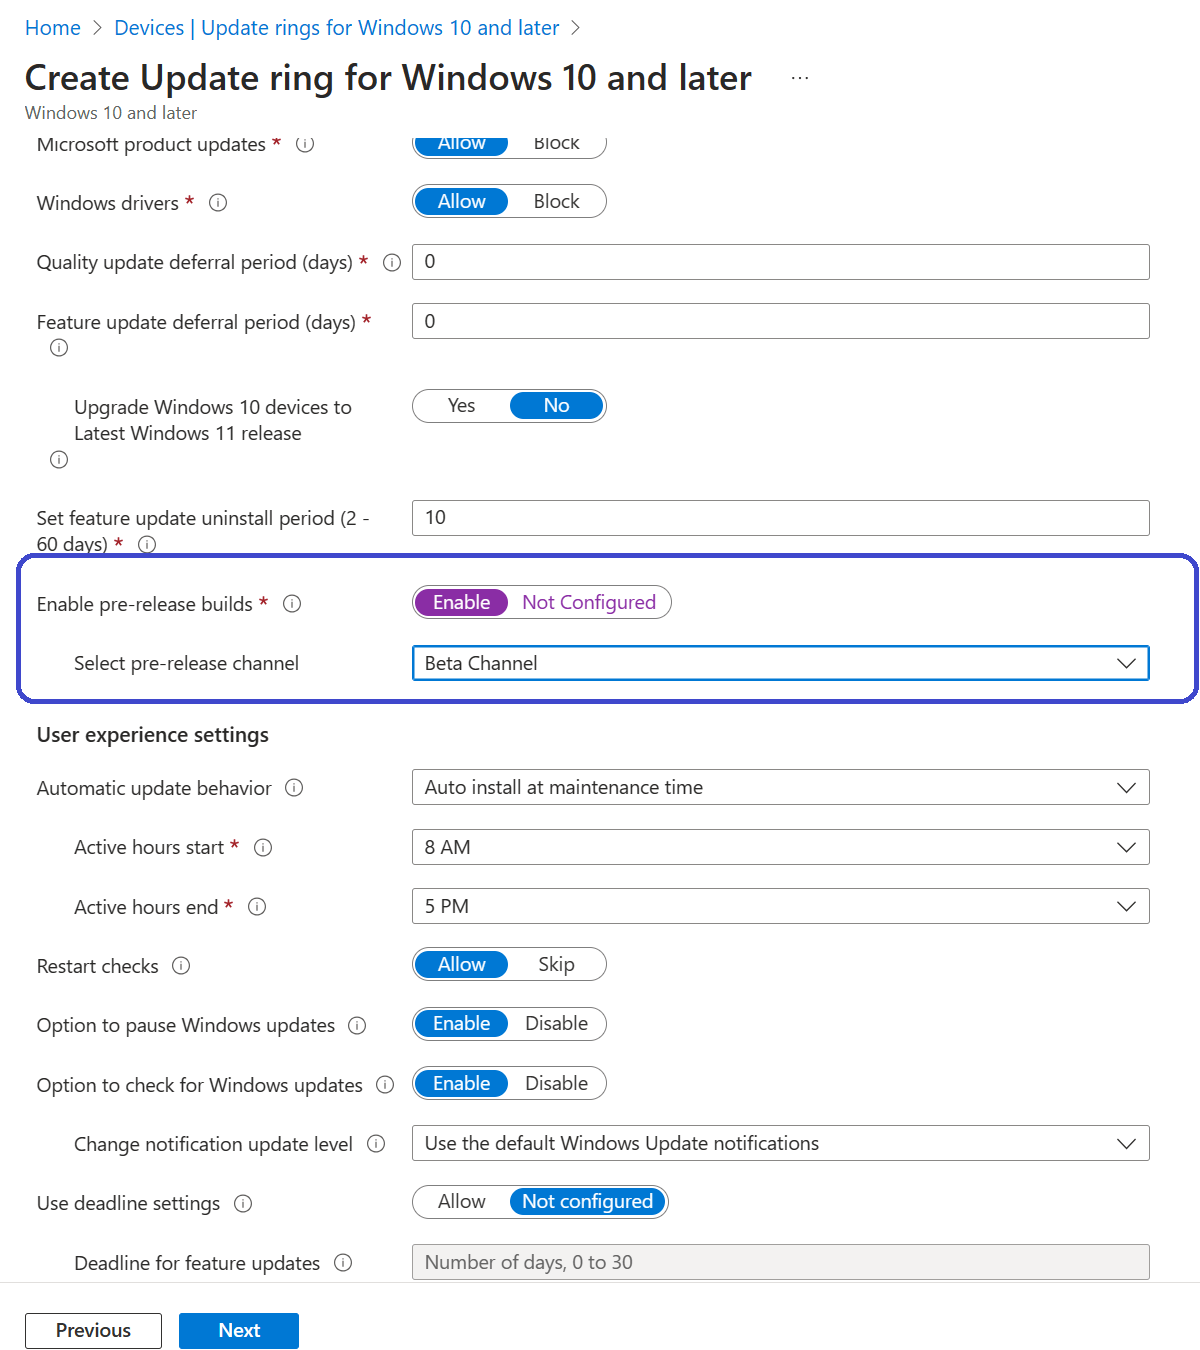
It’s not really necessary to talk about every option so so instead ‘Ill highlight the important ones:
- Enable pre-release builds: toggle to Yes
- Select pre-release channel: Beta channel (or Dev channel for rebels.)
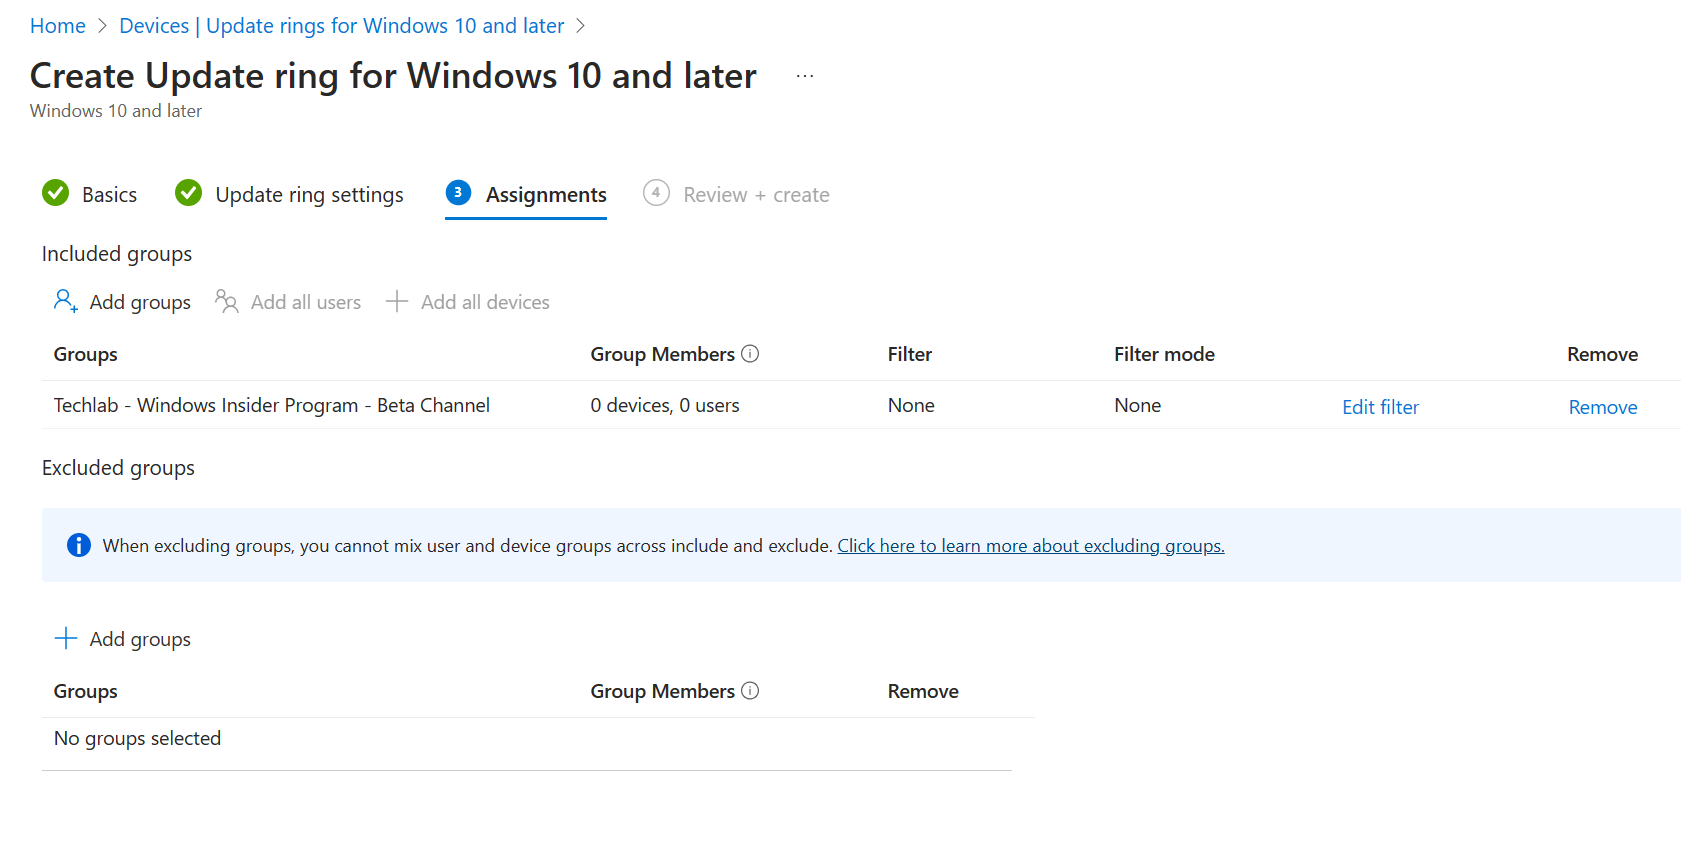
The only thing left to do is to take a moment to admire your awesome work and create the policy if you’re happy with it. I ended up with something like this:
Install Windows 365 - Formerly known as App
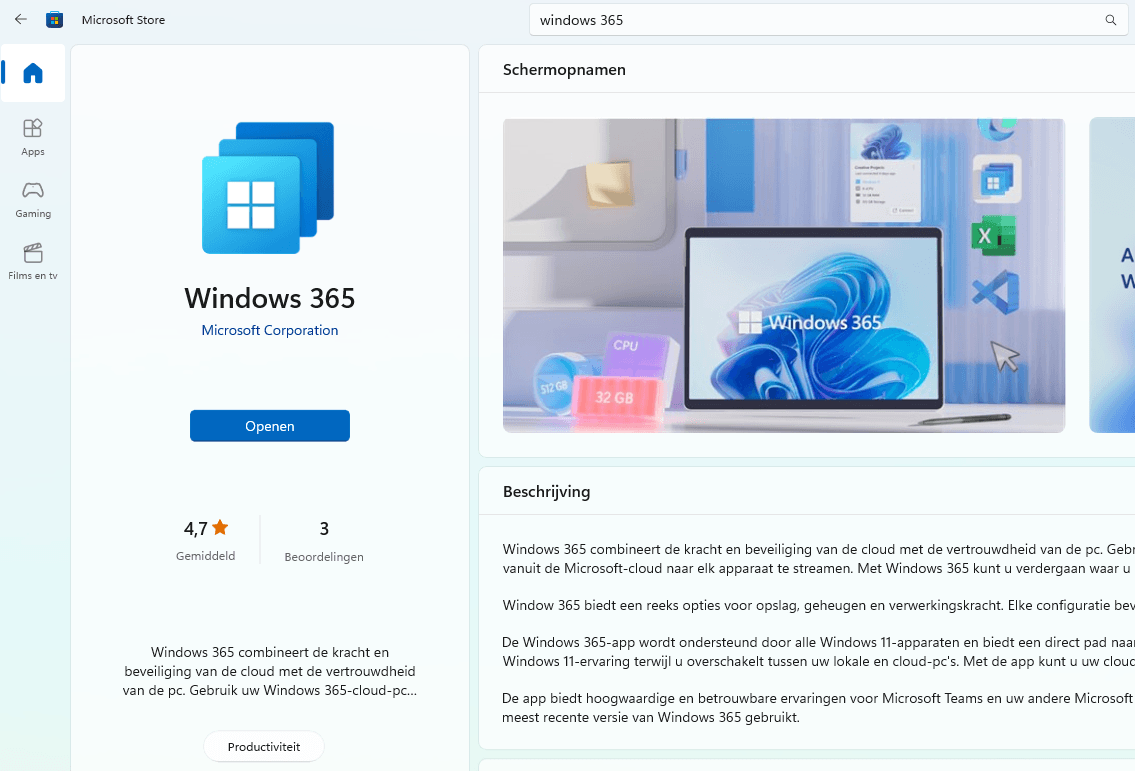
Make sure to install Windows 365 from the Microsoft Store if you have’t already. The app seems to be renamed from Windows 365 App to Windows 365.
You can use Microsoft Intune to deploy Windows 365 to your endpoints. Sign into the Microsoft Intune admin center, Apps, by Platform, Windows and click + Add in the ribbon.
Make sure to select Microsoft Store app (new), click the search the Microsoft Store app (new) link and search for Windows 365. Complete the process by assigning the app the a group and create the app in the final pane.
There you go, that’s all there is to it.
Experiencing Windows 365 Switch
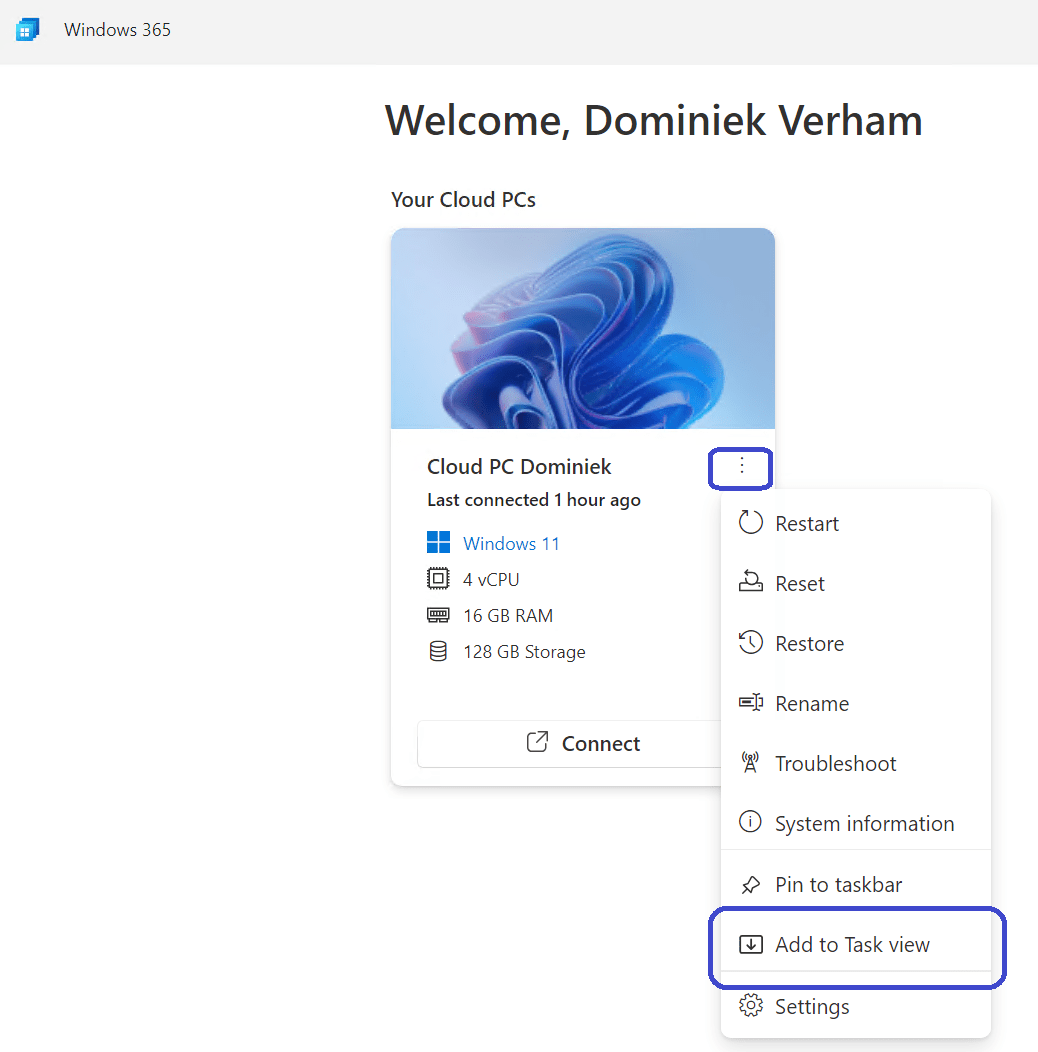
Time for the good stuff! Let’s find out what the user experience looks like. The first step is to fire up Windows 365 and click on the three vertical dots. You’ll know that everything works if there’s a Add to Task View option.
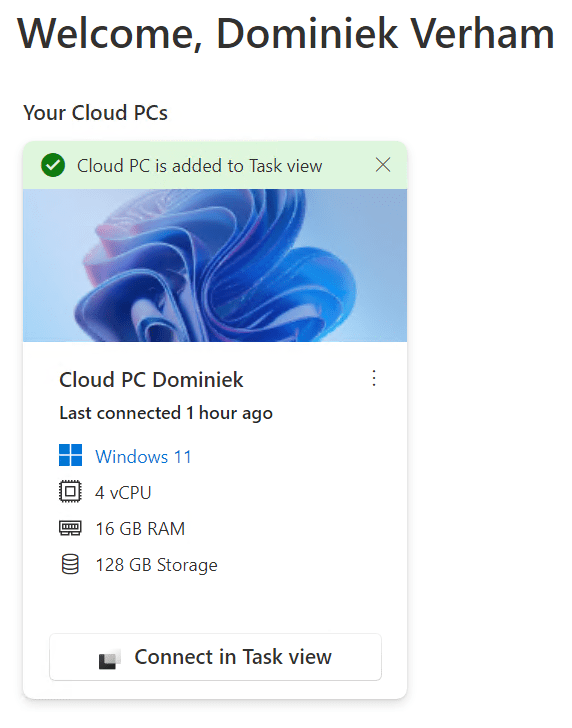
You’ll get a nice confirmation on top letting you know that you can now use the switch feature via the task view button in the task bar. I noticed the text of the Connect button changed to Connect in Task view.
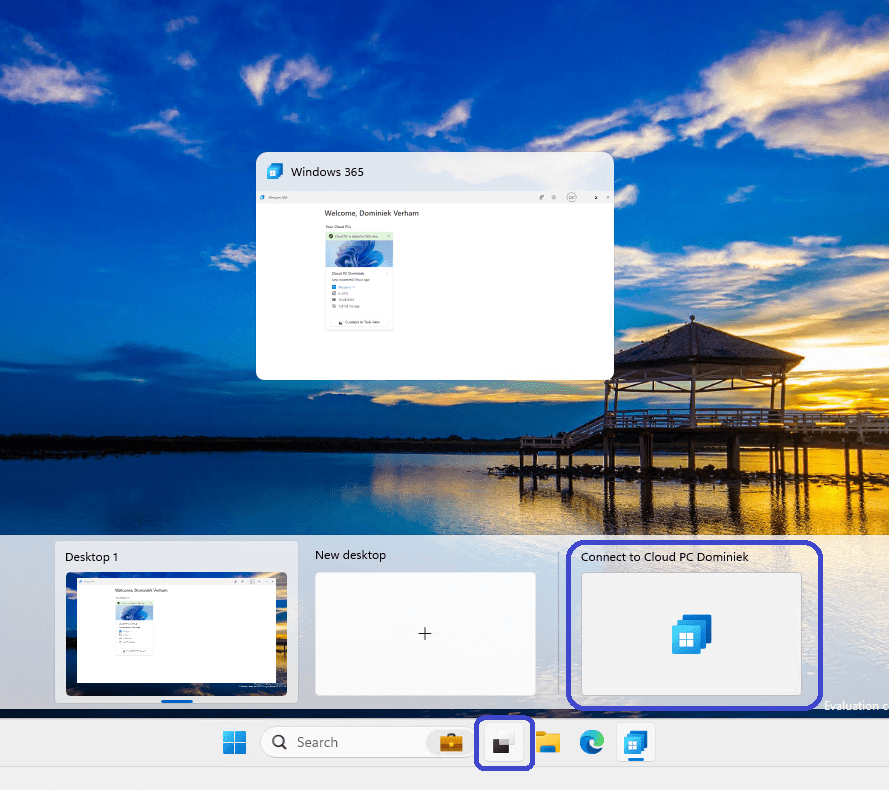
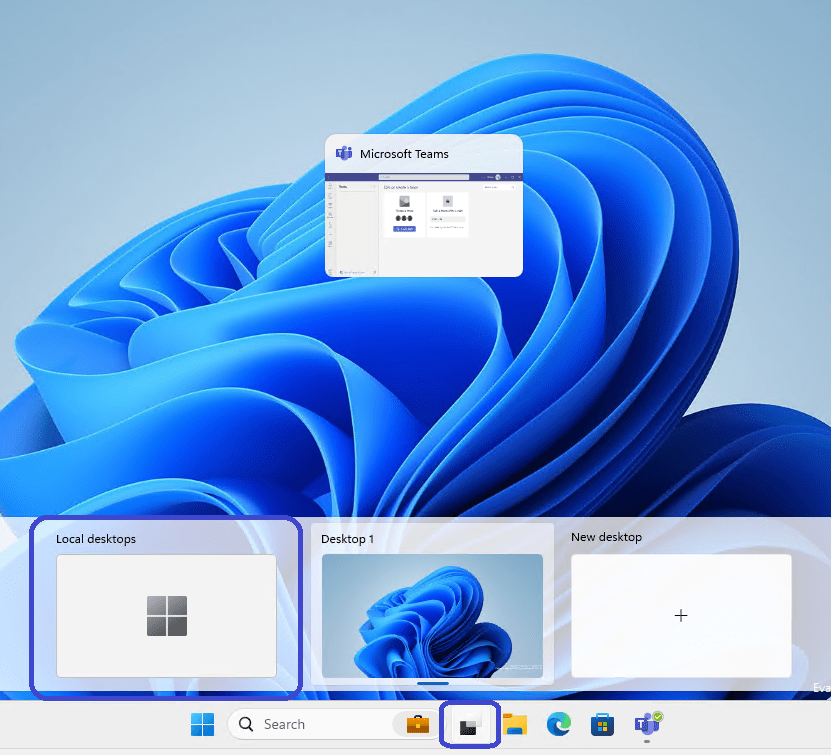
Next up is to click on the Task View button in the taskbar. I highlighted the correct icon in the taskbar. On the left side we have the local desktop and create a second desktop. On the righthand side is the Cloud PC. We can login to the Cloud PC by clicking on that desktop
If you clicked on the Cloud PC for the first time since you signed into your local endpoint, then logging in will take a moment because you will actually sign in to the Cloud PC.
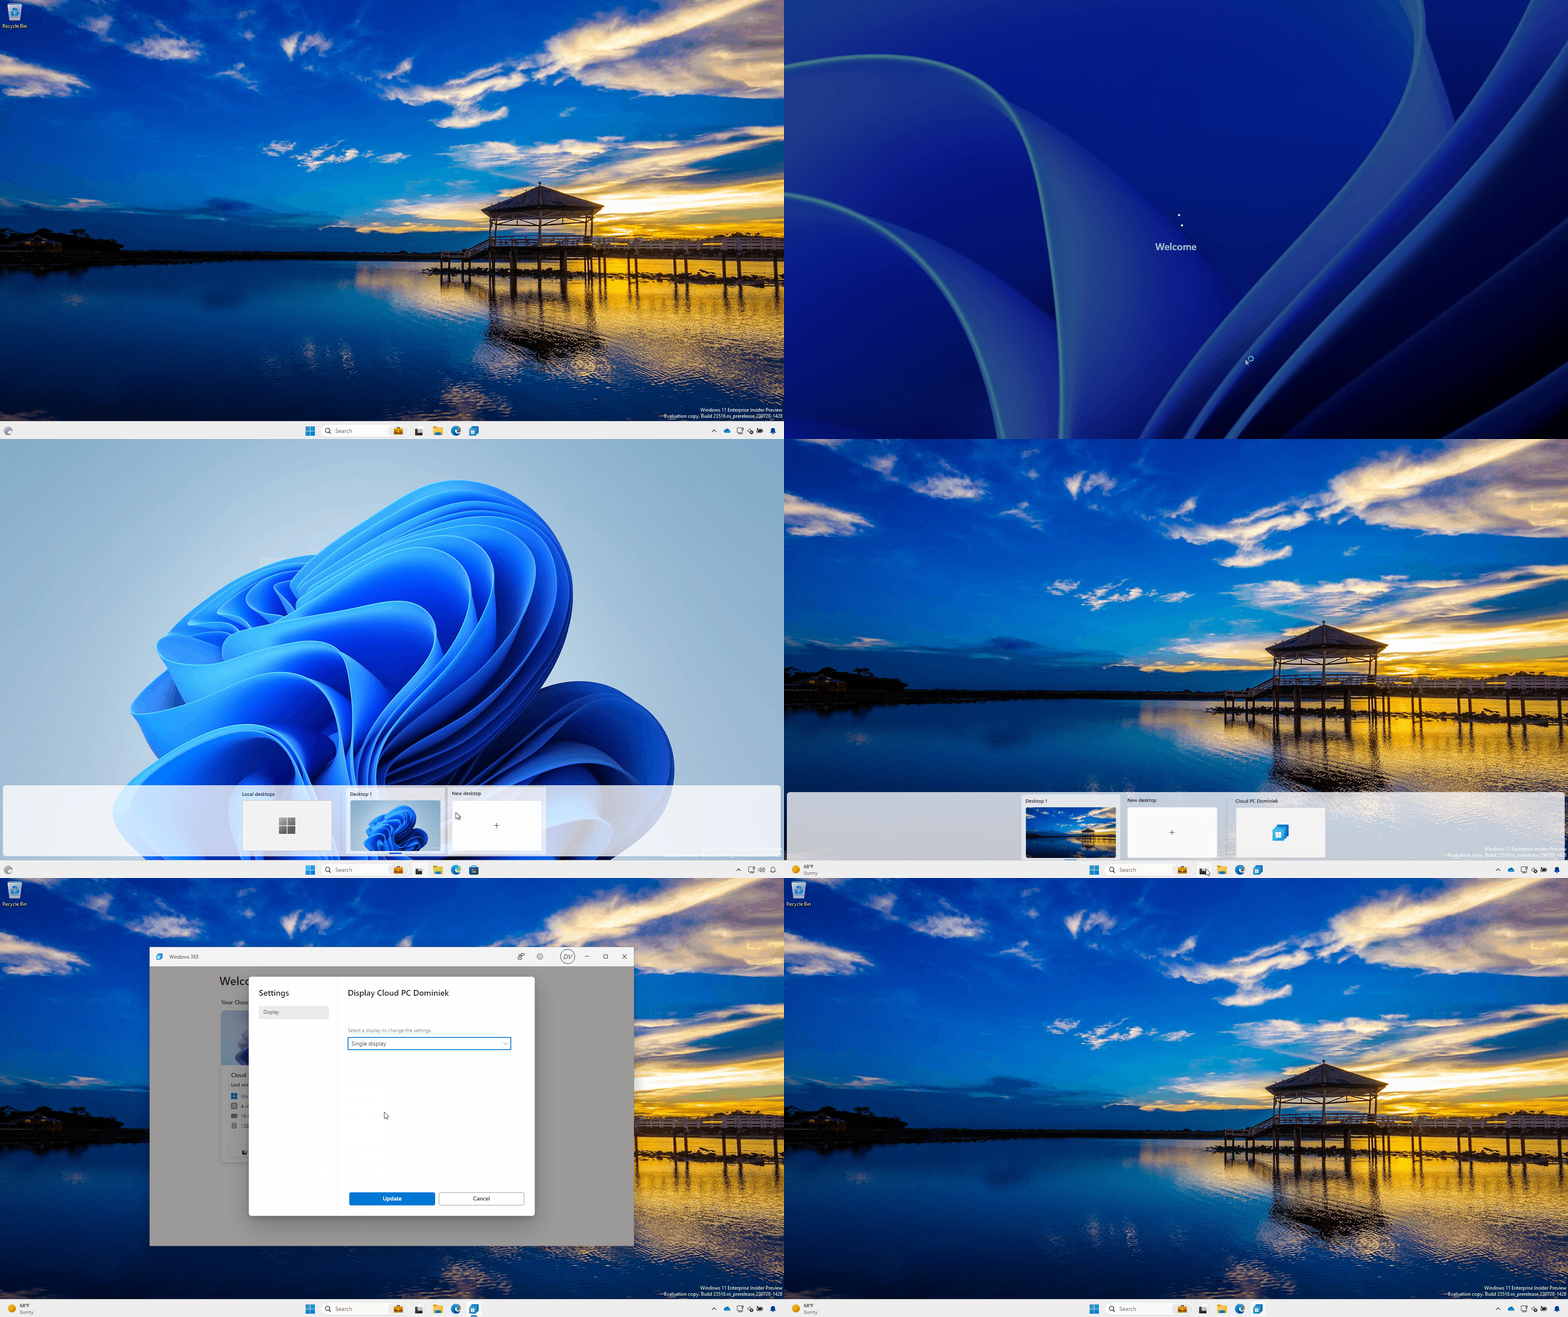
It’s a different story once you already signed into the Cloud PC. You can switch immediately without any delay between the local desktop and the Cloud PC. You can see the experience later on in the demo part.
Here is a screenshot of the Task View button from the Cloud PC.
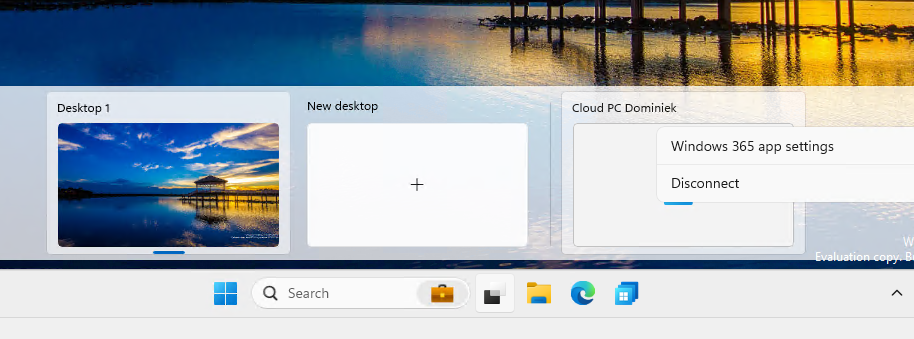
Another cool thing is that you can right-click on the Cloud PC desktop and it will present a couple of options. You can open the Windows 365 App settings and choose to disconnect the connection to the Cloud PC.
Let’s see the user experience in a short GIF;
Another cool thing is that you can actually use a gesture to switch back and forth to the Cloud PC. Just use 4 fingers to swipe over the touchpad of your device. You can also use keyboard shortcuts to change back and forth if you like to use those.
Limitations and know issues
It’s always a good idea to read up on known issues. That can prevent you from going down the rabbit hole and cost you a lot of time troubleshooting. Here is the Microsoft document on known issues for Windows 365 Switch;







One Comment