What’s up, everyone!
Welcome to a new feature by Nerdio called shell apps! In this post I will discuss what a shell app is and how it fits into the Nerdio ecosystem of Unified Application Management.
What is Nerdios Unified Application Management?
Let’s start with a recap on Unified Application Management. Last year I’ve written two posts to help you get started with UAM:
- Introducing Unified Application Management by Nerdio – techlab.blog
- A deepdive into Unified Application Management by Nerdio – techlab.blog
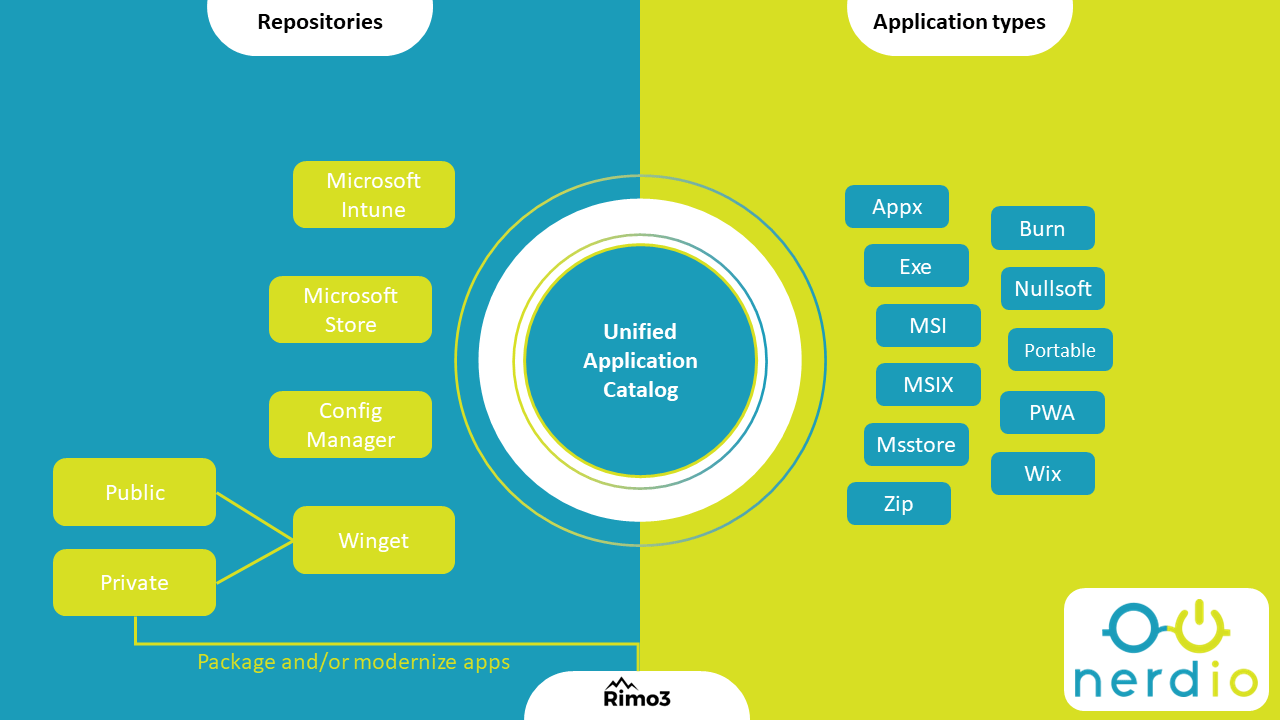
No worries, I won’t leave you hanging with just two links! The idea behind using unified application management (UAM) is really simple. What if you as an IT admin have a single pane of glass to manage applications for your virtual (Cloud VDI / AVD or Cloud PCs / Windows 365) or physical desktops (Intune managed) even though company apps exist in different repositories? UAM delivers on that promise by leveraging the Unified Catalog.
IT admins can easily search for applications stored in various connected repositories and deploy them to the desktops. The following slide should give a good idea which repositories and application types are supported by Nerdio:
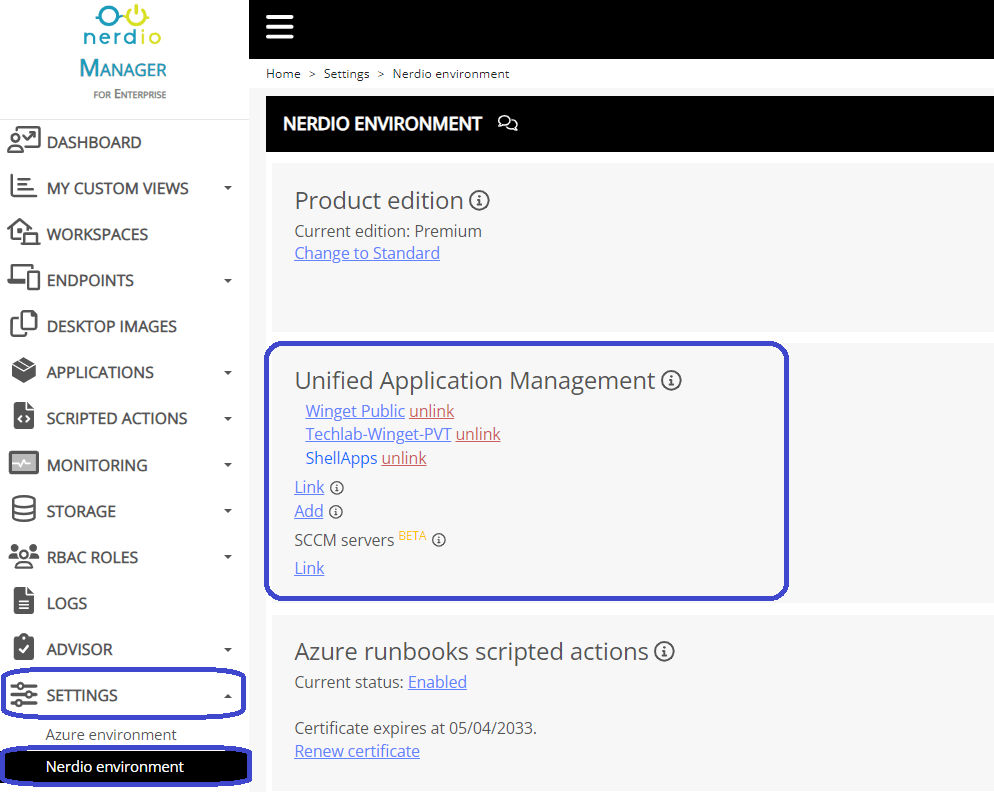
Managing repositories is done via Settings, Nerdio environment. Locate the Unified Application Management box, this is where all the UAM action happens!
Have no fear, shell apps are here!
Packaging apps can be a simple and straightforward process for smaller applications, but what if you have an application that needs extra configuration such as placing a license file or other actions? These apps tend to increase the complexity of packaging and deploying the app.
That’s exactly where shell apps come in. Shell apps are installed using Powershell scripts so make sure that the target desktops are enabled for Powershell remoting (WSMan). Shell apps are broken down into three script areas:
- Detection: use this script to detect if the application is present
- Install: use this script to install the application and perform additional required tasks.
- Uninstall: use this script to uninstall the application and cleanup other components that are not needed anymore.
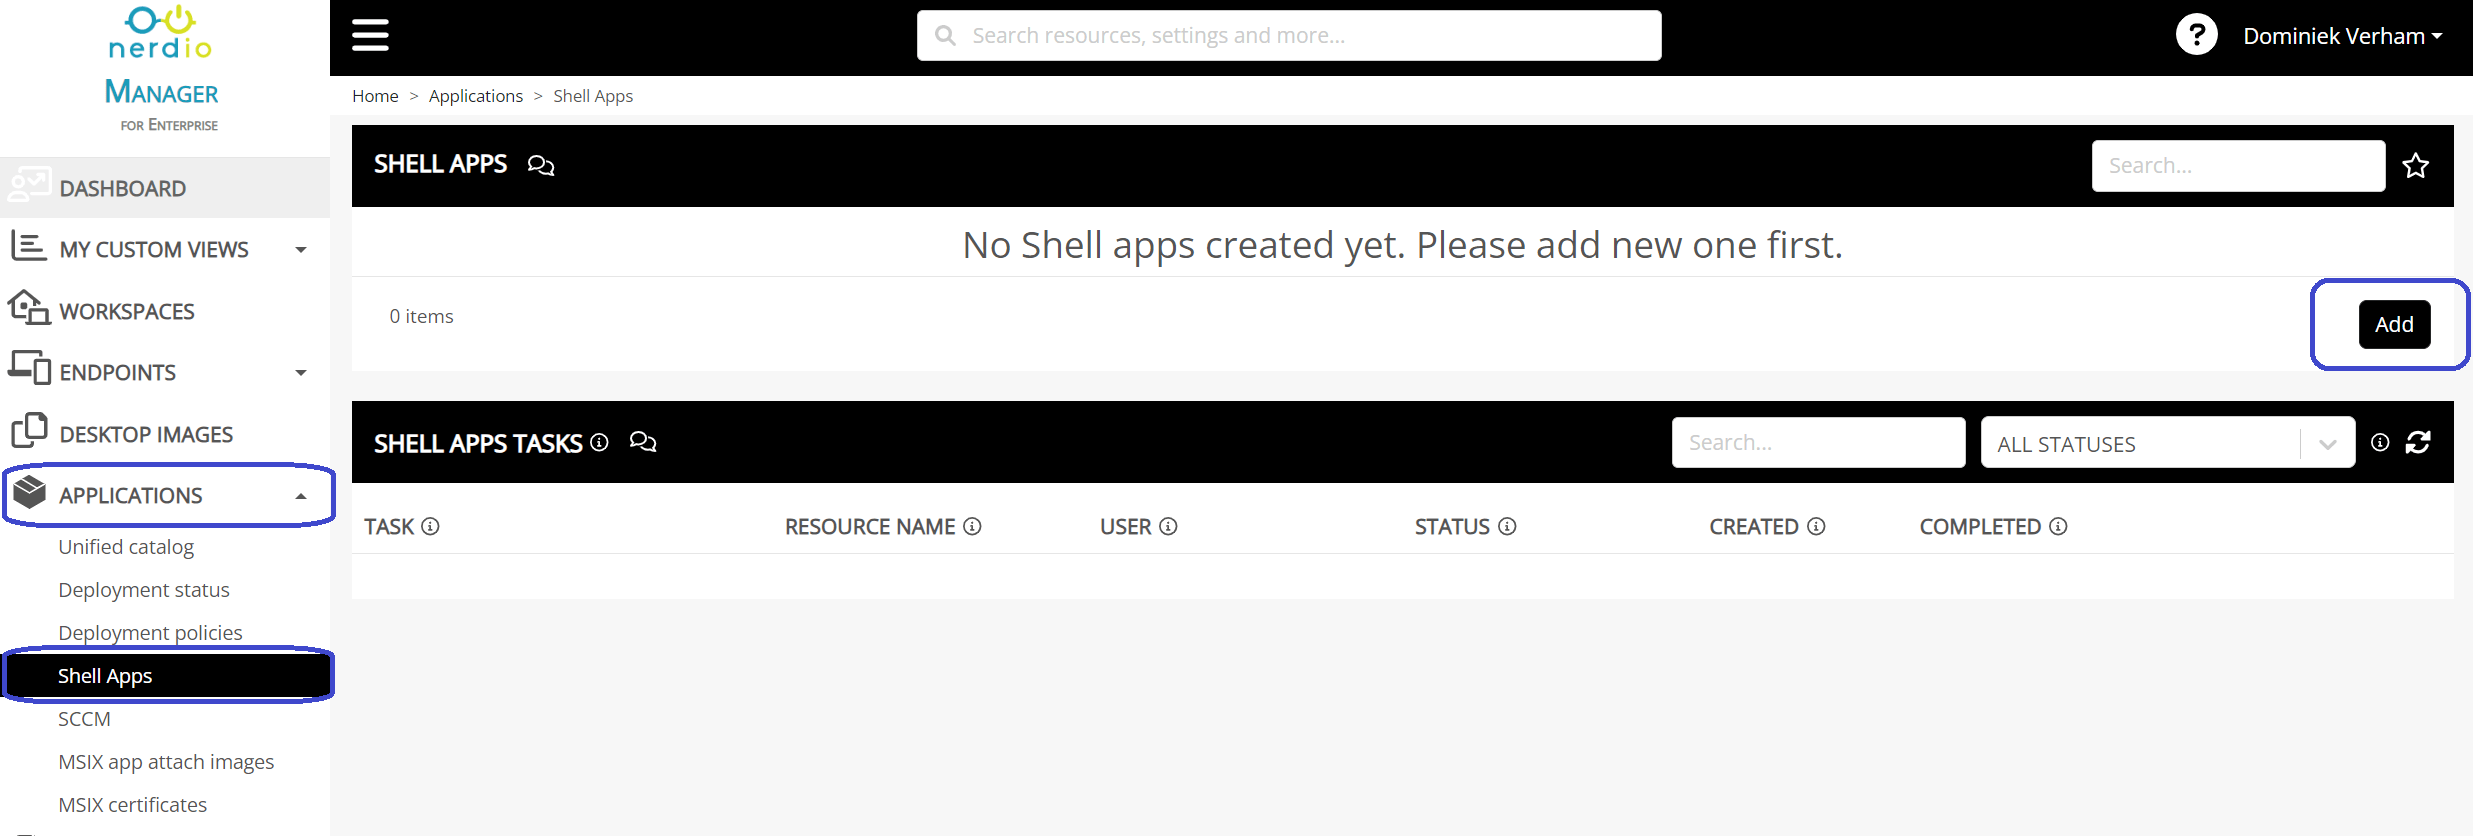
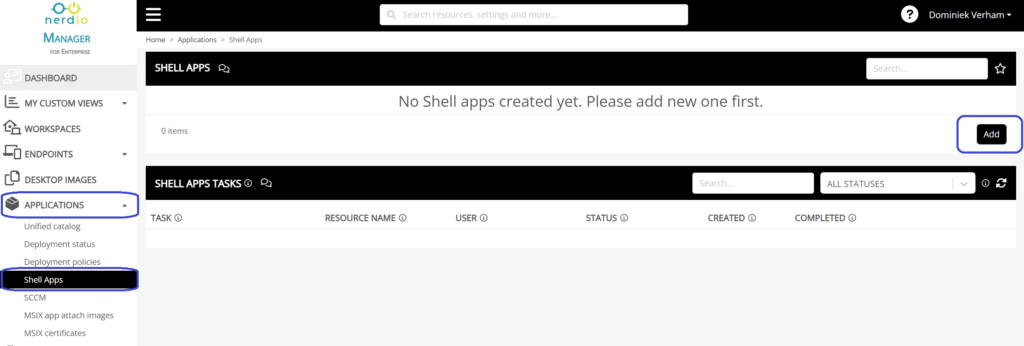
Just click the Add button to start the process of adding your first shell app to UAM.
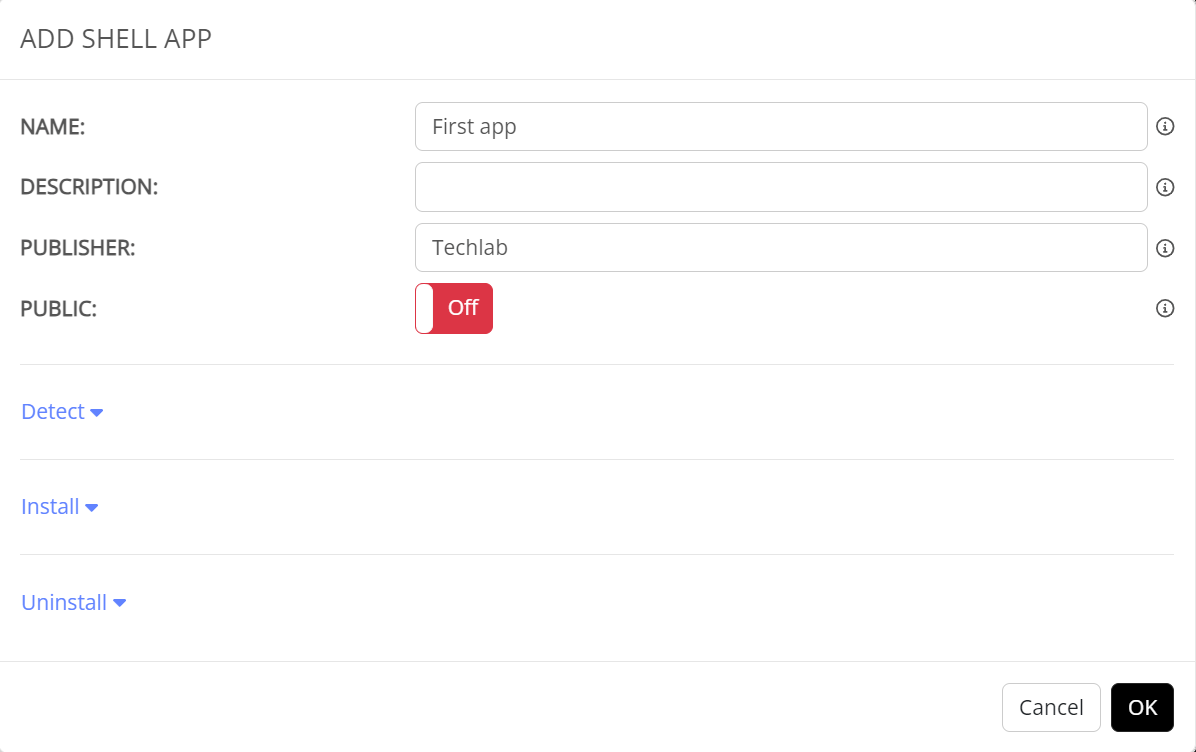
The layout of adding a shell app is pretty self-explanatory. Give the shell app a name and optionally a description. Enter the name of the publisher and continue to the Detect, Install and Uninstall scripts.
Once you are ready, finish up by setting the Public status to On. By doing this you make sure that the Shell app pop ups in the Unified Catalog. If it’s still set to Off, you will not be able to find the app in the Unified Catalog.
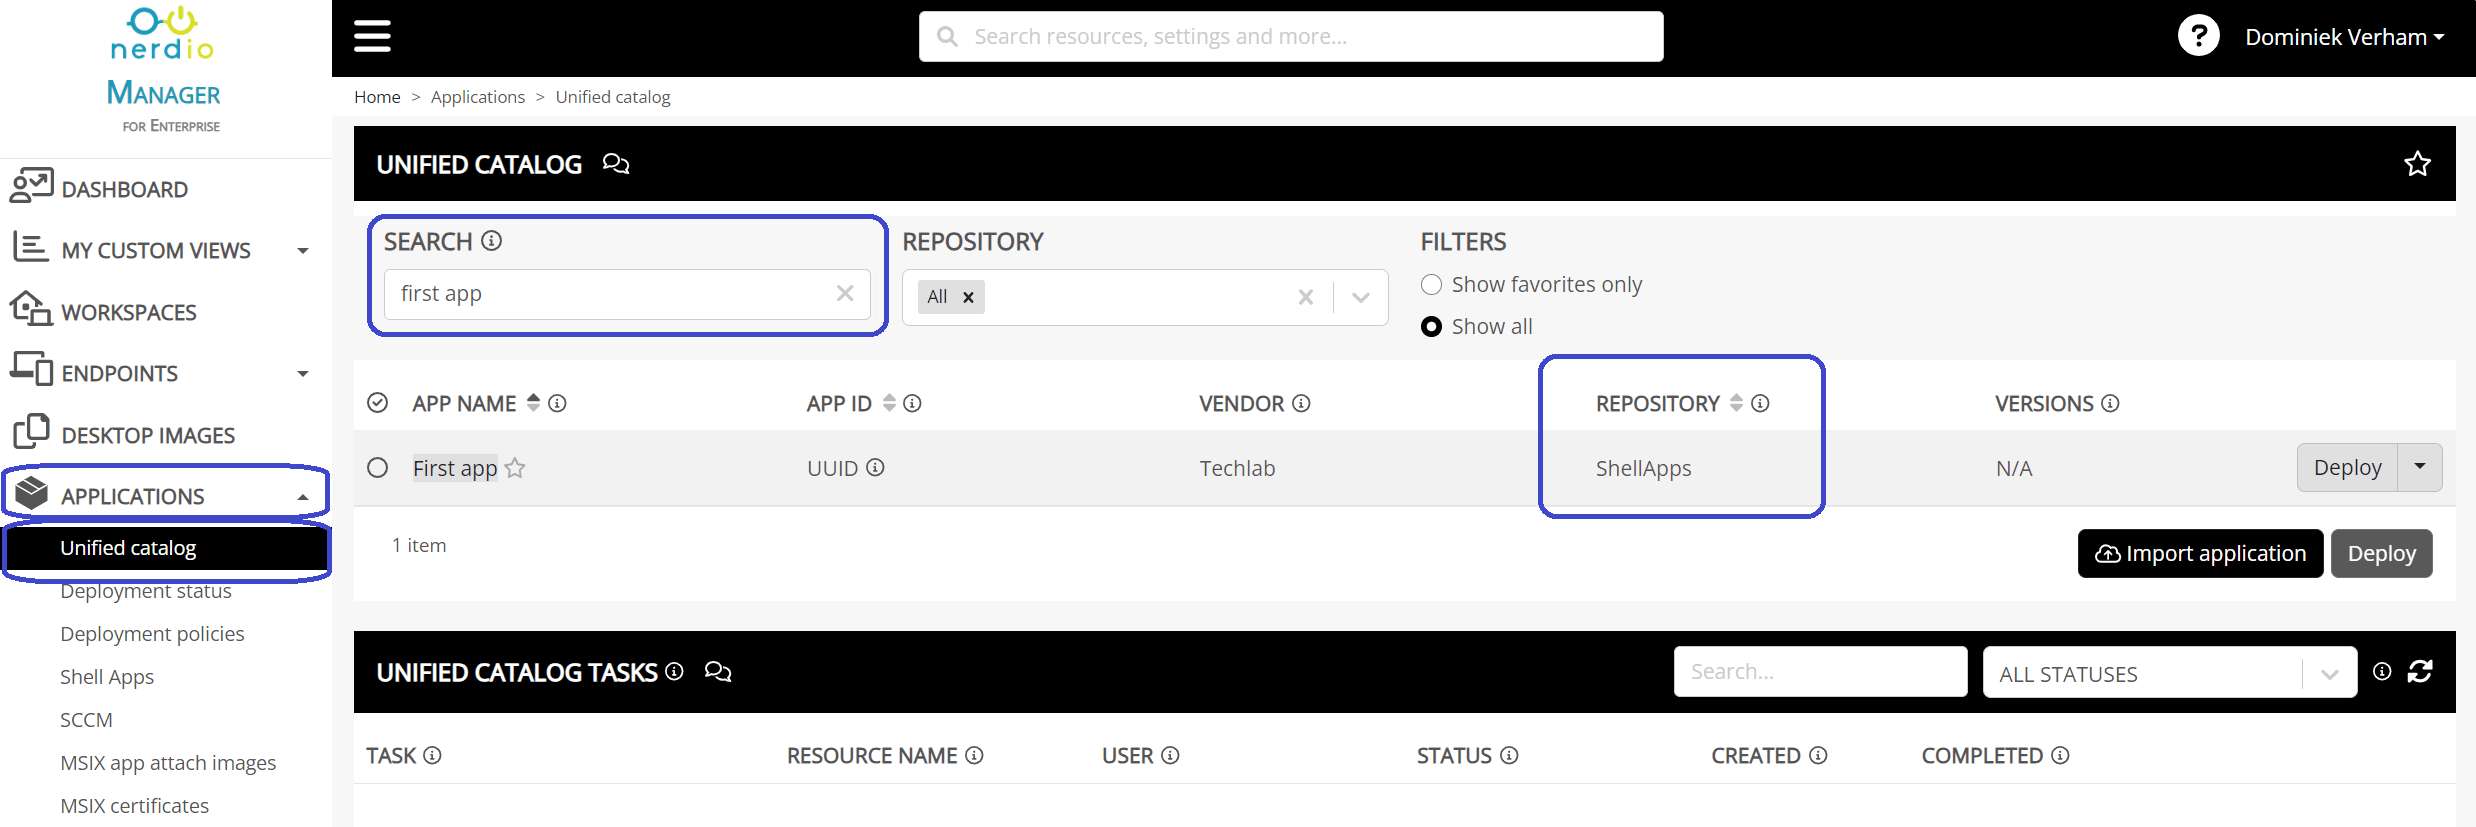
Now that the status is set to Public and the app is created, IT admins can now search for the app in the Unified Catalog via Applications, Unified catalog.
That concludes the introduction of Shell apps and how they fit into Unified Application Management. Which brings me to the following …

I hear you! So you want to learn more about the detection, install and uninstall scripts? Make sure to follow me because I will cover this in an upcoming post!
Resources
I used the following resources for this post:
Release Notes – Nerdio Manager for Enterprise (getnerdio.com)
Unified Application Management: Manage Shell Apps – Nerdio Manager for Enterprise (getnerdio.com)
