What’s up, everyone!
Welcome back to the Nerdio Manager for MSP mini-series!
Now that you’ve successfully deployed Nerdio Manager for MSP in your own environment, you have a powerful single-pane-of-glass to manage Microsoft solutions such as Azure Virtual Desktop, Windows 365, Microsoft Intune and more. Let’s continue that journey by adding our first customer environment, or Account as they are called in Nerdio Manager.
Mini-series overview
- Nerdio Manager showdown: Enterprise vs MSP – dominiekverham.com
- Installing Nerdio Manager for MSP – dominiekverham.com
- Configuring Nerdio Manager for MSP: post-installation checklist – dominiekverham.com
- Nerdio Manager for MSP: Adding accounts – dominiekverham.com
Enjoy!
Scenarios and prerequisites
There are three scenarios on how to add an account to your Nerdio Manager:
- Add a single Microsoft tenant to your Nerdio Manager. You’ll need an existing Entra ID account in the customers environment and part of Global Administrators and Subscription Owner.
- Add one or multiple Microsoft tenants to Nerdio Manager from the Microsoft Partner Center. A Global Admin from the customers Microsoft tenant needs to consent to permissions on behalf of the organization.
- Last but not least, it’s possible to add an existing Nerdio Manager for Enterprise environment to Nerdio Manager for MSP. This is called Link Enterprise Account.
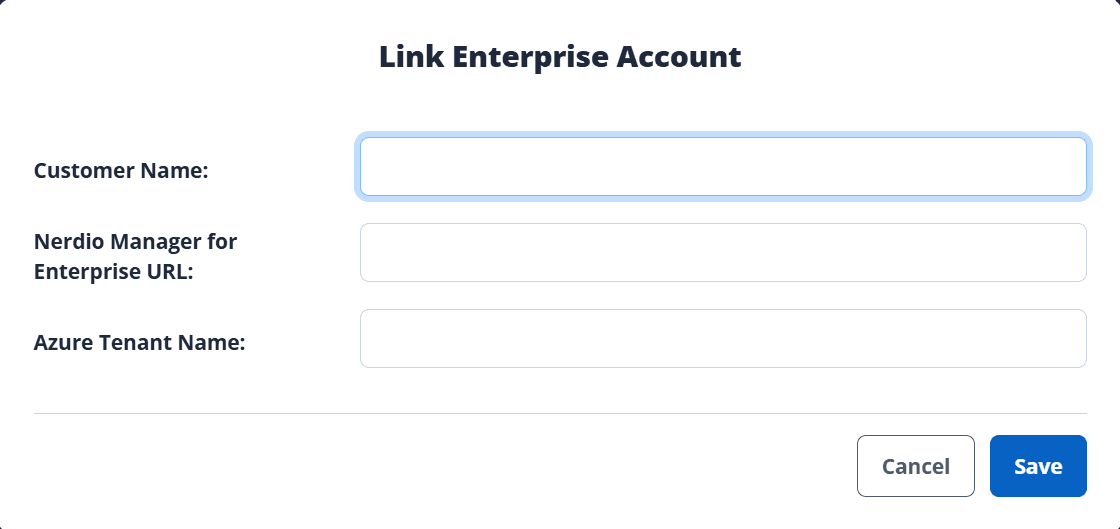
Adding a single Microsoft tenant
Let’s add a single Microsoft tenant to Nerdio Manager. Go to Accounts, New account. This will give you the following screen:
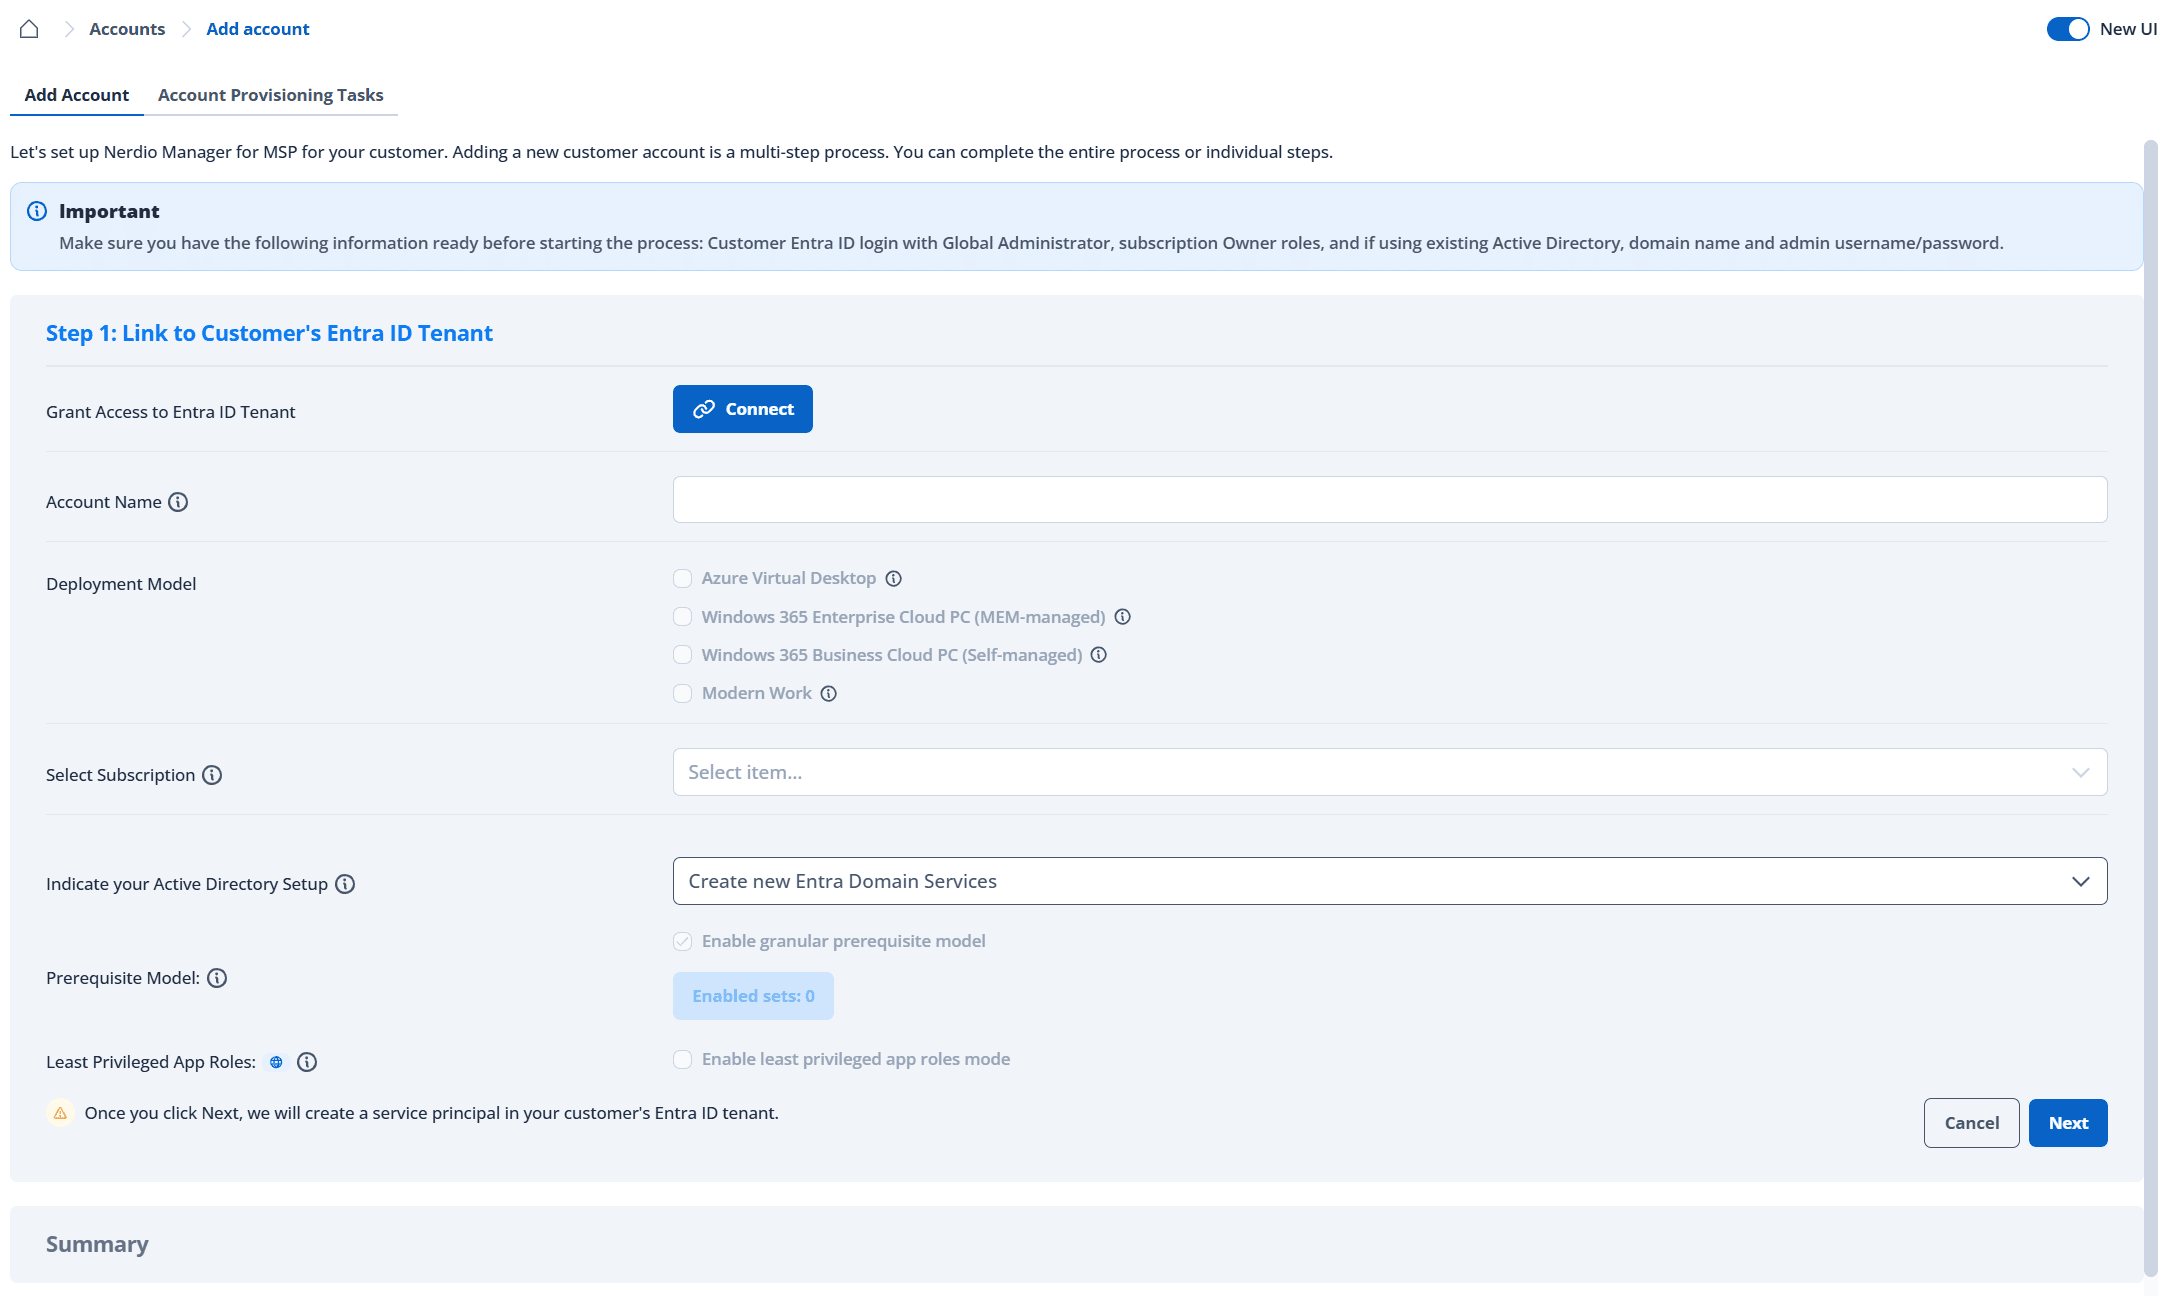
Let’s start things off with granting access to the Entra ID tenant. Select Connect.
This will open up a sign in window. Of course you’ll need to sign in to the customers tenant. Once that is done, you’ll be asked to consent on behalf of your organization for the following permissions:
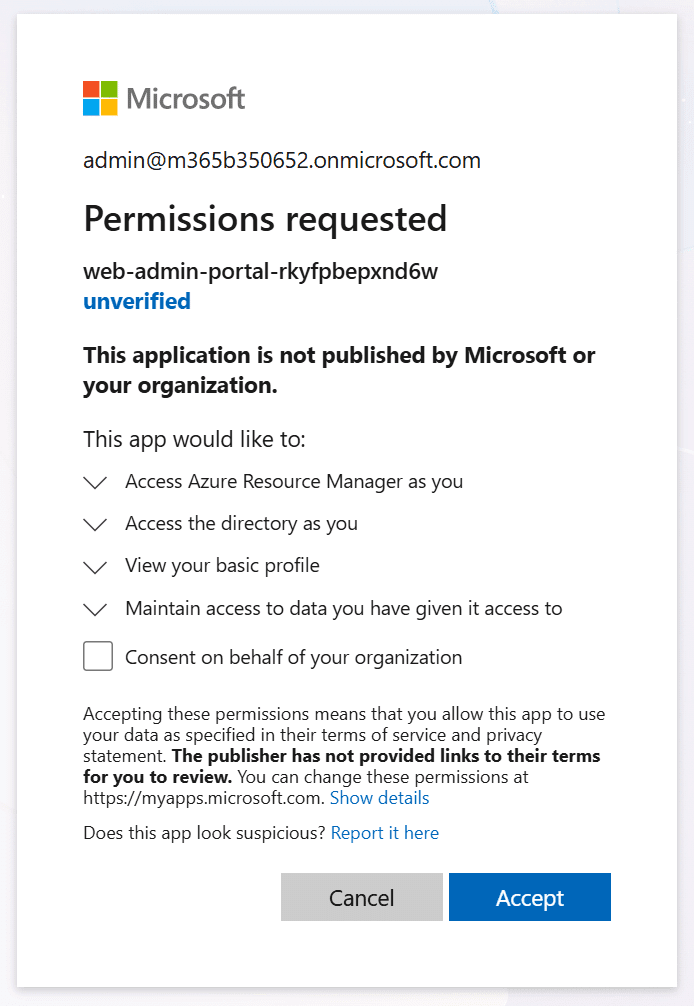
Once you’ve clicked you way to glory, you’ll return to the previous window. Only this time you can see that access to the customers tenant is granted for 60 minutes, during this time you’ll need to complete the following steps. So take a deep breath, get yourself a coffee, and proceed with entering a name for the account.
Next up on the list is the deployment model. You can choose between:
- Azure Virtual Desktop to manage personal and pooled host pools.
- Windows 365 Enterprise / Business Cloud PC’s. These options might be greyed out if you don’t have any Windows 365 licenses in the tenant.
- Modern Work which allows you to manage Intune, defenders etc.
Make sure to review which Nerdio licenses you need · here.
Add the customers Azure Subscription from the dropdown box. Can’t find any? Then validate that your account has permissions on the Azure Subscription.
Select your identity source. You can choose between:
- Entra ID.
- Active Directory.
- Create a new or select an existing Entra Domain Services instance.
I will keep things simple and continue with Entra ID.
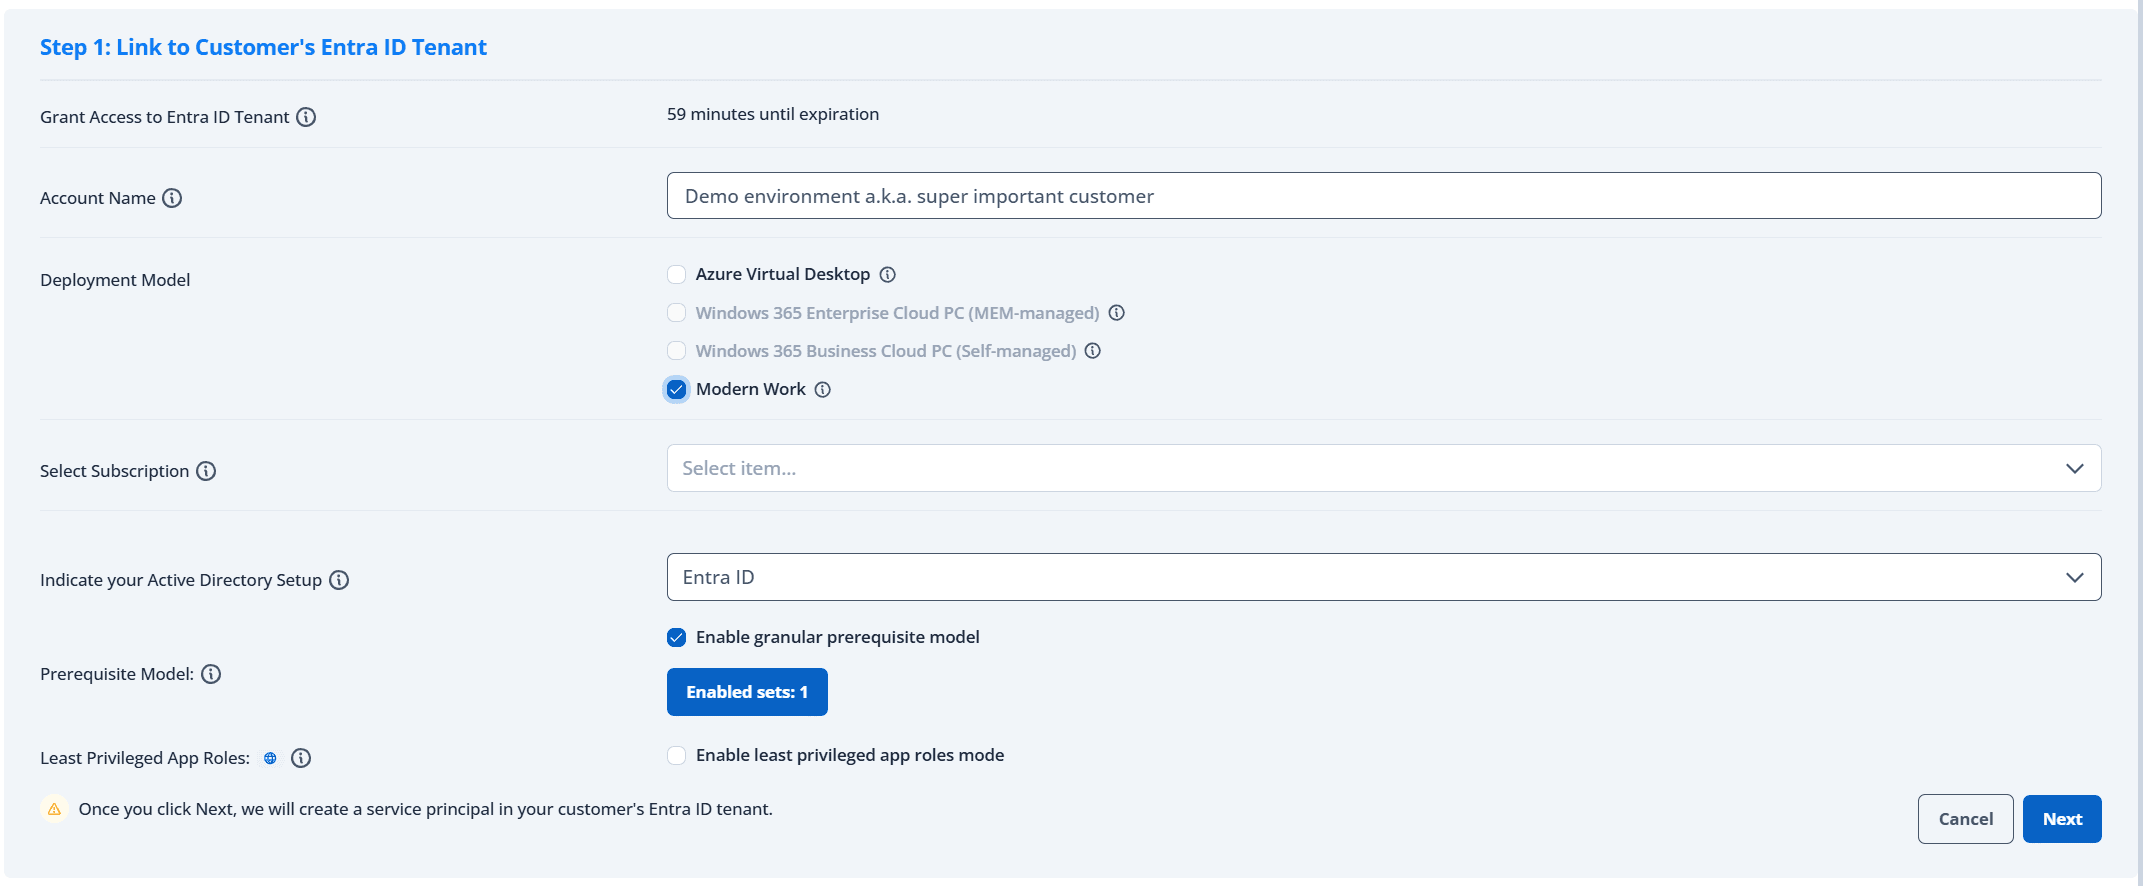
Then we arrive at two things that align together perfectly:
- Prerequisite model: this moves away from the traditional god-mode and only allow groups of permissions that Nerdio Admins actually need to manage customer environments. These are basically API permissions grouped together and assigned to the service principal.
- Least Privileged App Roles: check this box and immediately replace the Global Admin role with least privilege roles like Cloud Application Administrator, Privileged Role Administrator, Exchange Administrator.
Later on, when you added the account, you’ll see something that is called Access Model. And it will display one of three states:
- Classic: means you disabled both the prerequisite model and Least Privileged App Roles. It’s supported, but I would not recommend it anymore.
- In transition: means you selected the Prerequisite Model or the Least Privileged App Roles. Also supported, but why not simply make that last step and earn the title of…
- Modern: means you are a genius. (and selected both Prerequisite model and Least Privileged App Roles.)
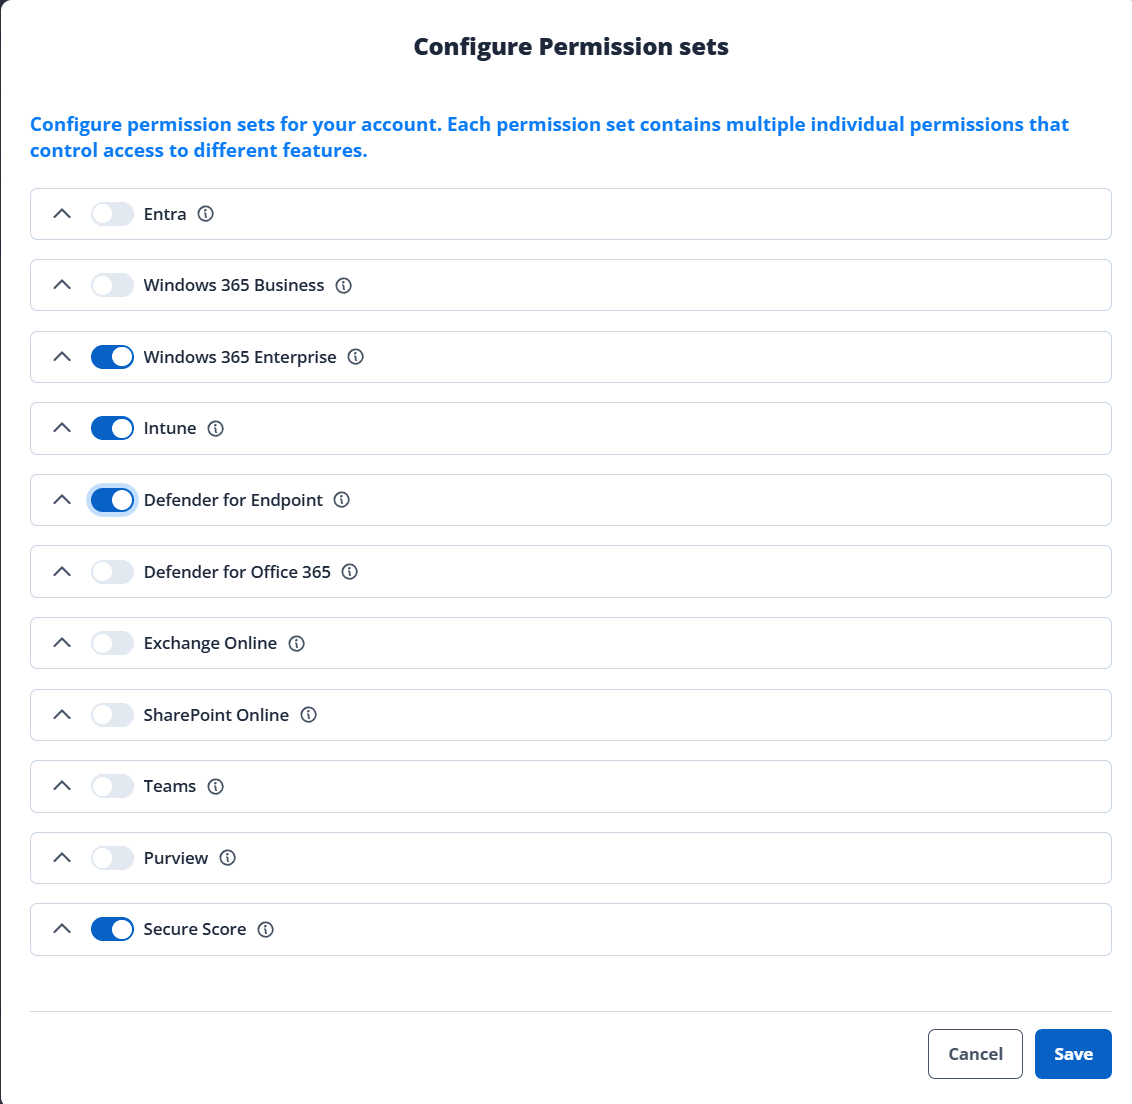
Once you are happy with your configuration, click Next to finish up. Nerdio Manager will take a bit of time to do it’s magic:
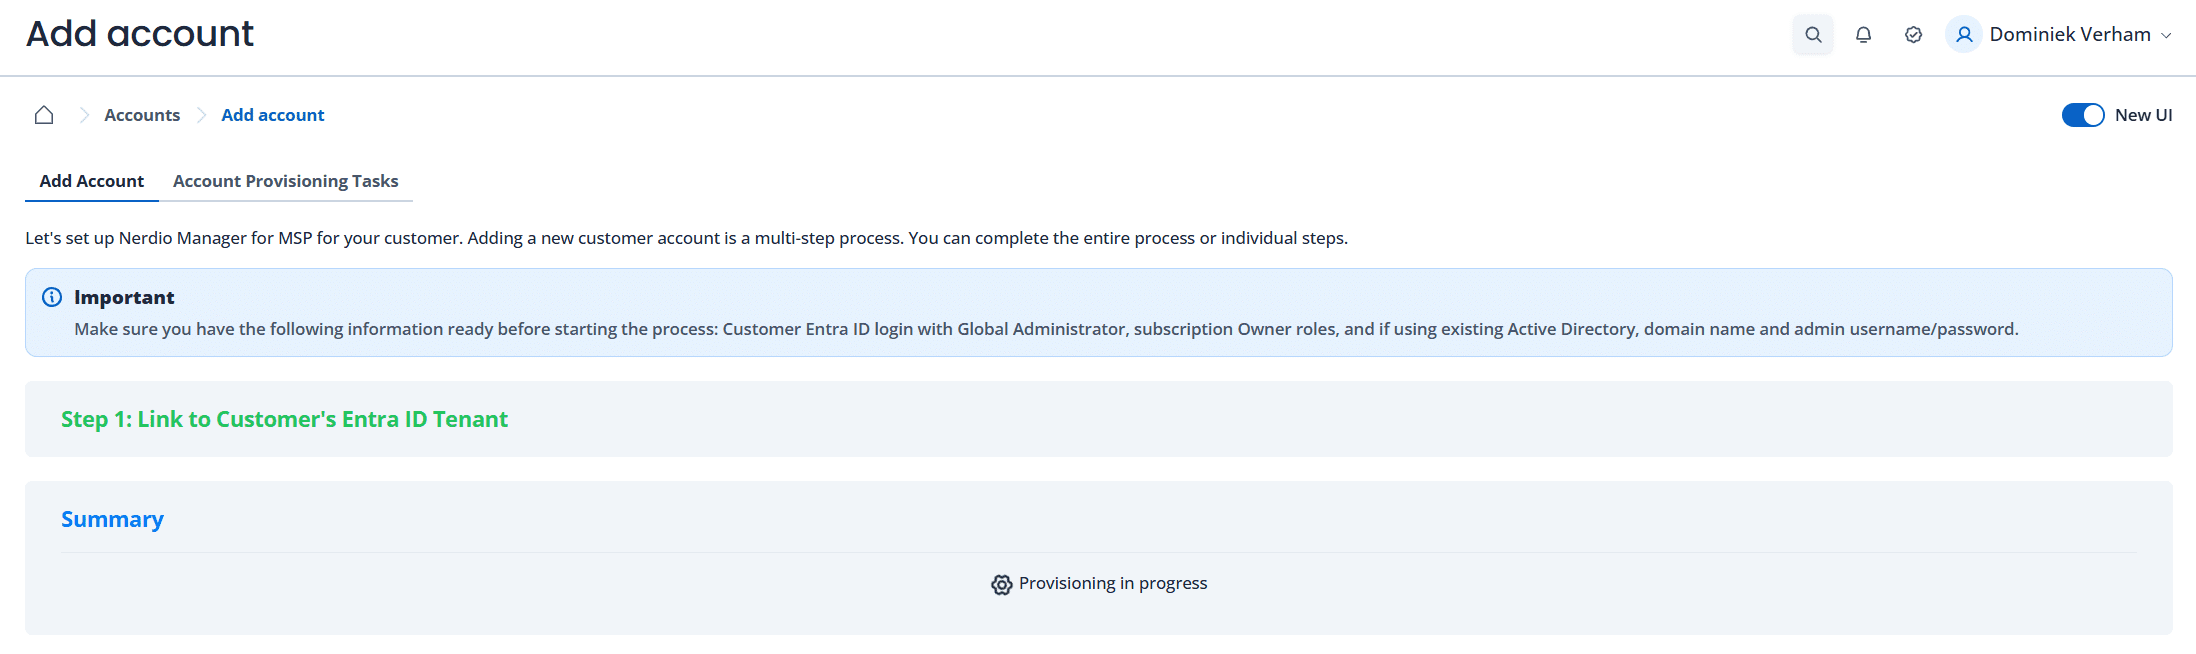
The account will be added after a short while:
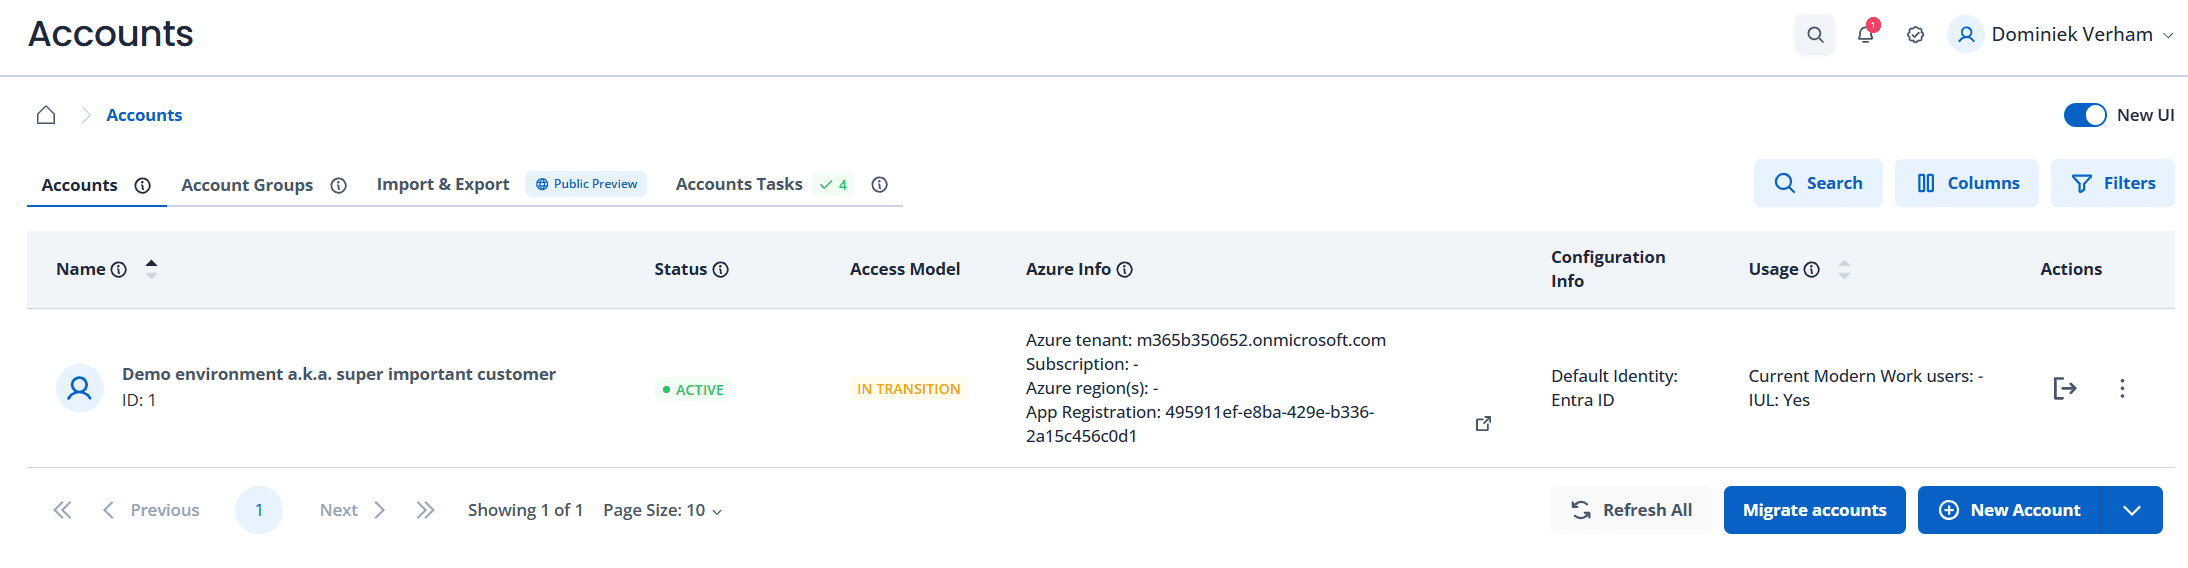
The Access Model now says “in transition” because I unchecked the Enable granular prerequisite model option.
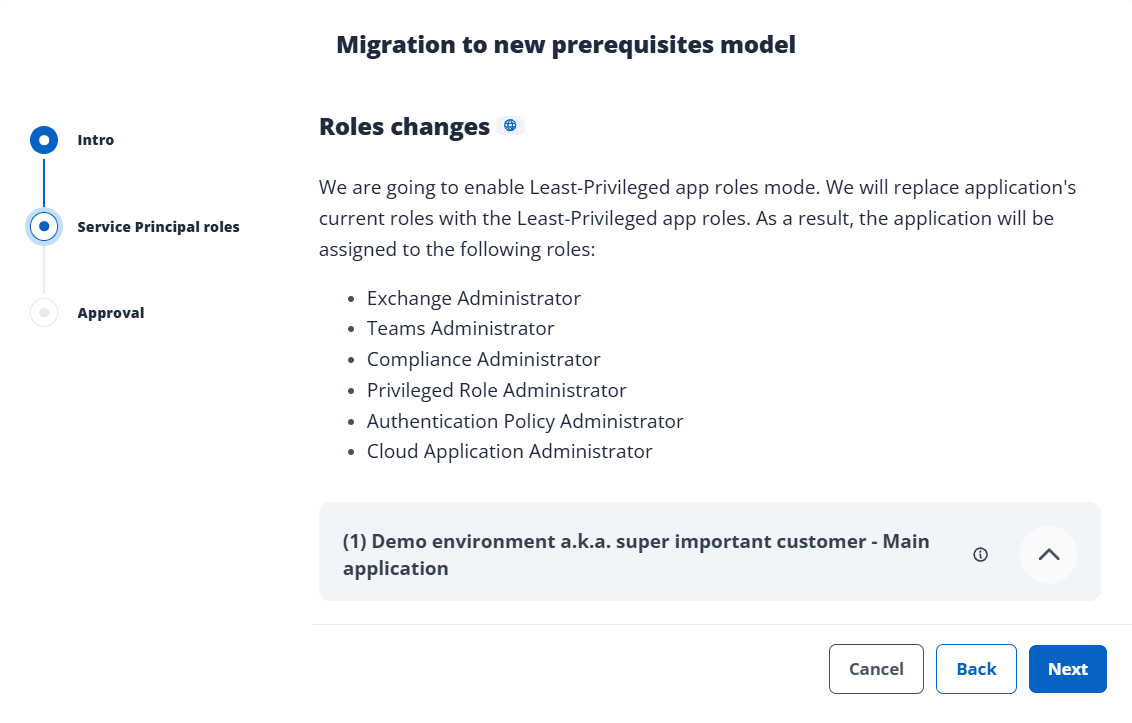
Let’s fix that. Simply click on the “IN TRANSITION” label to spin up a wizard and improve the security even more. As you can see, I can move away from the Global Admin role to Least Privileged App Roles.
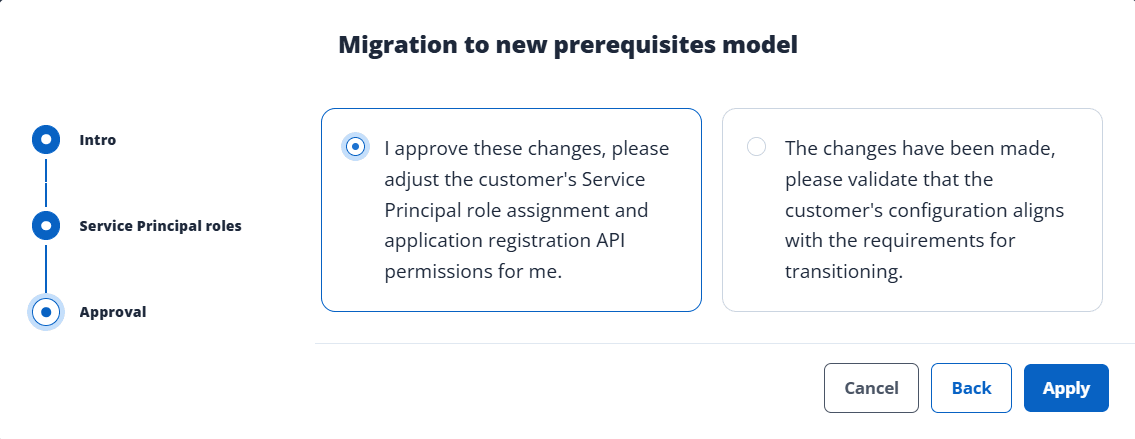
The approval step provides two options:
- I approve · requires that your account has sufficient permissions to apply the changes. This will probably be the default for more companies.
- Please validate · useful when your account does not have sufficient permissions to change the role assignments of the service principal. This requires IT staff of the customer to apply the changes manually and simply as Nerdio Manager to check if the changes are successfully applied.
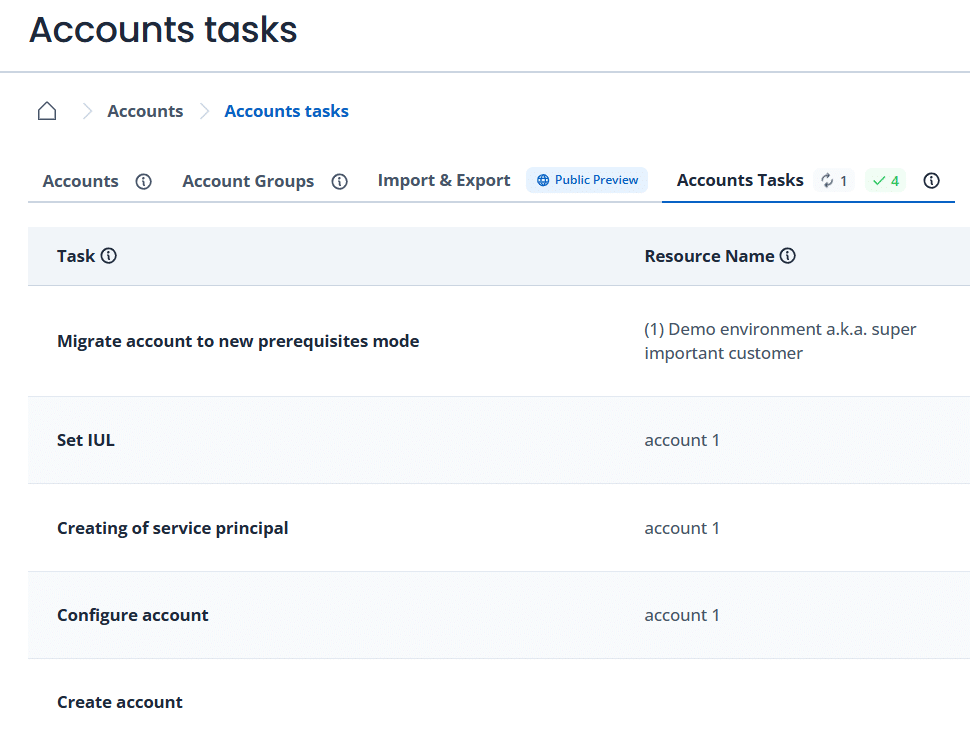
As always, you can follow along with the tasks from the Account Tasks pane:
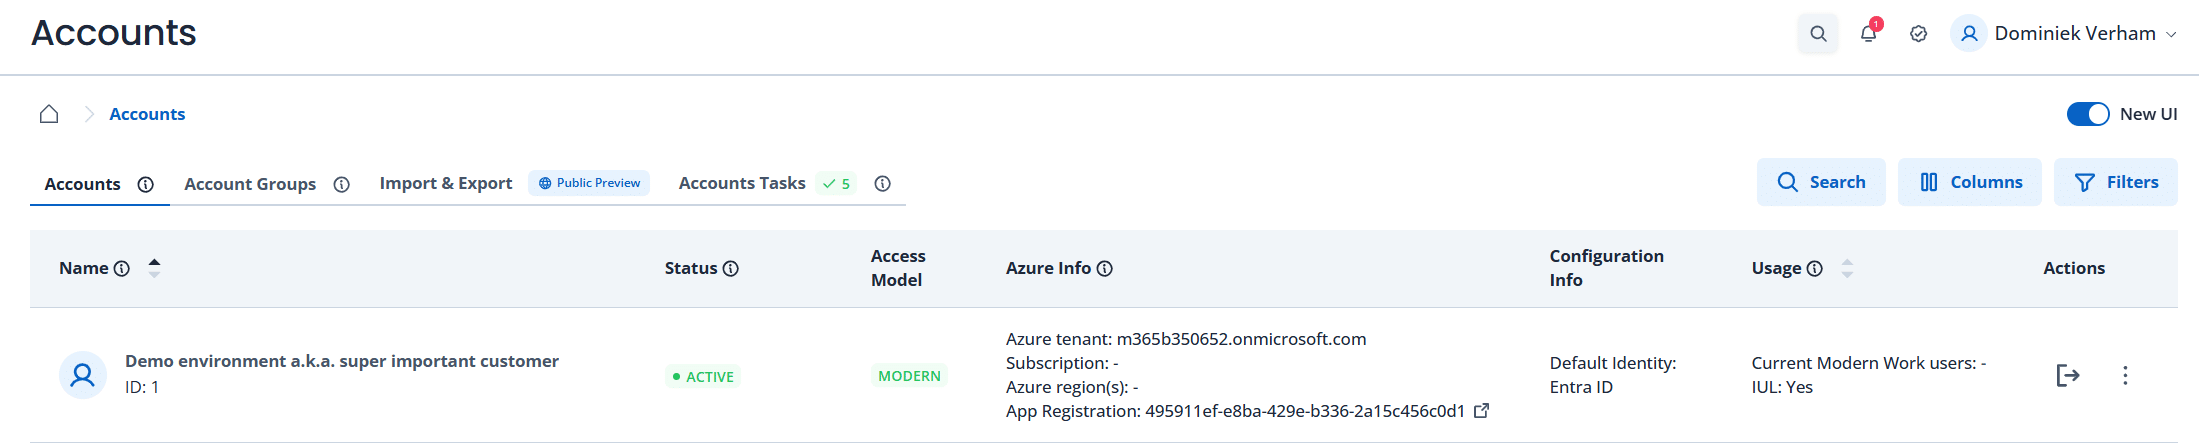
It will only take a couple of minutes before everything will turn up green, or modern!
Internal Use License – IUL
One last thing to call out at this point is the option to flag an account as an internal account. Why would you want to do that? As per Nerdio:
Nerdio partners can take advantage of Nerdio’s Internal Use License (IUL) program. The IUL program allows a Nerdio partner to get free Nerdio resources for their own use within their organization. We want our partners to have complete confidence in the product they are selling to their customers by using it for themselves.
And since this is a demo environment, I flagged it as IUL. Click the three dots and select Set IUL.
Levels in Nerdio Manager for MSP
Congratulations! You just added your first customer into Nerdio Manager for MSP. This is an excellent moment to talk about the levels in Nerdio Manager for MSP. There are two you should be aware of:
- MSP level · it’s the level we are actively working in. It provides global settings that we can reuse for various accounts and make our life a lot more easy.
- Account level · when you click on an account in Nerdio Manager, it will drill into the specific environment and settings for that account.
Something that we can further optimize on a per-account basis is enabling the Graph API Booster feature.
Basically what happens is that changes in Nerdio Manager are sent to Microsoft Graph APIs. These APIs have limits and the last thing you want is that things fail because you unknowingly hit a limit. The solution is simple:
- Think of a cool name for a feature: Graph API Booster · Check!
- Add a second app registration with permissions in the customers tenant.
- Load balance API calls and avoid hitting any limits.
- It’s free!
So how do we enable it? From Nerdio Manager for MSP, select Accounts, select the desired account, Settings, Integrations.
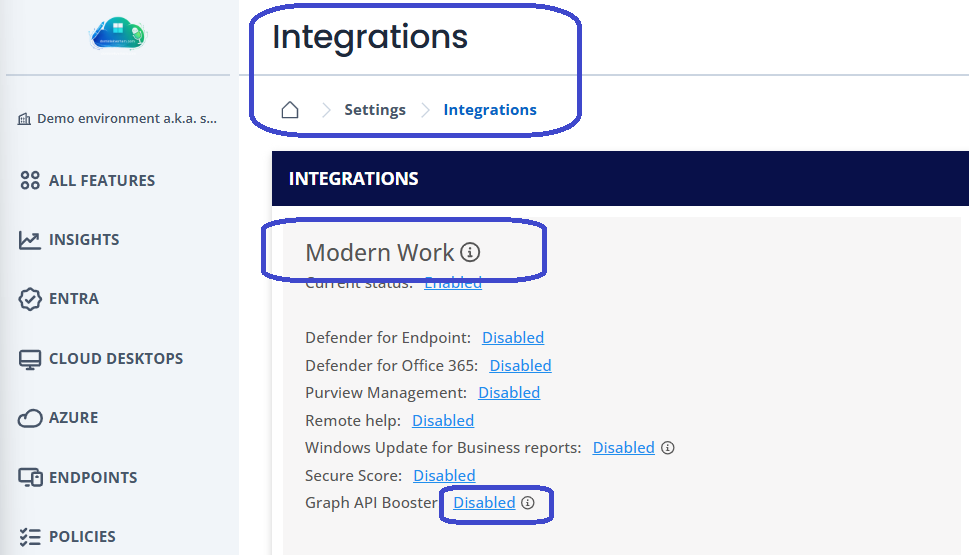
Locate Graph API Booster in the Modern Work section. Click on Disabled to start the configuration process:
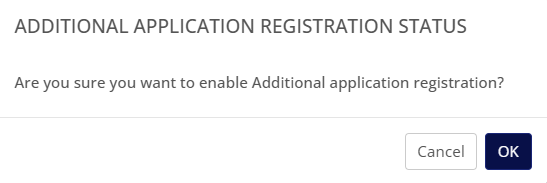
The status will change to Enabling… Give Nerdio Manager a bit of time to complete the task and wait for the status Enabled.
If you need to revert the change, just click the Enabled status and select OK.
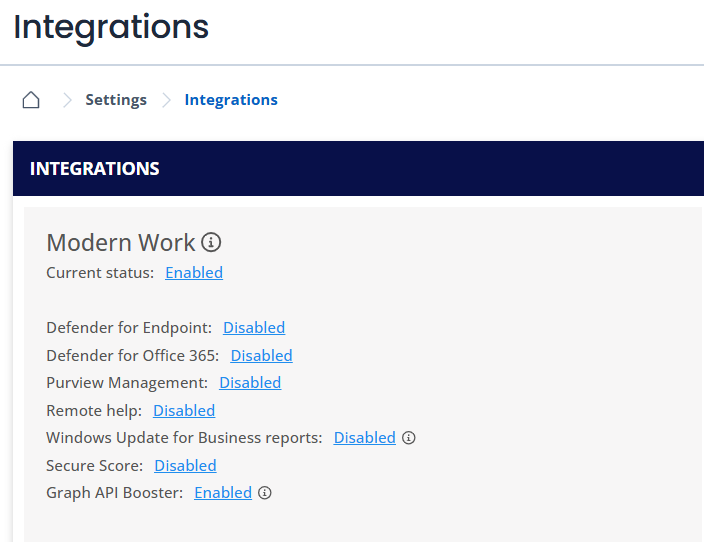
You’re all done, the feature is now enabled. But if you are curious like me, you can check the secondary app registration in the Microsoft Entra admin center:
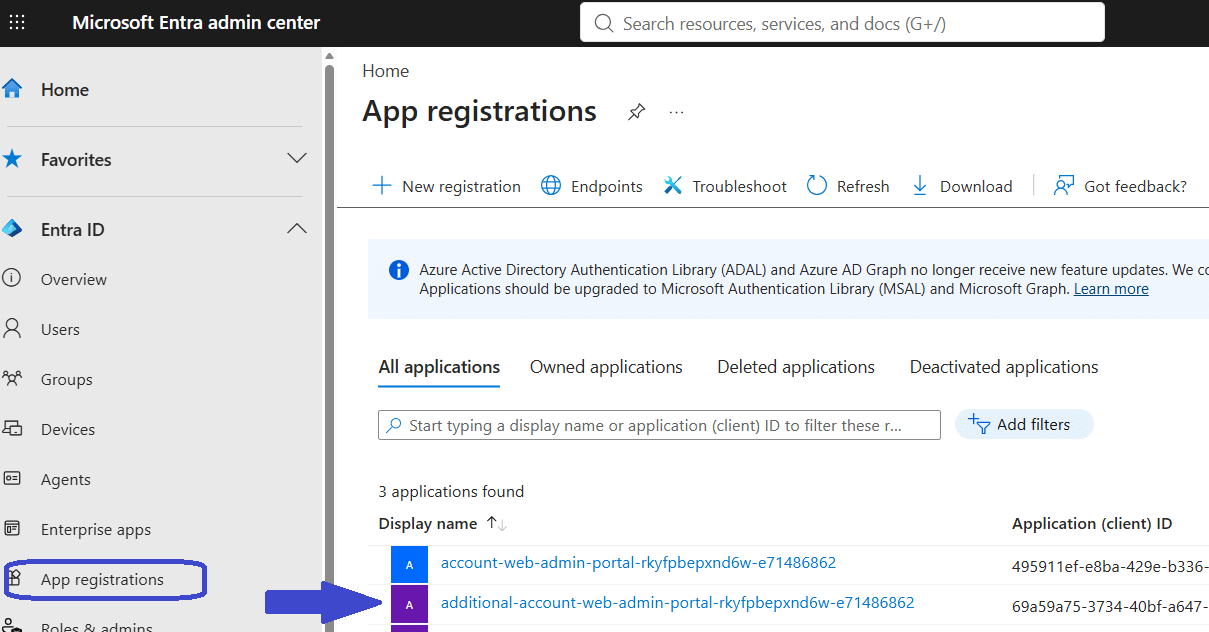
And there it is!
With that out of the way, we now have Nerdio Manager fully setup, optimized and added our first account. Make sure to keep an eye out for my next post where I dive into details on policies, baselines and configuration.
Resources
I used the following resources for this post:
https://nmmhelp.getnerdio.com/hc/en-us/articles/26125624156173-Add-an-account
https://nmmhelp.getnerdio.com/hc/en-us/articles/35074398002701-Link-a-Partner-Center-account
MSP Pricing