What’s up, everyone!
Welcome to the mini-series about Rimo3 Workspace360. Workspace360 is a great solution to help companies and IT admins with application management tasks like:
- Packaging an app so it’s ready to use with Microsoft Intune or other endpoint management tools.
- Modernizing apps which is a great way to deploy apps to virtual desktops like Azure Virtual Desktop with App Attach or Windows 365 Cloud PCs.
- Testing application in migration scenarios from physical to virtual, or testing apps in a new Windows build or version.
- It also features a large catalog of applications that are already packaged and ready to be imported in Workspace360.
The series:
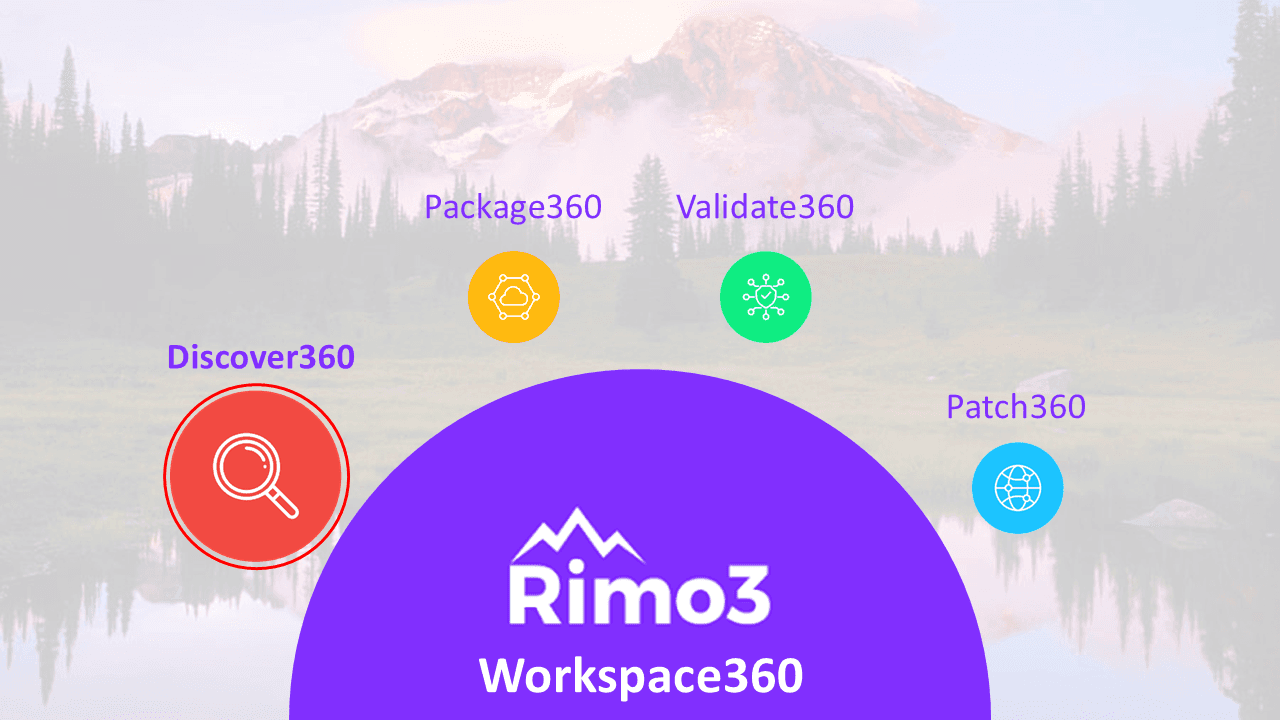
- Part 1: Get to know your apps with Discover360 by Rimo3
- Part 2: How to modernize apps using Package360 by Rimo3
- Part 3: Make sure apps are packaged correctly using Validate360 by Rimo3
- Part 4: Introducing Patch360 by Rimo3
Introducing Discover360 by Rimo3
Workspace360 offers various features to help you modernize, package and manage your applications. These features build on top of each other to provide additional value and they have their own 360 name. The good news is that they are all available for Rimo3 customers, they are not individual solutions.
You can export the package to Microsoft Intune once the onboarding process is complete. If you want to, you can modernize the apps to a more modern format making it an excellent choice for virtual desktop solutions like Azure Virtual Desktop or Windows 365.
Discover360 is used to add or create a new package. You can add previously created packages to Rimo3 Workspace360, manually create a package or import applications from SCCM.
How to create a package?
Let’s create a package using Discover360 and see what the process looks like.
From the Workspace360 portal, go to Discover360 and select Add Packages.

This will bring up the following choices:
- Upload previously created packages that you have save on your device.
- Manually create a new package.
- Import apps from Microsoft Endpoint Configuration Manager (or SCCM).
For this demo I will select the second option. A new popup will appear and it shows 5 steps:
- Select pipepline actions allows IT admins to select which pipeline actions will be executed. The import step is mandatory, other steps like Discovery, Baseline and Test are optional.
- Package details is used to specify details about the application.
- The installation step is used to provide the installation and uninstallation commands.
- Additional information is a completely optional step.
- Use Upload files to upload the app in a compressed format.

In the second step we can specify details about the app that is about to be packaged. Let’s use Notepad++ for the demo.

Discover360 uses automation, which means we need to provide silent (un)install commands. This automatically means that apps that do not support silent installations are cannot be packaged by Discover360.
Don’t worry if you are new to creating packages and want to learn how to find these commands. Here are some tips and tricks:
- Use a virtual machine with a snapshot to manually install and remove the application or use another way to install apps in a temporary environment like Windows Sandbox.
- Check the documentation from the vendor. Chances are that they already have documentation on how to silently (un)install the app.
- Use the full install command like (2 screenshots) below, or use the install.cmd / uninstall.cmd method. Using last method is an easy way to run more than one command.
- In case of .MSI files, you can install these via msiexec.exe. /I is used to install the app while /X {identifier} is used to remove the app. You will need to locate the application identifier which you can easily find using a Powershell command:
get-wmiobject Win32_Product | Sort-Object -Property Name |Format-Table IdentifyingNumber, Name, LocalPackage -AutoSize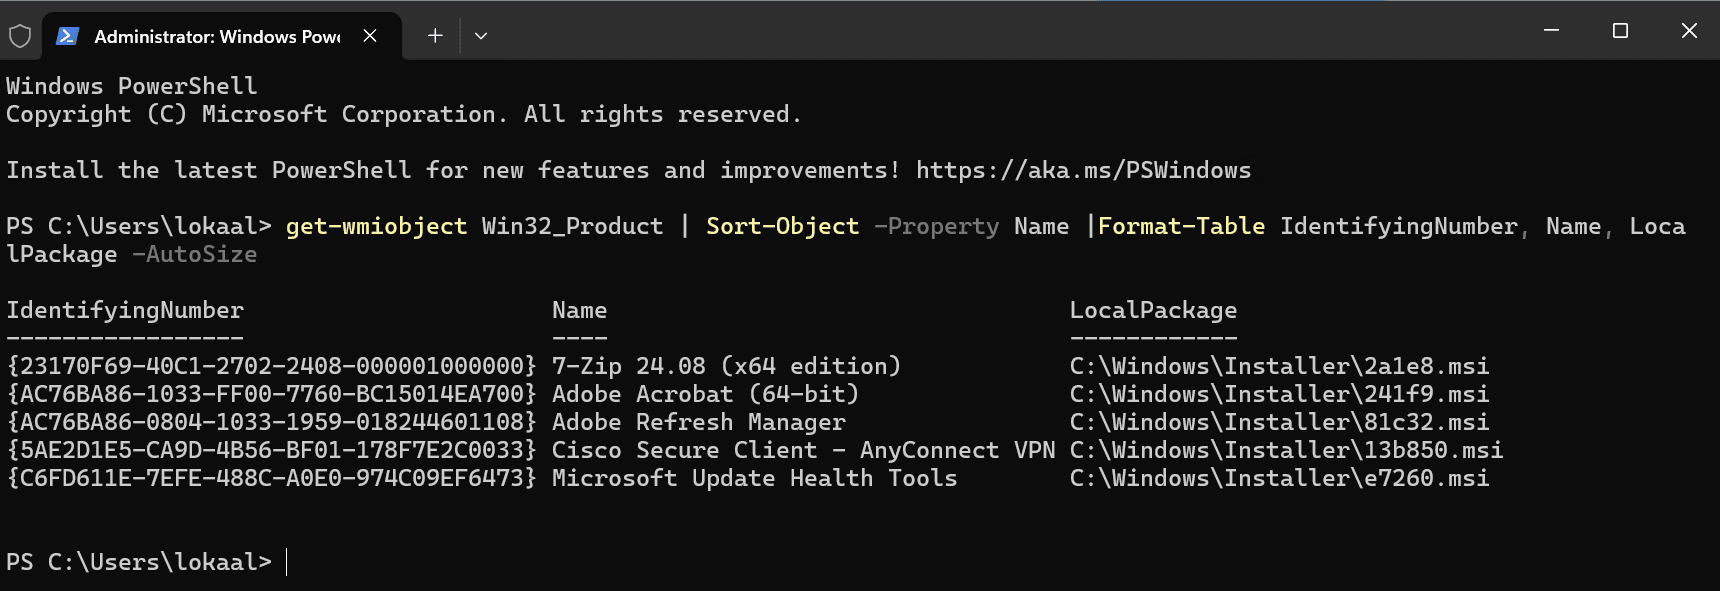
I ended up with this:

The next step allows IT admins to add additional information, like adding an icon or notes if you want. You can also specify the install behaviour if you like. This step is completely optional.

The last step allows IT admins to upload the app in a compressed format like .ZIP / .RAR / 7zip.
Just drag the compressed file to the window or click the browse files link and click the green submit button.
You can track the progress from the Discover360 Dashboard:

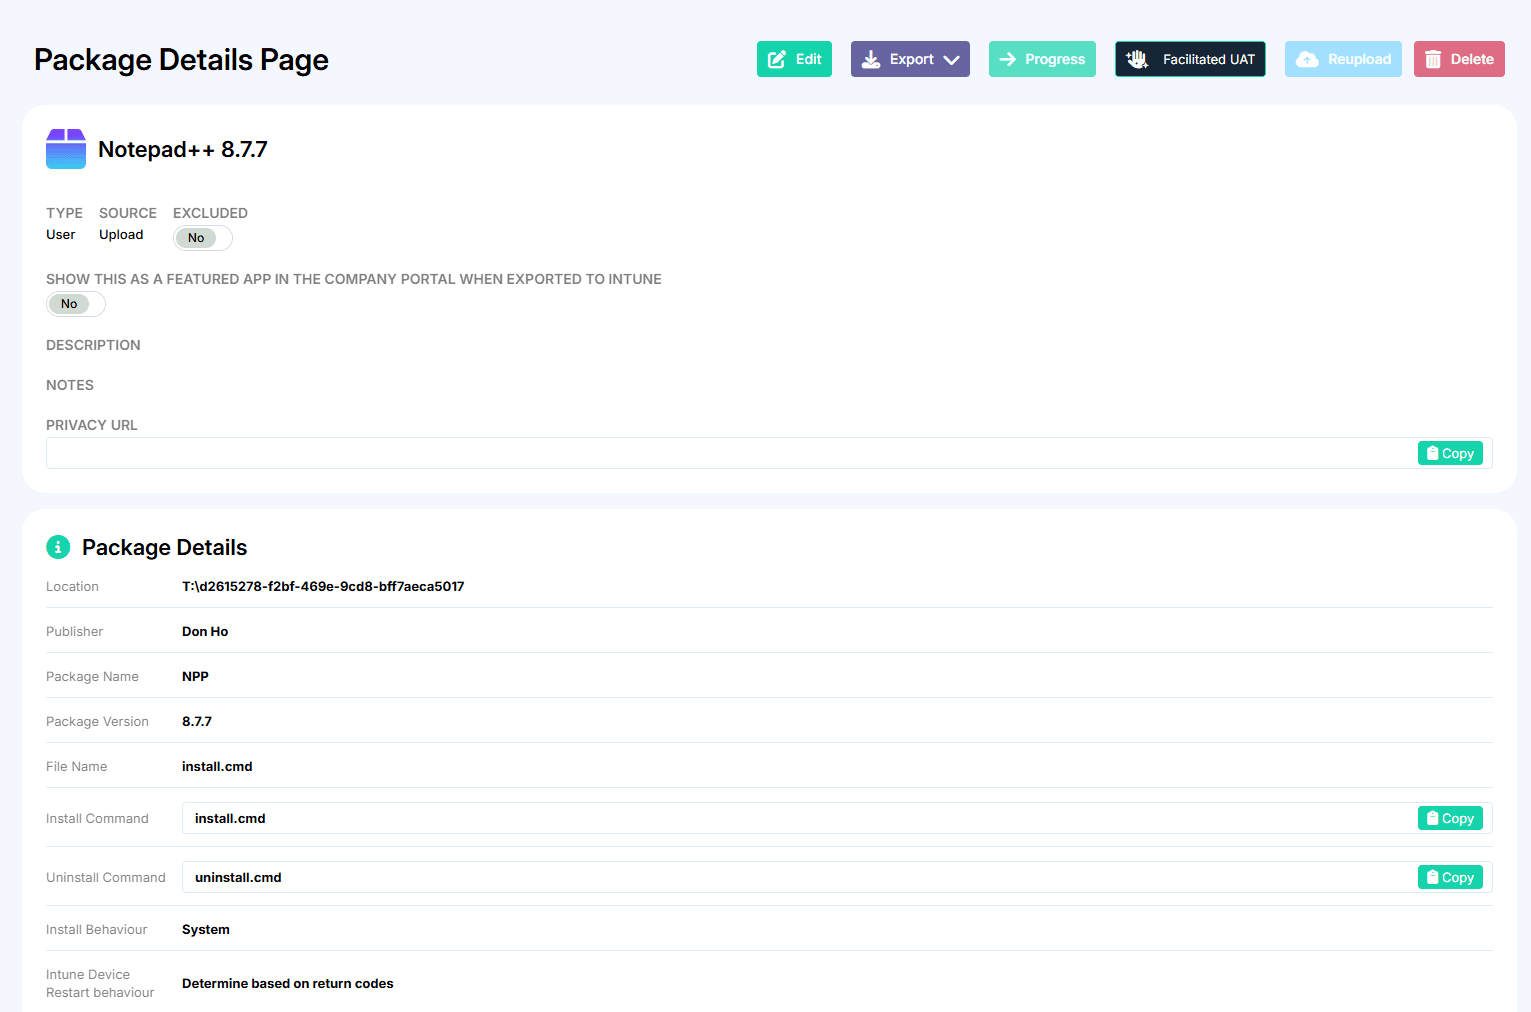
We can get detailed information about the app once it passes the discovery phase in the pipeline. Go to the Discover360 Dashboard from the menu and click on the name of the app. This will open the Package Details Page which by default is read-only. We do have an edit button on top of the screen in case we need to change certain details. Like a typo somewhere or in case the wrong executable is selected for the Smoke Test.

Let’s take a look at the information that the Package Details Page provides. I will add a couple of screenshots since there is a lot of information:
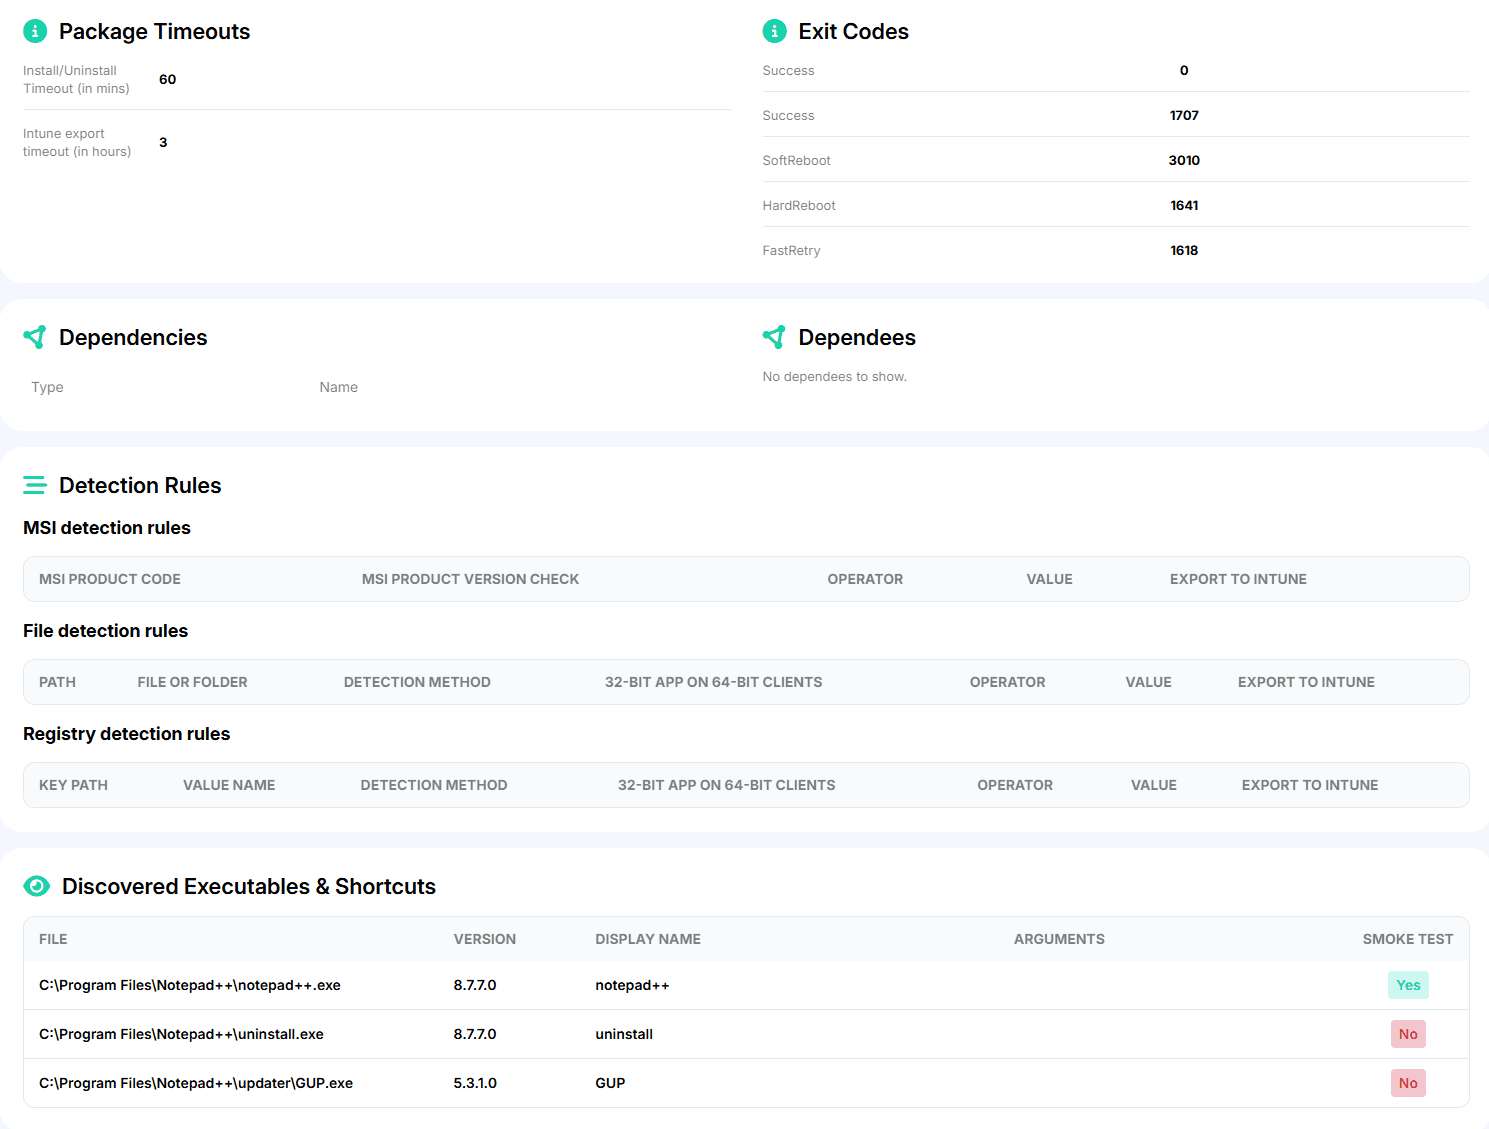

Click the edit button and change any information that you need to. You can easily change the install or uninstall command or change the executable that is selected for the Smoke Test:

Once finished, click the green Save button. The pipeline continues to do it’s work by completing the Baseline IST (Intelligent Smoke Test) and Onboarding steps.
Baseline Intelligent Smoke Test
Packaging an application is great, but knowing that it will work once packaged is even better! Rimo3 uses the Intelligent Smoke Test (IST) for this process. The IST performs the following steps:
- Deploy a fresh task runner VM.
- Install the app.
- Run all the steps in the smoke test, like determine if running the app creates a new window.
- Uninstalls the app.
- Deprovisions the task runner VM.
IT admins can get more information from this process in a couple of ways:
- Get textual feedback from the console window.
- Watch the process from a video. This video is only kept for a limited amount of time.
- View a screenshot of the desktop with the app open from the Output window.
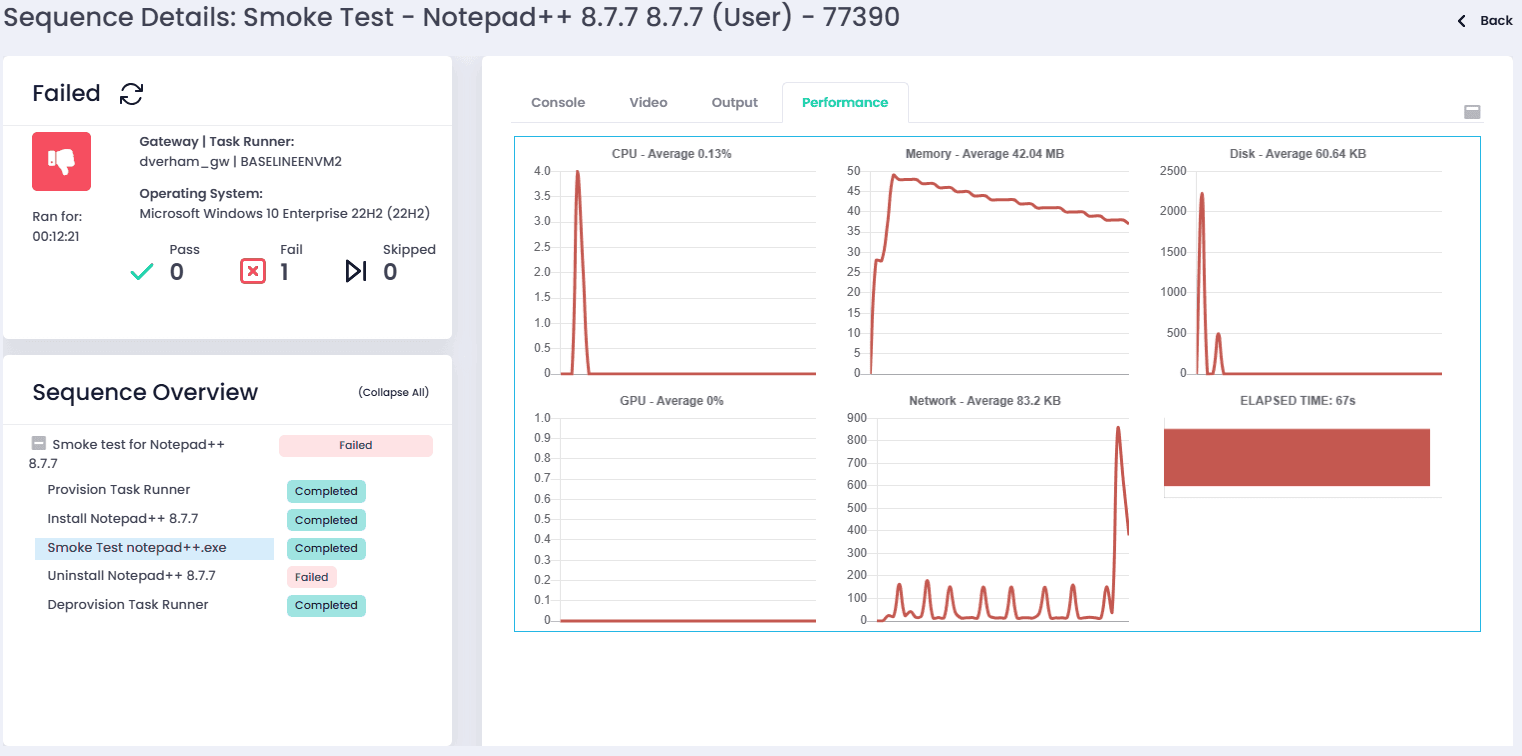
- Review various performance metrics to get an idea of the impact of the app on the target system. This is especially handy when creating an updated package and compare that information to the previous package. You can now successfully predict increase of system resources before going to production!
Let’s see if the package survived the smoke test. Here is a console output:
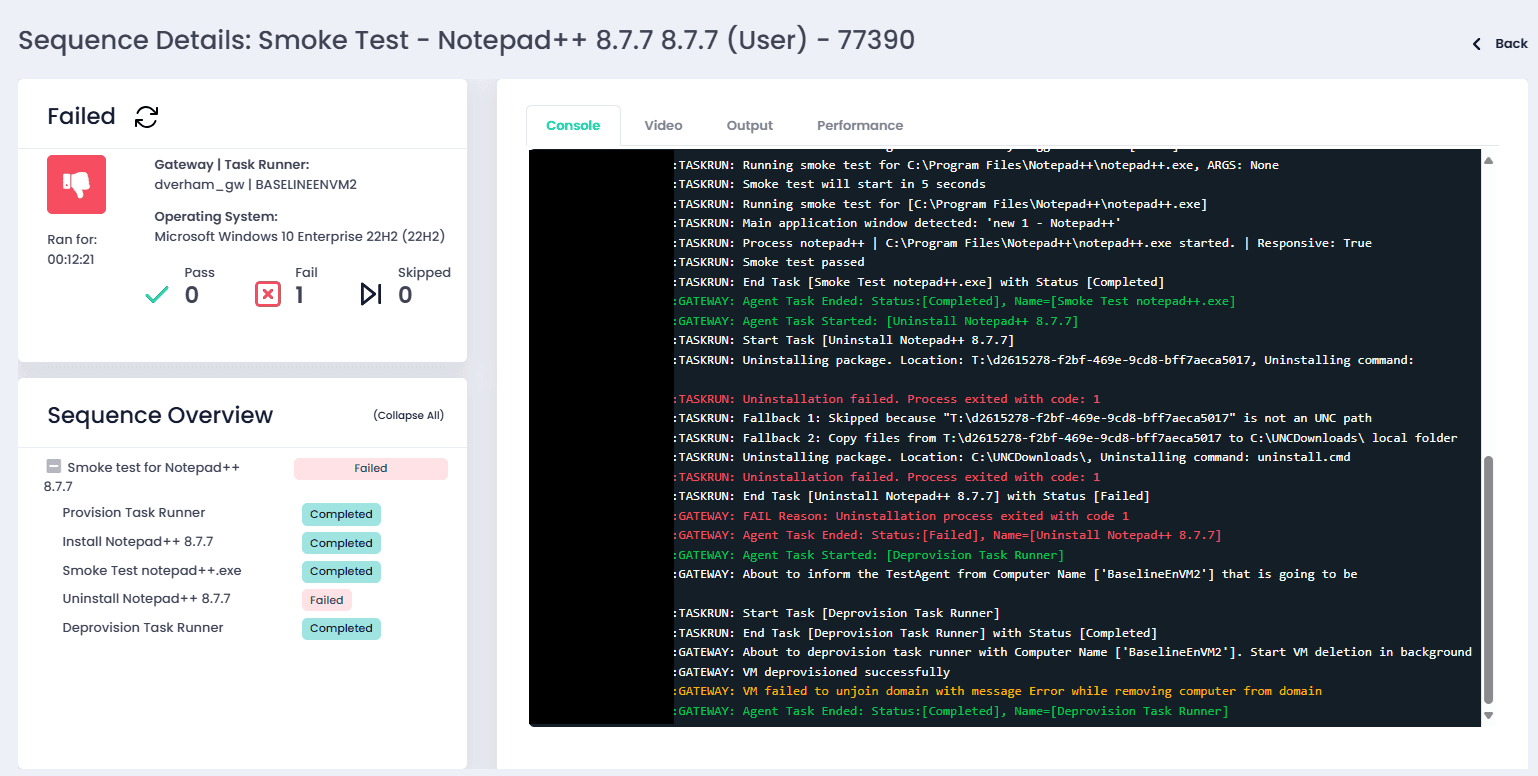
This run failed at the uninstall process. We can see that the uninstall command has run but the process finished with an error code. Since I used uninstall.cmd, I need to review the command I put into that file. Note that you can drill down to the specific part by clicking on the step in the sequence overview.
The Output tab shows a screenshot of the task runner in a specific step. Here is a screenshot of the task runner during the installation step:
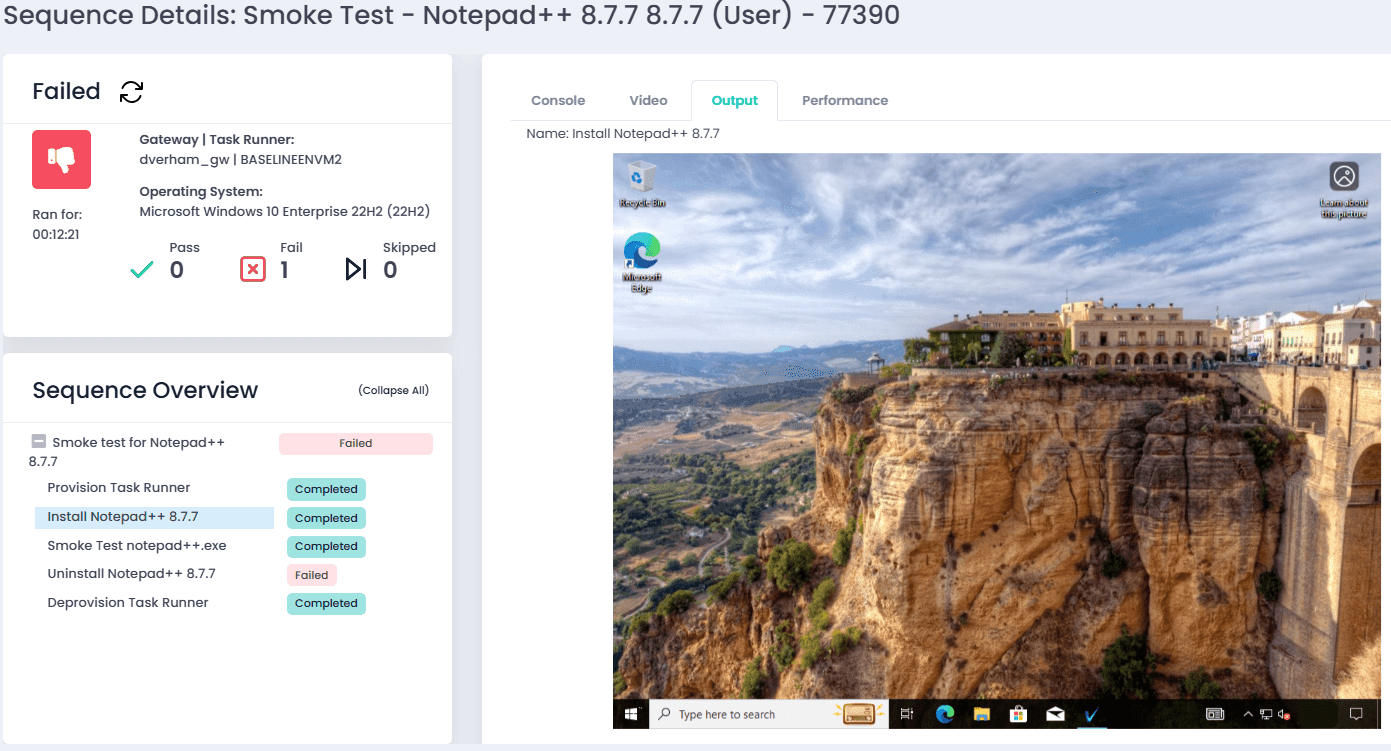
There are no issues while installing the app. Let’s take a look at the Smoke Test step:

You can find more metrics about resource consumption in the performance tab:
But where do you go from here? Once the package goes through the onboarding process, you have a couple of options:
- Download the package to your computer as a .intunewin file.
- Export the package directly to Microsoft Intune.
- Export to a WPM repository.
- Or modernize your application. Rimo3 Workspace360 support modernization scenarios to .MSIX or capture the app and save it as an App Volume or FlexApp One.
Do you to learn more on the modernization process? Then make sure to follow this series when I continue with part 2: how to modernize apps using Package360 by Rimo3.