What’s up, everyone!
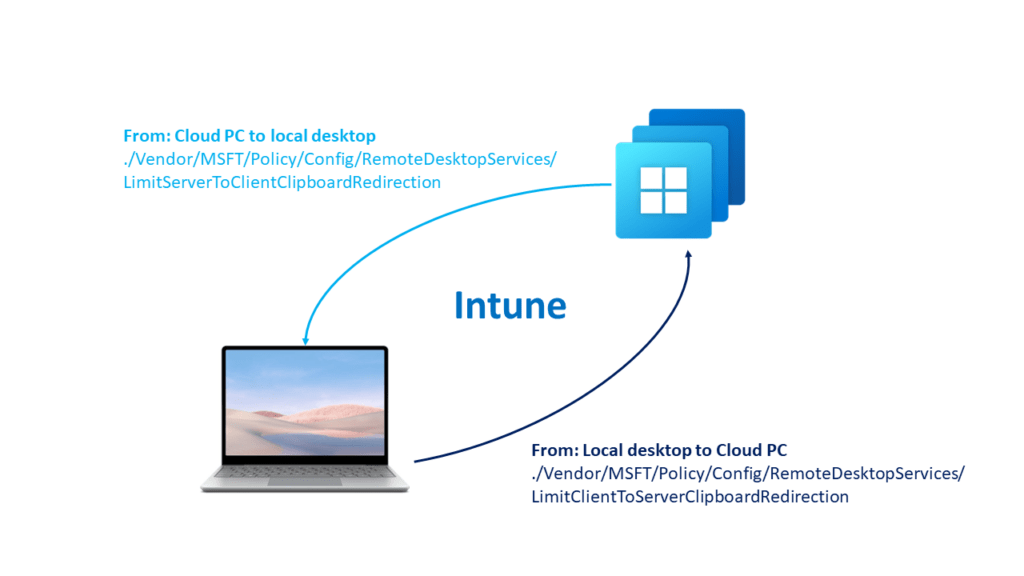
You probably know that it’s possible to disable clipboard redirection when connecting to a Cloud PC. When configured, it either works or it does not. So it makes a lot of sense to have some more granular control over the clipboard, right? Let’s say you want to be able to upload documents from the local PC to your secure Cloud PC but you want to prevent downloads from the Cloud PC. That’s not possible… or is it? Good news, it actually is possible! You can not configure the clipboard settings when connecting to AVD and Windows 365.
Let’s check it out!
Prerequisites
- The Cloud PC should run Windows 11 enrolled into Windows Insider Dev channel, at least build 25898 or higher.
- Make sure that the Clipboard functionality is not blocked by another setting.
- This feature works for desktops in AVD as well as Cloud PCs. For this demo I will use my Cloud PC. If you are looking to configure these settings for Azure Virtual Desktop, you can also use the latest AVD administrative templates (link).
Configuring the clipboard
Let’s start with blocking the clipboard entirely and then compare it to the new feature.
Blocking the clipboard is done via a configuration policy in Microsoft Intune, Devices, Configuration, Policies, + Create. Make sure to use the settings catalog and search for Device and Resource Redirection. Add and enable the Do not allow Clipboard redirection setting:
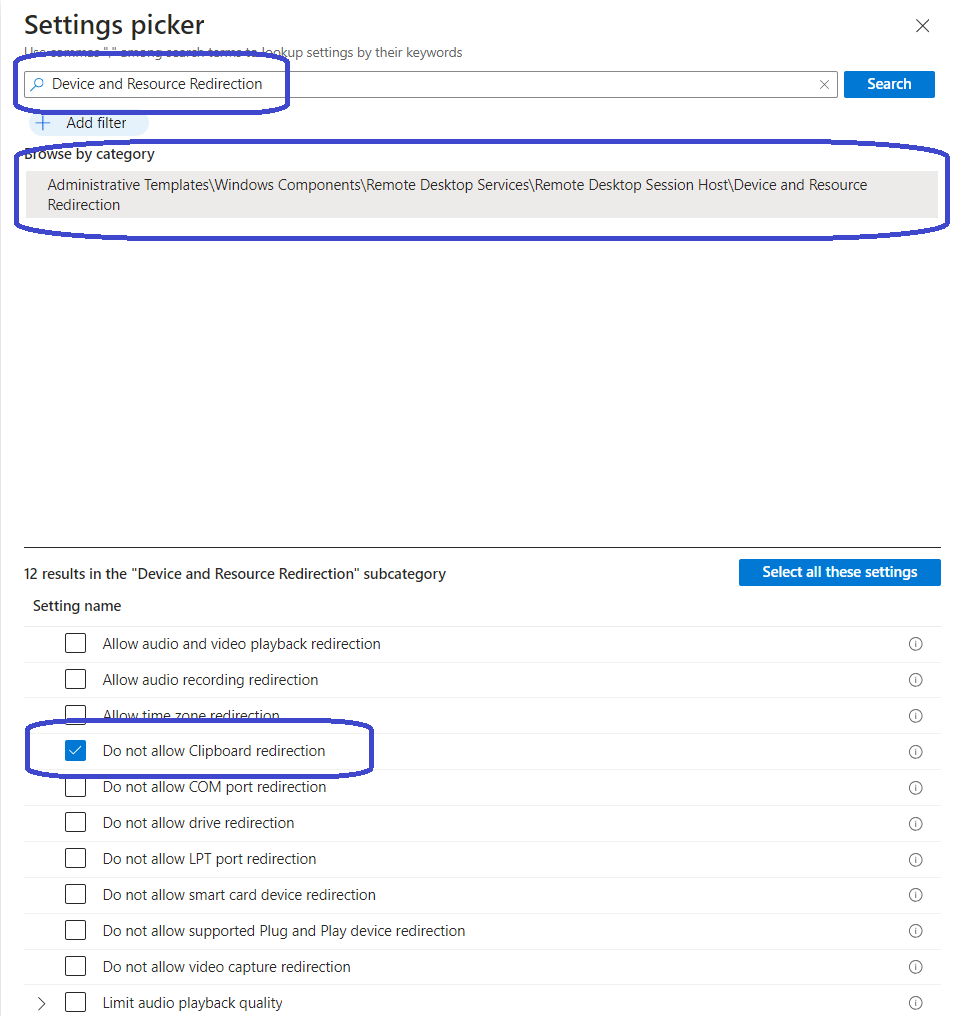
Finish up by creating and assigning the configuration policy. As mentioned before, this will block the clipboard entirely which means no uploads and downloads.
Using the new method we can configure clipboard settings from the Cloud PC to the local desktop and from the local desktop to the Cloud PC. Each setting can be configured as follows:
- Disable clipboard transfers from session host to client.
- Allow plain text.
- Allow plain text and images.
- Allow plain text, images and rich text format.
- Allow plain text, images, rich text format and HTML.
Using Microsoft Intune
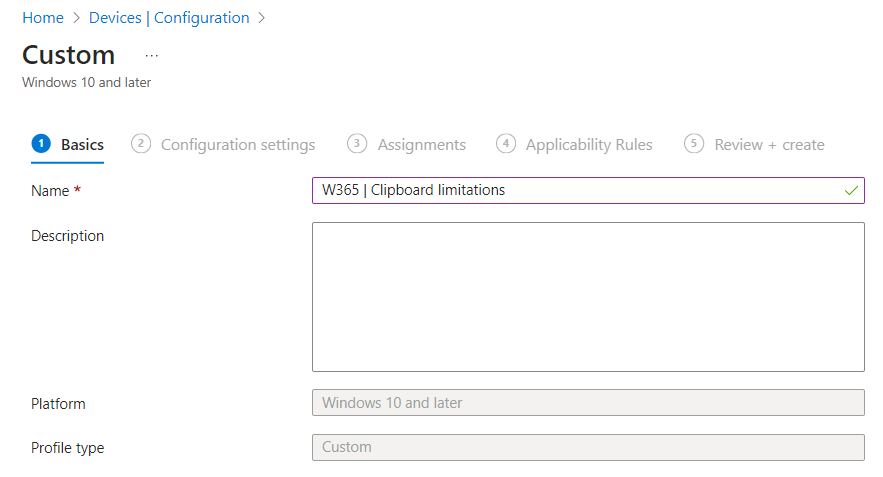
Let’s do an example of configuring both settings in Microsoft Intune. Go to Devices, Configuration, + Create, New Policy, Windows 10 and later, Templates, Custom.
Give the policy a name and continue.
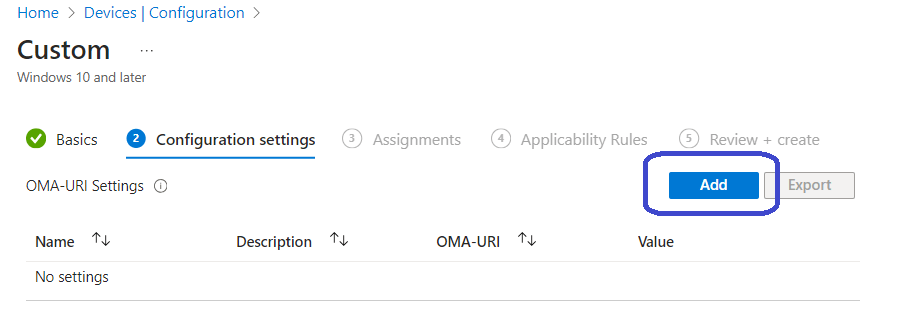
This is where we can add our settings. Click the Add button to get started:
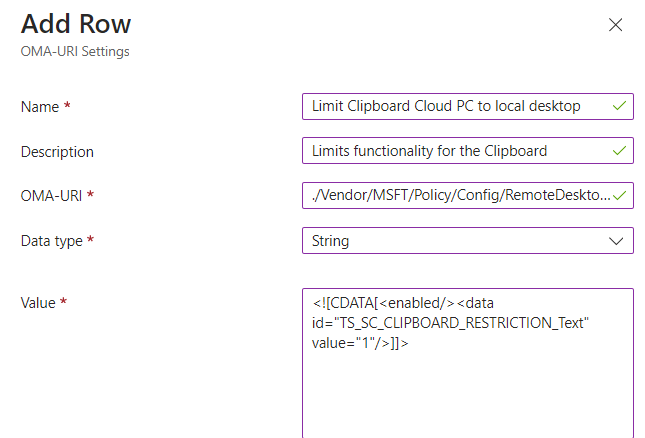
All you need to do is fill out the following:
- Give the setting a name.
- Give the setting a description.
- Copy the correct OMA-URI URL.
- Select String and the data type.
- Copy the correct value.
- Click the Save button to save this specific setting.
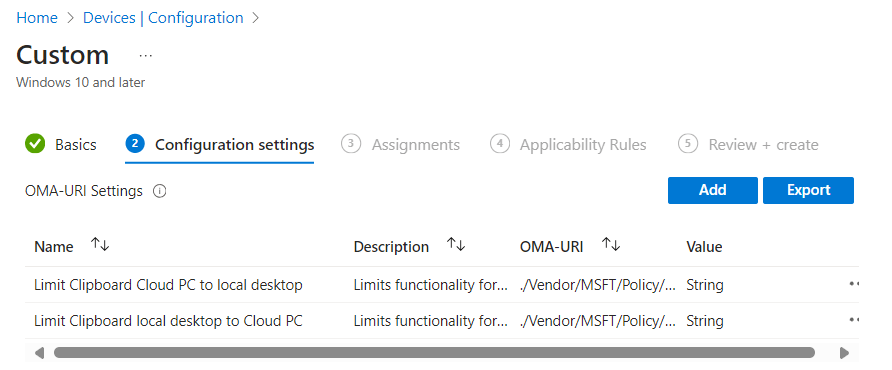
Click the Add button again and add the second setting. As a demo I chose to allow everything except HTML:
Now both settings are configured:
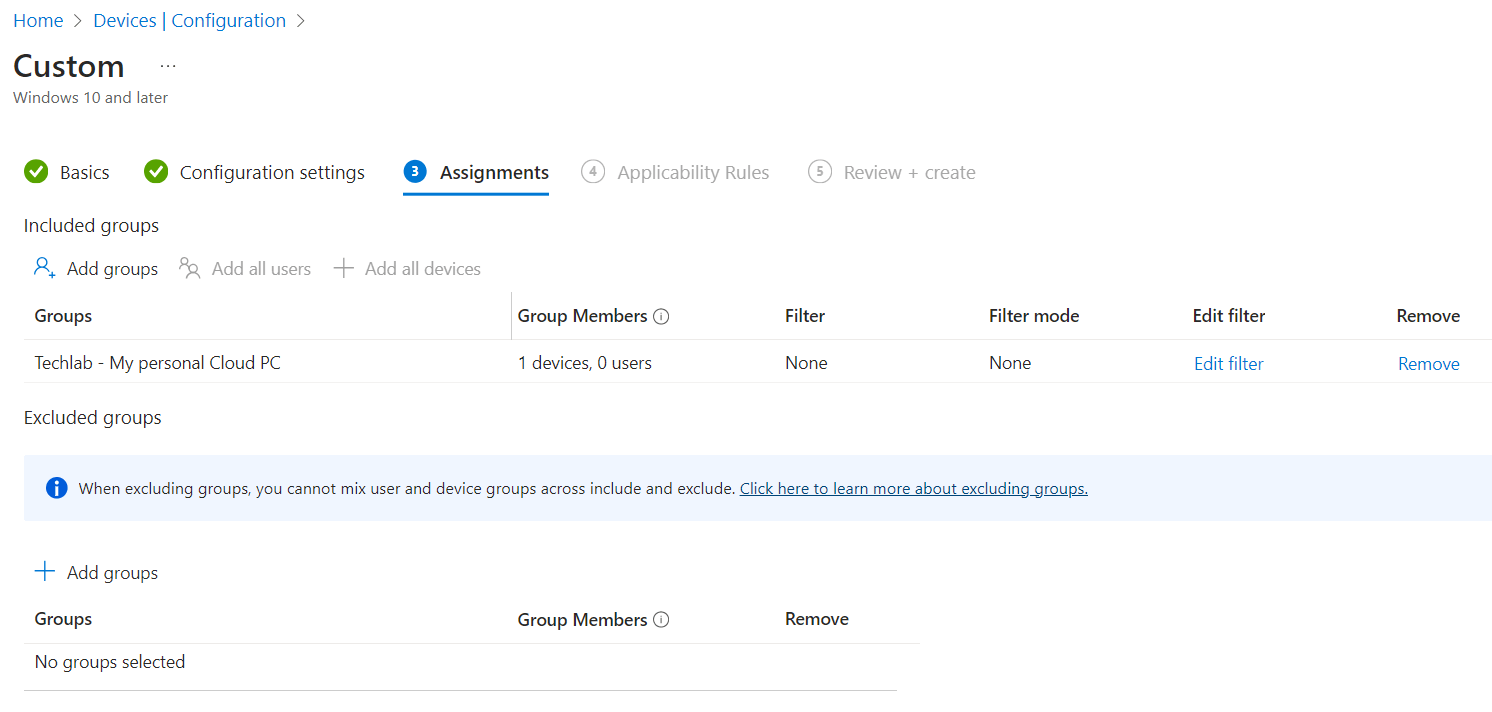
Now assign the policy to your Cloud PCs:
Finish up and create the policy and make sure that the new policy is applied to the Cloud PC.
Using the local registry
Perhaps editing the registry is the fastest way if you just want to test the functionality on a single device, right?
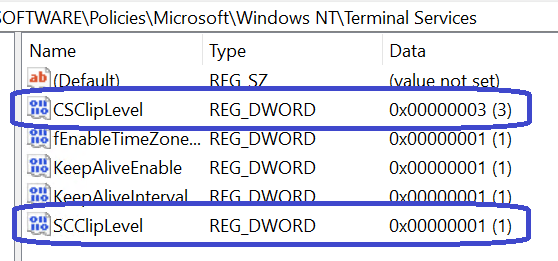
To do so, just sign into your Cloud PC and open up registry editor. Since this feature works for AVD as well as Cloud PCs, you can either configure this feature for all users or the currently signed in user. So to me it makes a lot of sense to use the HKCU location since Cloud PCs are assigned and should be used by one user only. Navigate to:
HKCU\Software\Policies\Microsoft\Windows NT\Terminal Services
Create a REG_DWORD with a name of:
- SCClipLevel: Cloud PC to local desktop
- CSClipLevel: Local desktop to Cloud PC
Make sure to use a String type and select one of the following values:
0 – Disable Clipboard transfers
1 – Allow plain text
2 – Allow plain text and images
3 – Allow plain text, images and RTF
4 – Allow plain text, images, RTF and HTML
I ended up with something like this:
Let's do some testing
Now it’s time to test the functionality. I created a file on the Cloud PC called Cloud PC file 1.txt and I added some text. I copied that text on the Cloud PC and copied it over to my Word app on my local device:
The text automatically appeared when I highlighted the paste option so it works like a charm.
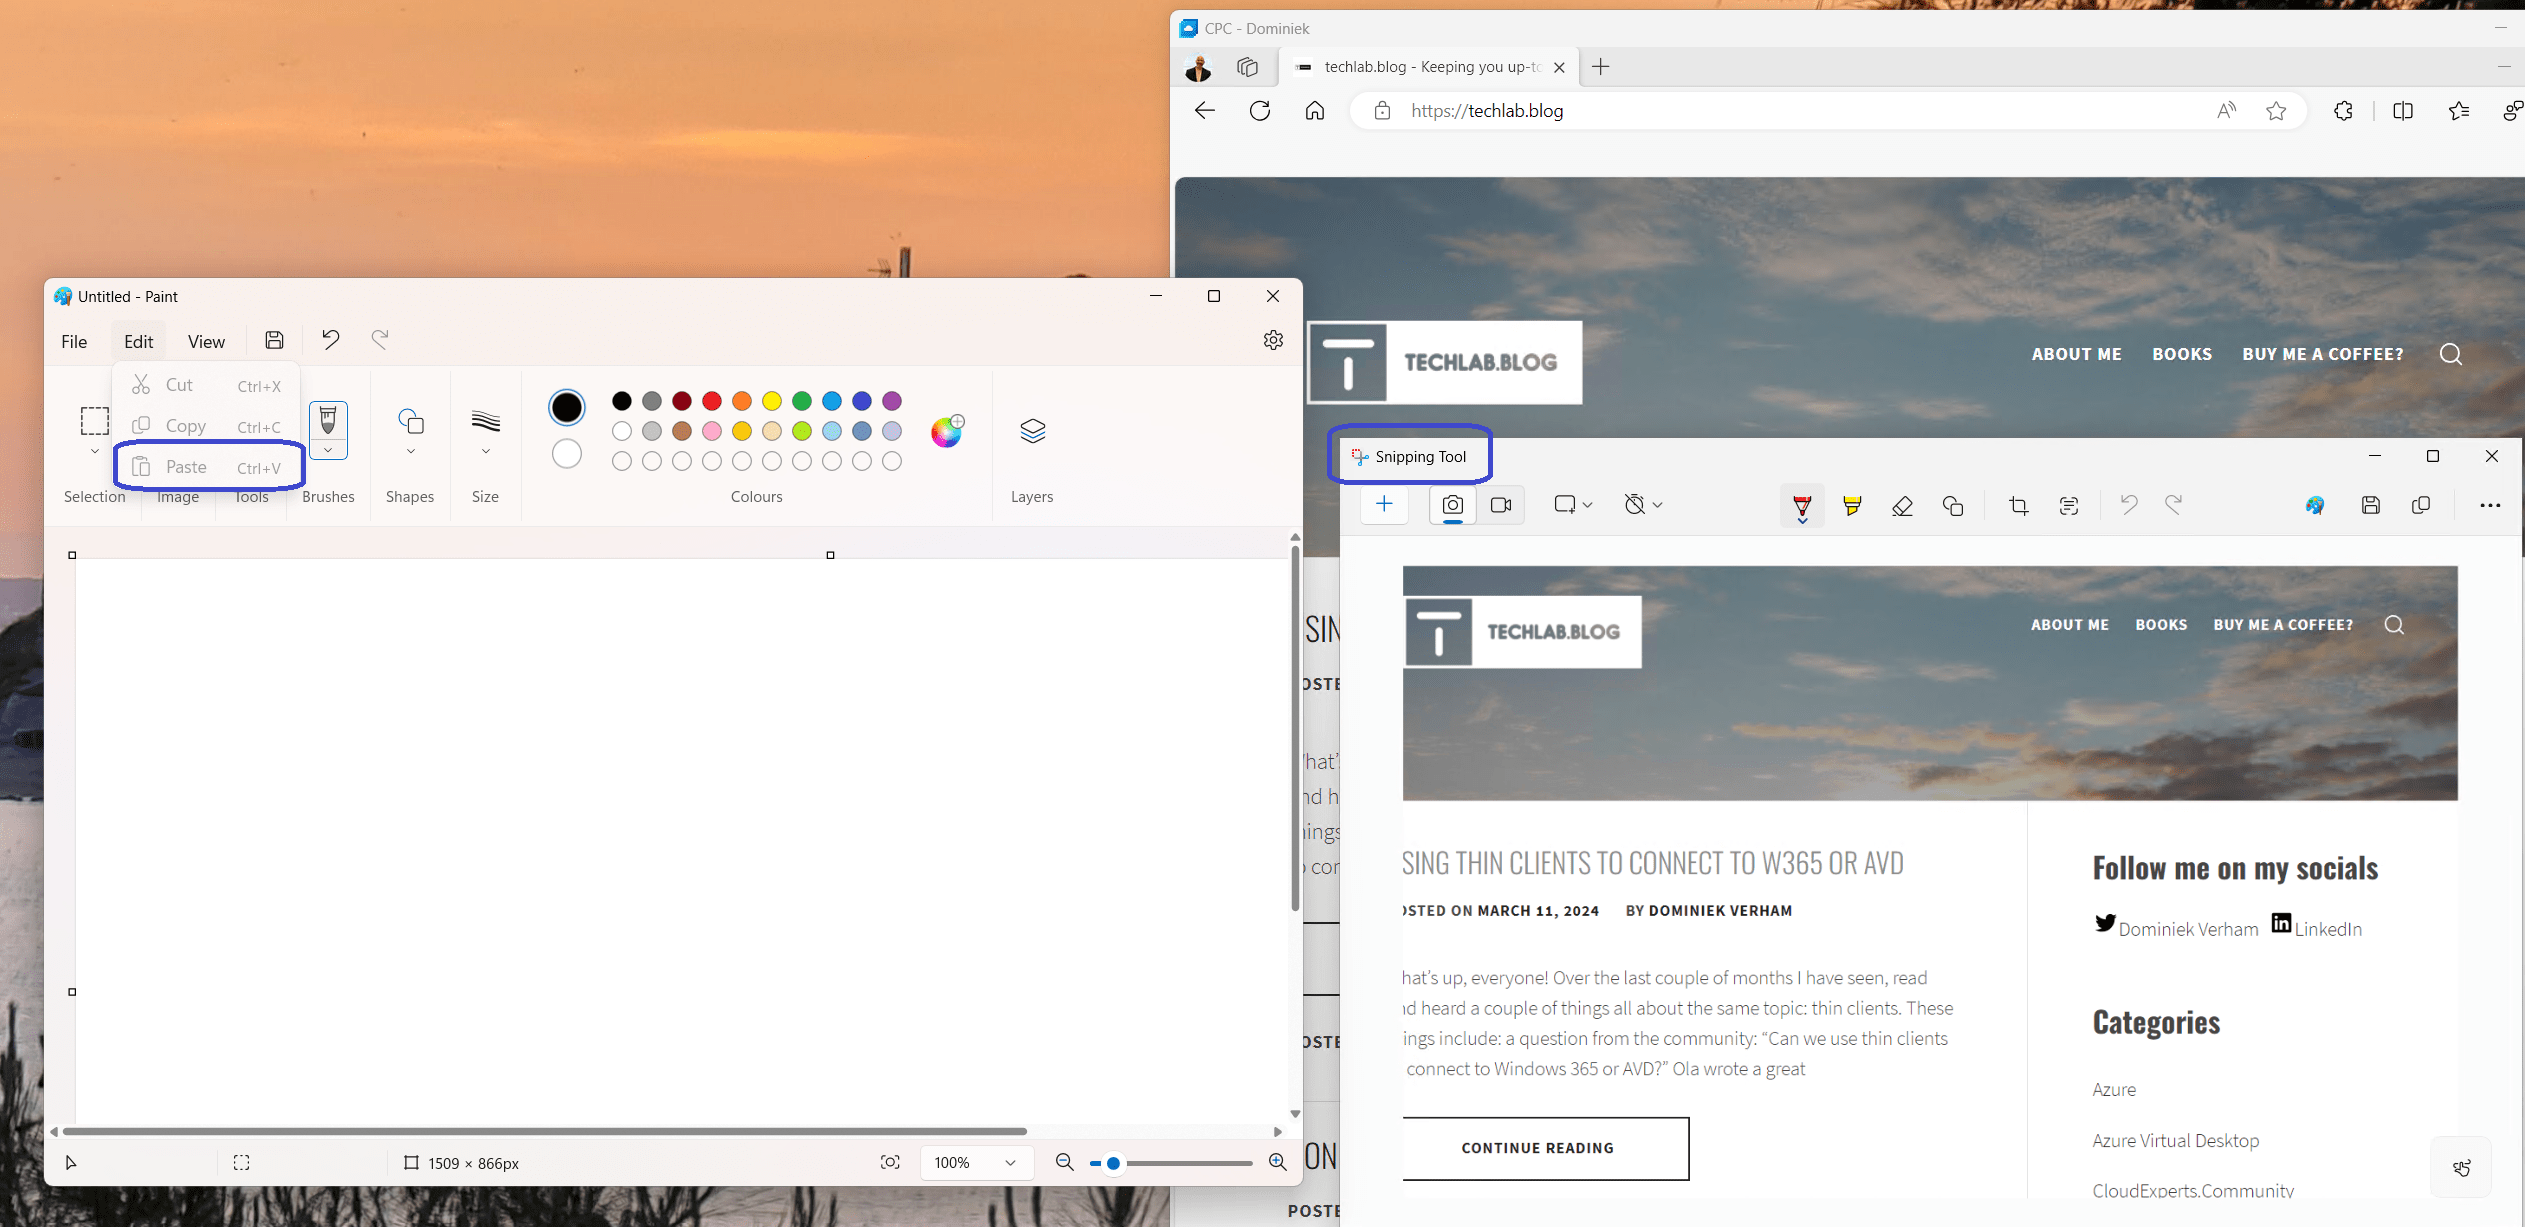
Let’s do another test, I did not allow images to be copied using the clipboard. So from my Cloud PC I opened the snipping tool and create a screenshot from my blog. I copied it on the Cloud PC side and tried to paste in locally into Paint:
As expected I was not able to paste the image into Paint. So, all good!
Now let’s test the other way around, from the local device to the Cloud PC? Remember that I chose option 3 – allowing text, images and RTF to be copied over using the clipboard.
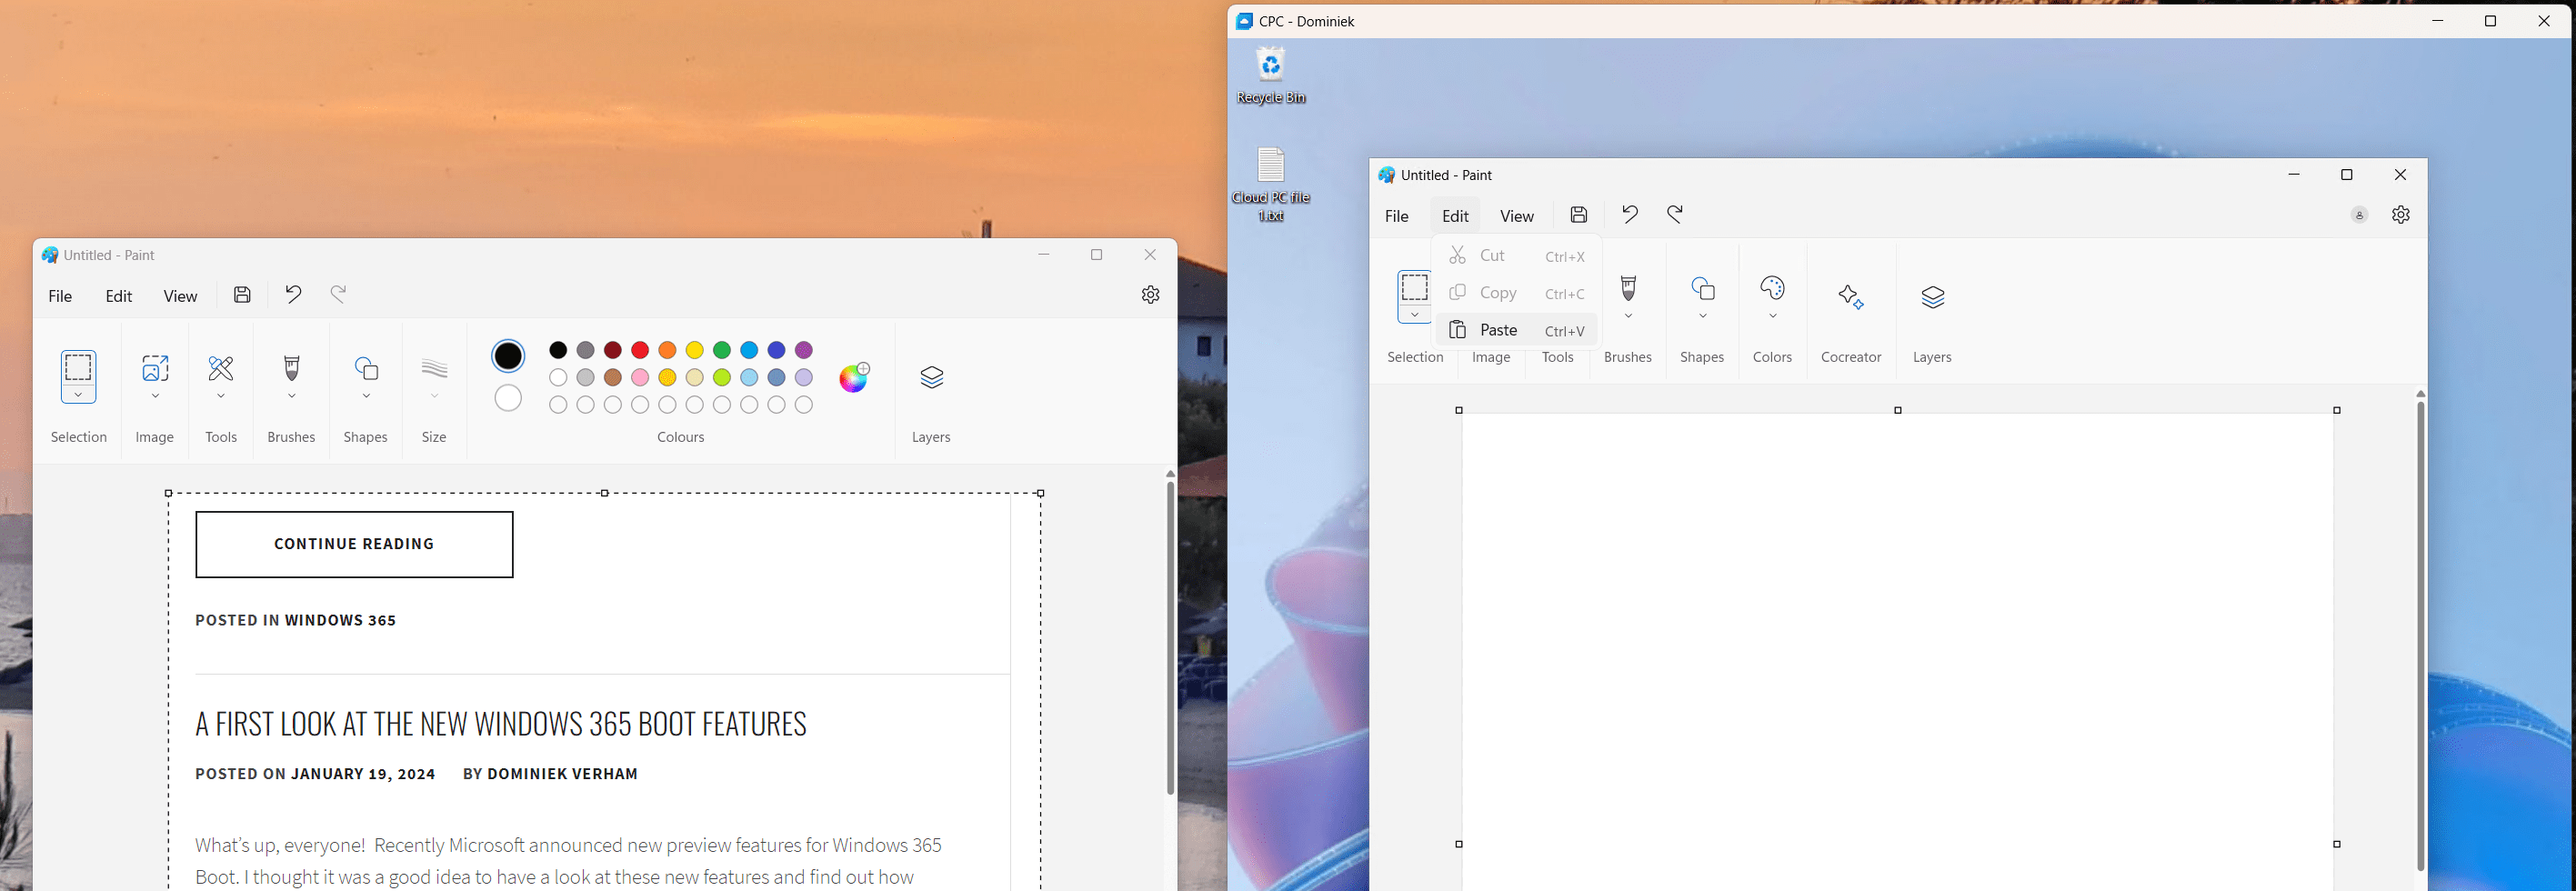
So I made a screenshot using the local snipping tool and saved it locally into paint, because I can’t create the second snip for this post otherwise 😉 Next I moved to the Cloud PC and checked if the Paste option was available in Paint.
As you can see, it does work this time!
To me this feels like one of those small features that make a big impact. Having more granular control over the clipboard is great tool for an IT admin to have in their virtual toolbox to increase security. Well done Microsoft!
Resources
I used the following resources for this post:
What’s new in Windows 365 Enterprise | Microsoft Learn
Configure the clipboard transfer direction in Azure Virtual Desktop | Microsoft Learn
Special shoutout to my friend Travis Roberts for creating an awesome video on this feature for AVD
Share this:
- Click to share on LinkedIn (Opens in new window) LinkedIn
- Click to share on X (Opens in new window) X
- Click to share on Facebook (Opens in new window) Facebook
- Click to share on WhatsApp (Opens in new window) WhatsApp
- Click to share on Telegram (Opens in new window) Telegram
- Click to print (Opens in new window) Print












One Comment
Comments are closed.