What’s up, everyone!
One of the advantages of using Cloud PC’s is that admins can easily resize Windows 365 Cloud PC’s. Admins can upgrade or downgrade the virtual hardware to give the user more power or save some money depending on the use case. As admins we used to be able to do so on a Cloud PC basis and we had to be careful to directly assign licenses to a user since group based licensing wasn’t supported. But now it is! In this post I’ll walk you through the different ways you can use to resize Cloud PC’s. Let’s get to it!
Requirements
You’ll need the following if you want to try it out for yourself;
- A Microsoft tenant.
- Different types of Cloud PC licenses.
- Cloud PC’s provisioned to user accounts and Cloud PC’s provisioned via a group.
- Windows 365 Enterprise 2vCPU, 8 GB, 128 GB.
- Windows 365 Enterprise 4vCPU, 16 GB, 128 GB.
Resizing a single Cloud PC
The first thing you want to check is the way that you’ve assigned Windows 365 Cloud PC licenses to your users. Did you assign a license directly to your end users or did you use group based licensing?
Direct assignment
It’s slightly more easy to resize a Cloud PC when you assigned a license to a user directly because you do not have to change group memberships.
Group based licensing
You can also create a group and add users to it. You can add a license to the group in which case this license will be automatically applied to every member of the group. If you chose this method, you can still resize your Cloud PC but you’ll need to perform some additional steps which I will show in the demo.
So how does this work for a single Cloud PC? Well, in my case I’ve provisioned a Cloud PC using group based licensing so I can take you through all the steps.
Sign in to the Microsoft Intune admin center and go to the Cloud PC that you want to resize. It doesn’t really matter if you go to Devices, Windows and click on the Cloud PC or go to Devices, Windows 365 and click on the Cloud PC. Either way, you’ll see the Resize (Preview) button in the ribbon on the top.
The device model property tells me that I’ve got a Cloud PC with 2vCPU, 8 GB of RAM and a 128 GB disk.
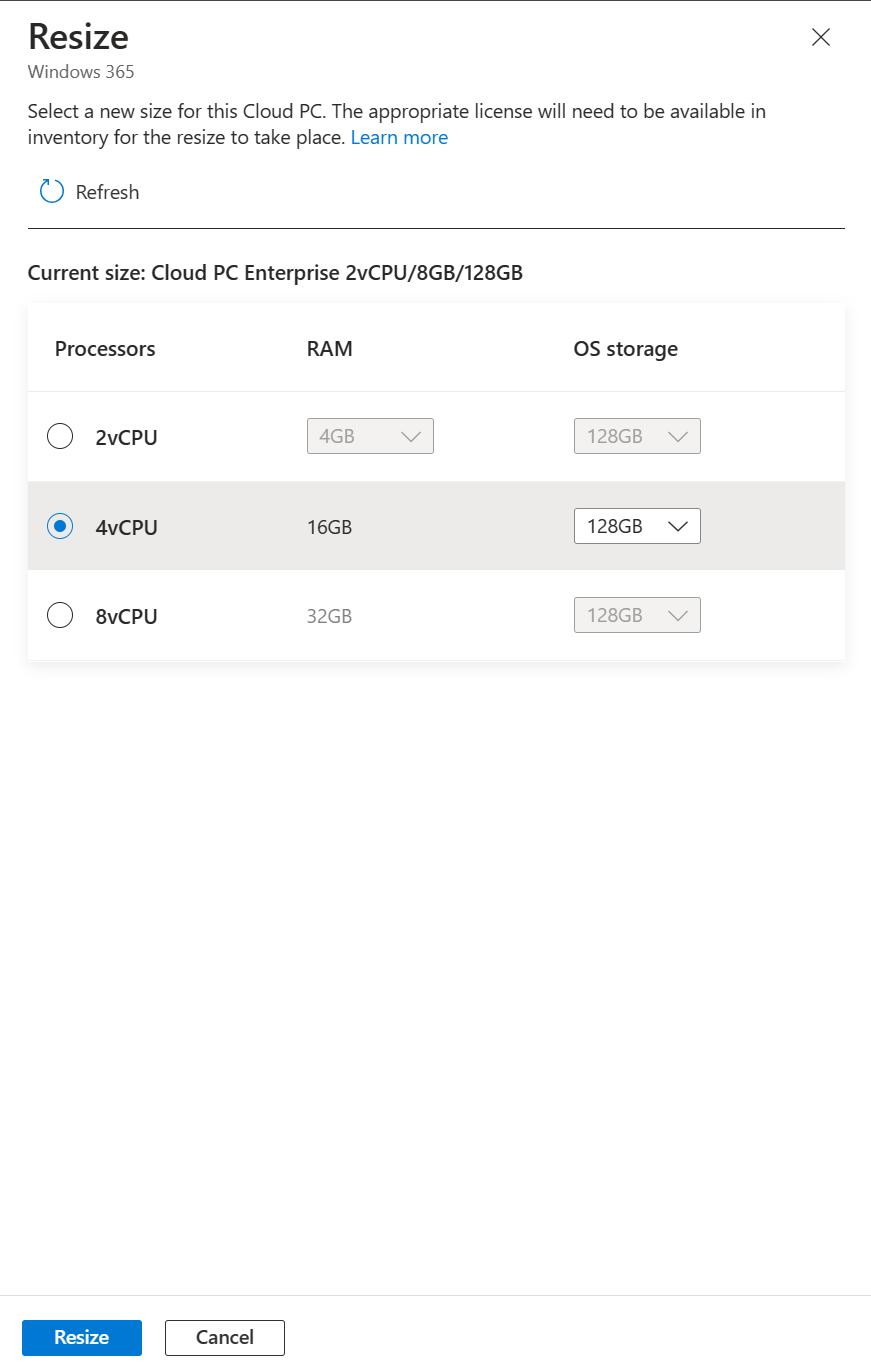
Admins can change this license by clicking the Resize (Preview) button in the ribbon on the top. A small blade will popup on the right side to help you select the new license.
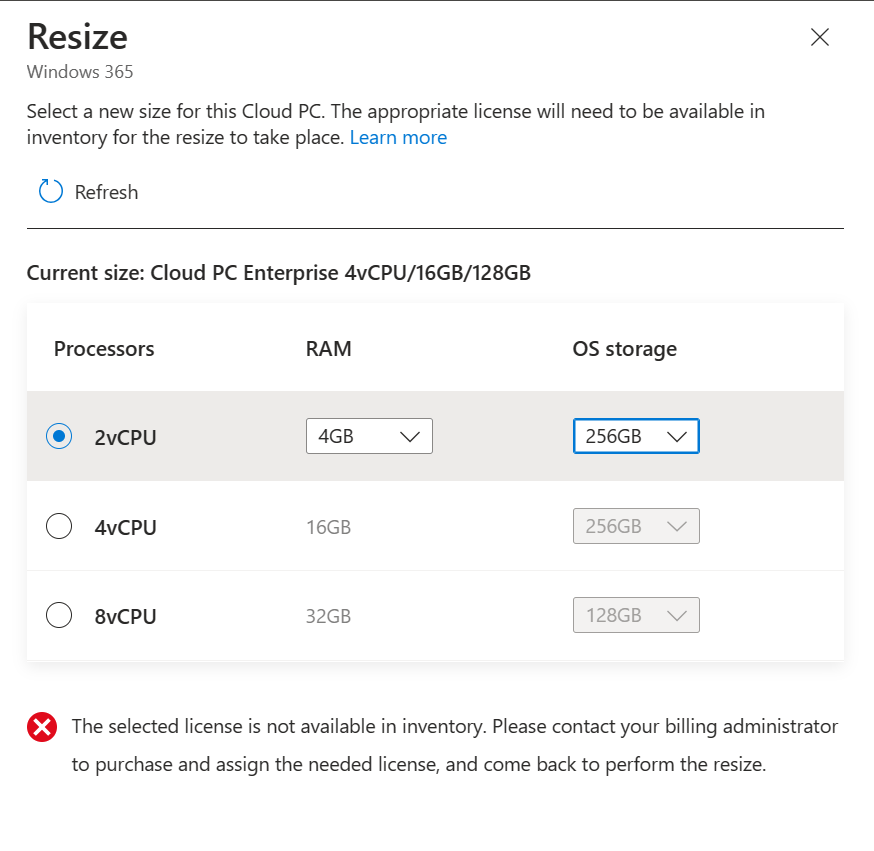
You can only select licenses that are available in your tenant even though you can click each button. You’ll get a reminder if you chose a license that is not available.
So I changed it to a 4 vCPU with 8 GB of RAM and a disk of 128 GB and the blue Resize button in the bottom lights up.
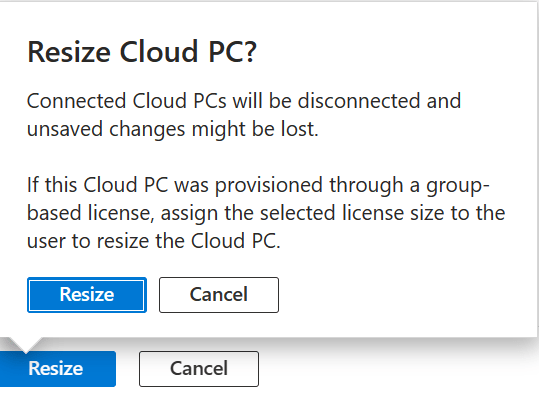
A small reminder will popup once you click the resize button.
Remember to give your user or users a heads up to save their work and sign out of their Cloud PC. The second message hints at using group-based licensing (which I used). Let’s continue and resize the Cloud PC.
If you go back to Windows 365, All Cloud PCs tab, you’ll see the status of the Cloud PC change to resize pending license. This basically means that we as admins have to change the membership of the user from the old group to the new one. So next I removed the user from the group with the license for the 2vCPU Cloud PC and I added the user to the group with the license for the 4vCPU.
Remember that you can always check the assigned licenses if you go to users and click on a specific user. Go to manage, licenses.
It will also show you how the license was configured:
- Direct: the license was assigned to the user.
- Inherited: the license was assigned using group based licensing and it will also show you the group responsible.
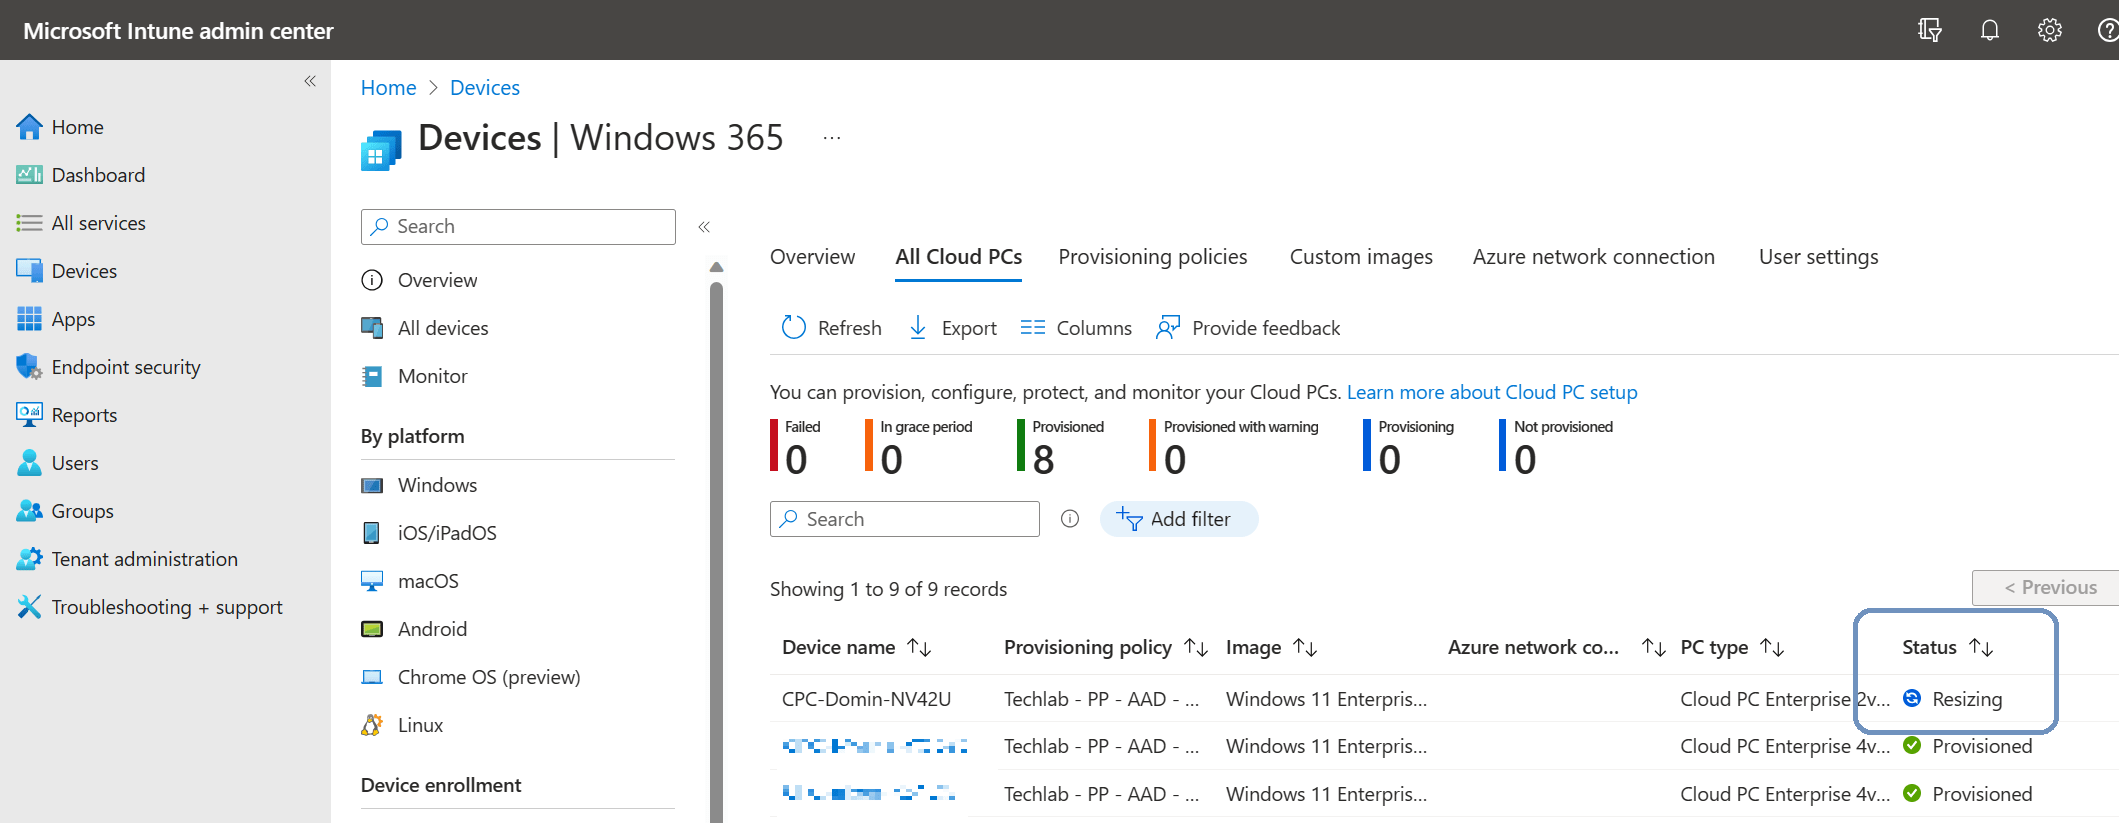
So the license is updated. Let’s checkout the status of the Cloud PC. The status has changed to Resizing. Just wait until the resizing process completes.
After a bit of time we can see that the resize process completes and the status changes to Provisioned. The user can sign in again!
Resizing Cloud PCs in bulk
Resizing a single Cloud PC works fine for the occasional resize action. But as an admin you probably want to be able to resize Cloud PC’s in bulk. Good news, that’s also possible!
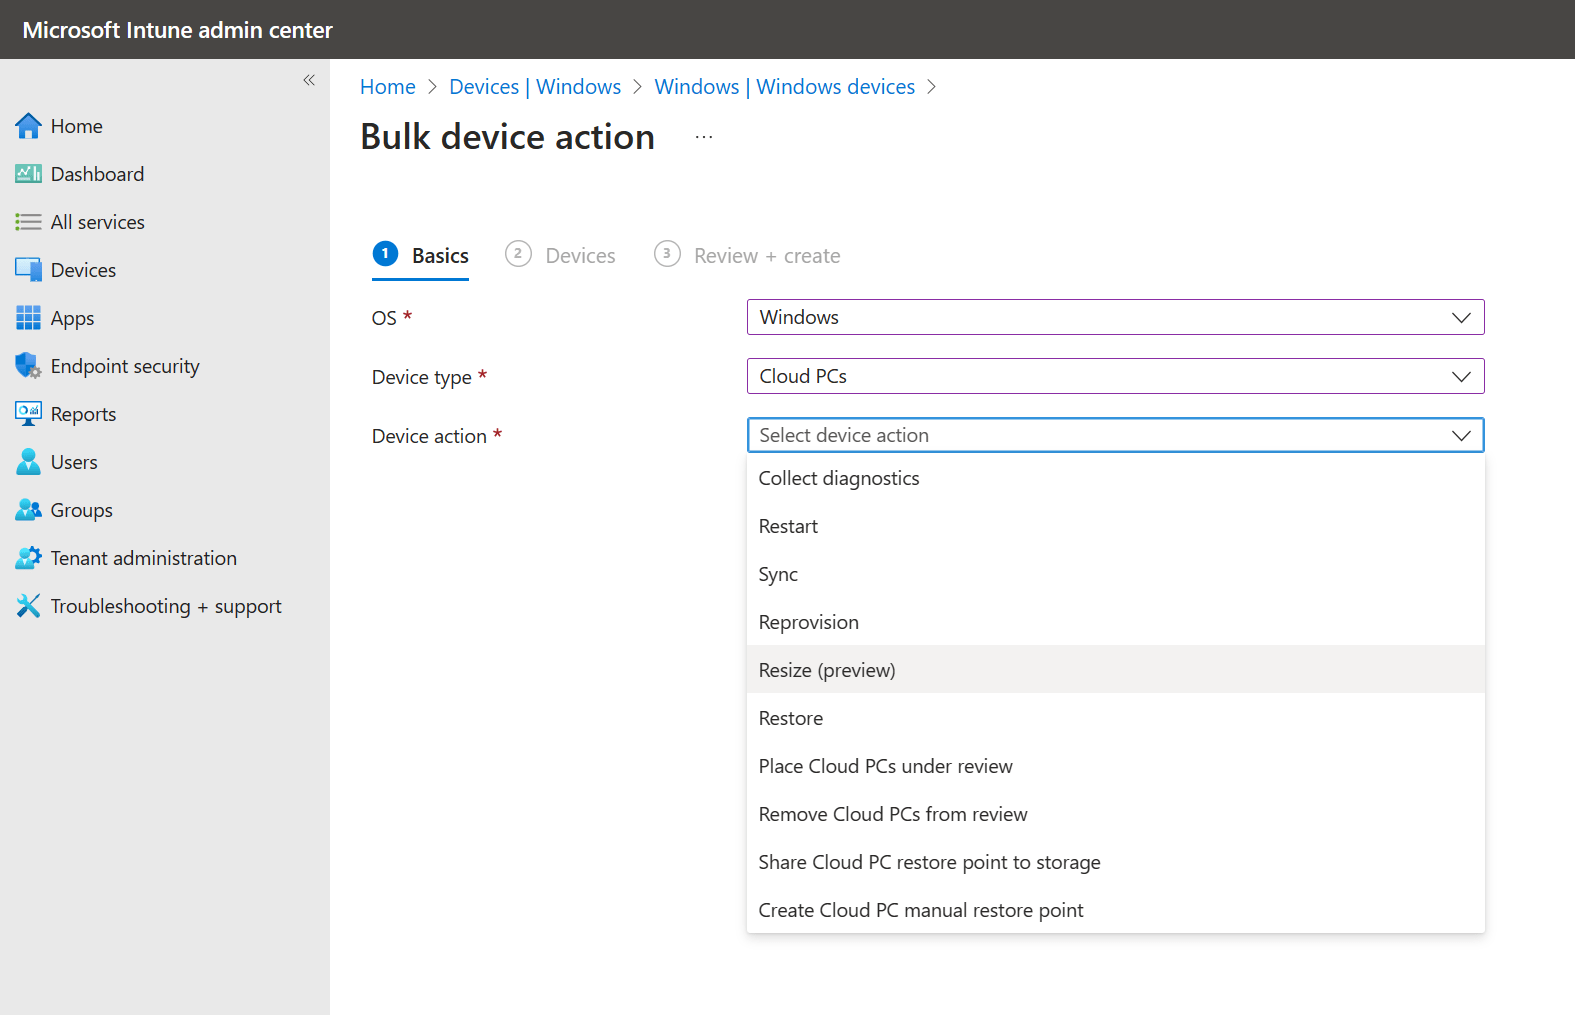
We can use bulk device actions to resize multiple Cloud PC’s at once. To do so, sign into the Microsoft Intune admin center and go to Devices, by platform, Windows. The bulk device actions button is located in the ribbon on top.
Select Windows as the OS, Cloud PC’s as the device type and Resize (Preview) as the device action.
You’ll see some other questions appear once you selected the device action. Select the source size and the target size.
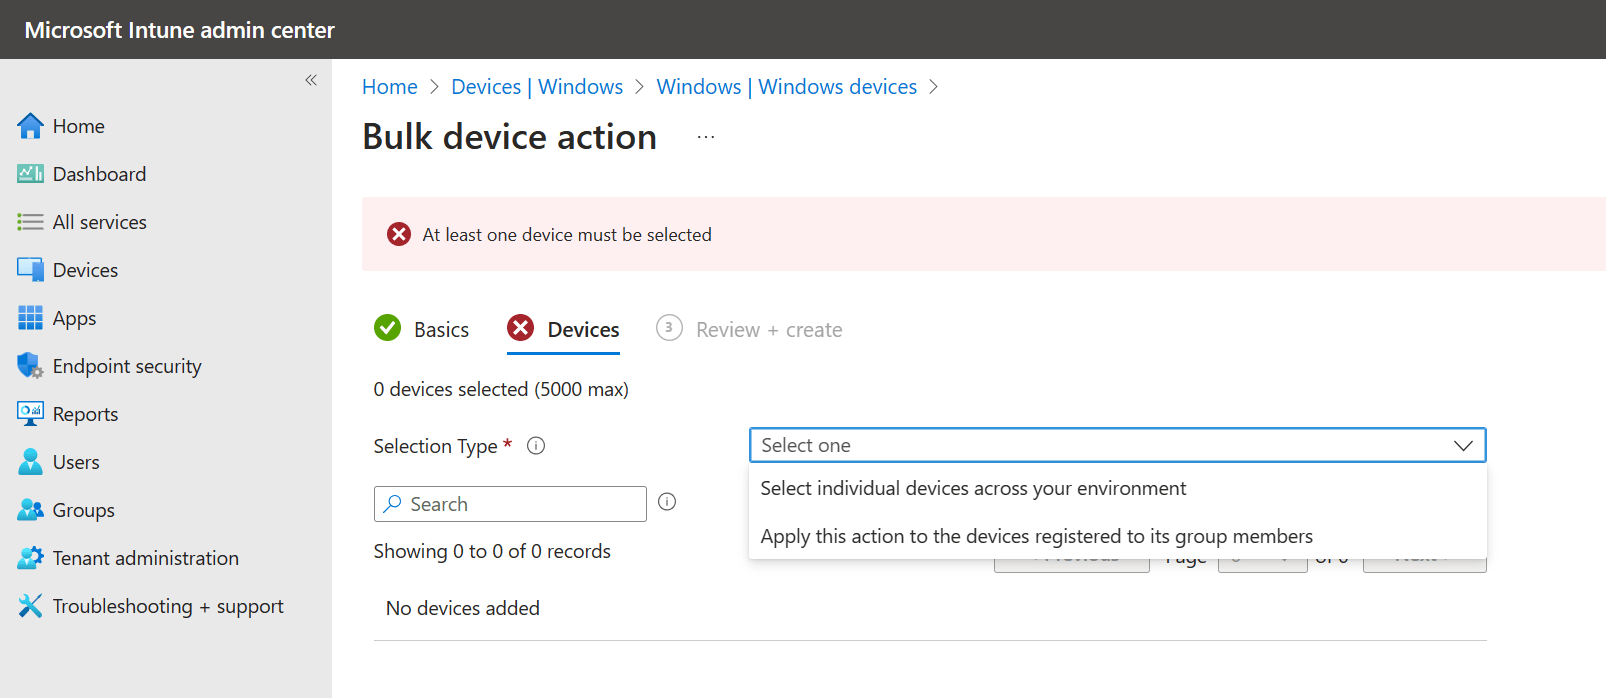
I’ve upgraded the virtual hardware in the previous demo so now I’ll see if I can downsize the hardware. Once you click Next you’ll be asked to select the devices you want to resize.
You can resize up to 5000 Cloud PC’s per batch during the preview.
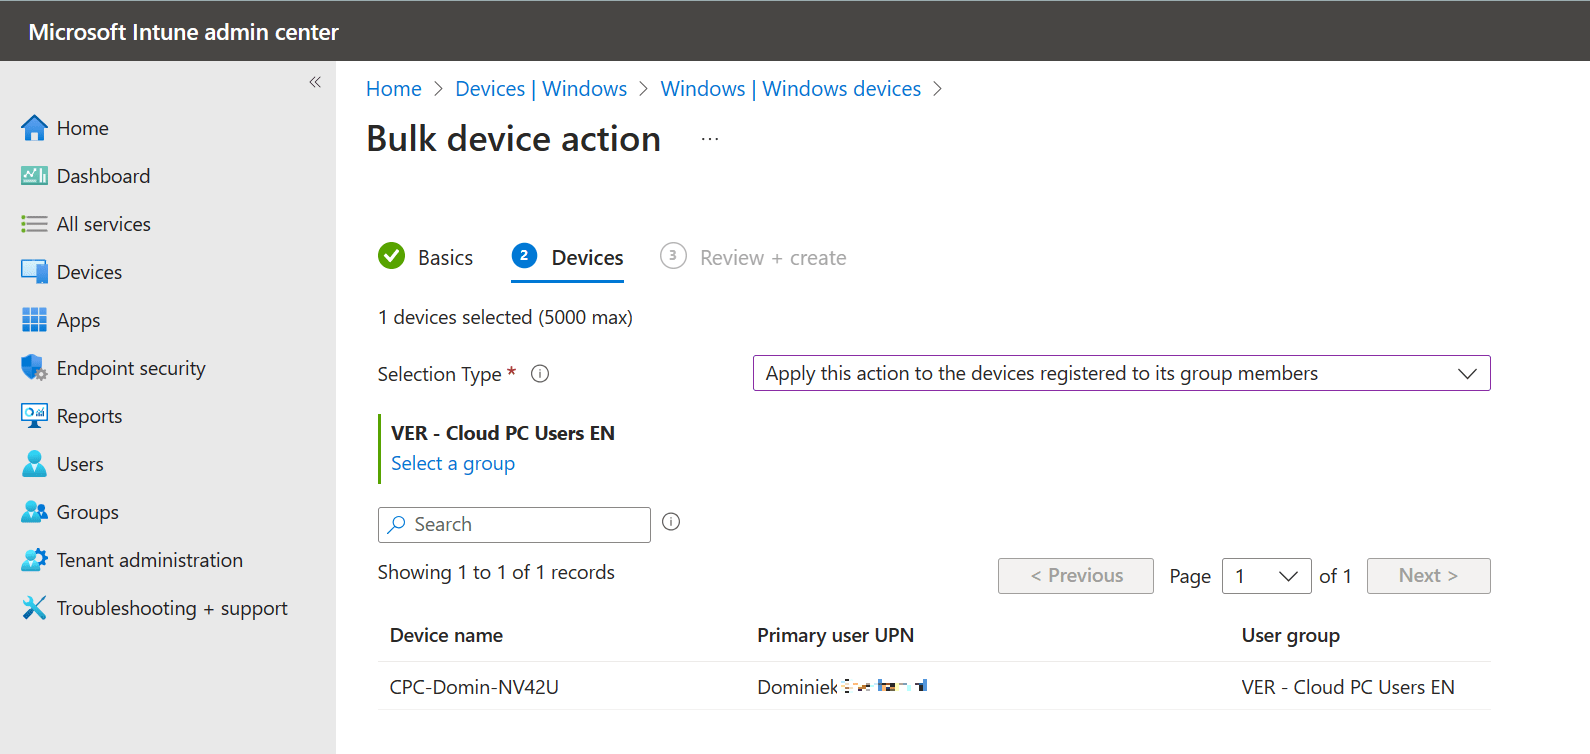
My group only contains one Cloud PC so that will work just fine. I selected Apply this action to the devices registered to its group members and selected a group. You’ll see which Cloud PC’s will be impacted by this device action.
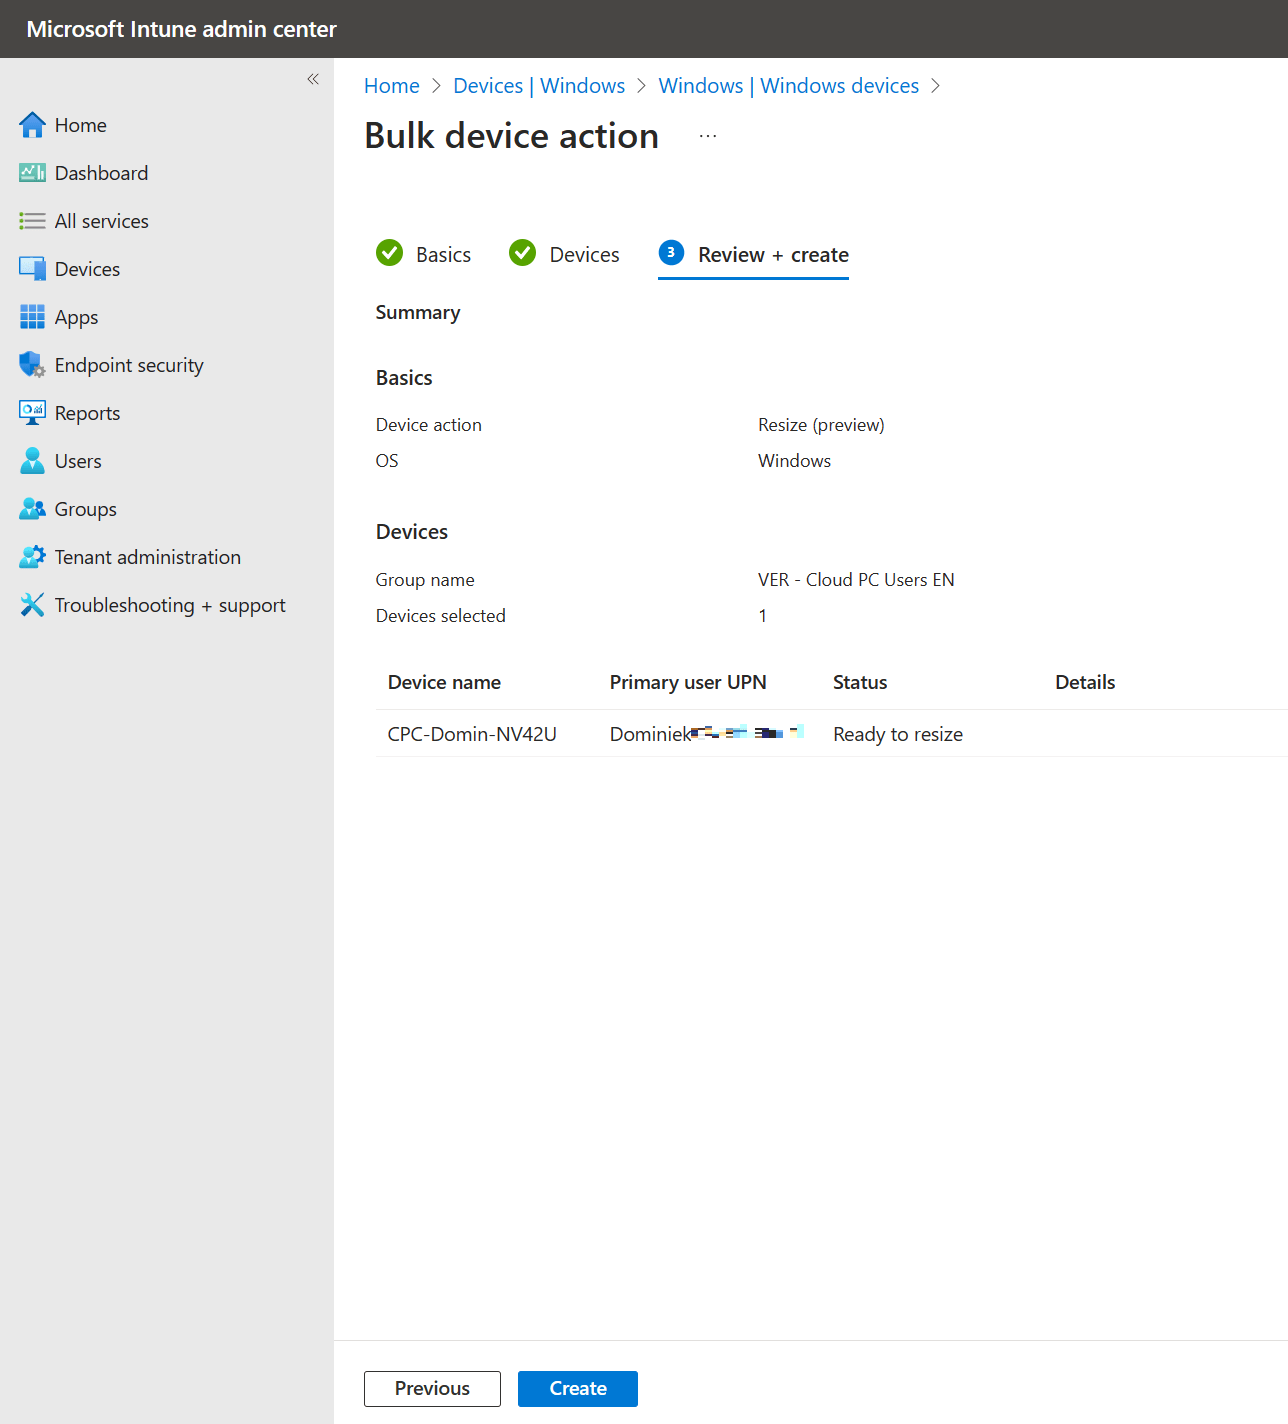
Everything looks good to go so I’ll click next to continue to the review screen.
Now it’s definitely time to take a minute to admire your awesome work and click the create button if you’re happy with the device action. There’s a nice confirmation message at the notification bell telling you that the device action has been initiated on (in my case) one device.
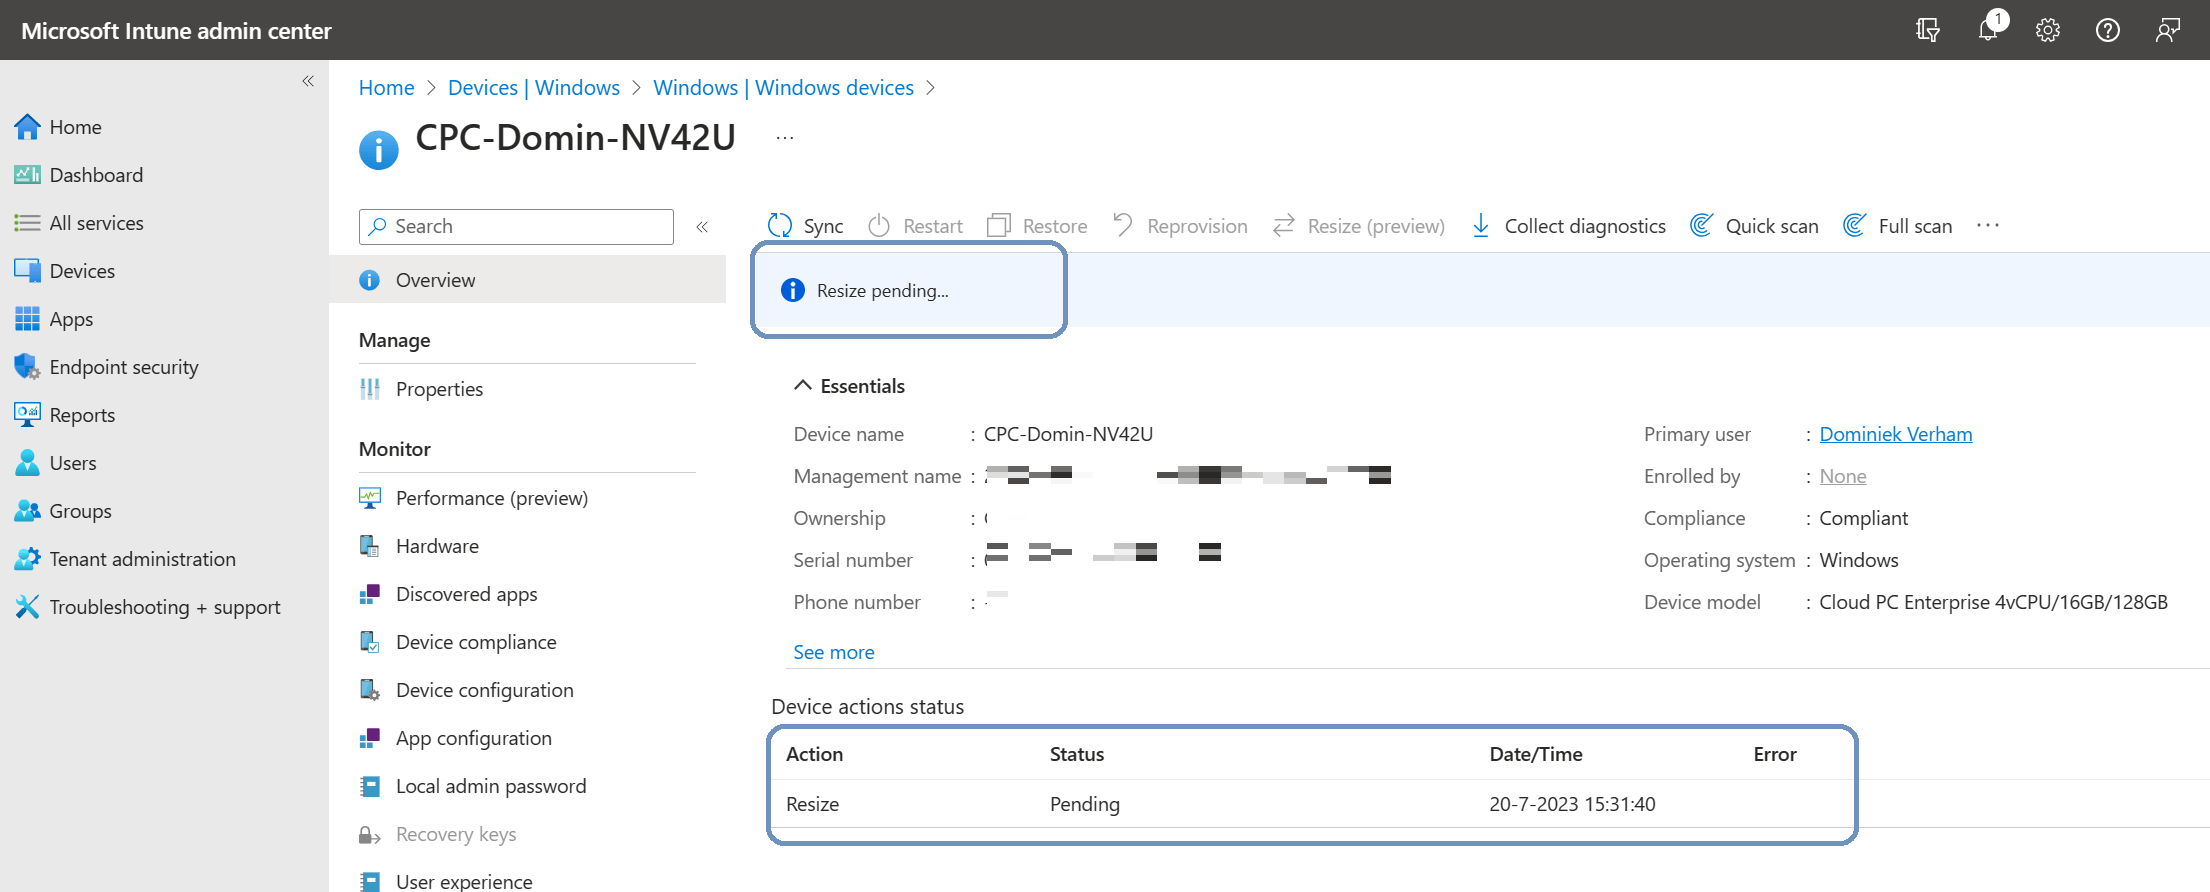
You can see the progress of the device action from Devices, By platform, Windows and click on the Cloud PC:
But remember, we used group based licensing instead of direct assignment of the licensing. So nothing happens as of yet. It makes more sense to check the status from the All Cloud PCs tab in the Windows 365 blade so we get more information:
The status is set to Resize pending license. So next up on our to do list is to change the user from the old group to the new group and wait until the Windows 365 service notices the license change. So after a couple of minutes the resize process will begin automatically.
Remember you can check the licenses from the user (Manage, Licenses blade).
Give the process some time to complete. Once you see the status change to Provisioned you know that all is good and the user can work on their Cloud PC again.
That concludes this post on how to resize single Cloud PC’s or use bulk device actions to resize multiple Cloud PC’s and how licensing is tied into the process.
Resources
I used the following resource for this post:
Share this:
- Click to share on LinkedIn (Opens in new window) LinkedIn
- Click to share on X (Opens in new window) X
- Click to share on Facebook (Opens in new window) Facebook
- Click to share on WhatsApp (Opens in new window) WhatsApp
- Click to share on Telegram (Opens in new window) Telegram
- Click to print (Opens in new window) Print














One Comment
Comments are closed.