What’s up, everyone!
This week I had the opportunity to check out the Intune Insights feature in Nerdio Manager. Join me in this post if you want to learn how to enable Intune Insights in your environment and what kind of information this dashboard brings you as a Nerdio admin.
Enjoy!
Prerequisites
You need the following prerequisites if you want to follow along:
- Nerdio Manager for Enterprise V7 of better.
- You need to have an Intune license present in the tenant. It makes sense that you will need a Windows 365 license if you want to manage Cloud PCs.
- You need administrator rights.
- Intune and Intune Insights need to be enabled.
- Make sure to review and configure the Intune thresholds.
Nerdio has updated the interface from v7 and up. In my demo I will show the newest version.
Step 1: Enabling Intune functionality in Nerdio Manager for Enterprise
Sign into your NME instance and navigate to Settings, Environment, Integrations and expand the Intune integration.

You can enable the Intune functionality here. There is one thing I would like to highlight here. Did you notice that you have the option to link an Intune service account? This links into the mode that NME is using. It can either be:
- Application context only: most features will work, but some operations need to be run in user context. Viewing the Bitlocker key for example. These features will not work in this mode.
- Application & user context: by linking an Intune service account you enabled all features to work, including the operations that require user context.
That’s all there is to enable the Intune functionality.
Step 2: Enable Intune Insights
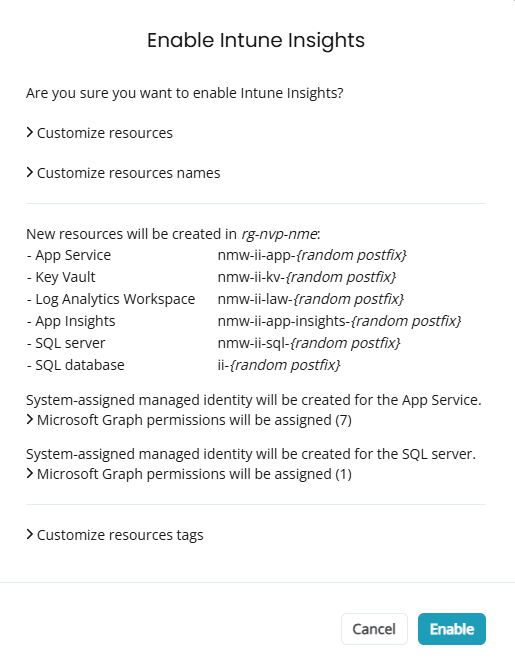
From the Intune integration, scroll down to the last setting called Intune Insights. Enable the feature.
This will prompt you to create some required resources. You can either customize the resources or accept the defaults. Click the Enable button to begin.
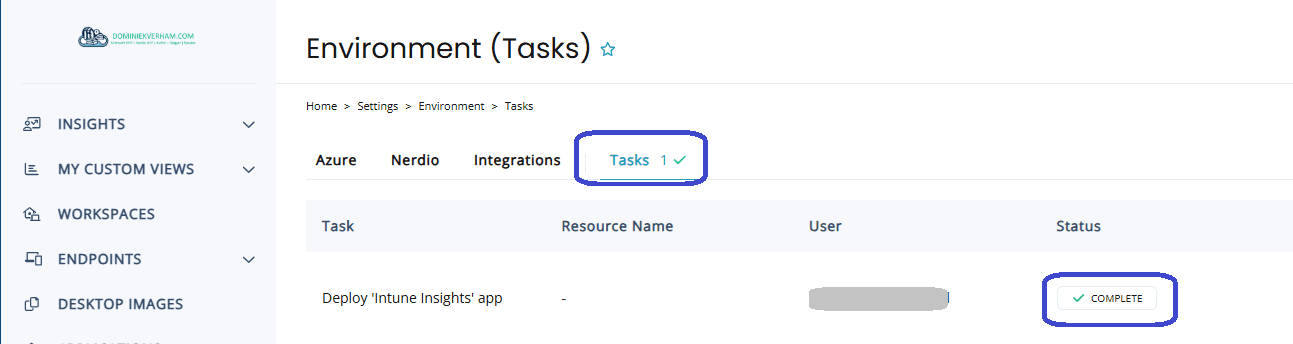
You will not see the progress immediately but you can track it if you open the Tasks section. Mind you this might take a bit of time to complete.
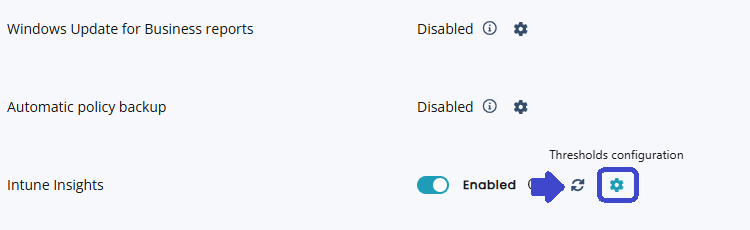
New it’s time to review and configure the thresholds. Just head back to the Integrations, Intune integration. Intune Insights is now switched to enabled. You also get access to a manual sync button and the settings icon.
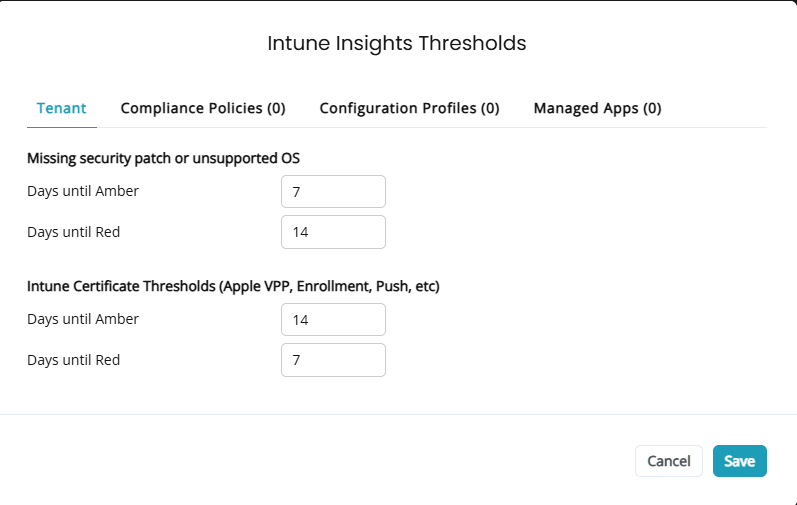
Clicking the settings icon will give you the following settings to review:
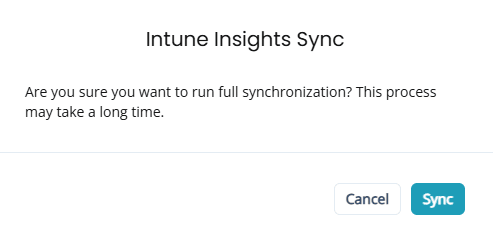
Just to be complete I wanted to show what happens if you trigger a manual sync:
Using Intune Insights
We can now shift our focus to the Intune Insights dashboard now that all preparations have been completed. From NME, Insights, Intune.
Don’t see the Intune menu item yet? Just refresh your browser and it will appear.

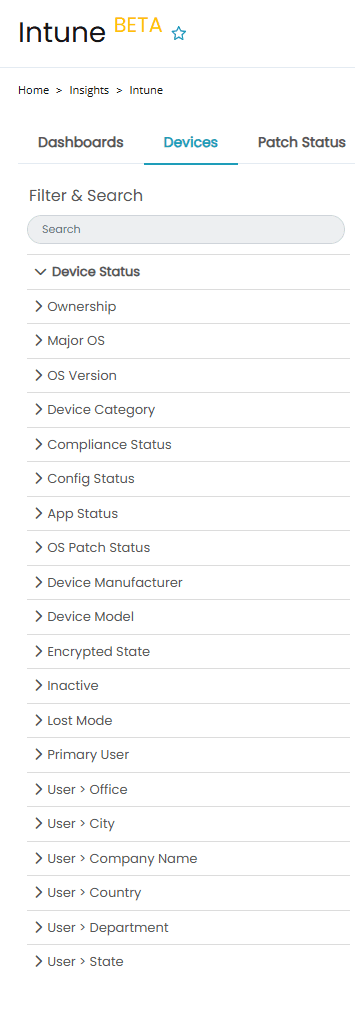
You will get access to the default dashboard which already provides a good starting point to use Intune Insights. You also have access to different filters which you can use to get a lot of information on a specific topic:
- Devices: this dashboard displays device related information like Ownership, OS information, compliance status and lots more!
- Patch status: this dashboard displays patch information, OS information and OS SKU info.
- Apps: this dashboard display information on the apps that are used, like the name, versions, Usage etc.
- OS Health: this dashboard displays information related to the operating system, the OS SKU, End of Life information etc.
- Certificates: this dashboard shows the certificates in the tenant and when it expires.
- Trends: are you looking for trend analysis on topics like compliance, config and app health or patching? This dashboard has got you covered!
- Issues: this dashboard displays information on active and resolved issues.
- Reports: this dashboard provides access to built-in reports. Currently you have access to the following eight reports:
- Warranty
- Inventory
- Encryption
- Mobile
- Battery
- Device Guard
- Disk
- Intune Cert
Here is an example of the devices tab:
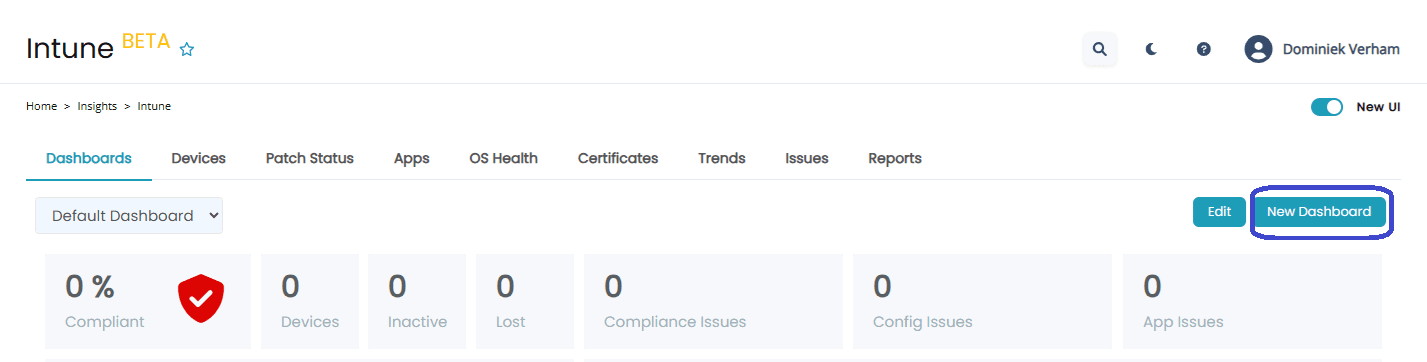
But what if you want to finetune the information so it displays information that is relevant to you? In that case you might want to create a custom dashboard and here is how.
Click the New Dashboard button.
Building the custom dashboard is really easy. I would suggest to give the dashboard a name first. You can do that by clicking in the name field and enter your custom name. Then remove (bin icon) the unwanted details from the dashboard to cleanup the space.
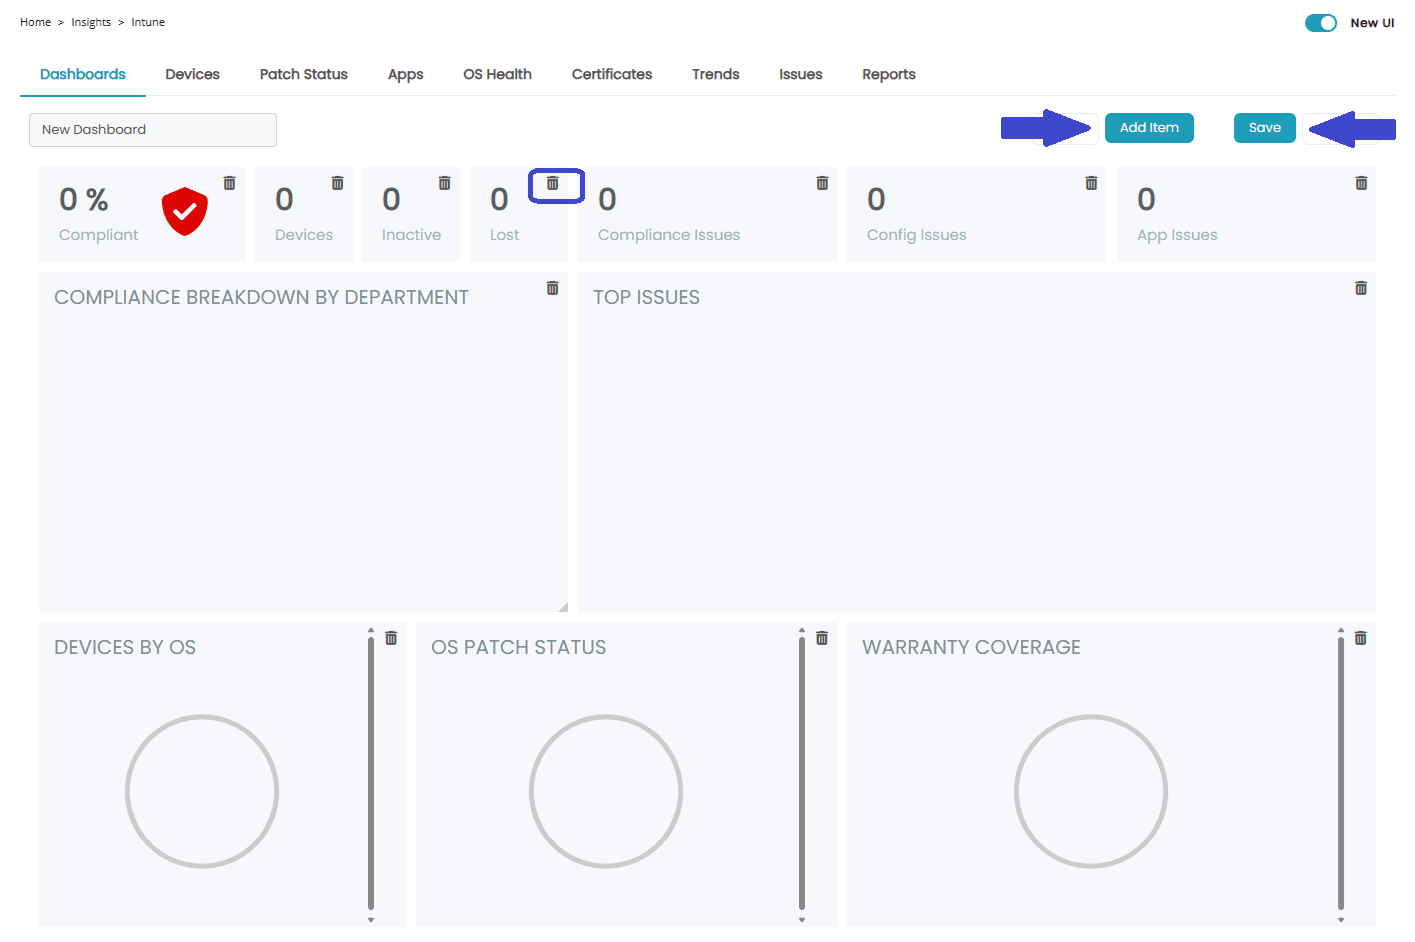
Then add the details you are missing with the Add Item box. You can simply drag and drop the items to the place on the dashboard where you want them to live. Once you are happy with it, click the Save button. Then simply select the dashboard in the dropdown box:
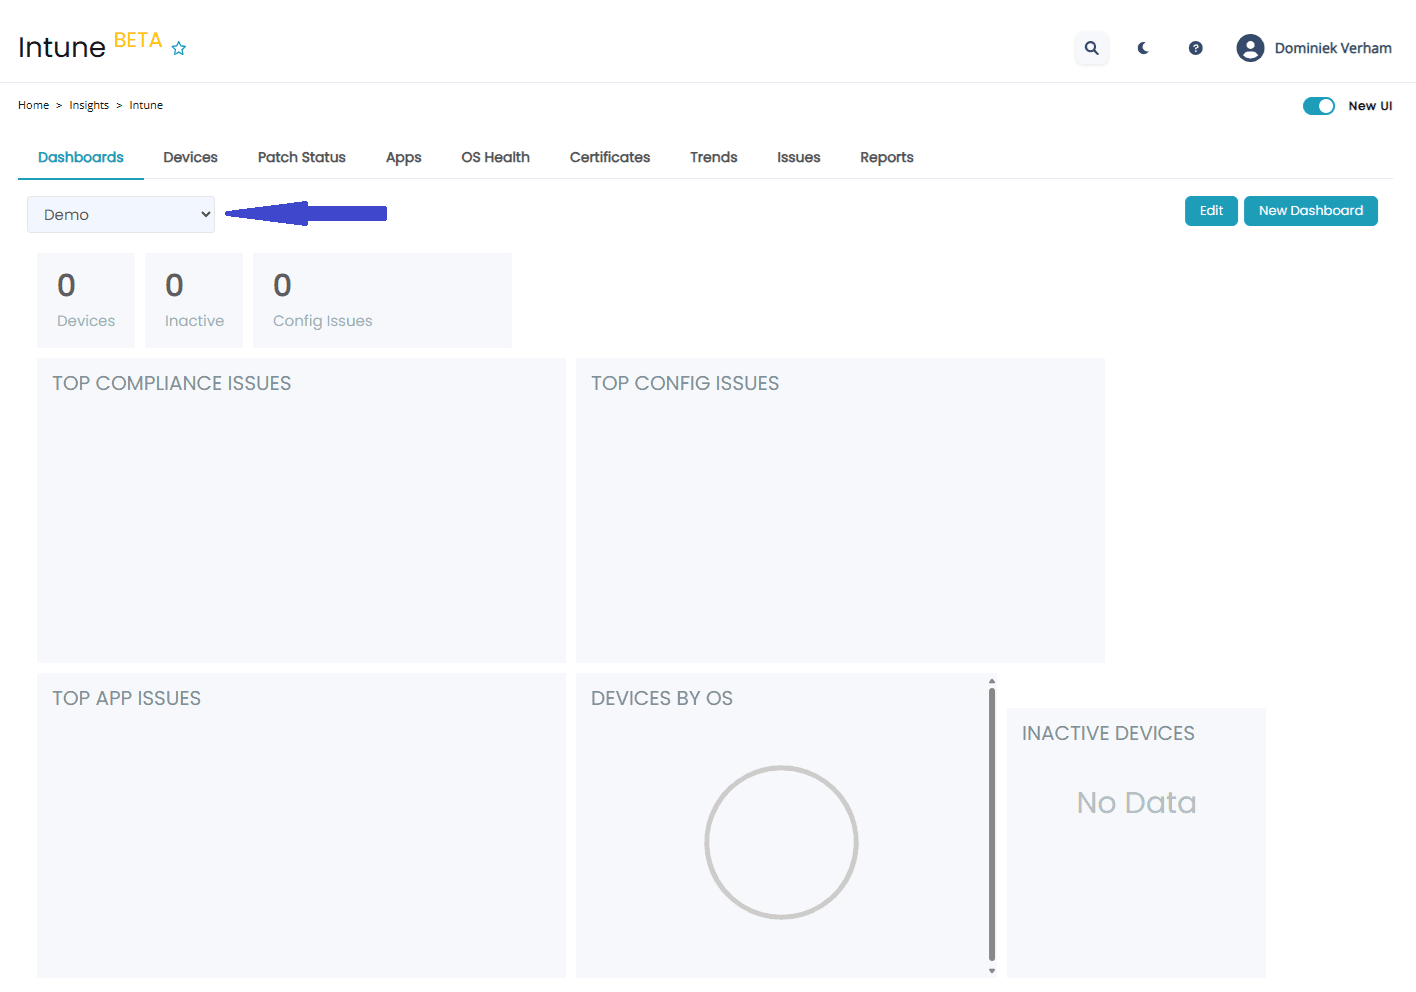
This is just a demo of course. Just think about the things that really matter to you. You can choose from the following items:

Resources
I used the following resources for this post:
UEM: Enable and configure Intune – Nerdio Manager for Enterprise
Insights: Intune – Nerdio Manager for Enterprise
Share this:
- Click to share on LinkedIn (Opens in new window) LinkedIn
- Click to share on X (Opens in new window) X
- Click to share on Facebook (Opens in new window) Facebook
- Click to share on WhatsApp (Opens in new window) WhatsApp
- Click to share on Telegram (Opens in new window) Telegram
- Click to print (Opens in new window) Print