What’s up, everyone!
This post is part of a series I’ve been wanting to do for a long time now. It is about Azure Virtual Desktop / Windows 365 in combination with Nerdio Manager for Enterprise. It is a great third party tool that enables us to create, manage and optimize our Azure Virtual Desktop environment.
In the previous post we talked about using MSIX packages to deploy applications to session hosts. This is only one of many ways to manage your applications on your AVD environment. Another way to go would be to install applications directly onto your golden image, this could be done manually or scripted. In this post we will have a look at installing apps manually in our golden image and how to configure the golden image in NME. We will have a look at the Microsoft way, as well as the Nerdio way.
Nerdio has written a great post called ‘Azure Virtual Desktop (AVD) Application Management‘. It perfectly describes the application management options for AVD. I highly recommend checking out this post if you have yet to decide how to deploy and manage your applications.
I will link every post in the series in each intro.
Series – AVD and Windows 365 with Nerdio Manager for Enterprise
- Part 1: Setup Nerdio Manager for Enterprise
- Part 2: Configure Azure Files and Azure AD DS Authentication
- Part 3: Setup a host pool, app group and workspace
- Part 4: Ways to login to AVD
- Part 5: NME and MSIX
- Part 6: Custom Image for AVD
Disclaimer: The way I setup and configured Nerdio Manager for Enterprise might not be the quickest way and it cannot be considered as best-practices by Nerdio. This is not a sponsored series.
Prerequisites
- This demo will assume you have NME as well as AVD up-and-running.
- A VM (to be used as golden image for the Microsoft way).
Golden Image (Microsoft way)
The term golden image is used for many years. In our case the term is used for a custom image containing all apps and configuration settings we want to apply to our deployment.
The way to configure the golden image might feel familiar if you used MDT or PVS before. The steps are as follows;
- Create an image from an Azure VM
- Create a baseline snapshot
- Customize the VM
- Take a final snapshot
- Run sysprep
- Capture the VM
- Configure NME
Step 1: Create An Image From An Azure VM
Make sure the OS is supported as a an OS for a virtual machine. Check the following Microsoft article.
In my demo I will use Windows 10 Enterprise multi-session, version 21h2.

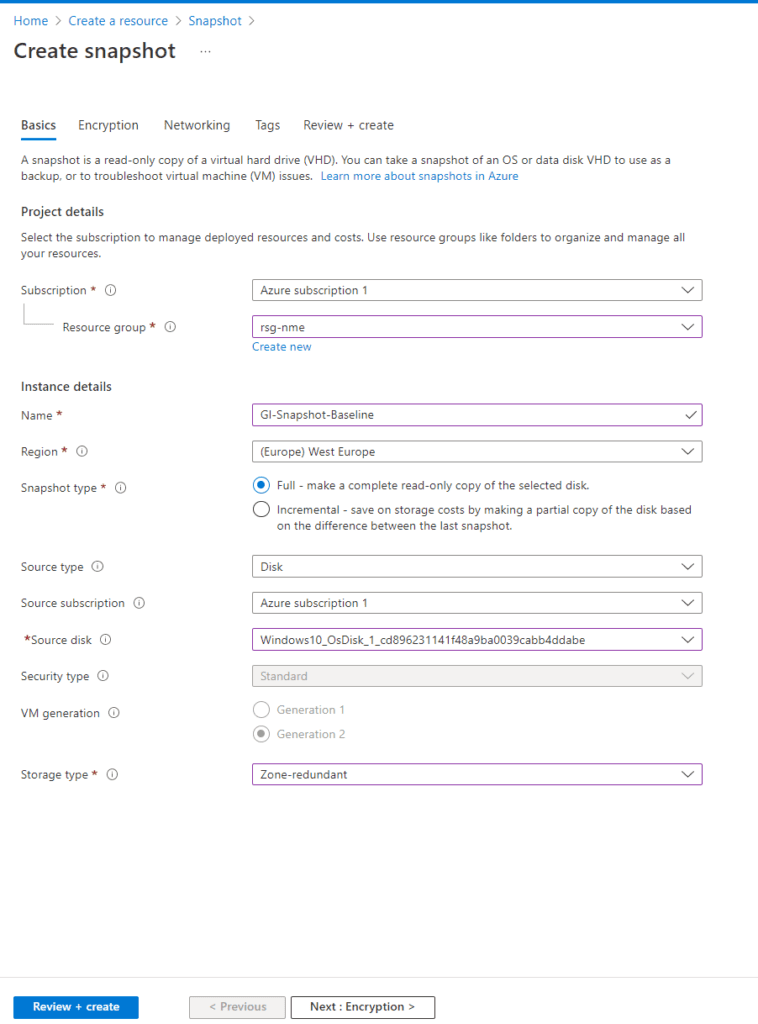
Step 2: Create A Baseline Snapshot
Take a first snapshot of the disk. This allows us to revert to a clean state and create a new and updates golden image.
There a two ways to create the snapshot;
- From the Azure Portal, select + Create a Resource.
- Navigate to the disk from the VM and create snapshot using the button on the ribbon.
From the Azure portal, navigate to the virtual machine, select disks, click on the disk. We will be able to create a snapshot of the disk on this page.

Step 3: Customize the VM
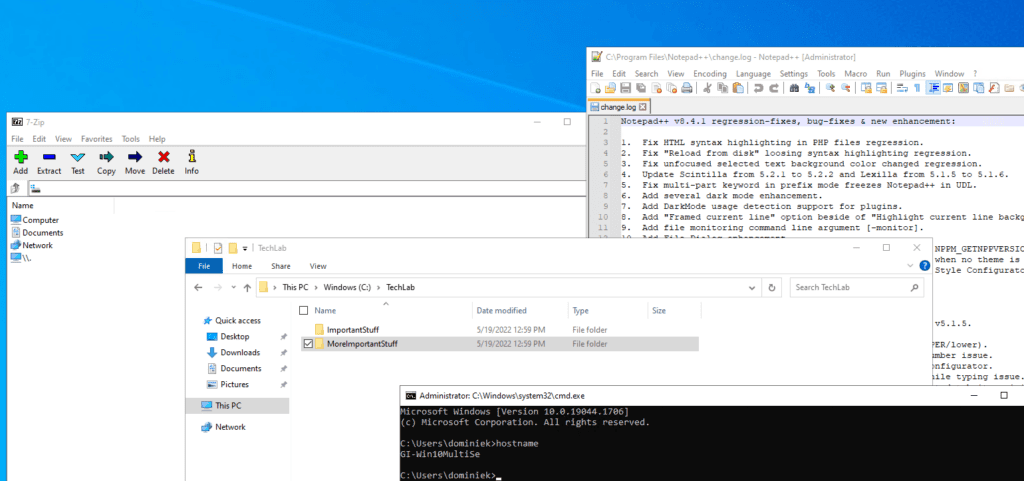
In this step we will customize our image as we like. For instance;
- Install the latest and greatest Microsoft Updates
- Install necessary applications
- Add / Remove registry items
- Add / Remove Windows features
- Perform cleanup tasks (cleaning up temp files, defragment disks, remove unnecessary user profiles etc.)
Step 4: Take A Final Snapshot
Take another snapshot of the disk. This will help in case sysprep or the capture fails.
Step 5: Run Sysprep
Now it’s time to prepare for the sysprep stage. Make sure to reboot your virtual machine, clean up temp files etc. Also remember to disable your anti virus program, should you have one installed. If not, it might cause issues while running sysprep.
Make sure to disable your antivirus application, should you have one installed, before you run sysprep. If not, it might cause sysprep to fail.
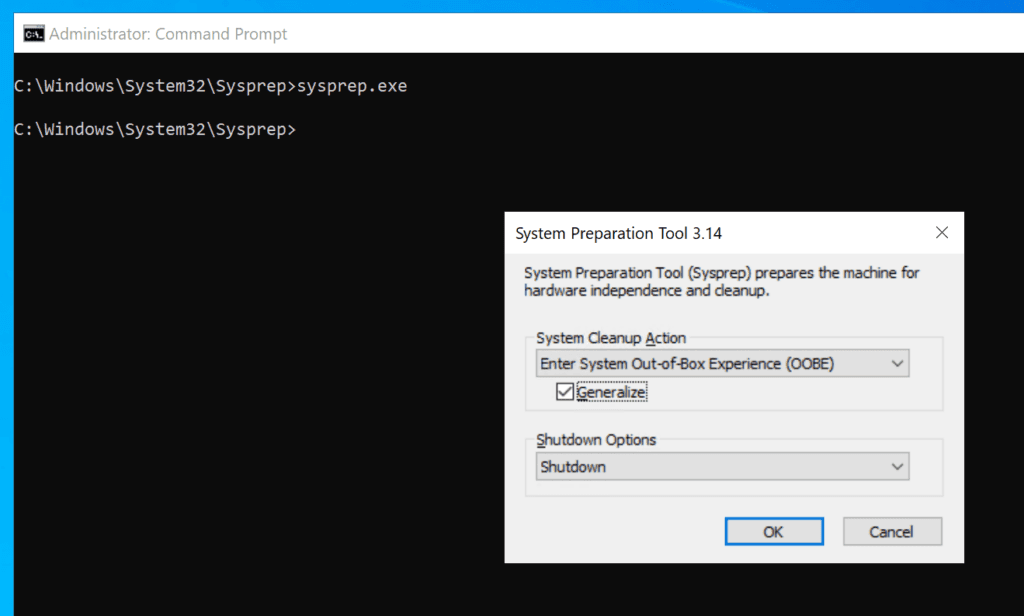
So once the virtual machine is back up-and-running, we can open up an administrative prompt and start sysprep. (C:\Windows\System32\Sysprep\Sysprep.exe)
Check the Generalize box to remove any user profiles and select Shutdown in the shutdown options dropdown list and hit the OK button.
Step 6: Capture The VM
Running sysprep might take some time. You’ll know the process is complete once the virtual machine switches off.
In this step we will capture the virtual machine. We will need to store our image somewhere. There are two options;
- Shared Image Gallery
- Managed Image
For smaller and simpler deployment, a managed image might be the way to go. A shared image gallery might be a better choice for a more complex environment. A SIG provides extra features, images are stored high-available and we can deploy the image at scale. Ofcourse NME is compatible with a SIG. Want to know more about a SIG? Check this Microsoft article.
Using a shared image gallery also has one drawback, we cannot use the same VM again. Instead we need to create a new VM from our last snapshot. Then run sysprep again.
I opted for a shared image gallery to store my image for this demo.
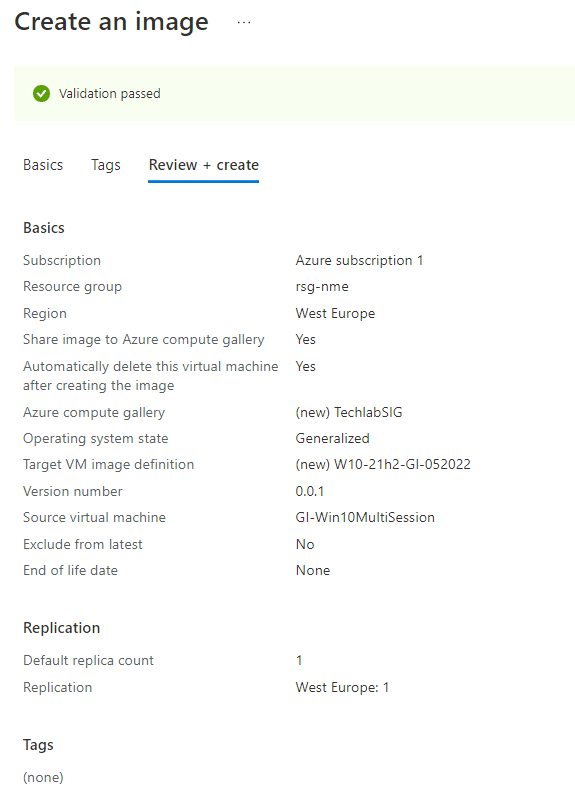
Open the Azure portal, navigate to the virtual machine and click on the Capture button in the ribbon.
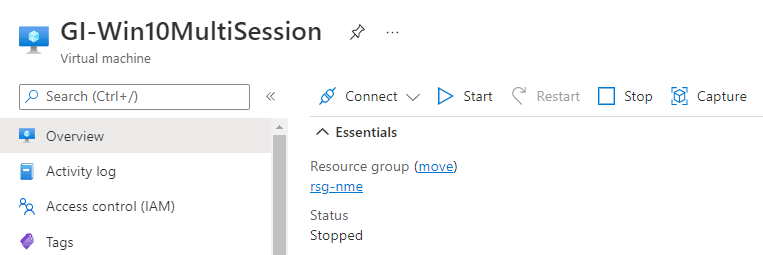
Provide the necessary information. I chose to remove the virtual machine after creating the image, since I won’t be able to reuse the virtual machine.
I didn’t have a SIG in place, so I used the link to create a new one.
The same is true for the Target VM definition. The portal will simply provide you with a link to create one.
Add tags if needed and create the image. I found this process to be quite fast, but that could be because I have a small virtual machine.
Step 7: Configure NME
Let’s put everything together using Nerdio Manager for Enterprise.
Login to NME and select Desktop Images from the menu bar.
Click the ‘Add from Azure Library’ button.
The image is already stored in the SIG, scroll down to the Shared Image Gallery and select the previously captured image.
Change the options to meet the requirements of your deployment.
Click the OK button to add the image. (This step is might take a long time).
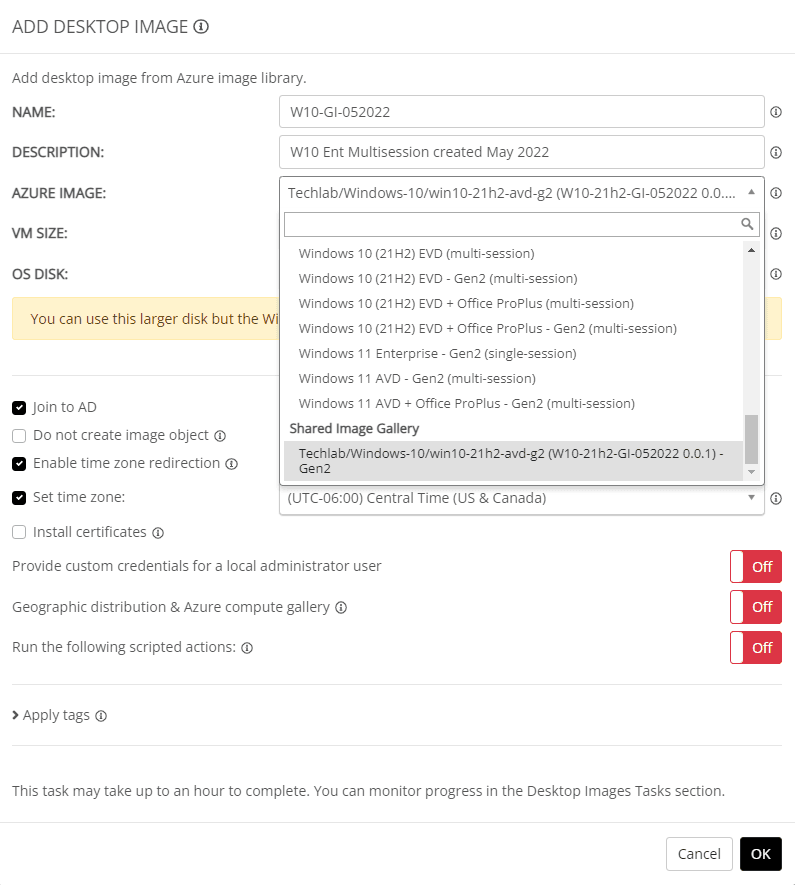
This step might be time consuming and once completed the image will pop up as a desktop image.
For us to be able to use it an image for session hosts, we need to ‘Set as image’ option from the dropdown list.
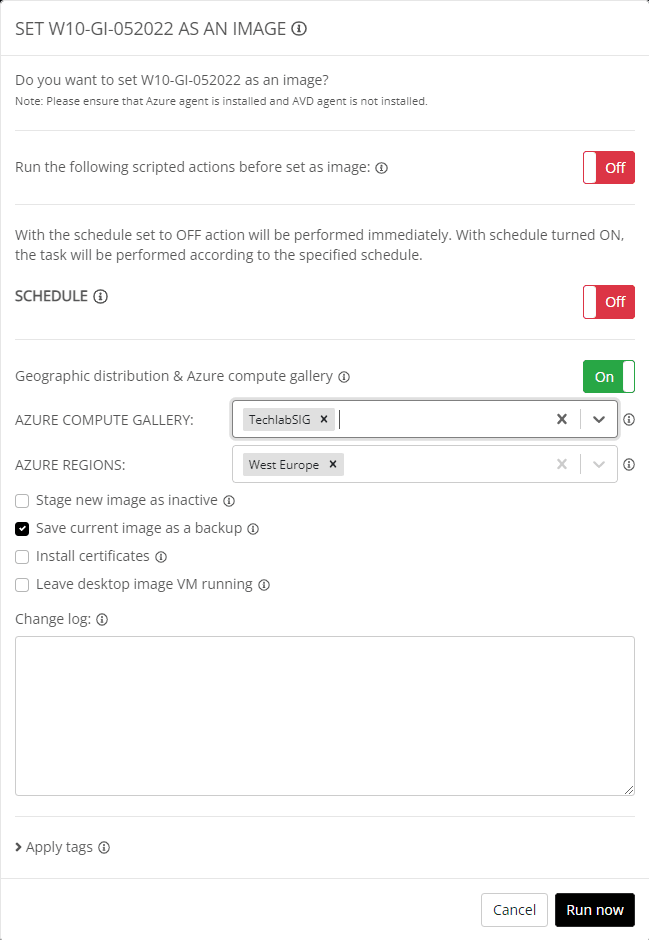
I saved the current image as a backup and chose to save the new image in the SIG.
The next step is to reimage the session hosts. Click on the dropdown box next to the host pool you want to reimage. Select Hosts, Resize/Re-image.
Select the new image.
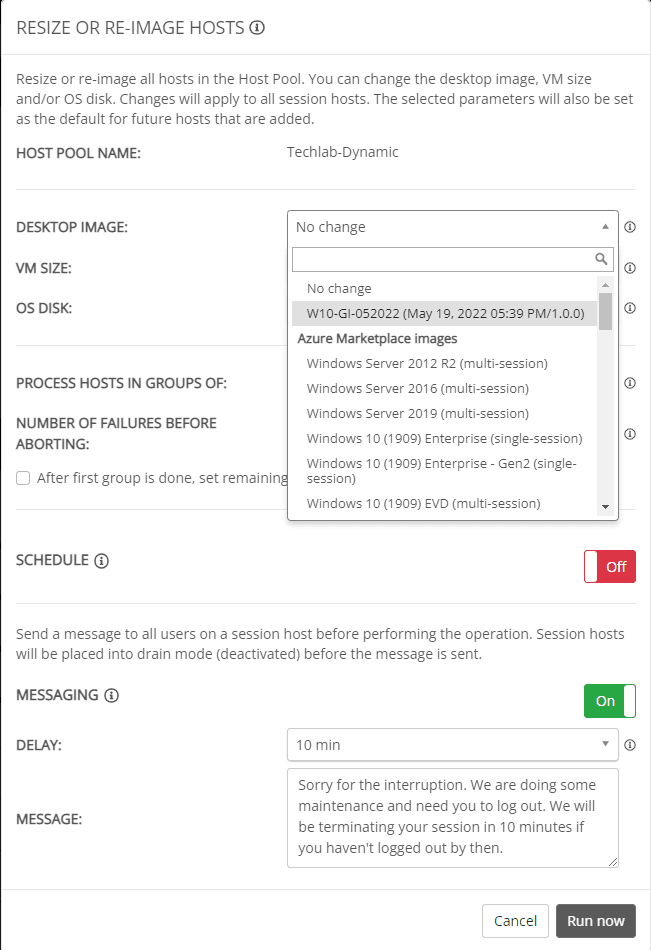
We can also change the VM size and OS Disk. These options are not necessary to reimage the session hosts at this moment.
We can configure how many session hosts will be reimaged at the same time and we can set the number of failures before aborting.
We can also set a schedule if we like.
We can send a message to logged on users to notify them of the interruption. For this demo I disabled the messaging option.
This task can take up some time. Remember that we can go to the session hosts and check the status per session host (which image is used, when is it provisioned etc)

Once completed, it’s time to test the new image. I used the web client to logon.
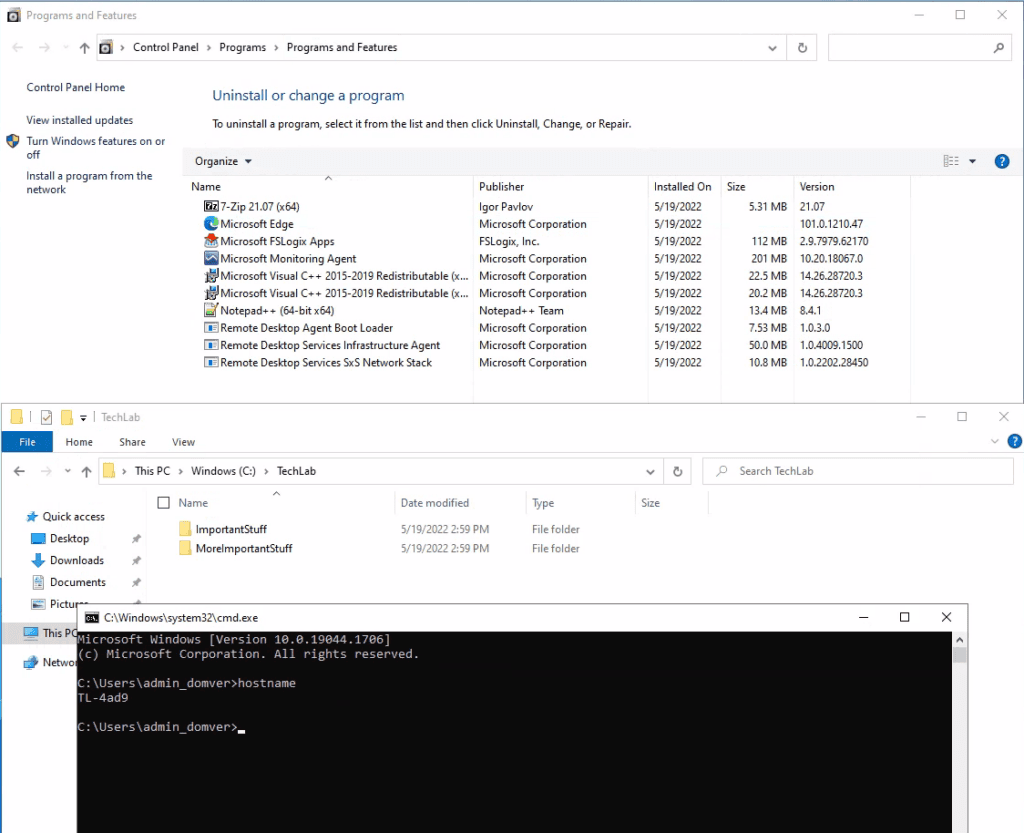
We can see that both apps (7zip and notepad++) are installed. The important stuff is still on the disk and we can see it’s a session host instead of the golden image.
That concludes the Microsoft way, time to checkout the Nerdio way!
Golden Image (Nerdio way)
Now it’s time to create new golden image Nerdio style!
Go to Desktop Images in the menu bar and click on the Add from Azure Library button.
Choose a name for the image, select your Azure image, the VM size and OS disk. I chose to join the VM to Azure AD and I configured the timezone.
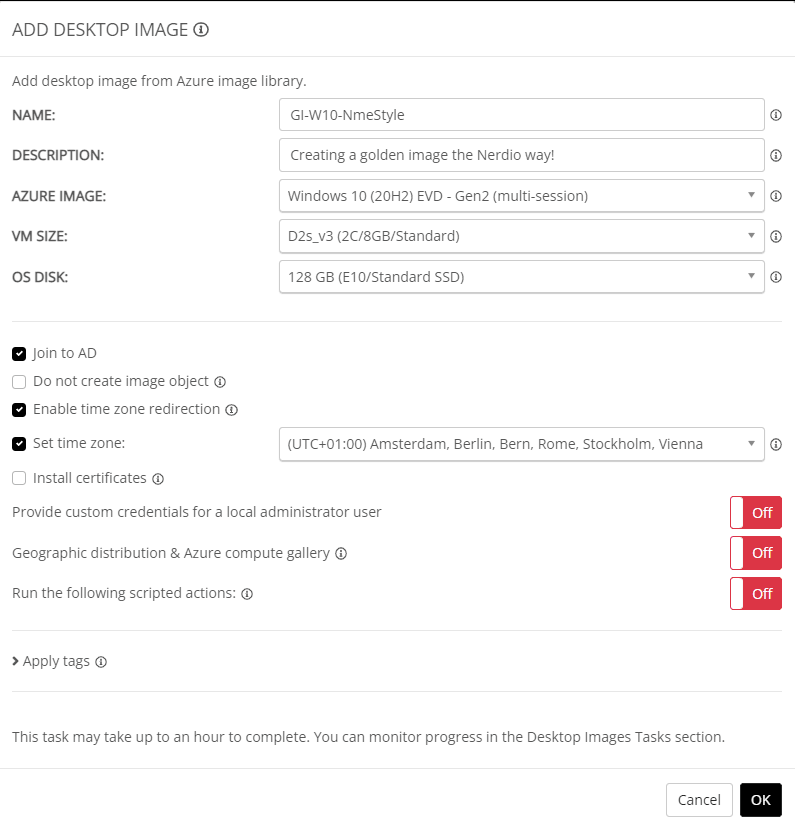
To quote Nerdio;
In Nerdio Manager, the desktop image consists of the following Azure objects:
A virtual machine that is used to manage the image.
The actual image that is used to deploy session hosts.
If we look at the job details, we can see the magic happen. A new VM is created. This explains why this step can take a bit of time to complete.
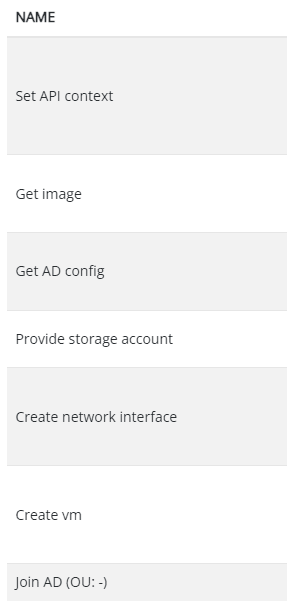
The new desktop will popup in the desktop images node once the task completes. Now it’s time to perform the customization that we want.
Click on the Power On button. Wait until the virtual machine boots up. Then connect to the virtual machine and perform the necessary customizations. If you have direct connectivity to the virtual machine, it’s worth noting that NME can generate an RDP file. Just click on the dropdown list and select Generate RDP file.
I just added a folder named NmeRocks! as a customization.

Once all customizations are done, logoff from the virtual machine.
Head back to NME and go to the desktop images. Click the button Power off & Set as image.

I chose to store the image in the SIG (I created before) and I checked the box to install the certificates.
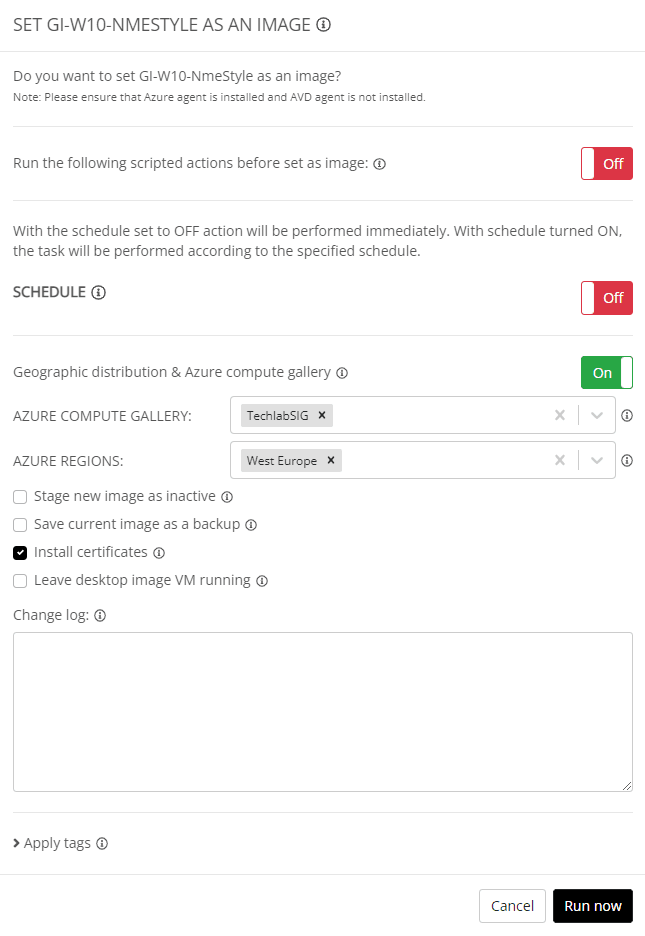
This step might take some time to complete.
Go back to Workspaces and select Hosts -> Resize/Re-image to re-image the session hosts.
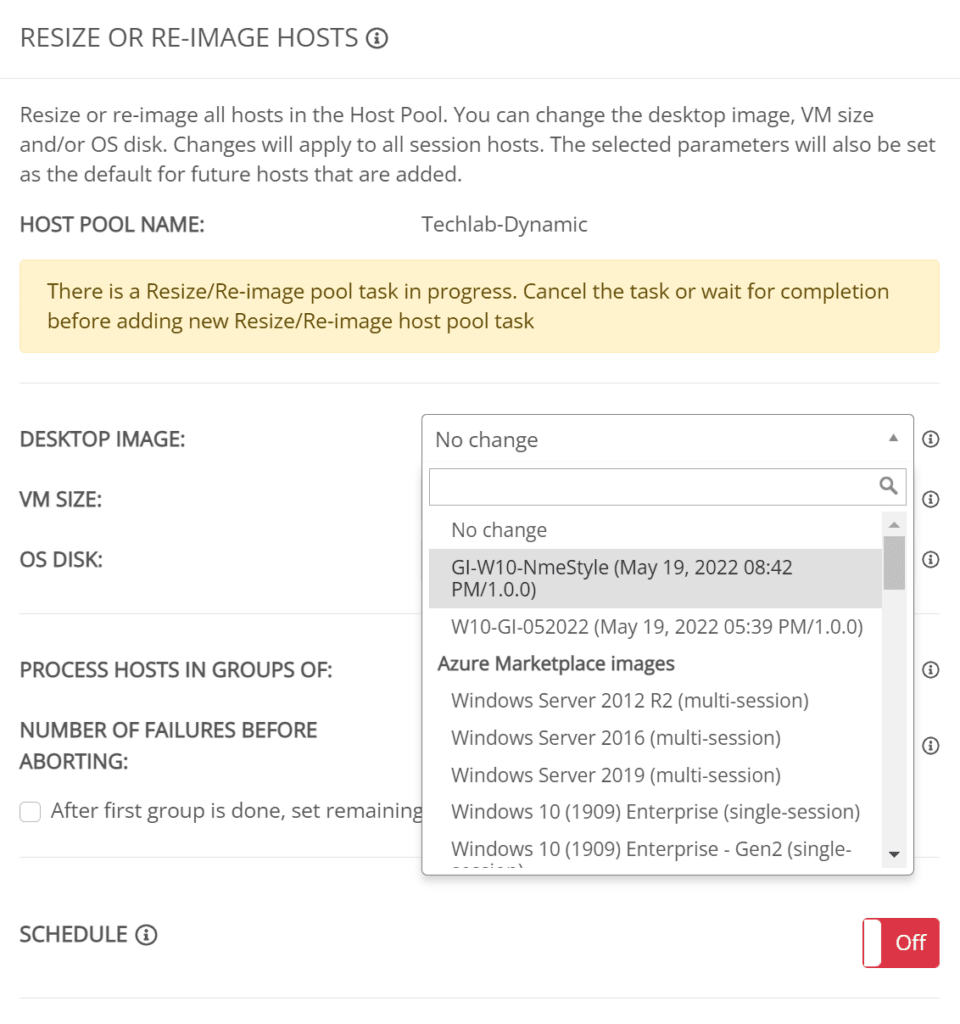
Wait until the task completes and test the new image!
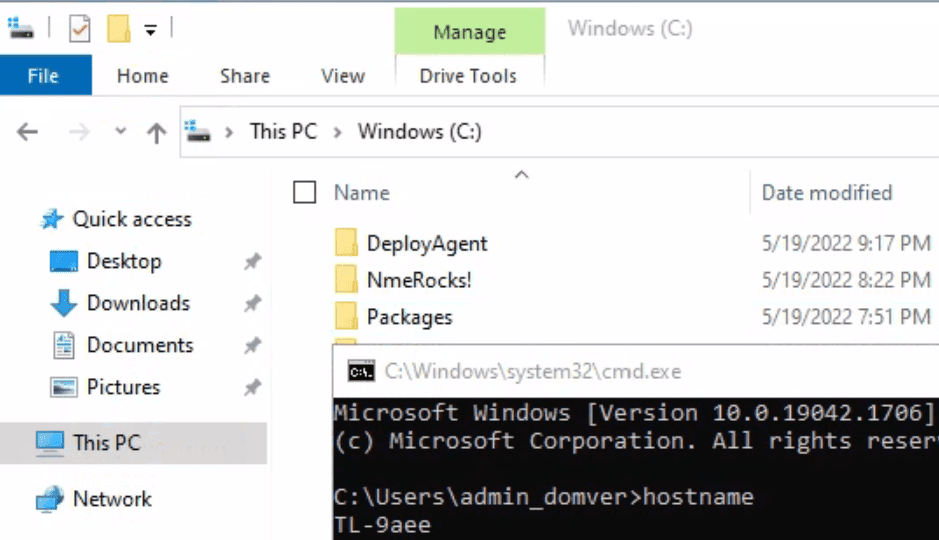
The folder is still present on the C: drive and we can see we are on a session host.
Resources
I used the following resources to write this blog:
Create a golden image in Azure (MS)


