What’s up, everyone!
Last year I wrote a post on how to use Intune to set up a kiosk mode on Windows 10 or Windows 11 machines. I thought it would be nice to revisit this post and see if we can check out a real-world example.
The goal
We have existing endpoints based on Windows 10 with multiple screens. These have to be reconfigured as Kiosk devices and support single sign-on wherever possible. The goal of these kiosk endpoints is to connect to Windows 365 Cloud PC’s.
We’ll have to set up Kiosk mode and use the AVD client to connect to the Cloud PC’s. At the time of writing Windows 10 doesn’t have the Windows 365 App and the webclient can’t use multiple monitors.
Let’s get to it!
Step 1: A clean endpoint via Autopilot
I would suggest to reinstall the endpoint to get a clean experience. You can do so manually of course but I like to use Autopilot for that. First create a security group and add the endpoints that will be used as a kiosk.
Next we’ll go to Devices, Device enrollment, Enroll devices and choose Deployment profiles.

Click on the + Create profile button in the ribbon and select Windows PC.
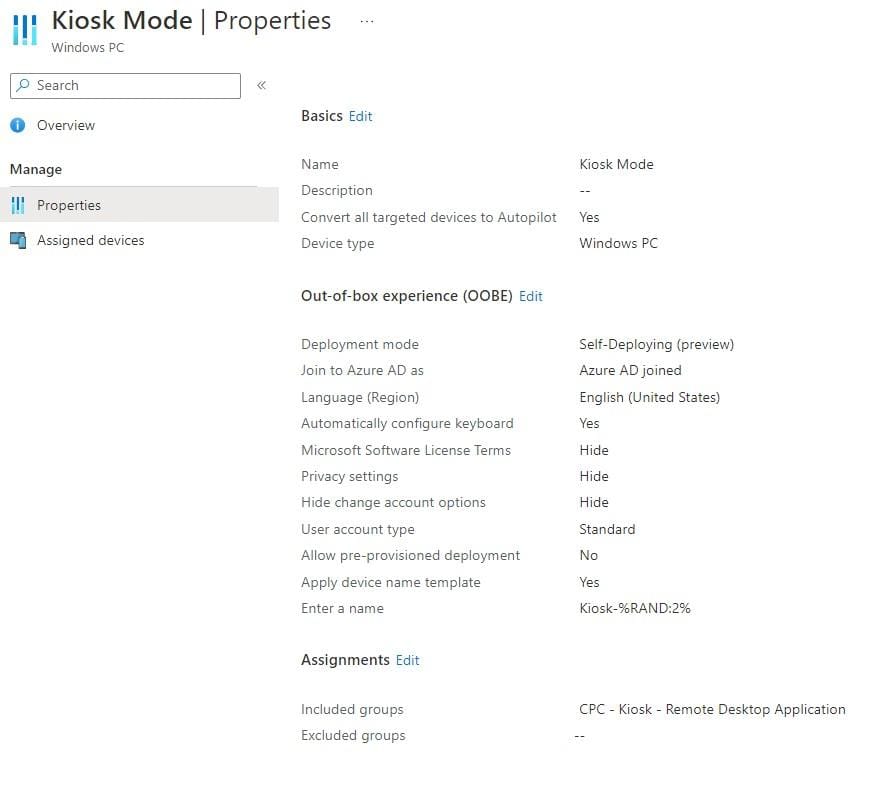
Give the profile a name, set Convert all target devices to Autopilot to Yes.
Select Self-Deploying (Preview) as the deployment mode. A lot of options will fade out but you can still;
- Choose the Language (Region)
- Automatically configure the keyboard
- Apply device name template
- Enter a name (Value for the device name template)
You should end up with something like this:
Remember that you can use the Assigned devices tab to check if your targeted the correct devices. I’m testing with a VM and it checks out.
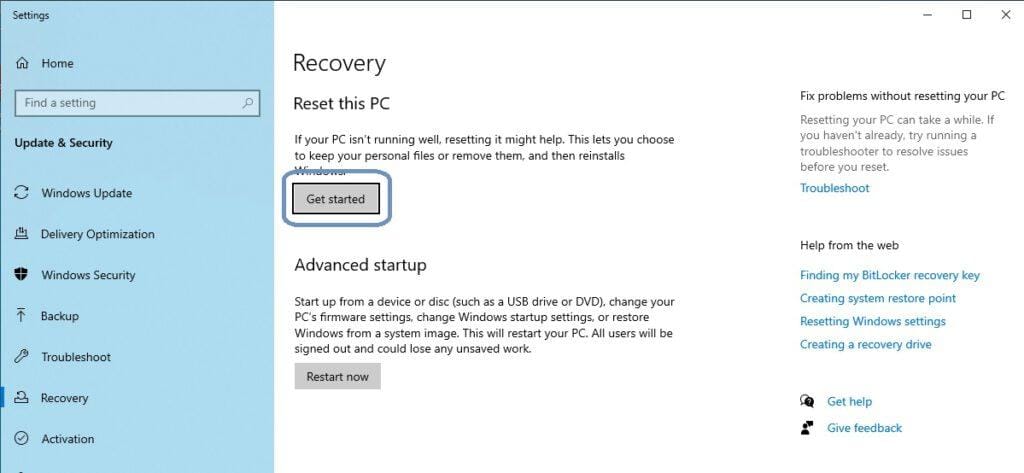
Last thing to do is to give the endpoint a reset and wait until it completes.
Step 2: Configure the kiosk
We will have to configure a couple of things in this step. Let’s start with adding the AVD client to Intune.
Deploying the AVD client
Download the AVD client from Microsoft. Remember you can also download the AVD client from https://windows365.microsoft.com.
From Intune; go to Apps, Windows and click the + Add button in the ribbon. Select Line-of-business app and upload the .msi file.
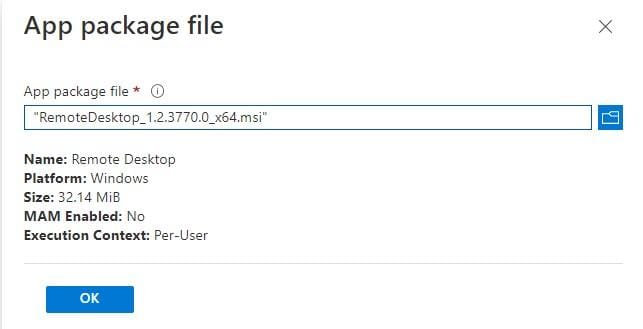
Assign the app to a security group that contains all the kiosk devices. You should end up with something like this;
Sounds good right!!
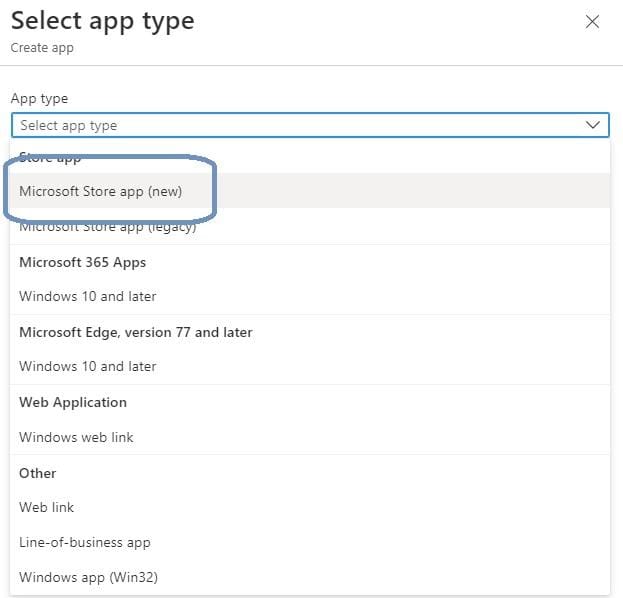
Well, no. Because now you’ll have to update the app yourself. And this is still a lot of work. Let’s get lazy and modern! Go back to the Windows apps and click the + Add button in the ribbon.
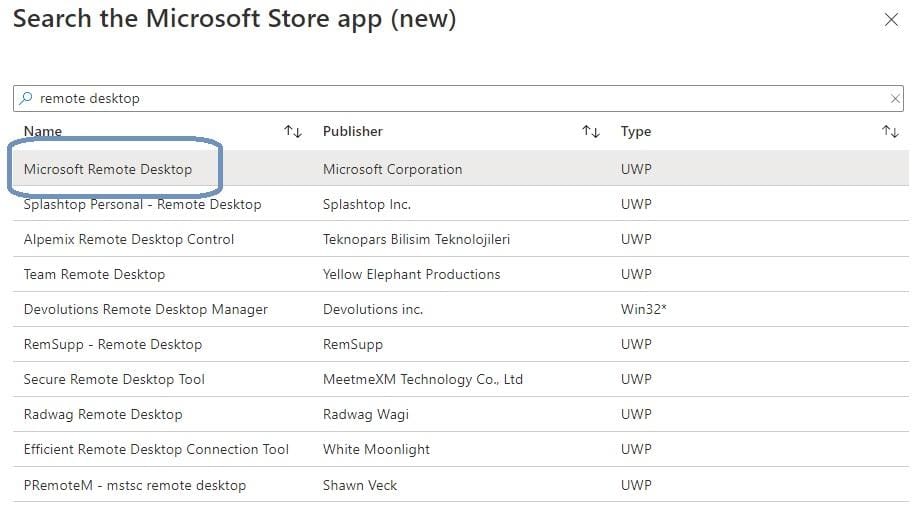
This time, select Microsoft Store app (new).
Search for Remote Desktop and select the correct app in the list and click Select.
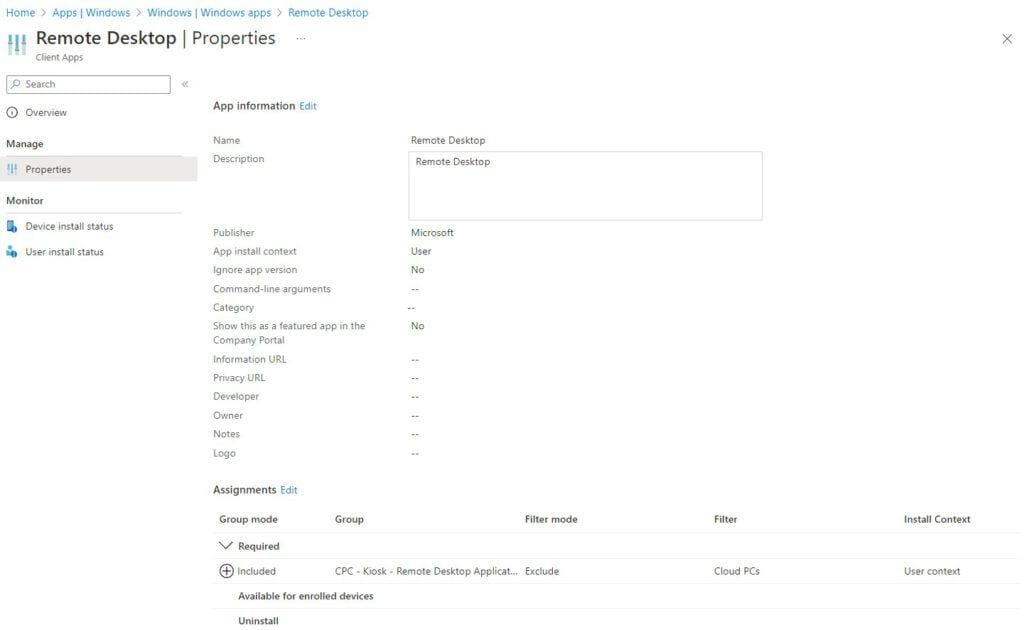
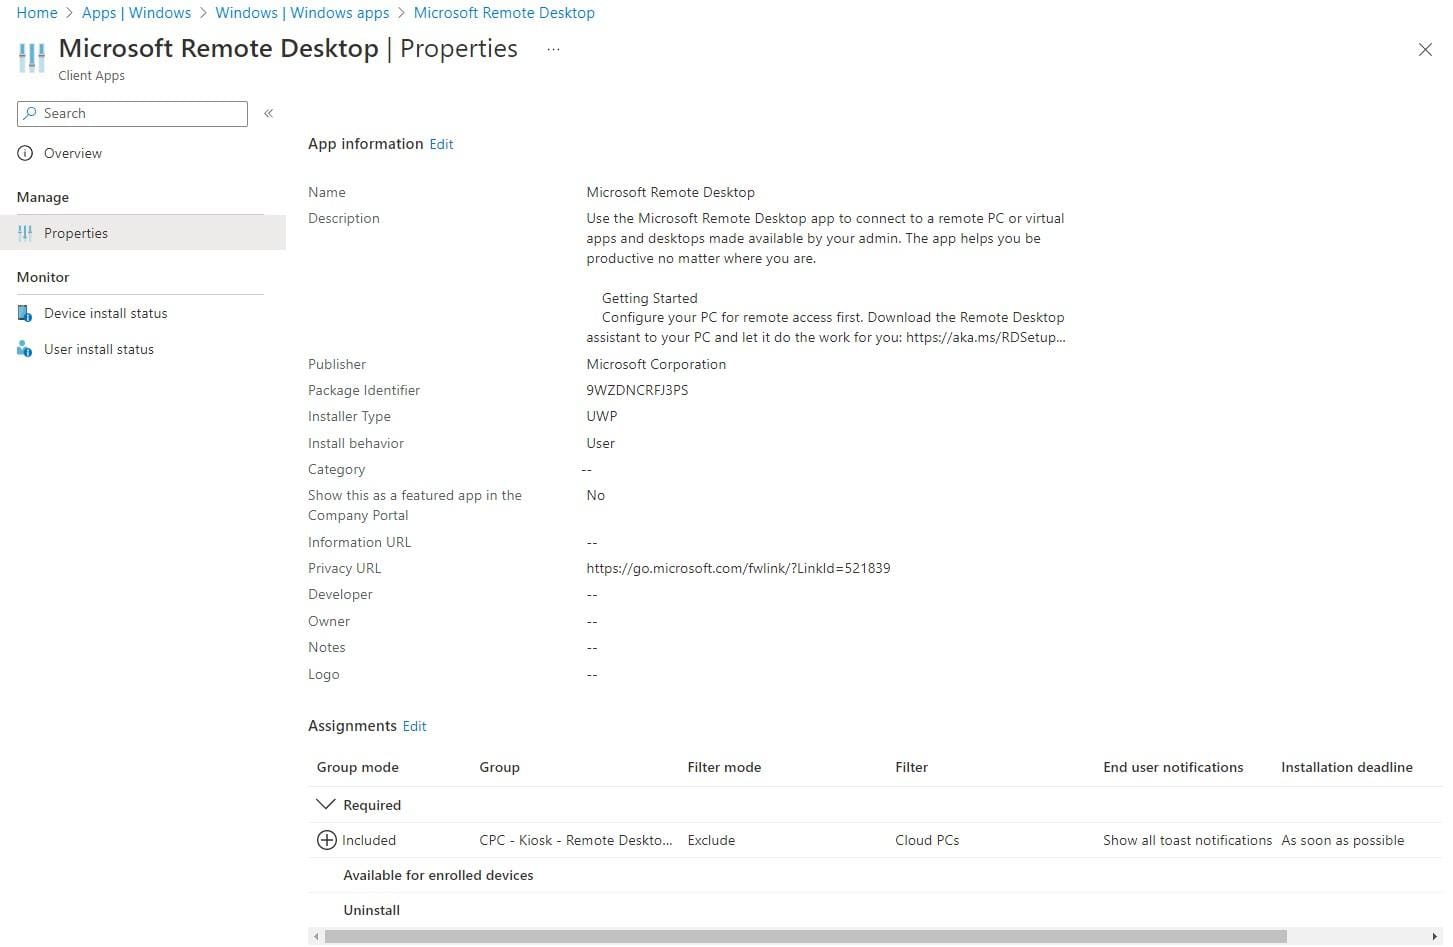
Assign the app and you should end up with something like this:
Way faster, auto-updating… Now that looks good!
Configuration profile for Kiosk mode
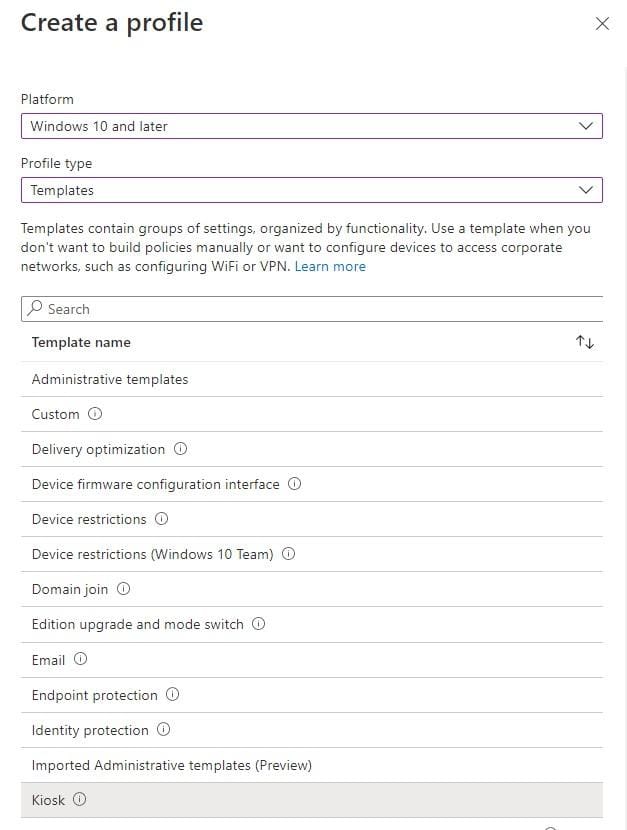
Go to Devices, Policy, Configuration profiles. Create a new profile for Windows 10 and later, select Templates, Kiosk.
We will have to configure the following settings;
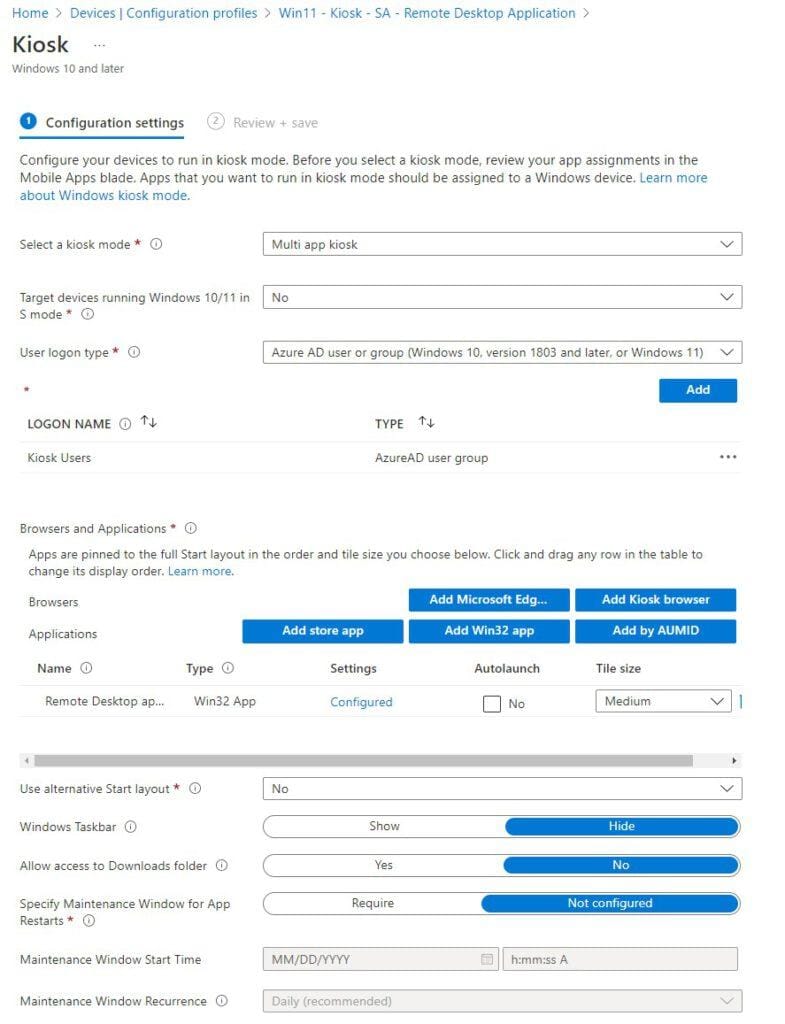
Here are the details of the MSI and the Store app.
MSI (Win32):
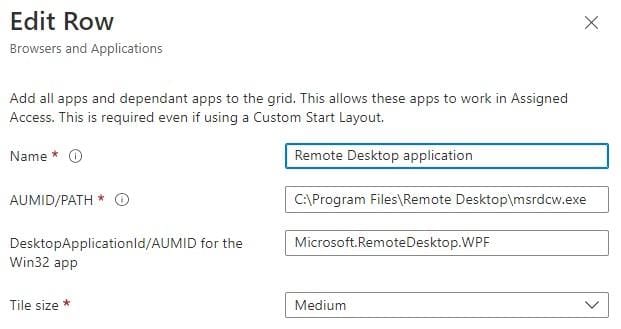
Microsoft Store app:

Add by AUMID
You can find more information about finding AUMID’s for installed apps on the Microsoft learn page here.
In short, make sure the Remote Desktop app is installed. Copu the function named Get-AppAUMID to Powershell ISE (Run as admin).
function Get-AppAUMID {
param (
[string]$AppName
)
$Apps = (New-Object -ComObject Shell.Application).NameSpace('shell:::{4234d49b-0245-4df3-b780-3893943456e1}').Items()
if ($AppName){
    $Result = $Apps | Where-Object { $_.name -like "*$AppName*" } | Select-Object name,@{n="AUMID";e={$_.path}}
        if ($Result){
            Return $Result
        }
    else {"Unable to locate {0}" -f $AppName}
}
else {
    $Result = $Apps | Select-Object name,@{n="AUMID";e={$_.path}}
    Return $Result
}
}
Get the AUMID’s of apps that are in the start menu. I only added | clip.exe behind the function. Now you can open Notepad and paste the result. Search for Remote Desktop in the results.
Get-AppAUMID | clip.exeI do want to take a minute to talk about the user logon type. Since I want users to login with the AAD credentials, I chose an Azure AD security group named Kiosk Users. The idea is that all users will automatically join this group. Guests shouldn’t be added. I used a dynamic group with the following expression;
(user.objectId -ne null) and (user.userType -eq "Member") and (user.givenName -notMatch "dominiek")The challenge here is that Global Admins are users too. And you probably do not want to add them so you can still login to the Kiosk with an admin account to perform some others tasks, like adding a local printer.
The bad news is that you cannot filter on roles and exclude users that are global admins. The good news is that there are a couple of others ways. You can use customer attributes to filter on or run a Powershell script to create a group containing all the global admins. You can exclude groups using these rules.
I took the easy way in my demo environment and just excluded my account.
Windows Hello for Business
I’m perfectly happy if users are able to login using their credentials on Kiosk endpoints. It wouldn’t be very user friendly if they have to configure a pin on each device they log in to. So let’s disable Windows Hello for Business on Kiosk endpoints.
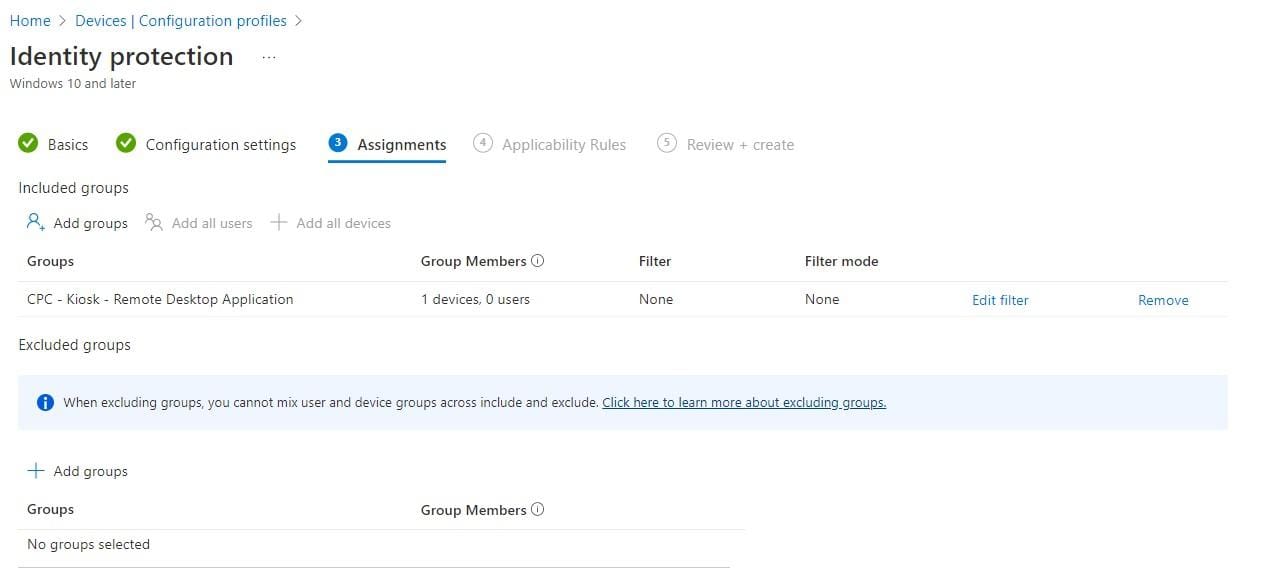
From Intune, go to Devices, Policy, Configuration profiles. Create a new profile for Windows 10 and later, select Templates and select Identity Protection.
Disable Windows Hello for Business.
Assign the policy to the device group containing your kiosk endpoints.
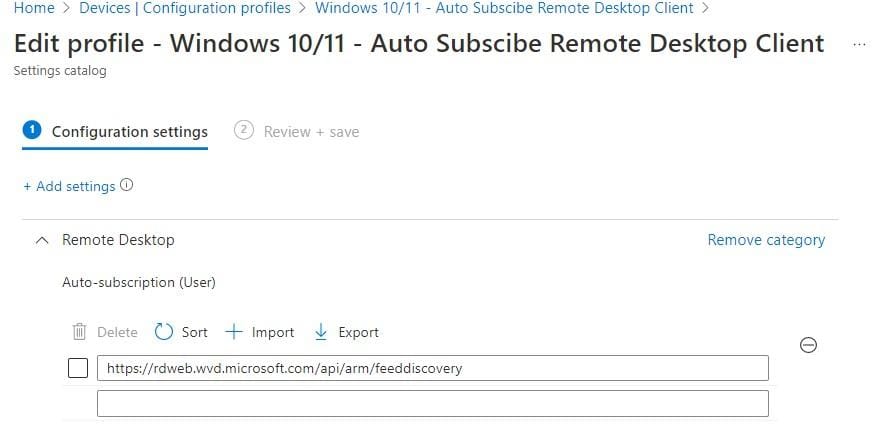
Auto-subscribe Remote Desktop Client
It’s possible to auto-subscribe the Remote Desktop Client. This means the user does not have to login to the app and retrieve the assigned desktops.
To do so create a new provisioning policy using the settings catalog. Configure the following option:
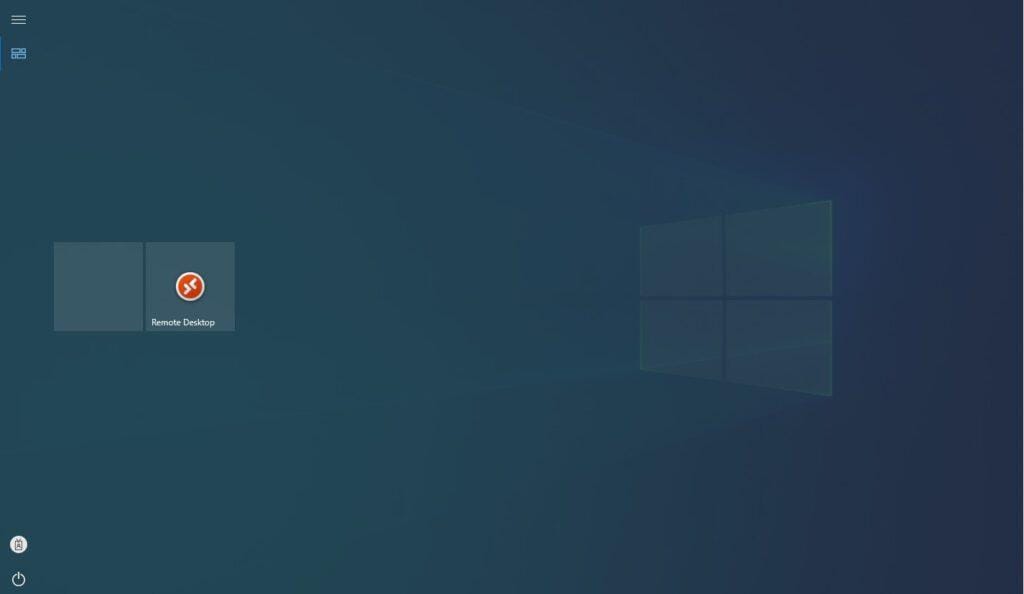
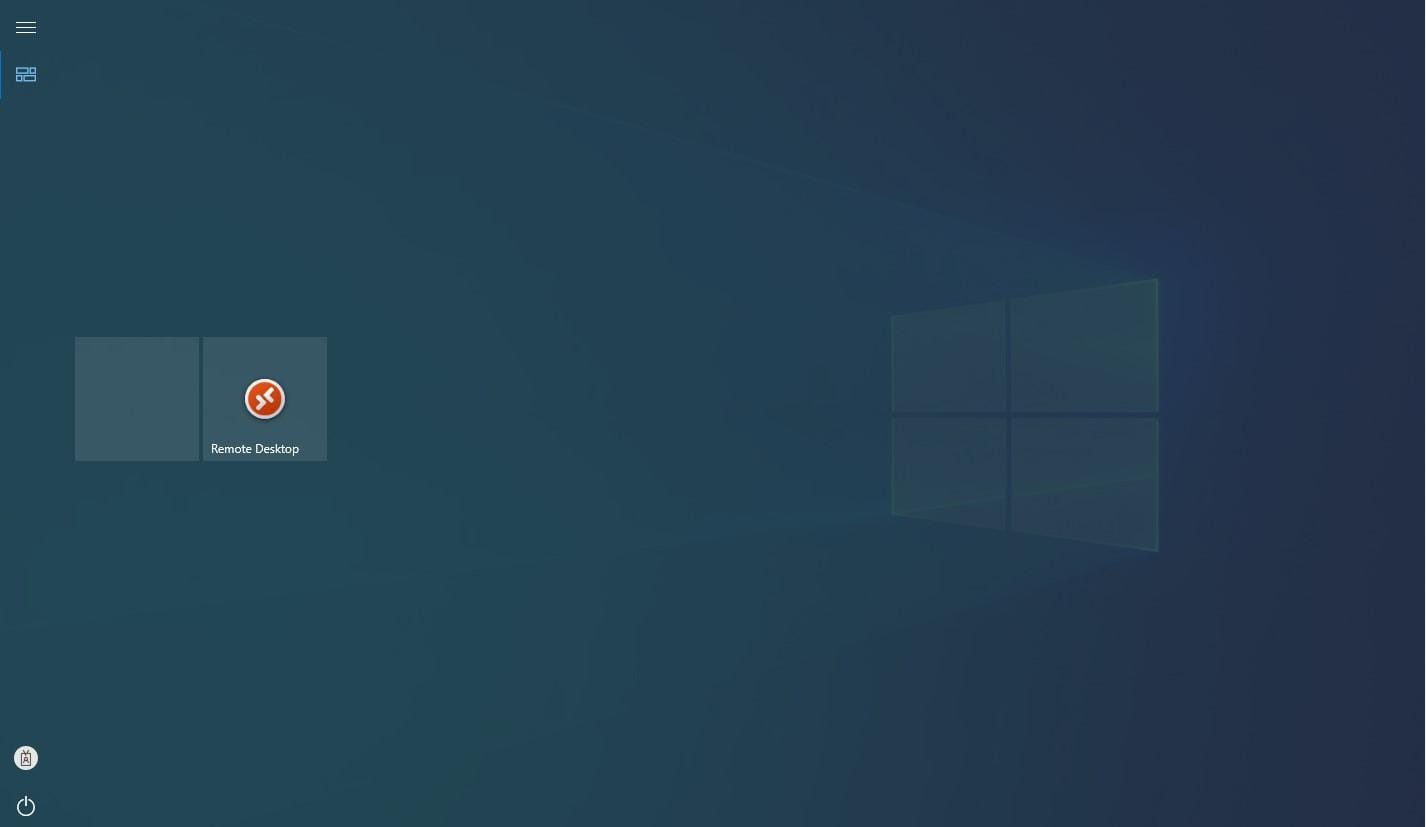
Let’s have a look at how the kiosk looks like;
Here we see two tiles. The first is an empty tile (because I let the MSI application in the configuration profile) and the second tile is the Remote Desktop app from the Microsoft Store.
The user is immediately logged in to the app because we configured auto subscribe using a configuration policy.
If you want you can customize the experience even more. What about configuring a wallpaper or lockscreen? Or a custom start menu if you have a lot of apps?
Resources
There are still other things you can consider, for instance adding a wallpaper.











Any problems here by not using the Microsoft Store version of the Remote Desktop client? and using the MSI installer instead?
Hi Tony,
I don’t think I had any issues when I was testing both options.