
What’s up, everyone!
This week I’ll dig into the Microsoft Dev Box solution. It’s a great way for companies to provide VMs, or dev boxes, to their developers. The main difference between Windows 365 Enterprise and Dev Box is that Dev Box is geared towards developers and their specific needs. You can use the Microsoft Intune admin center to setup and configure Windows 365 Enterprise but you have to use the Azure portal to setup and configure Microsoft Dev Box.
Another difference is that you’ll start with creating something that is called a DevCenter and projects. Then you’ll allow the developers to create their own dev boxes for them to work with. Also you can have different environments so your devs can work in dev, test or production environments.
I hope you are just as curious as I am so let’s get to it!
Prerequisites
Microsoft Dev Box has the follow prerequisites:
- A valid Azure subscription
- Owner or Contributor role on the Azure subscription or Resource group.
- Each user must be licensed for Windows 10/11 Enterprise, Microsoft Intune and Azure AD P1.
- Make sure to have to open the correct firewall ports.
The architecture and the steps to configure dev box
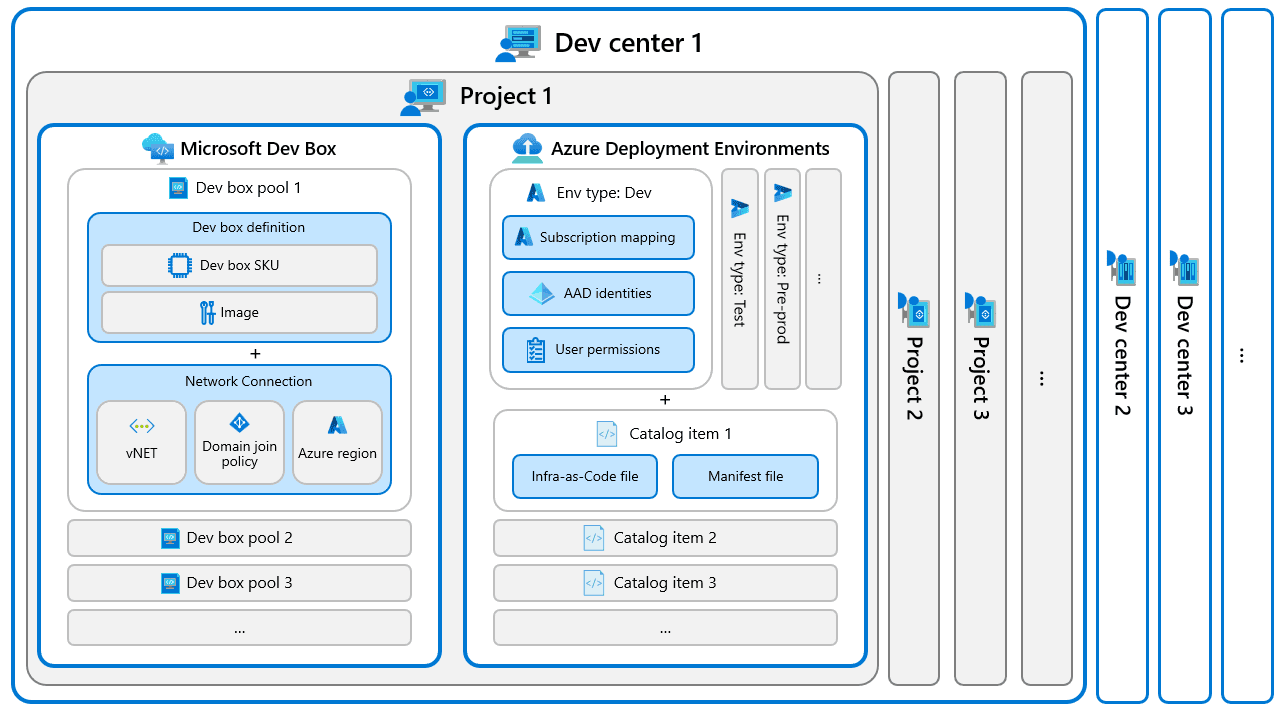
Let’s start with the architecture of dev box. It shows how the different parts of the product fit together. You start by creating a DevCenter and add a project. Next you’ll specify your environment and add your dev box pools. Per pool you assign a definition and network connection. DevCenter can have one or more projects. You can have more DevCenters.
Here are the steps I used to configure Microsoft Dev Box:
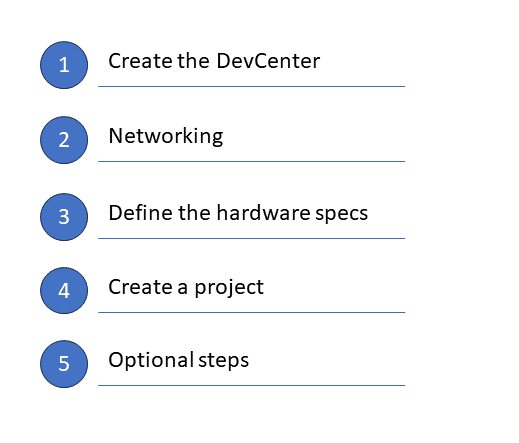
There’s a more detailed approach on the Microsoft website.
Step 1: Create the DevCenter
A DevCenter is where most of the configuration magic happens. You can have more than one DevCenter which comes in handy when you have developer teams spread around the world. This way you can make sure that the VM’s are closest to the developers.
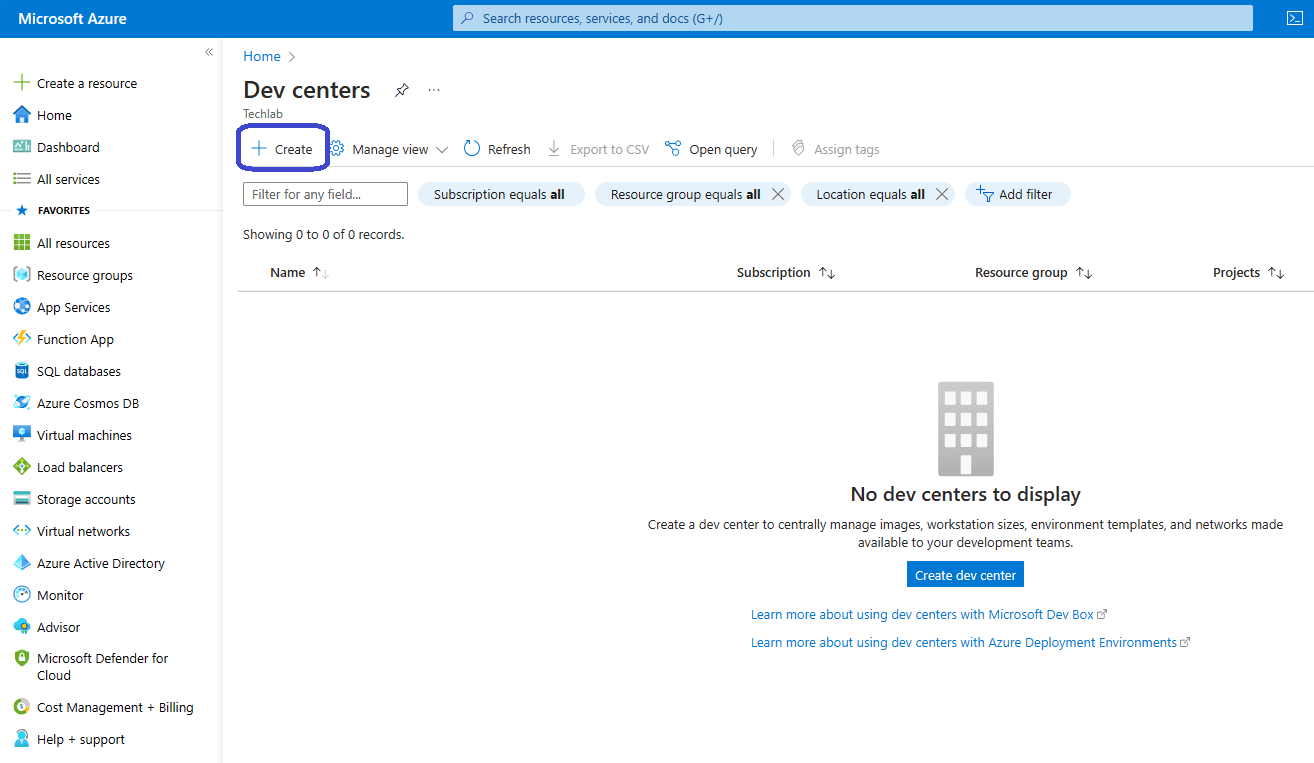
Sign into the Azure portal and search for ‘Dev Centers‘. Click on the + Add button in the ribbon to create your first DevCenter.
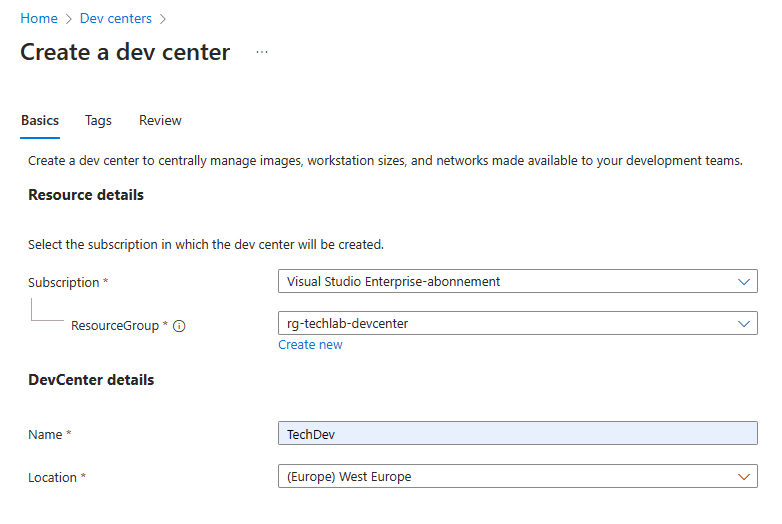
Select the correct Azure subscription and resource group. Give the DevCenter a name and select the location.
You can add tags if you want or continue to the review page.
The deployment of the DevCenter will start once you click the Create button. This action might take a couple of minutes to complete. Click the Go to resource button to go to your newly created DevCenter.
Step 2: Networking
Let’s start with creating a virtual network. From the Azure portal, search for Virtual Networks. Click the + Create button in the ribbon to get started:
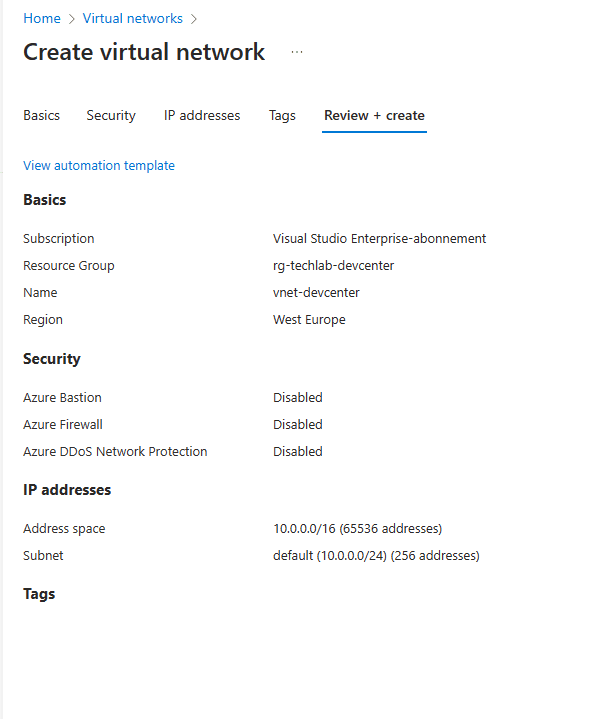
Select the Azure subscription and the correct resource group.
Give the virtual network a name and select the Azure region.
The default settings are OK for this demo so I won’t go into any details here. Take a moment to admire your awesome work on the Review + create screen and click the Create button once you’re happy with the settings.
The deployment of the virtual network only takes a couple of seconds to finish.
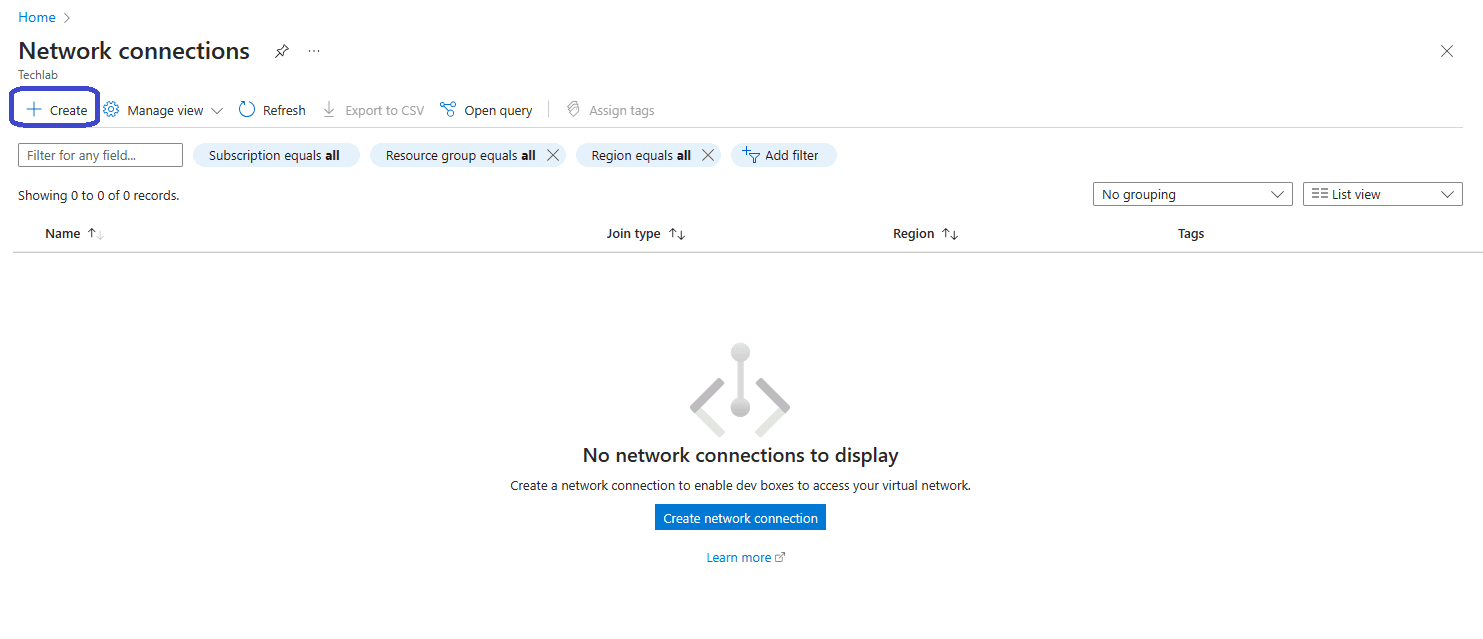
We can’t use the virtual network in our DevCenter yet. First we need to configure it as a network connection. To do so, search for Network connections in the Azure portal. Click the + Create button in the ribbon.
All we need to do here is to select the join type, the Azure subscription and resource group that holds the previously created virtual network.
And lastly we can give the network connection a name and select the virtual network and subnet for the dev boxes.
As always you can add tags if you want to go ahead and create the network connection. Creating a network connection only takes a couple of moments to complete.
For this demo I’ll use Azure AD join as the domain join type.
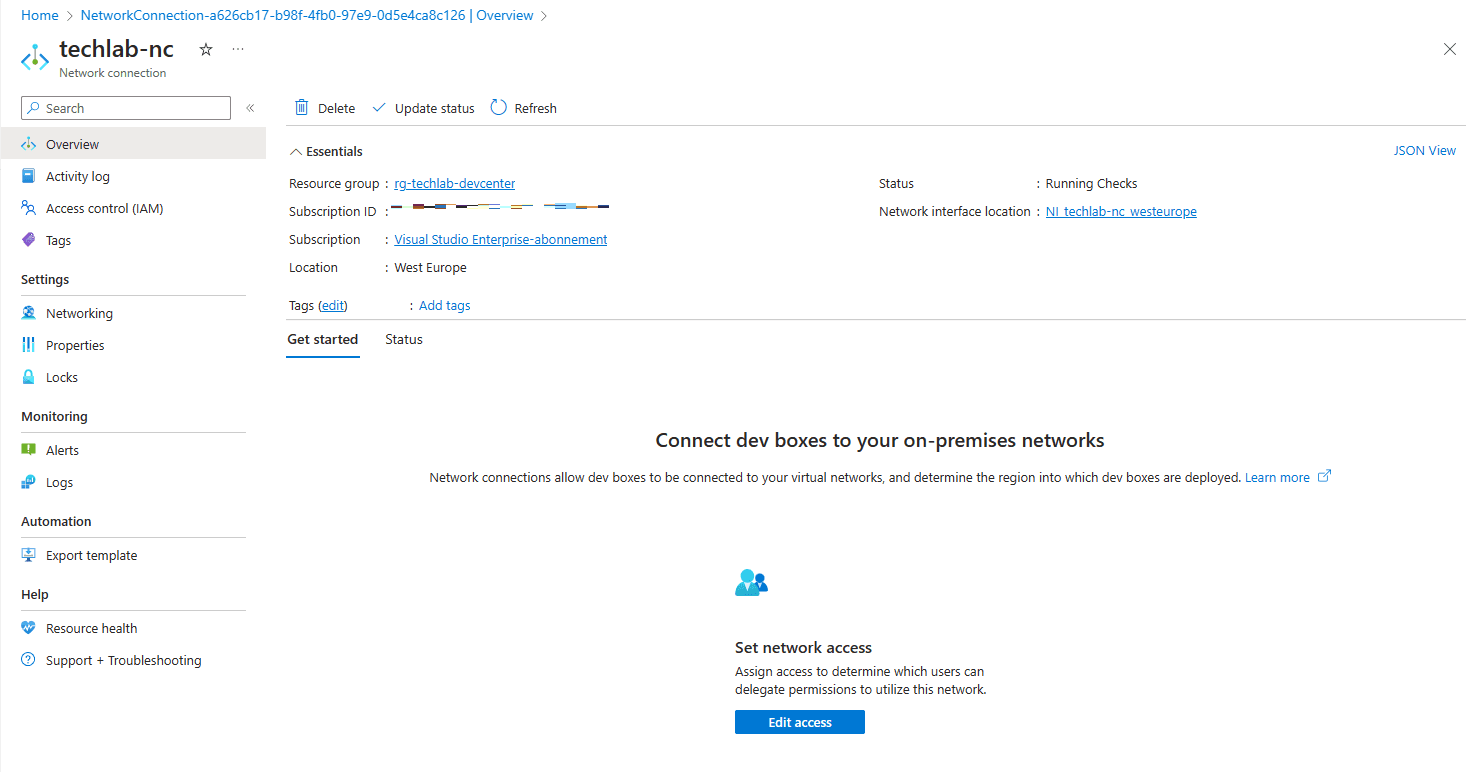
Once completed, the network connection looks something like this:
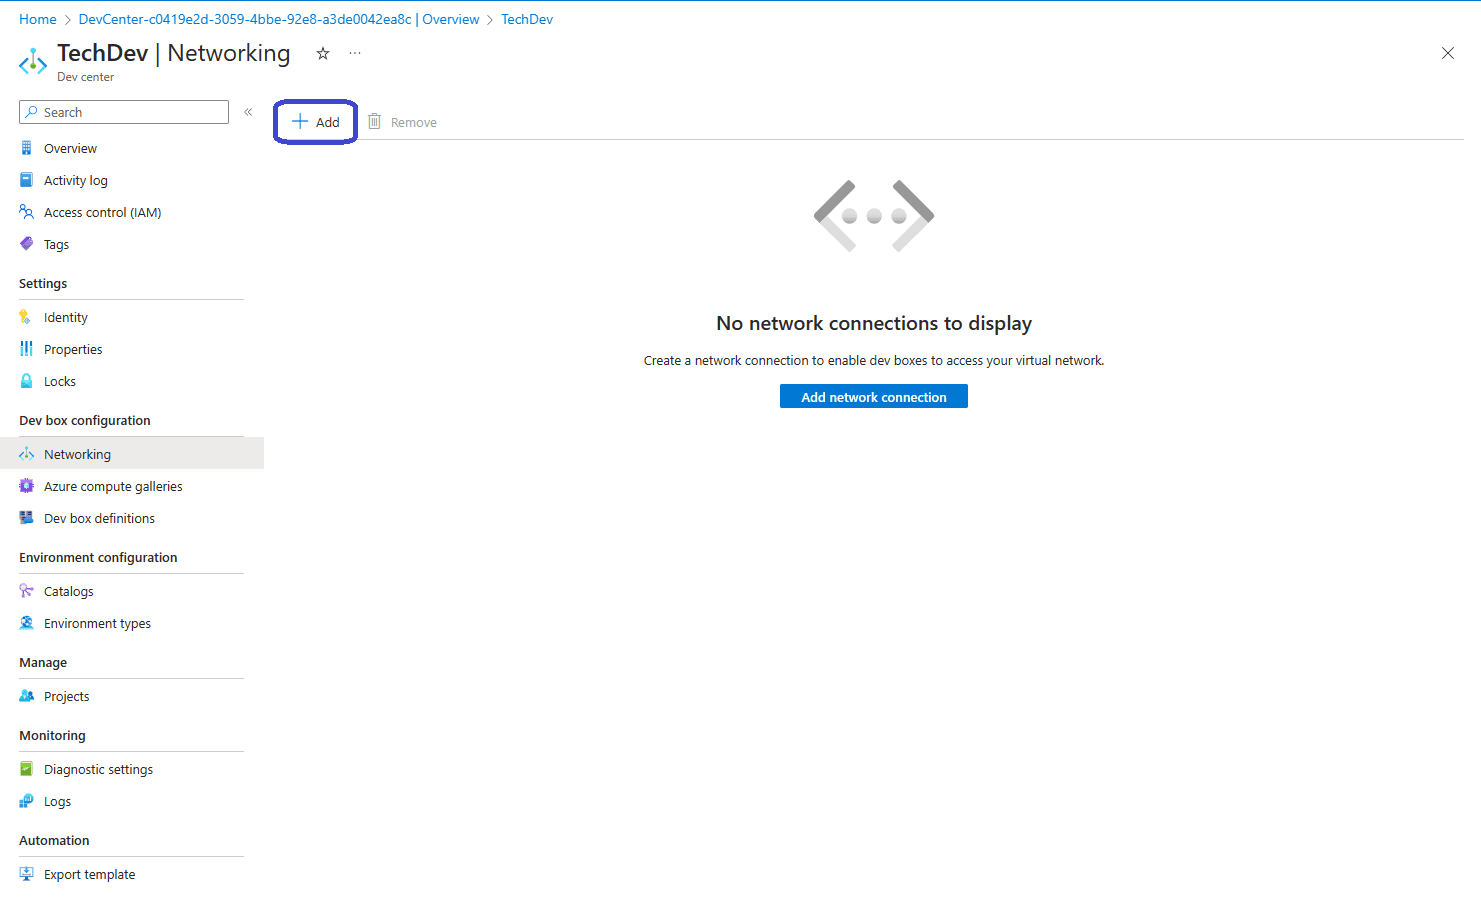
Now it’s time to link the network connection to the DevCenter. From the Azure portal, Dev Centers. Click the DevCenter your created earlier. Dev Box Configuration, Networking.
Click the + Add button to get started.
Select the correct network connection and click the Add button.
You should end up with something like this if everything goes according to plan:
Step 3: Define the hardware specs for the dev boxes
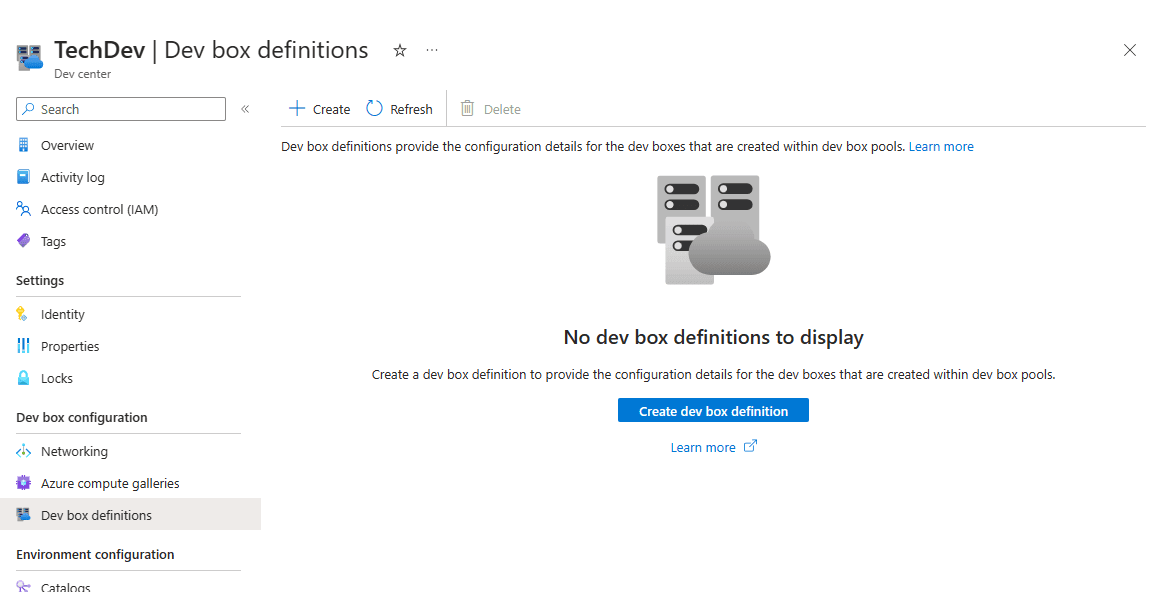
The next step is to define the hardware specs that our developers can use. We can define these definitions in the Dev box configuration, Dev box definitions menu.
Click the + Create button in the ribbon to get started. Creating a specification is pretty straightforward. All you need to do is to select;
- A name
- An image (operating system and apps)
- Image version
- Compute (how many vCPU and RAM)
- SSD Storage
Just add more definitions as you need. I created a high specced definition so let’s add a low spec definition as well.
Step 4: Create a project
We have now created the bare minimum to get started with Dev Boxes. I’ll come back to some other options later on in this post.
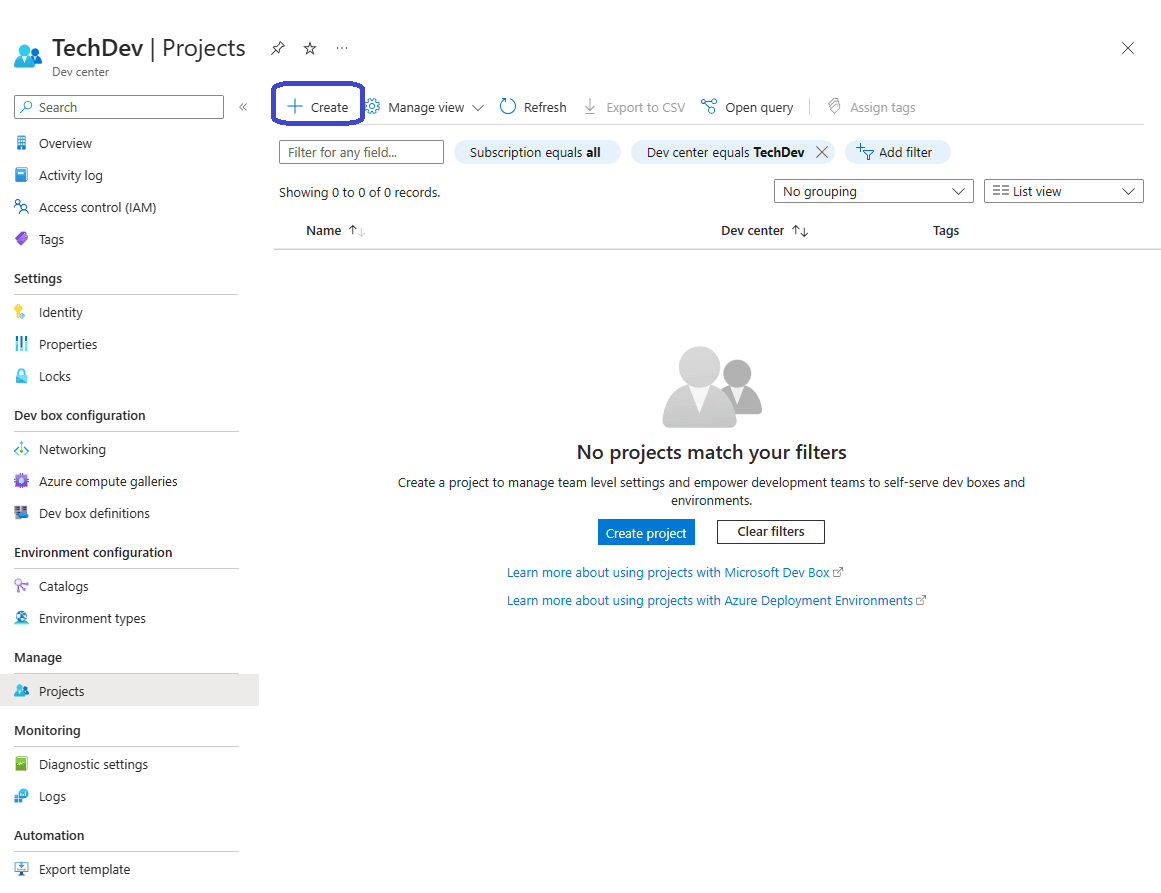
From the Dev Center menu, go to Manage, Projects. Click the + Create button in the ribbon to start your first project.
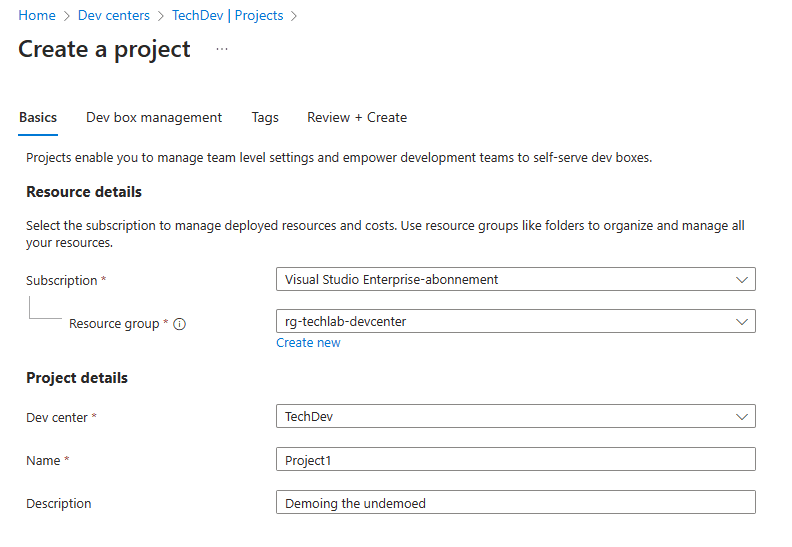
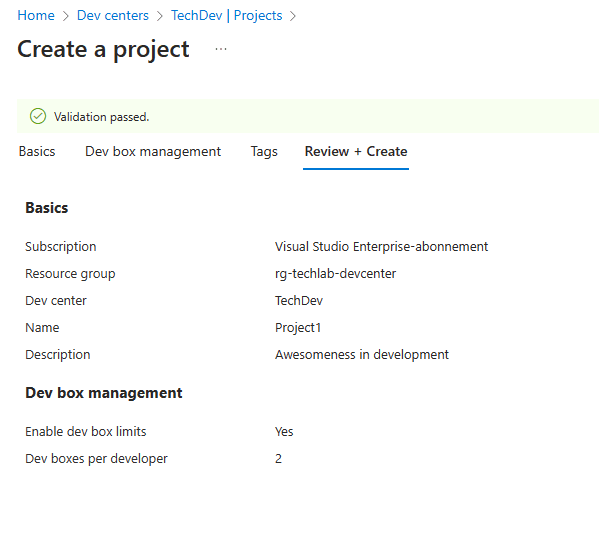
In the Basics tab we can select the Azure subscription and the resource group.
Then we need to select the Dev Center and give the project a name and optionally a description.
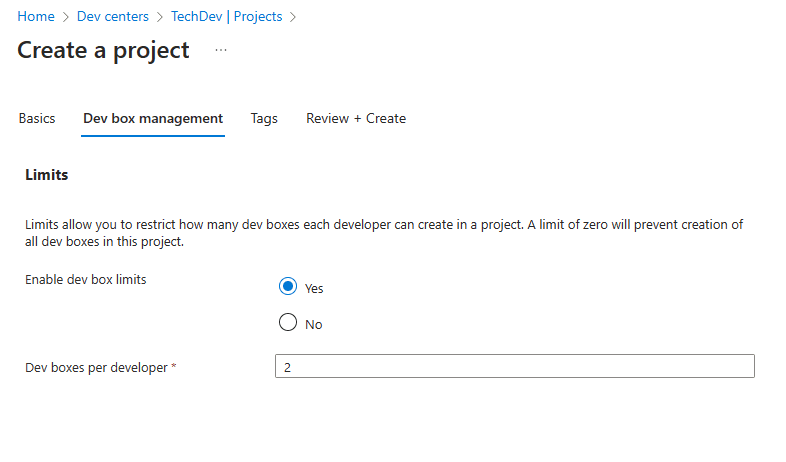
Moving on to the Dev box management tab. With limits you can set a limit to the number of dev boxes that each developer can create. If you leave the default option (No) then your devs can create as many dev boxes as they want. If you set the number to 0, then your devs cannot add dev boxes to this project.
I’ll set a limit to two dex boxes for this demo.
You can add some tags if you want to and continue to the Review + Create step. Create the project if you are happy with the settings.
Creating a project took a couple of seconds to complete.
There are a couple of things you need to configure for each project that you create;
- Assign permissions to the project.
- Create Dev box pool: configure the settings for each dev box in the pool.
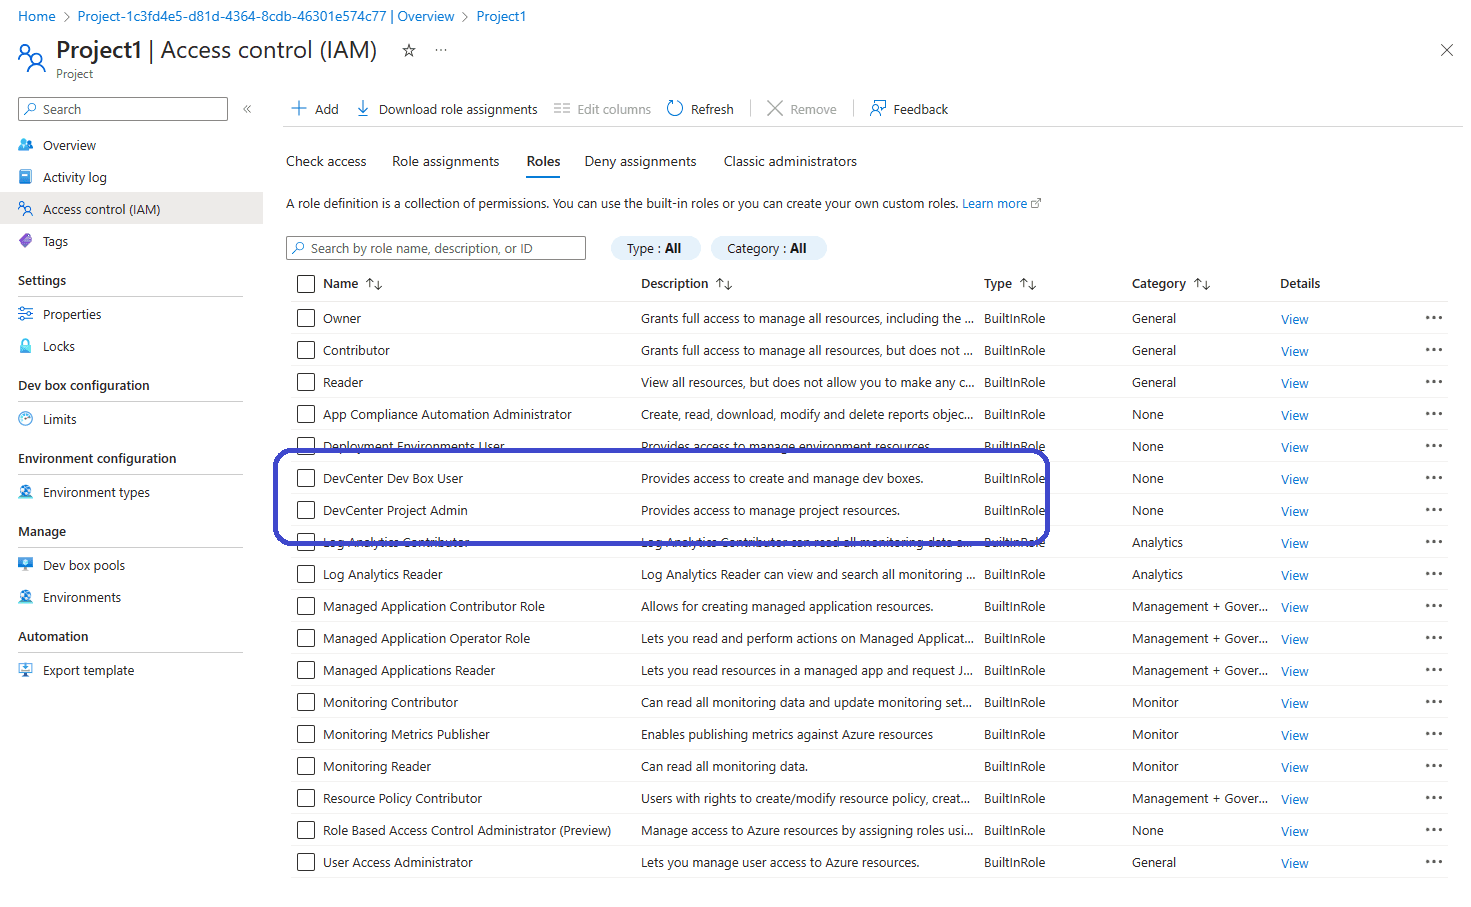
Let’s start with assigning permissions to the project. As always we can manage permissions on the resource itself, in this case the project in our DevCenter. Go to Access control (IAM), Roles tab.
There are two roles you want to be aware of;
- DevCenter Dev Box User: this role will provide access and management to dev boxes in the project.
- DevCenter Project Admin: this role will allow members to manage the project resources.
Click the + Add button in the ribbon and select Add role assignment. Select the DevCenter Dev Box User role and click Next. Search for a group or select individual users. For this demo I’ll just select one user.
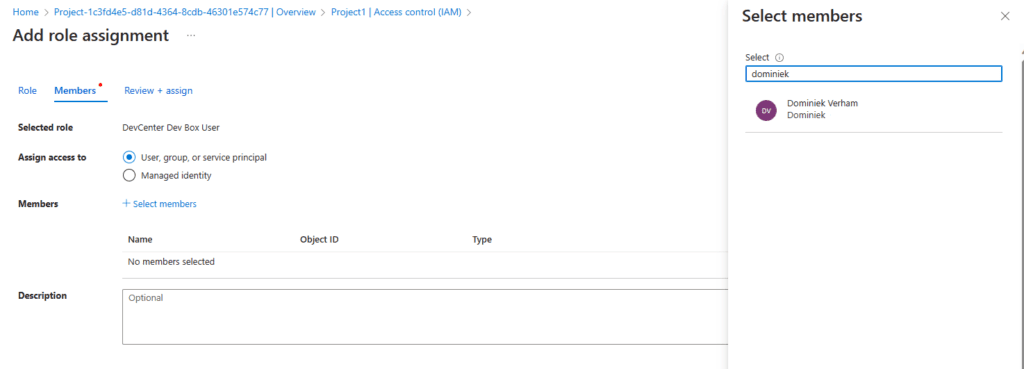
Save the role assignment by clicking on the Review + assign button.
I will skip the part of assigning user to the DevCenter Project Admin role since there really is no difference in the configuration process.
Now it’s time to configure a Dev Box pool. From the Project menu, Manage, Dev Box pools and select the + Create button in the ribbon.
In a dev box pool we can select the settings that we want to use for our dev boxes.
You can start out with some basic information, like specifying a name. Next we can choose from a dev box definition (that we created earlier in the demo) and an existing network connection.
You can choose if you want the devs to be local administrators or regular users. It probably makes more sense for them to be local admins so I’ll leave that to the default.
You can also configure auto-stop to save costs. Just set Enable auto-stop to Yes and set a time to power off the dev boxes.
Finish up by clicking the Create button.
Creating a dev box pool only takes a couple of seconds to complete and you’ll get a nice overview of the pool:
Of course you can add more pools into the project if you want to. In my case I added another pool to low end dev boxes.
You could also choose to create dev boxes based on other choices. For example you can create a pool for devs who are not local admin or for dev boxes that do not use the auto-stop feature.
Step 5: Optional steps
Our devs cannot now start to use Microsoft Dev Box since we completed the bare minimum. But I would like to point out that there are some other things that you can take a look at because there are things that can help the devs.
You have the option to create environment types. These come in handy when you work with dev, test or production environments. You can configure these at the Dev Center level and apply these at the project level.
Another thing to take a look at are Catalogs. You can link to existing catalogs on GitHub or Azure DevOps.
The developer experience
Great! The environment is now ready for our developers to use. But what is the developer experience like?
As a developer you can use your favorite browser to navigate to https://devbox.microsoft.com
Now that I’ve signed in as a developer, I can add my own VMs according to the settings of the project. I just have to click the + New dev box button. A pane will appear from the righthand side of the screen:
I can specify a name for my first dev box.
I can see how many dev boxes I can create for the project that I am assigned to. In this case I can see that I can create two dev boxes.
Now I can choose if I want a high spec of a low spec dev box. Let’s create one of both!
We are kindly reminded that creating a dev box can take up some time (25 – 65 minutes). So there’s definitely a coffee break in my near future!
I ended up with something like this:
So what happens if a developer tries to create more than the allowed number of dev boxes?
Well nothing, the options to create an additional dev box disappear and they end up with this screen:
You can see that the max number of dev boxes is reached and the create button stays greyed out.

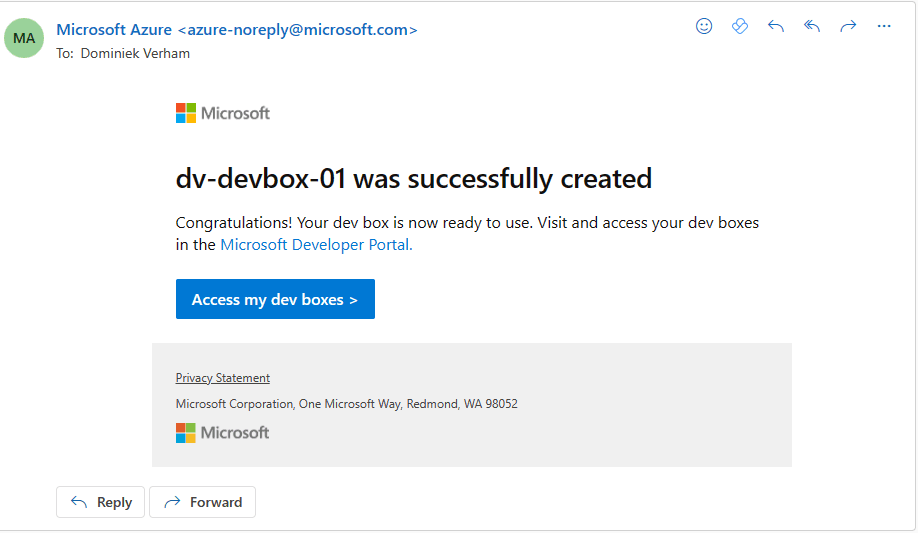
In one of the previous screenshots you can see that Microsoft will send you an email once the process completes. This is what that mail looks like:
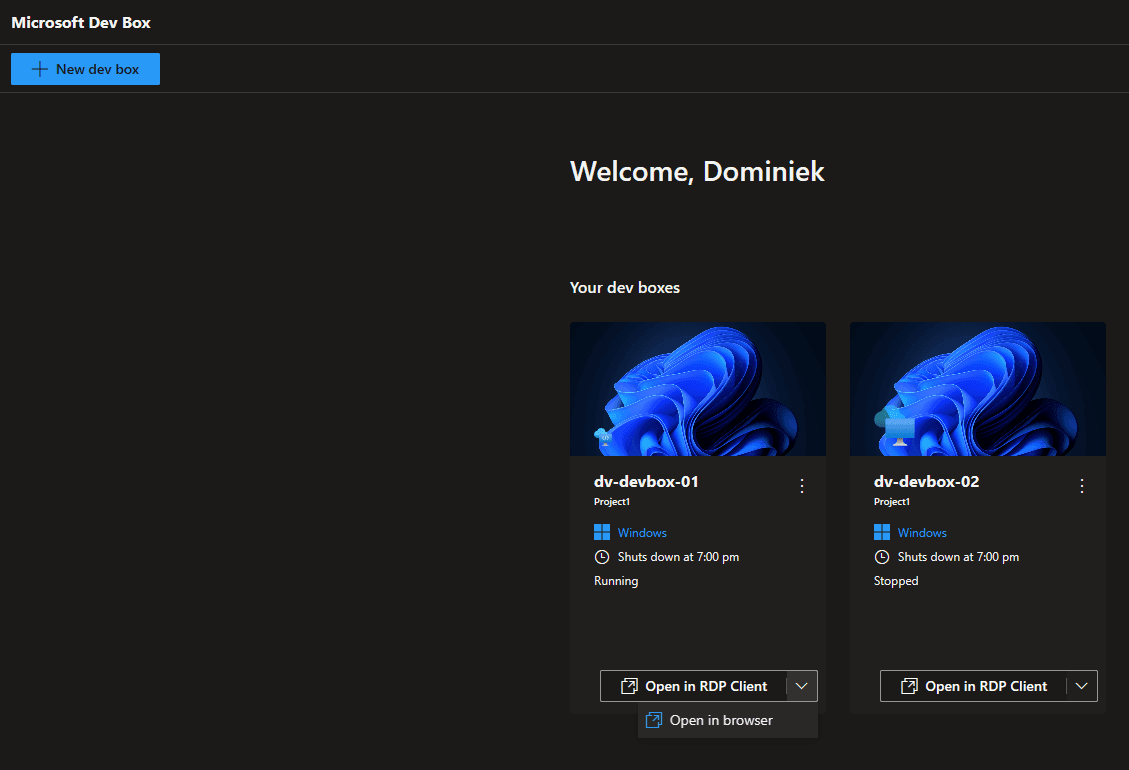
A quick refresh of the devbox webpage showed me that both my dev boxes are up and running!
Just like Windows 365, you get a nice menu with the follow options;
- Hibernate: if this applies to your configuration
- Shut down
- Restart
- Delay scheduled shutdown
- More info
- Delete
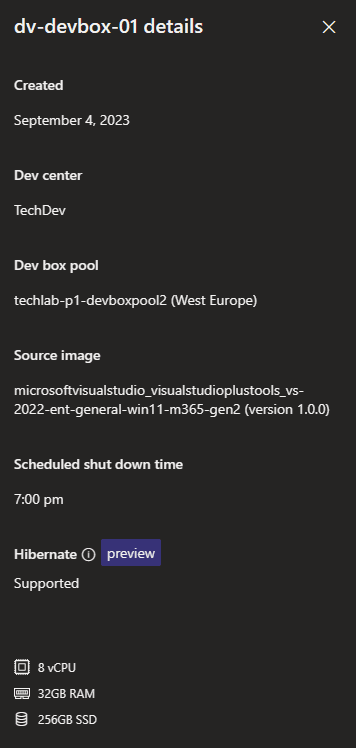
Most options are pretty self explanatory. I wondered about the more info, since I can’t tell the difference in virtual hardware from this screen. More info looks like this:
For me I thought it would make sense to have point in time restore points available. Especially since the dev box product uses the Windows 365 service. So let’s take a minute to spend on management options.
You can sign into the Microsoft Intune admin center. You can find the dev boxes in the Devices, All devices menu. They are not visible in the Devices, Windows 365 menu.
You might have to check the list twice because these dev boxes will actually follow the Windows 365 naming convention.
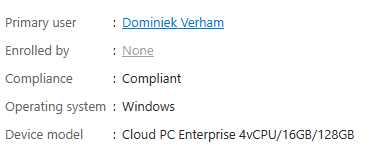
Once device will identify as a Cloud PC Enterprise and two others will identify as a Microsoft Dev Box.
This means we can manage our dev boxes with Microsoft Intune, which is a good thing!
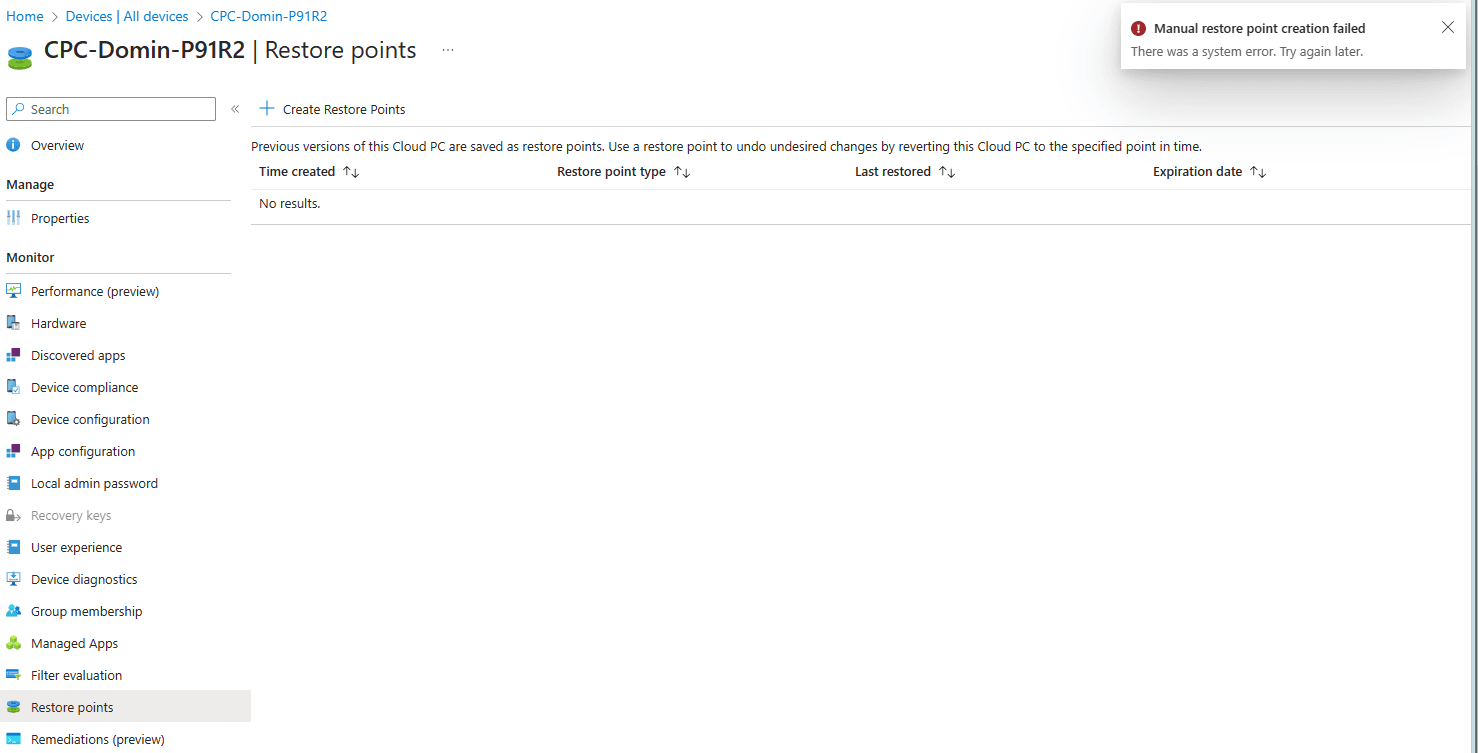
Back to the point in time restore feature. You can go to the restore points menu item and you’ll see that they do not have restore points. You cannot manually create a restore point. Microsoft Intune will give you a friendly reminder;
How to connect to the dev box?
Option 1: The dev box portal
We already saw the dev boxes pop up on the dev box portal. You have all the management options available and you can choose to connect using the browser or the RDP client.
URL: https://devbox.microsoft.com
Option 2: The Windows 365 portal
A second way to connect is the Windows 365 portal. You should know that the management options are different for the dev box compared to the dev box portal. Currently you have the following options:
- Reset
- System information
Option 3: The Windows 365 App
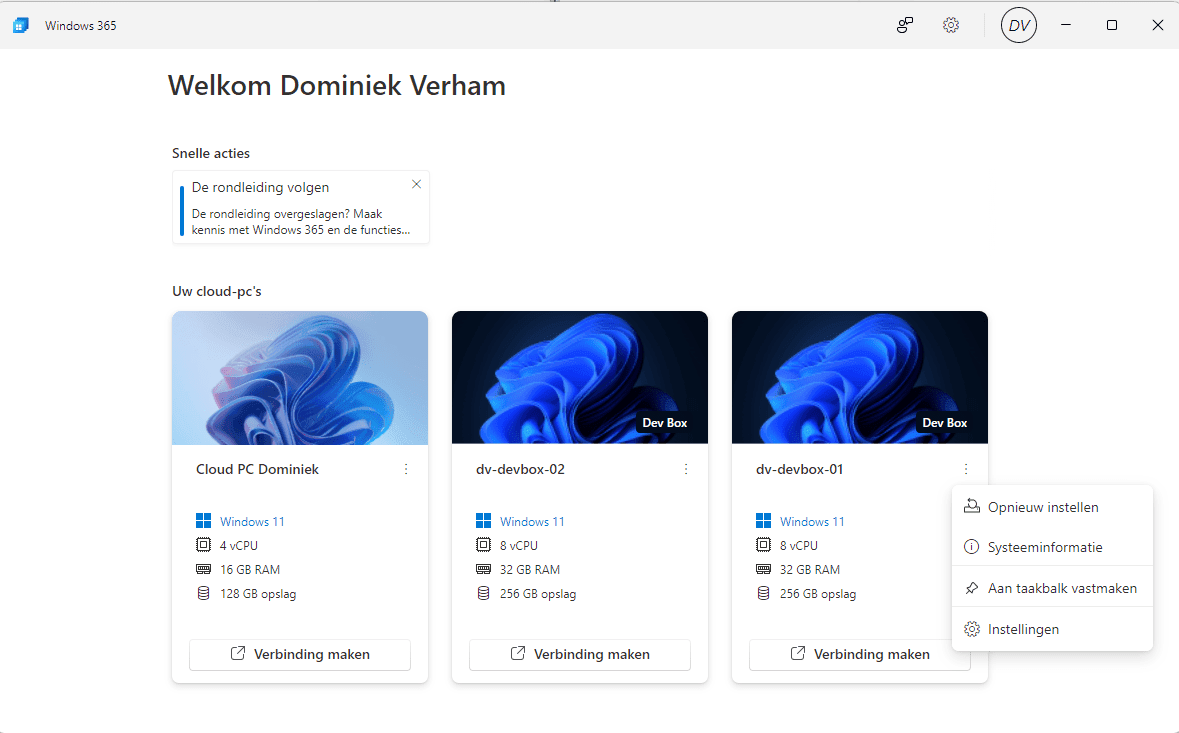
The dev boxes are visible in Windows 365, formerly known as the Windows 365 App.
You do get some management options here:
- Reset: this will reinstall your dev box. This is not the point in time restore feature.
- System information.
- Pin to taskbar.
- Settings; you can set display settings.
Option 4: The Remote Desktop app
The Remote Desktop app already shows your Windows 365 Cloud PCs, your Azure Virtual Desktops and RemoteApps. So it makes perfectly sense that it also shows the assigned dev boxes. The only management option you have is which screens you want to use.
I think it’s about time we connect to the dev box and see what the buzz is all about! In my case I used the RDP client to connect to the dev box. In this case I chose a Windows 11 system and we can see that it’s tailored to developers:
Resources
I used the following resources for this post:
Configure hibernation for Microsoft Dev Box – Microsoft Dev Box | Microsoft Learn
Configure dev center environment types – Azure Deployment Environments | Microsoft Learn
Add and configure a catalog – Azure Deployment Environments | Microsoft Learn
Quickstart: Configure Microsoft Dev Box – Microsoft Dev Box | Microsoft Learn
Share this:
- Click to share on LinkedIn (Opens in new window) LinkedIn
- Click to share on X (Opens in new window) X
- Click to share on Facebook (Opens in new window) Facebook
- Click to share on WhatsApp (Opens in new window) WhatsApp
- Click to share on Telegram (Opens in new window) Telegram
- Click to print (Opens in new window) Print






















Thank you for this great instruction.
I followed your instruction and run into an issue where the developer cannot create a dev box under devportal.
I created a MS Outlook account and subscribed to Microsoft Azure Pay As You Go Subscription. I also subscribed to Microsoft 365 90 days trial.
The problem that I have is the created Azure user cannot create the Dev Box because of No Intune License. I cannot assign an Intune License to this Azure user (No option). I’m not sure because I’m using MS 365 Trial or not. I cannot also create the dev box using the Microsoft 365 user account, which I assigned an Intune license to it successfully. Furthermore, the Devportal complains that the Microsoft 365 User account is a guest account and cannot access to any resource after login to Devportal. From Azure I invited the Microsoft 365 user to access the Project to create the Devbox. Azure lists the invited user as external.
Have you run into this issue and have any suggestion?
Thank you.
Man Ho
I too have this issue and would love some instruction. I set up a brand new Azure subscription as a sandbox and cannot figure out how to pair Intune with the DevBox capabilities?