What’s up, everyone!
Did you know that Microsoft released External Identity in public preview for Azure Virtual Desktop and Windows 365? I’m really excited for this feature since it allows secure access to corporate desktops for external guest users which means you don’t have to create a user identity in your own tenant anymore, which is a great solution for contractors. Join me in this post as I will cover external identities for Windows 365!
Enjoy!
Prerequisites
The following are prerequisites for external identities to work:
- The operating system must run Windows 11 Enterprise with the 2025 – 09 cumulative updates installed.
- The Cloud PC / AVD Session Host must be Entra Joined.
- Single Sign-On (SSO) must be enabled.
- Users have to sign in with the Windows app or using the web browser.
- Configure a registry setting on the local device running the Windows app (EnableIdSignInUx). You don’t need to configure this setting on the affected Cloud PCs.
- Windows 365 has it’s own requirements and they must be met. So make sure to add the Entra P1, Windows and Intune (or M365 plan) to the guest user.
Make sure to read up on the known limitations:
- Assigning an Intune device configuration policy to users will not work. Instead assign policies to devices.
- Kerberos authentication will not work (which is used to connect to on premise resources like file shares.)
- Know that FSLogix is not supported (yet).
- And more…
Provision a Cloud PC to a guest user
First I will need to invite a guest user to my tenant. For now I will invite a guest user from another demo tenant.
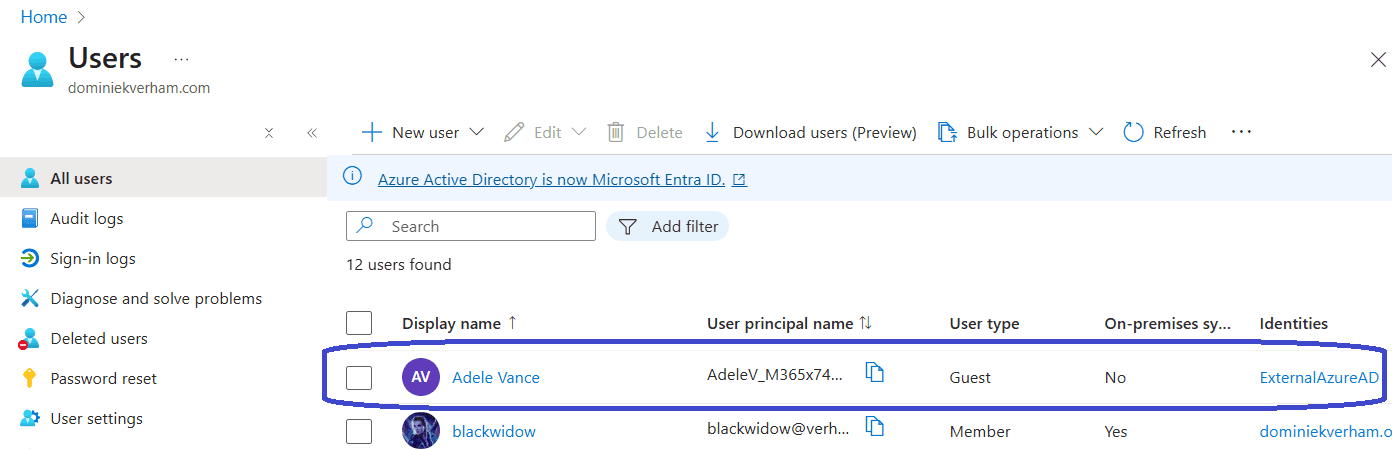
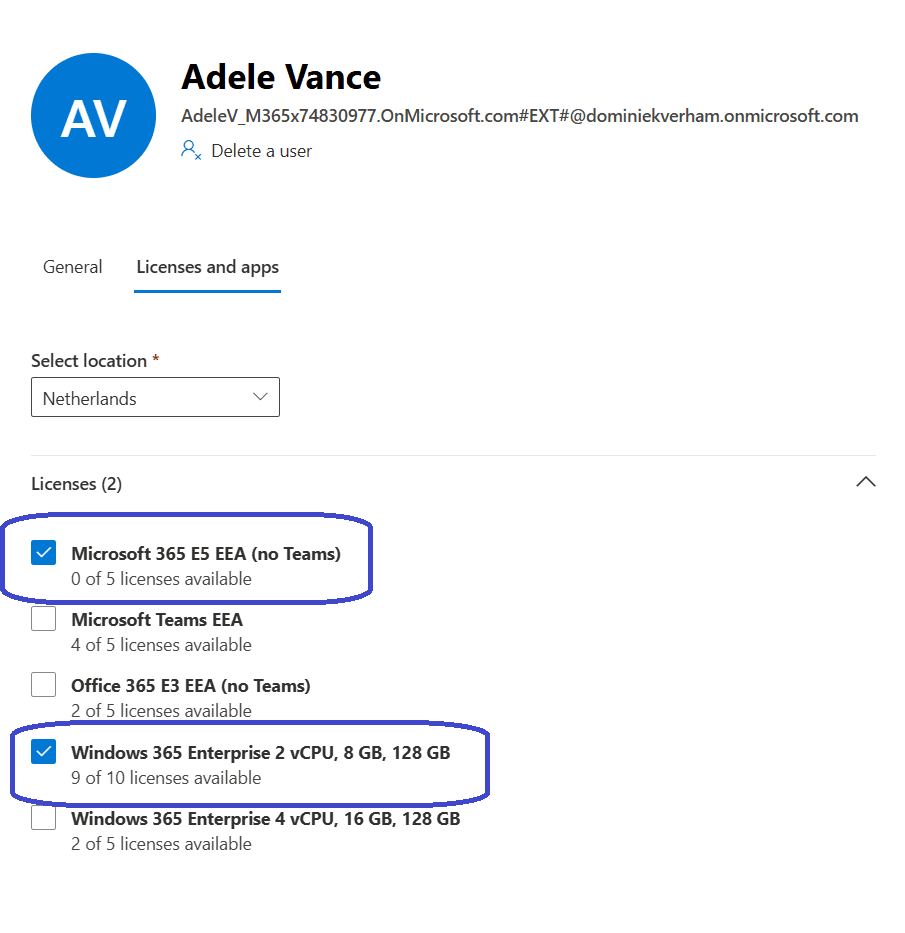
With that taken care of, we can now assign the Windows 365 license to the guest user. Sign into the Microsoft 365 Admin Center, Users, Guest users:

Click on the guest user, go to Licenses and apps and select the desired Windows 365 license and M365 license:
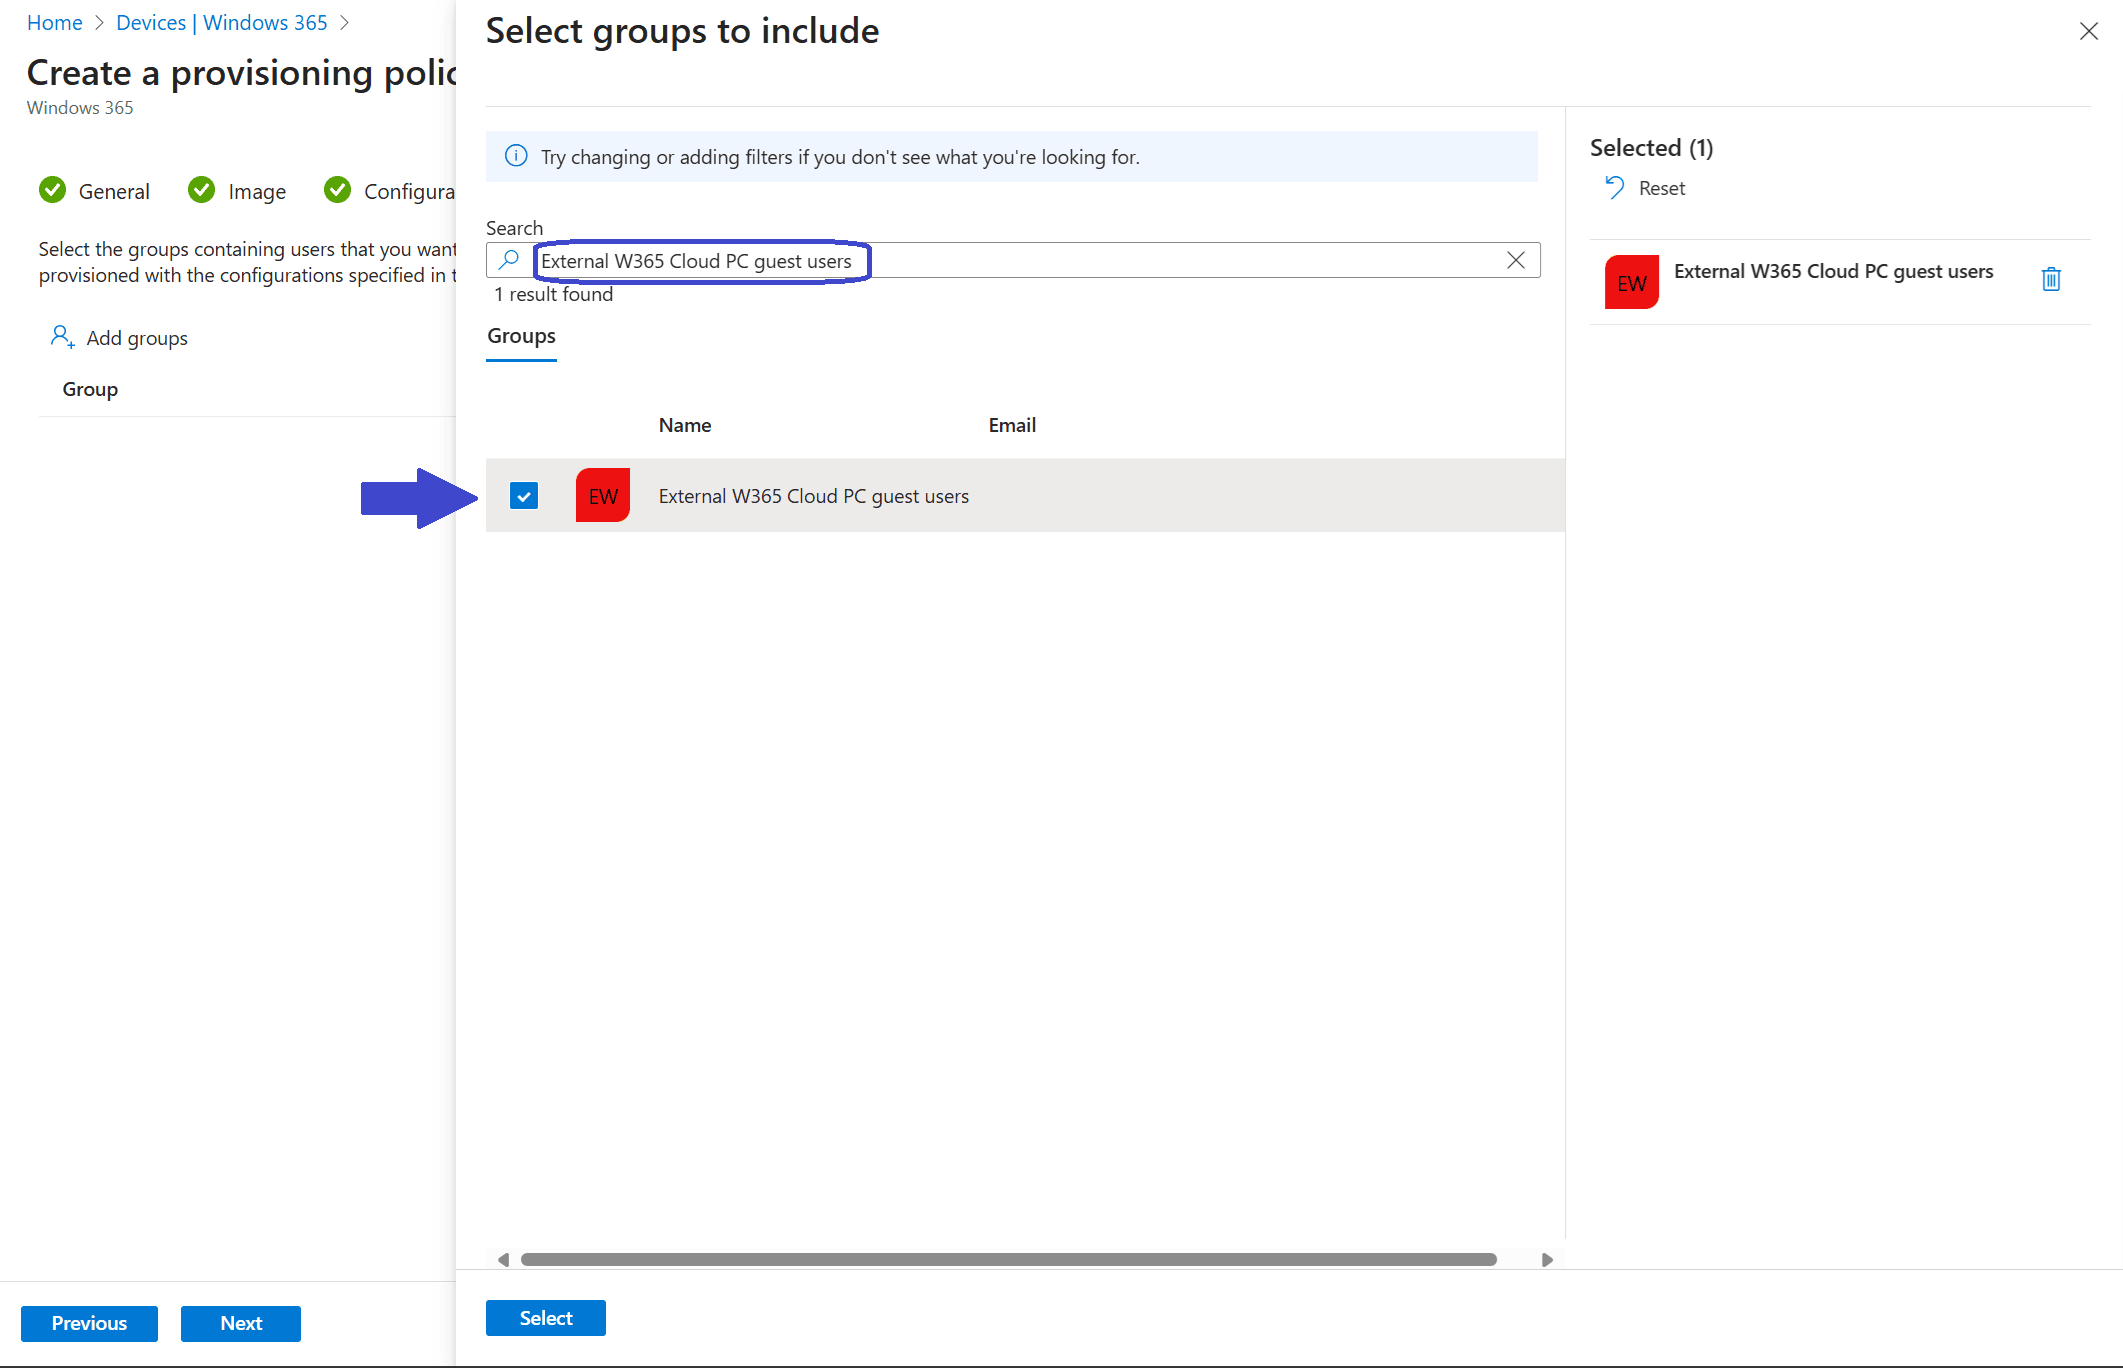
I would recommend to create a group and add the external users to it. We will need it later on when creating the provisioning policy. In my demo I used the name External W365 Cloud PC guest users.
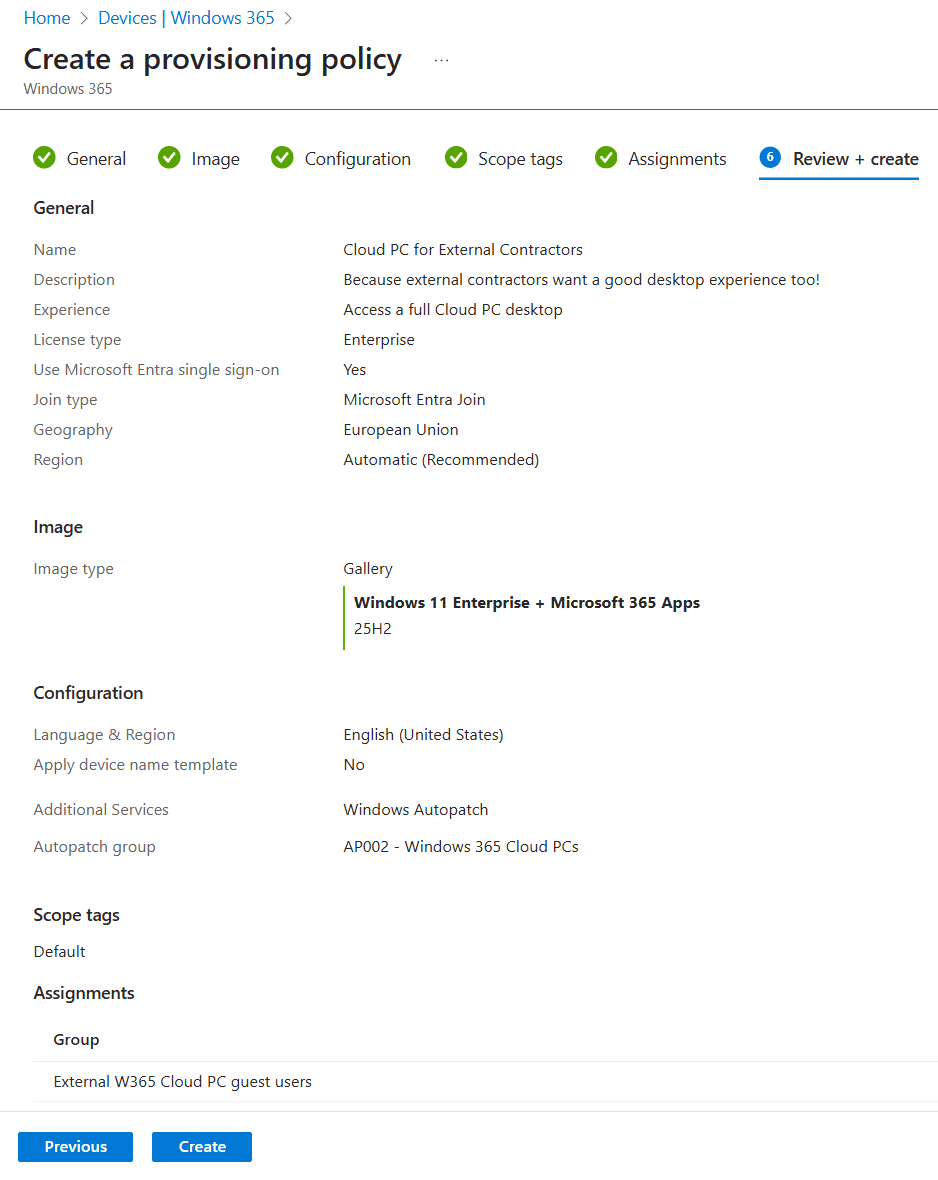
Now it’s time to create a provisioning policy. From the Microsoft Intune Admin Center, Devices, Windows 365, select the Provisioning Policies tab. Click the + Create policy button in the ribbon.

Create the provisioning policy:
- Enter a name and a description.
- Select Access a full Cloud PC desktop as the experience.
- Select Enterprise or Frontline depending on the license that is assigned to the user.
- Make sure the join type is Microsoft Entra Join, which is a requirement.
- Make your networking life easy and select Microsoft Hosted Network or select Azure Network Connection if you want to configure the networking part yourself.
- Select the desired Geography and Region.
- Finish up by enabling Single Sign-On, which is a requirement.

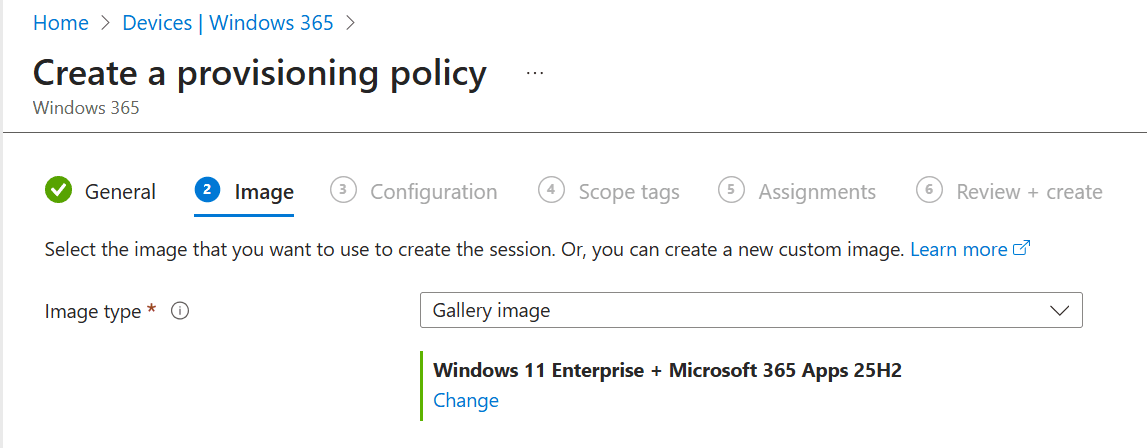
Select the image type you want to use. Gallery images are already optimized for Cloud PCs. You can also select a custom image, make sure to use Windows 11 Enterprise and install the required cumulative update (and of course optimize the image accordingly).
Also, did you notice that we have the option to select the new Windows 11 Enterprise 25H2 image?
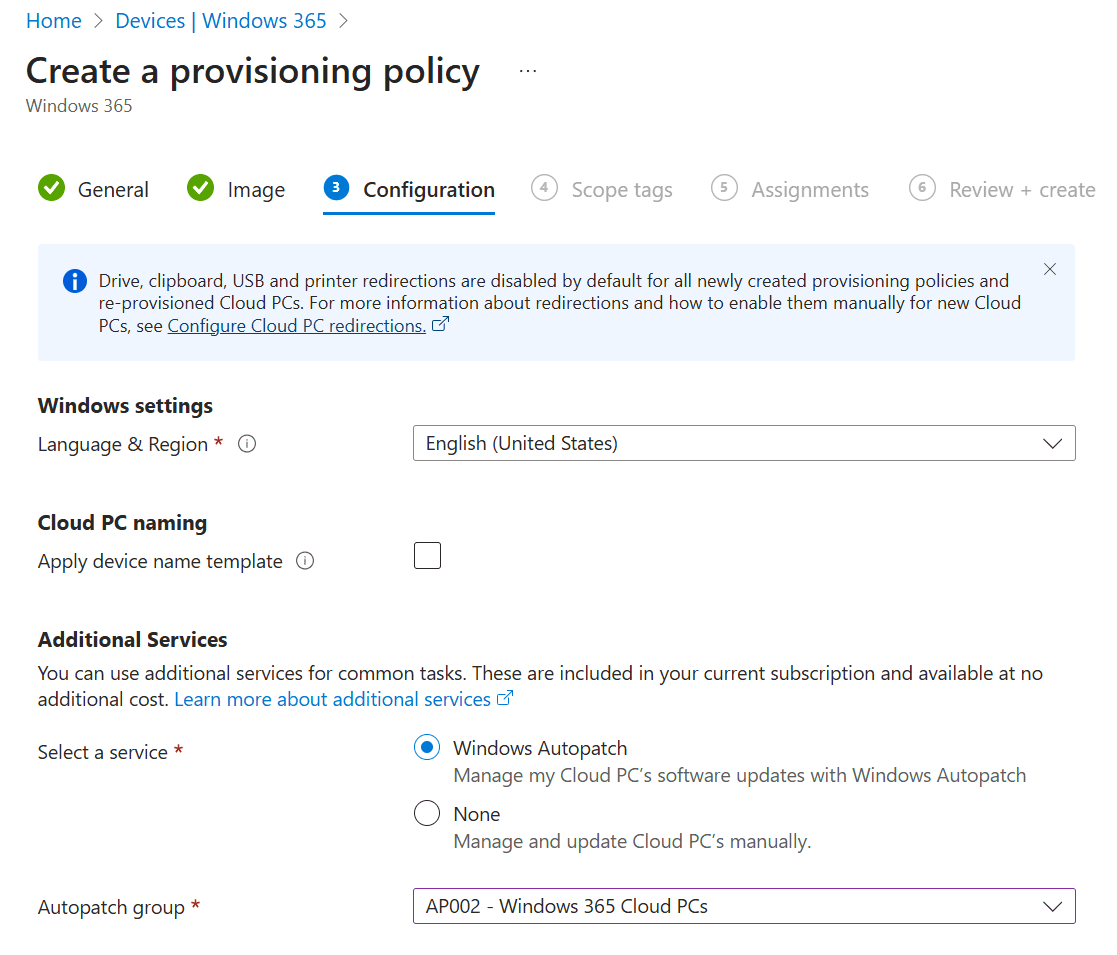
Next up is the configuration step. Here you have the option to:
- select the Language and Region.
- configure a device naming template.
- enable Windows Autopatch.
Earlier in this post I created a group called External W365 Cloud PC guest users. Assign the group to this provisioning policy.
As always, take a moment to admire your awesome work and click the create button once you are happy with the configuration.
You will find the newly created provisioning policy in the Provisioning Policies tab:

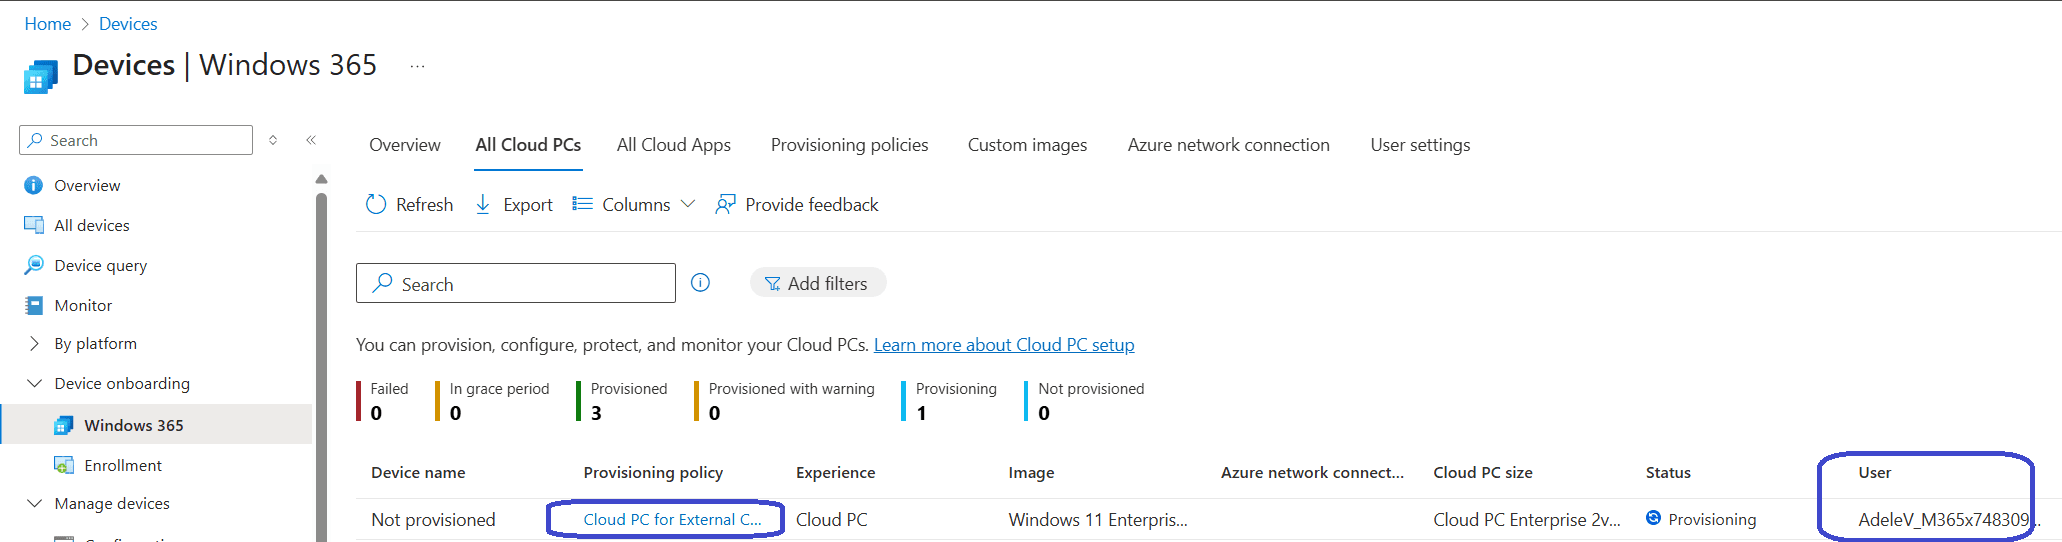
How do we know that it worked?
If we head back to the All Cloud PCs tab, we should now see that a Cloud PC is being provisioned for the guest user, in my case Adele Vance.
While the Cloud PC is being provisioned, we can continue with the final requirement which is adding a registry setting on the local client. You can add it manually:

Or you can use the PowerShell oneliner if you prefer:
New-Item -Path "HKLM:\SOFTWARE\Microsoft\WindowsApp" -Name "Flights" -Force | Out-Null; Set-ItemProperty -Path "HKLM:\SOFTWARE\Microsoft\WindowsApp\Flights" -Name "EnableIdSignInUx" -Value 1 -Type DWordSigning in to the Cloud PC as a guest user
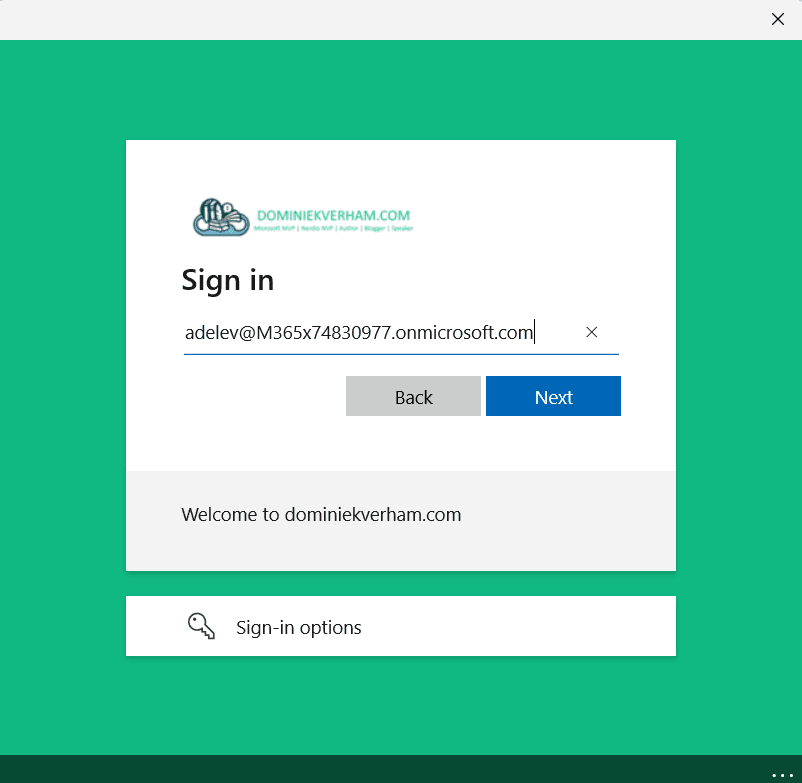
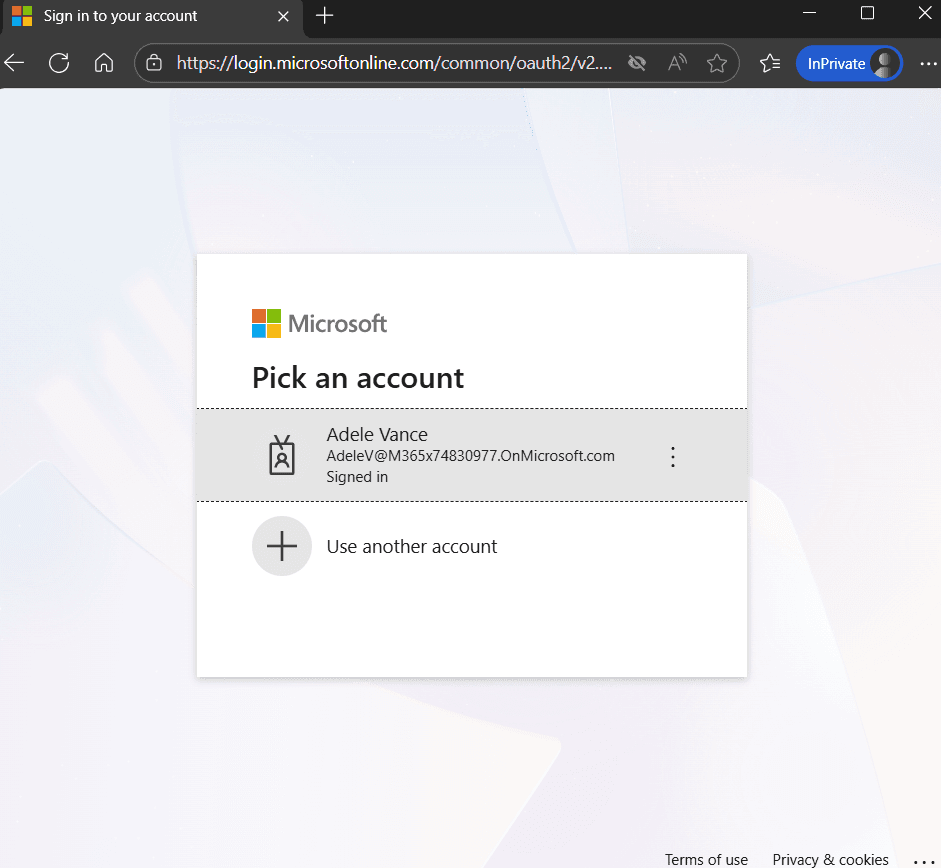
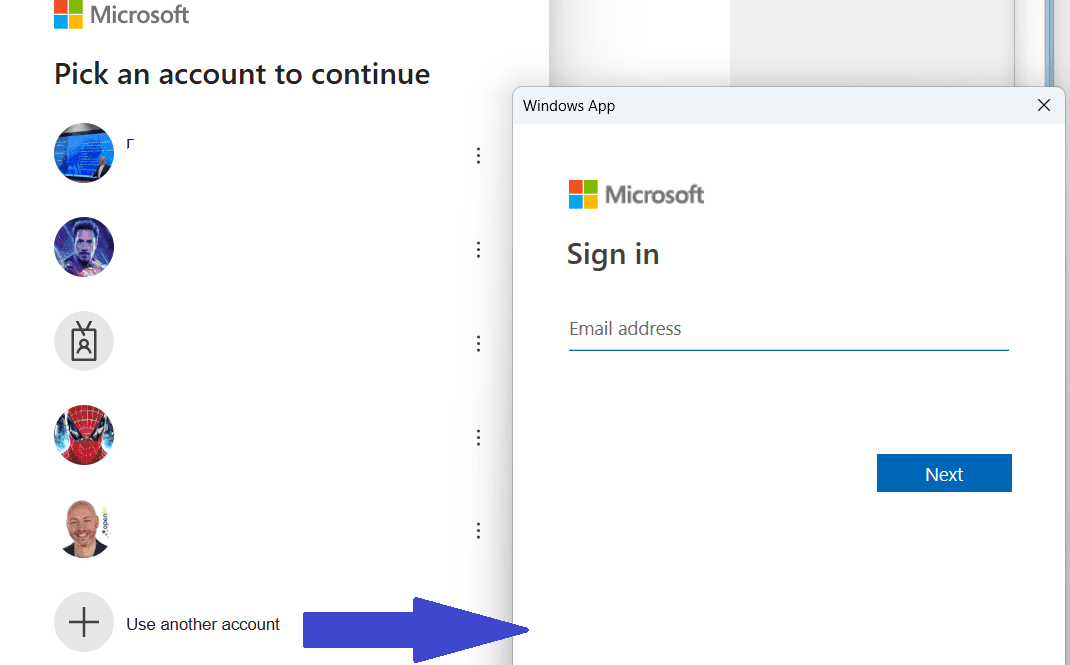
Let’s find out what the user experience looks like. Start by opening up the Windows app and use the account selector, Use another account.
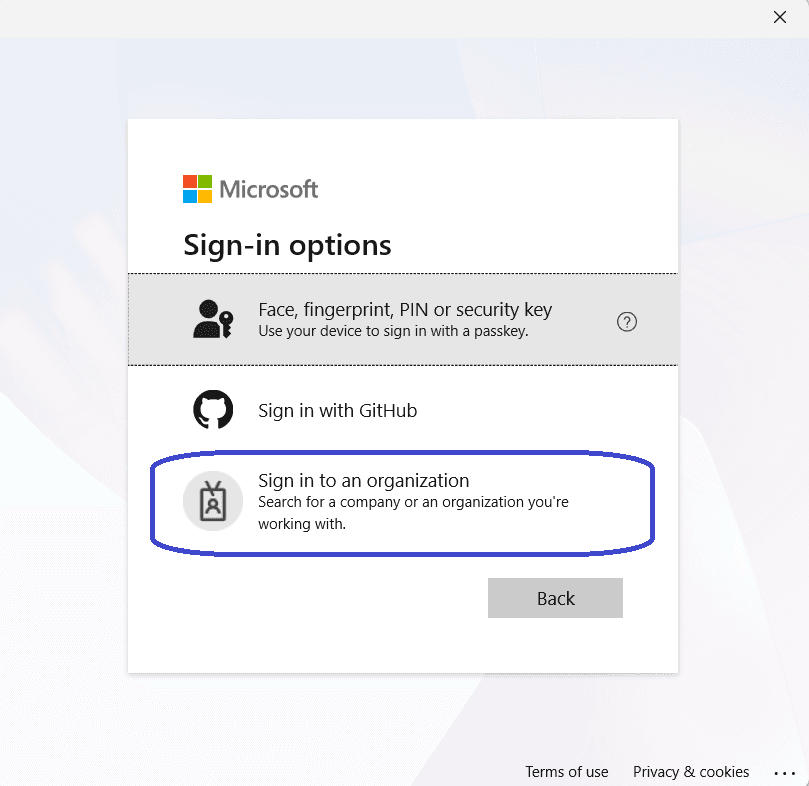
But wait! Don’t enter the user credentials yet! First, click the Sign-In options at the bottom.

Select Sign in to an organization and continue.
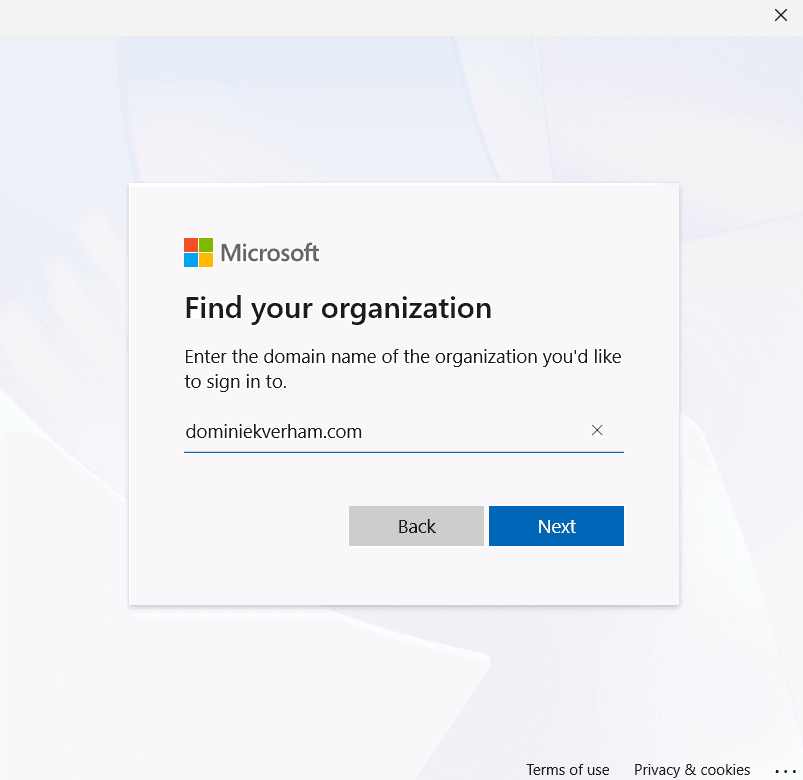
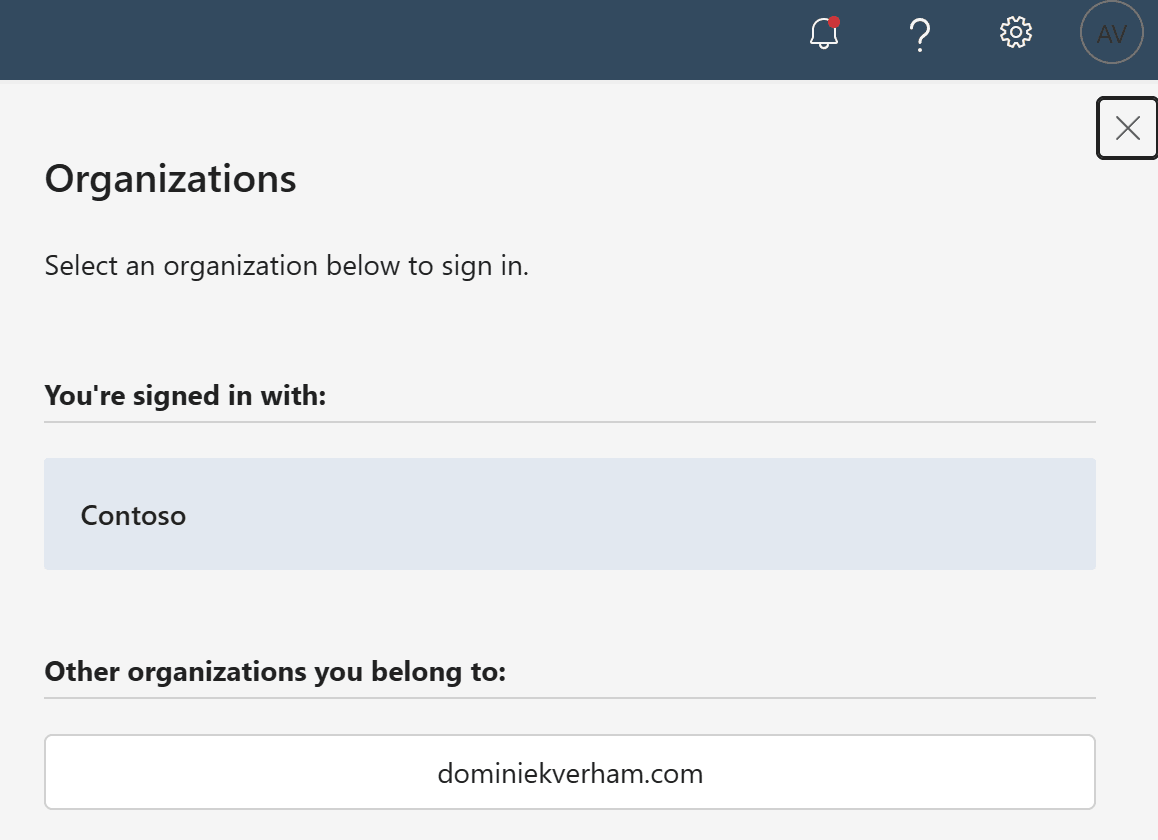
We need to tell the Windows app where to authenticate the user, so it makes sense we need to enter the domain of the company that will provide the Cloud PC and has the guest user object.
Now it’s time to sign in as the user so we need to enter the mail address of the external guest user (also notice the company branding):
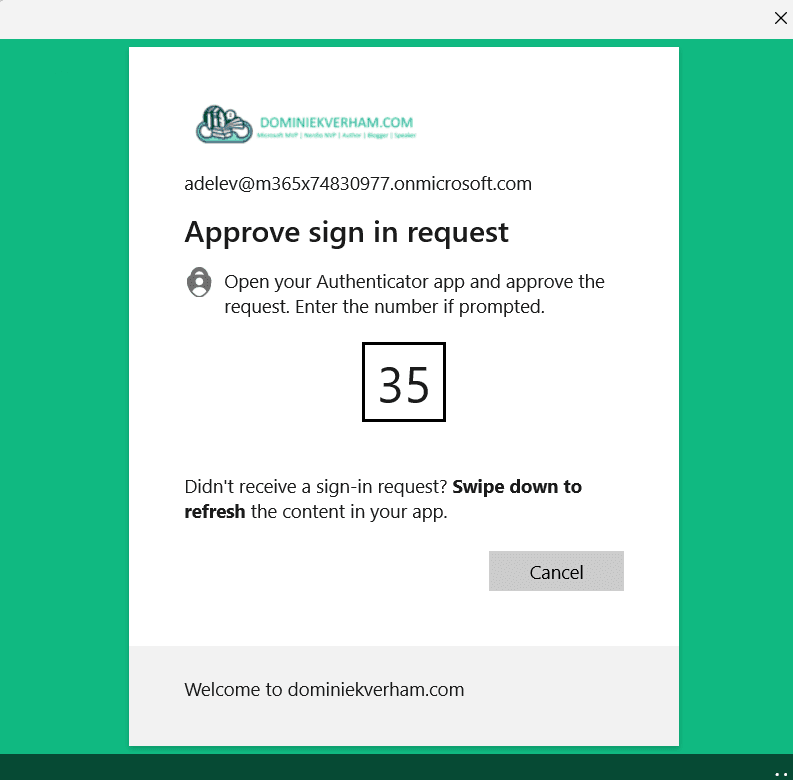
Continue to process as usual. Enter the corresponding password and complete the sign in with MFA:
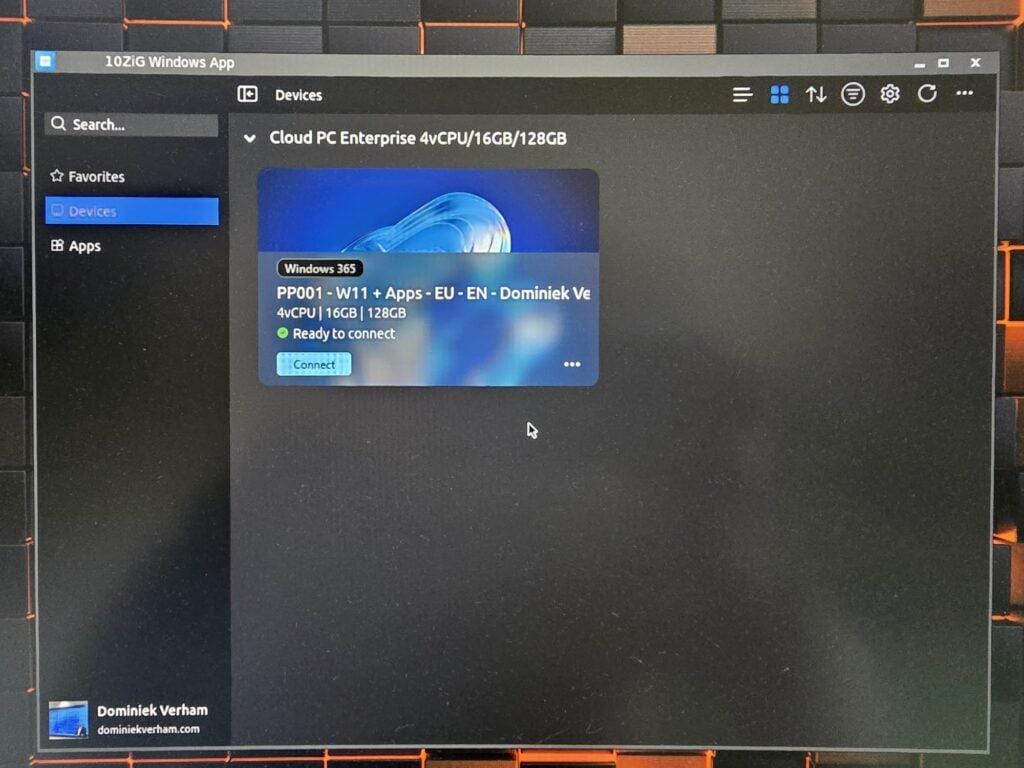
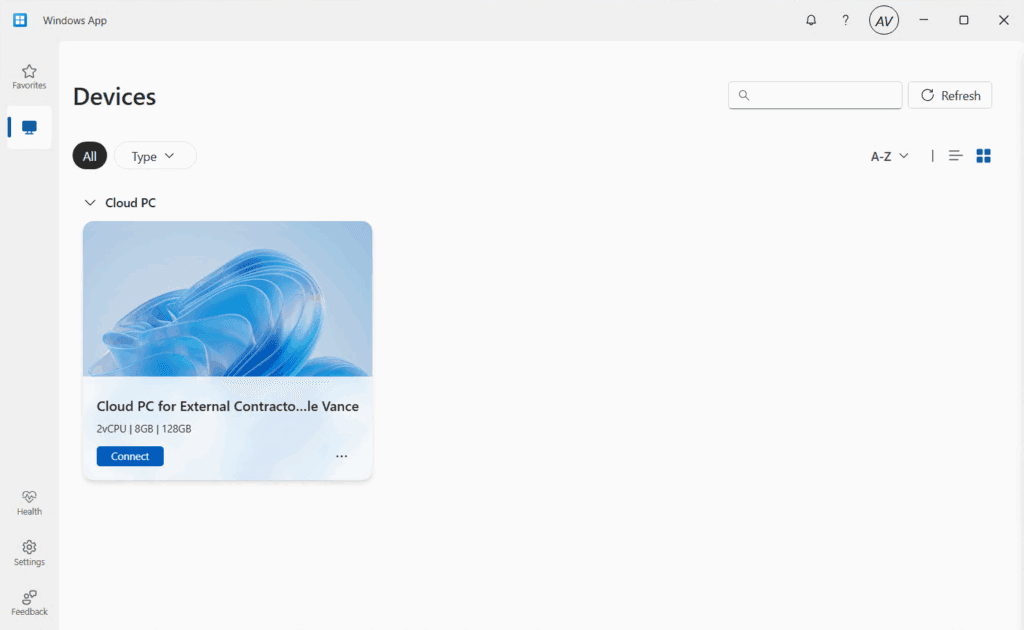
You will get access to your shiny Cloud PC once you signed into the Windows app:
What about the web client?
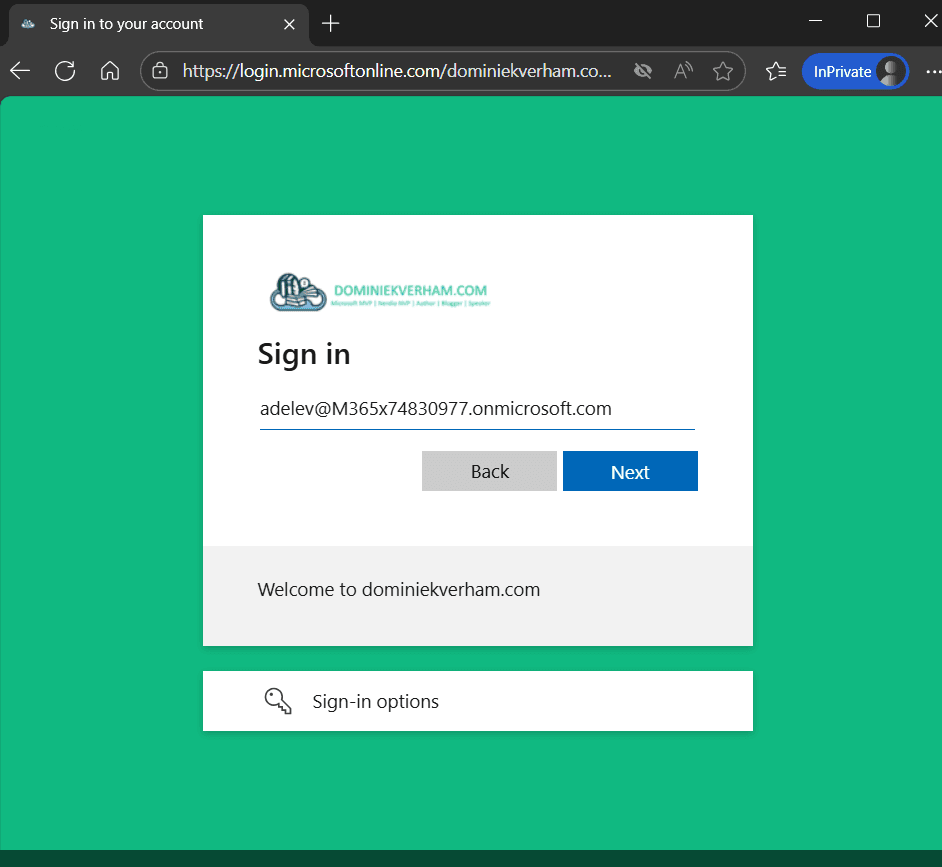
The web client experience is more or less the same. Open your favorite browser and navigate to https://windows.cloud.microsoft but https://windows365.microsoft.com still works too. Make sure to click the Sign-in options.

Select Sign in to an organization and continue to the next step.

Enter the domain of your company (tenant).

Enter the mail address of the guest user account.
Next up, enter the corresponding password and complete the sign in with MFA. I will skip the screenshots for these two steps.
So here is where things get a bit tricky! At this point you will get a nice sign in screen like this and notice that the company branding is gone:
If you click on the account and complete the MFA challenge, you will actually be signed into the original account in the original tenant. Of course there is no Cloud PC provisioned in this tenant for the user:

So how do we fix this? Well, we need to use the guest account so we need to click + Use another account and click the Sign-in options button again. Select Sign in to an organization, enter your domain, and you should see your company branding again.
Also notice that the guest user is already signed in so we are good to go!

Alternatively it’s possible to use the account selector to change organization. Make sure to click on the three dots and select Switch organization.

Click the organization where your Cloud PC lives and watch the magic happen!
The Cloud PC will now be available for the guest account. Note that the user has the same self service options to reboot the Cloud PC as a regular user has.

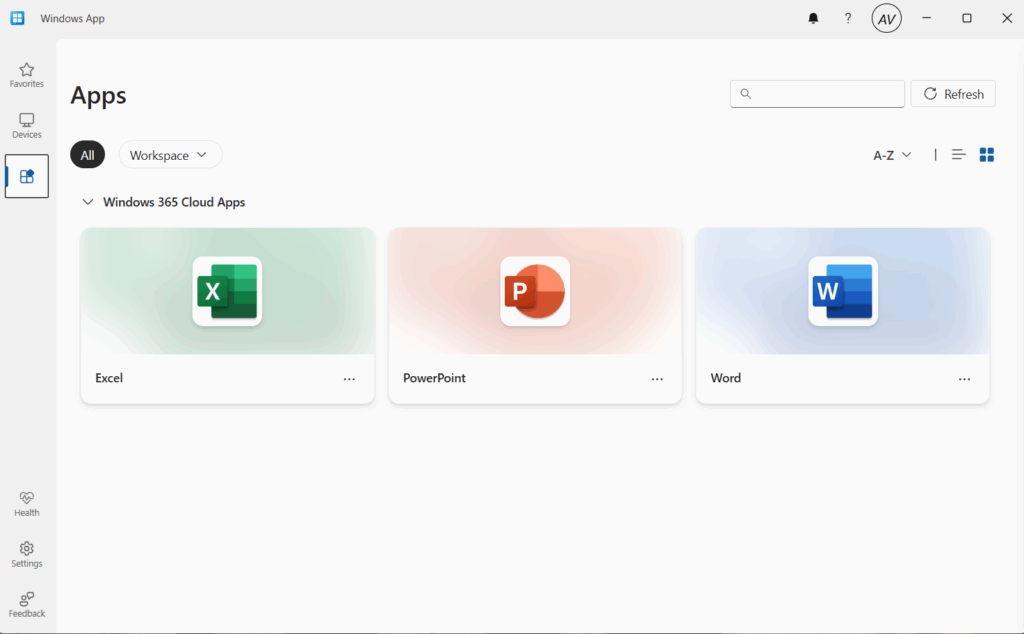
Once you connect, you get all the desktop goodness from the cloud!

That completes the user experience of signing into a Cloud PC with a guest account using both the Windows app and a browser. Let’s include a couple of…
Tips and tricks
Tip 1: Use filters in Microsoft Intune
Managing the Cloud PCs for external identities is done using Microsoft Intune. As mentioned in the prerequisites section, assigning policies in this scenario to users is not supported, to we need to assign policies to devices instead.
Remember that you can make your life a bit more easy by simply configuring a filter for these Cloud PCs by using the name of the provisioning policy.
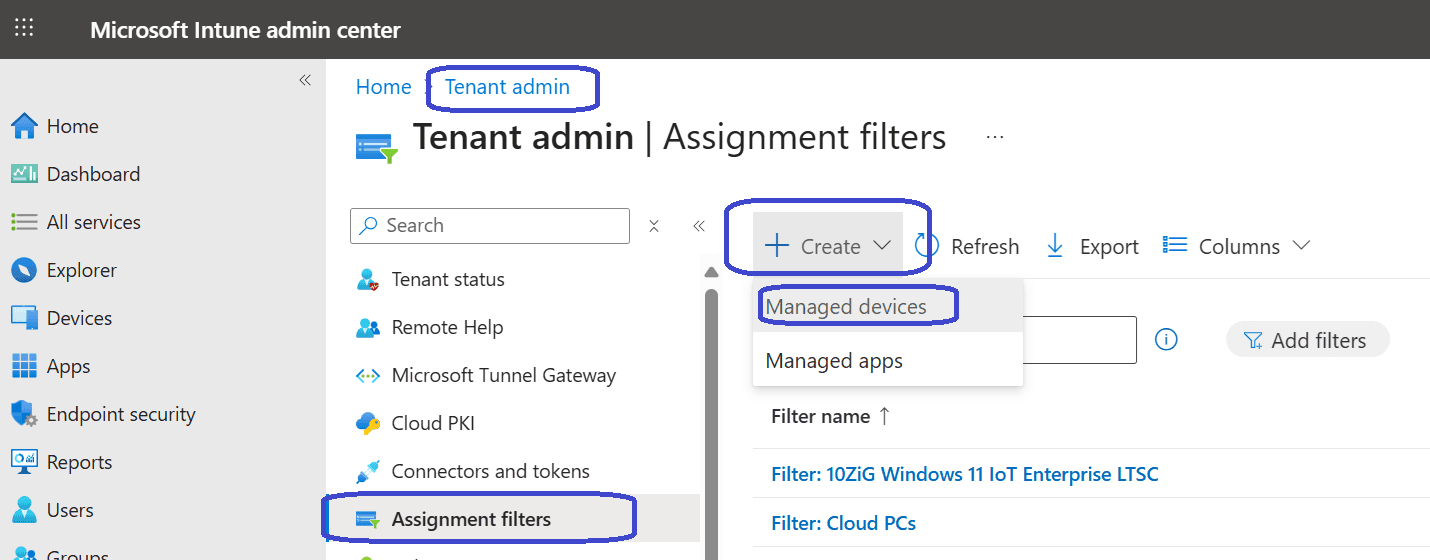
First go to Tenant Administration, Assignment filters. Click the + Create button and select Managed devices.
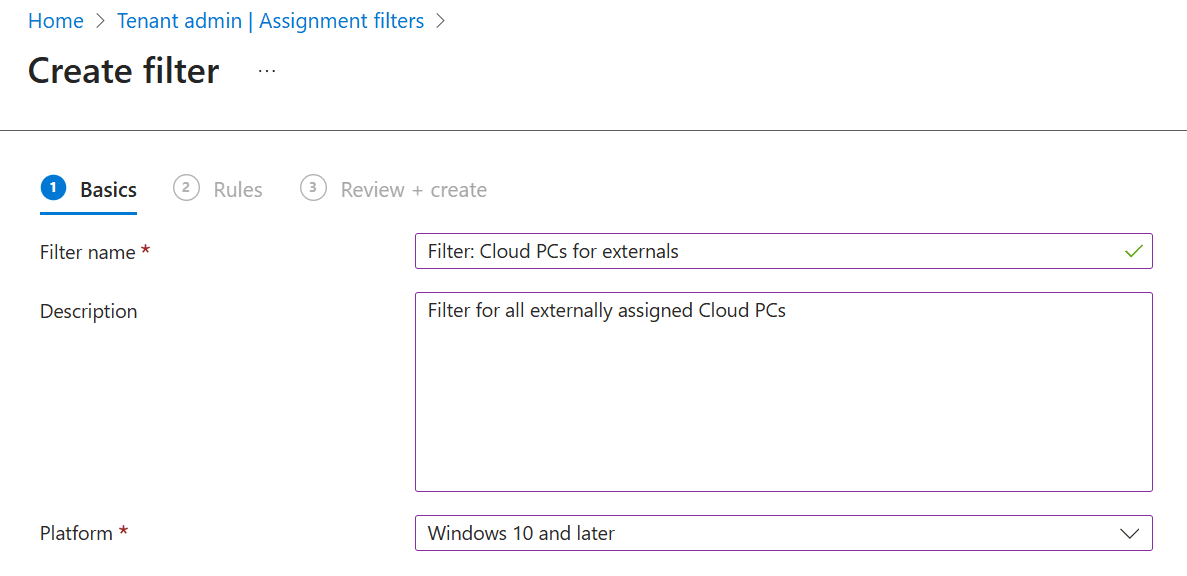
Give the filter and name and description. Make sure to select Windows 10 and later as the platform.
Configure the following properties:
- Property: enrollmentProfileName
- Operator: Equals
- Value: {name of your provisioning policy} in my case: Cloud PC for External Contractors.
- Make sure to doublecheck by using the preview button:

Finish up by admiring your awesome work and save the filter.
Tip 2: Device Naming Template
Another way to go is by applying a device naming template in the provisioning policy. Edit the configuration settings. Just be aware of the limit of 15 characters:
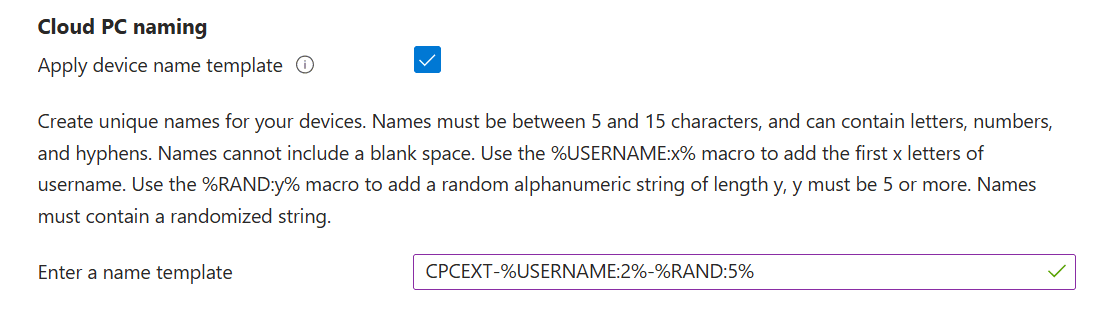
Adding something like EXT will give a quick indication that you are working with a Cloud PC that is being shared externally.
Tip 3: Cloud PC not found?
Did your user sign in the Windows app and get the message: No devices found. Sign in with another account, refresh, or contact your system administrator:
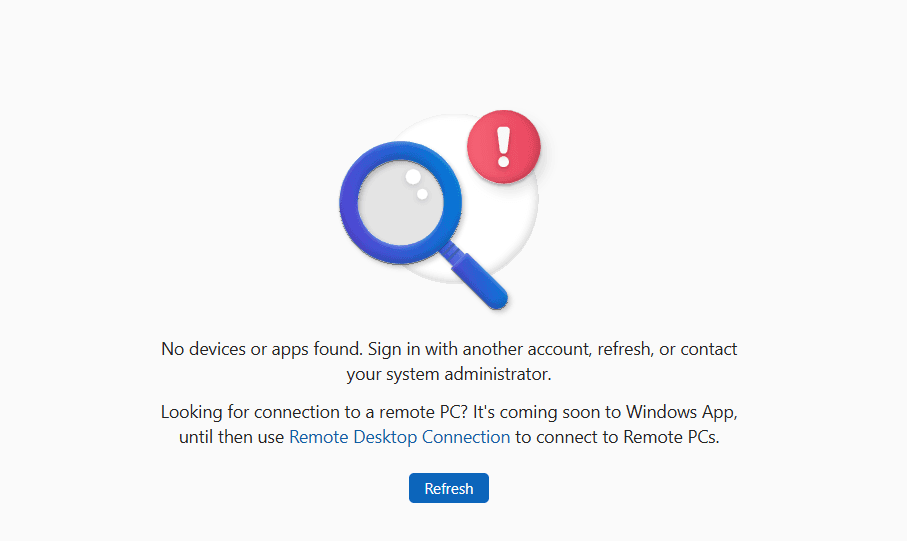
Chances are that the user signed into the Windows app without using the Sign in to an organizations steps. Fixing it is easy, just sign out, and sign in again using the steps outlined above.
Tip 4: Sign in to an organization not available from the Windows app?
This happens when the registry key is not configured or has a value of 0 instead of 1. Make sure the registry setting is applied on the local device and the value is 1. Close the Windows app and try again. You do not need to reboot the local device.
Resources
Share this:
- Click to share on LinkedIn (Opens in new window) LinkedIn
- Click to share on X (Opens in new window) X
- Click to share on Facebook (Opens in new window) Facebook
- Click to share on WhatsApp (Opens in new window) WhatsApp
- Click to share on Telegram (Opens in new window) Telegram
- Click to print (Opens in new window) Print