What’s up, everyone!
Back in August ’23 I’ve written a post on using screen capture protection and watermarking on Windows 365 and AVD. The QR codes are pretty easy to resolve to a connection ID but I never got it to work properly for Windows 365. So how exactly can we resolve the QR codes for Windows 365?
Step 1: Configure watermarking
Let’s start this post with configuring watermarking for Windows 365 Cloud PCs. We can use the Microsoft Intune admin center and create a configuration profile.
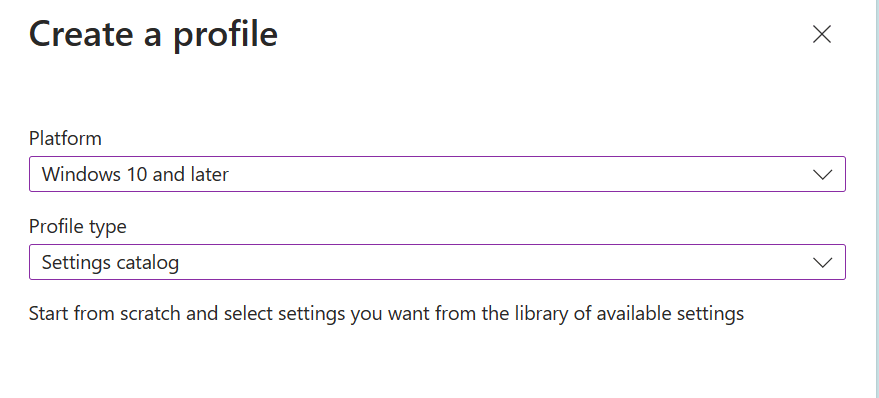
Make sure to create profile suited for Windows 10 and later and select the settings catalog as the profile type.
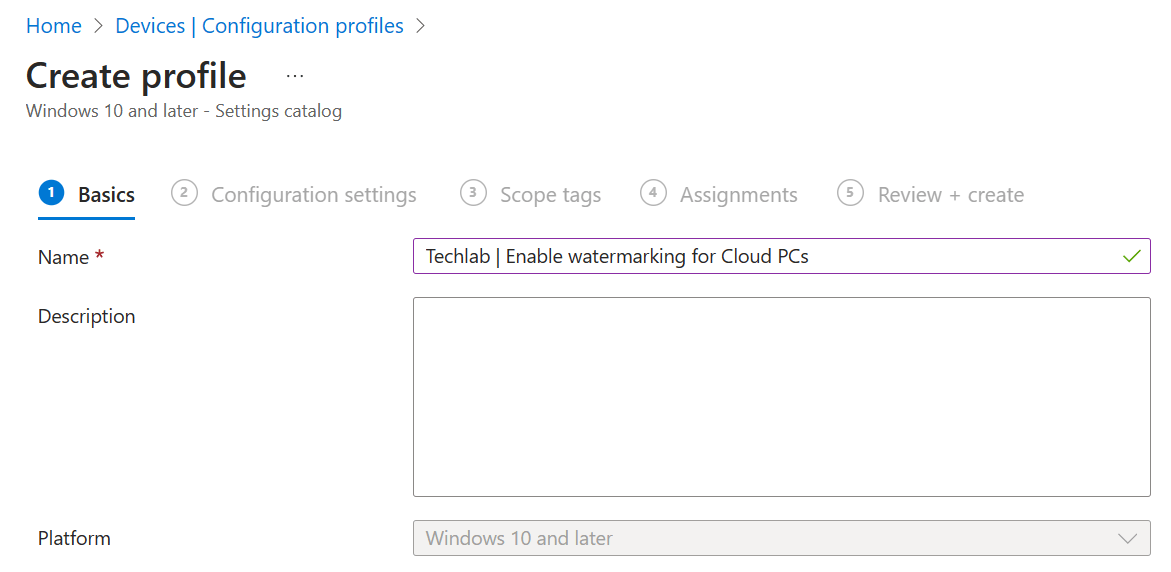
This will bring us to the familiar 5 steps. First we have to give the configuration profile a name and description;
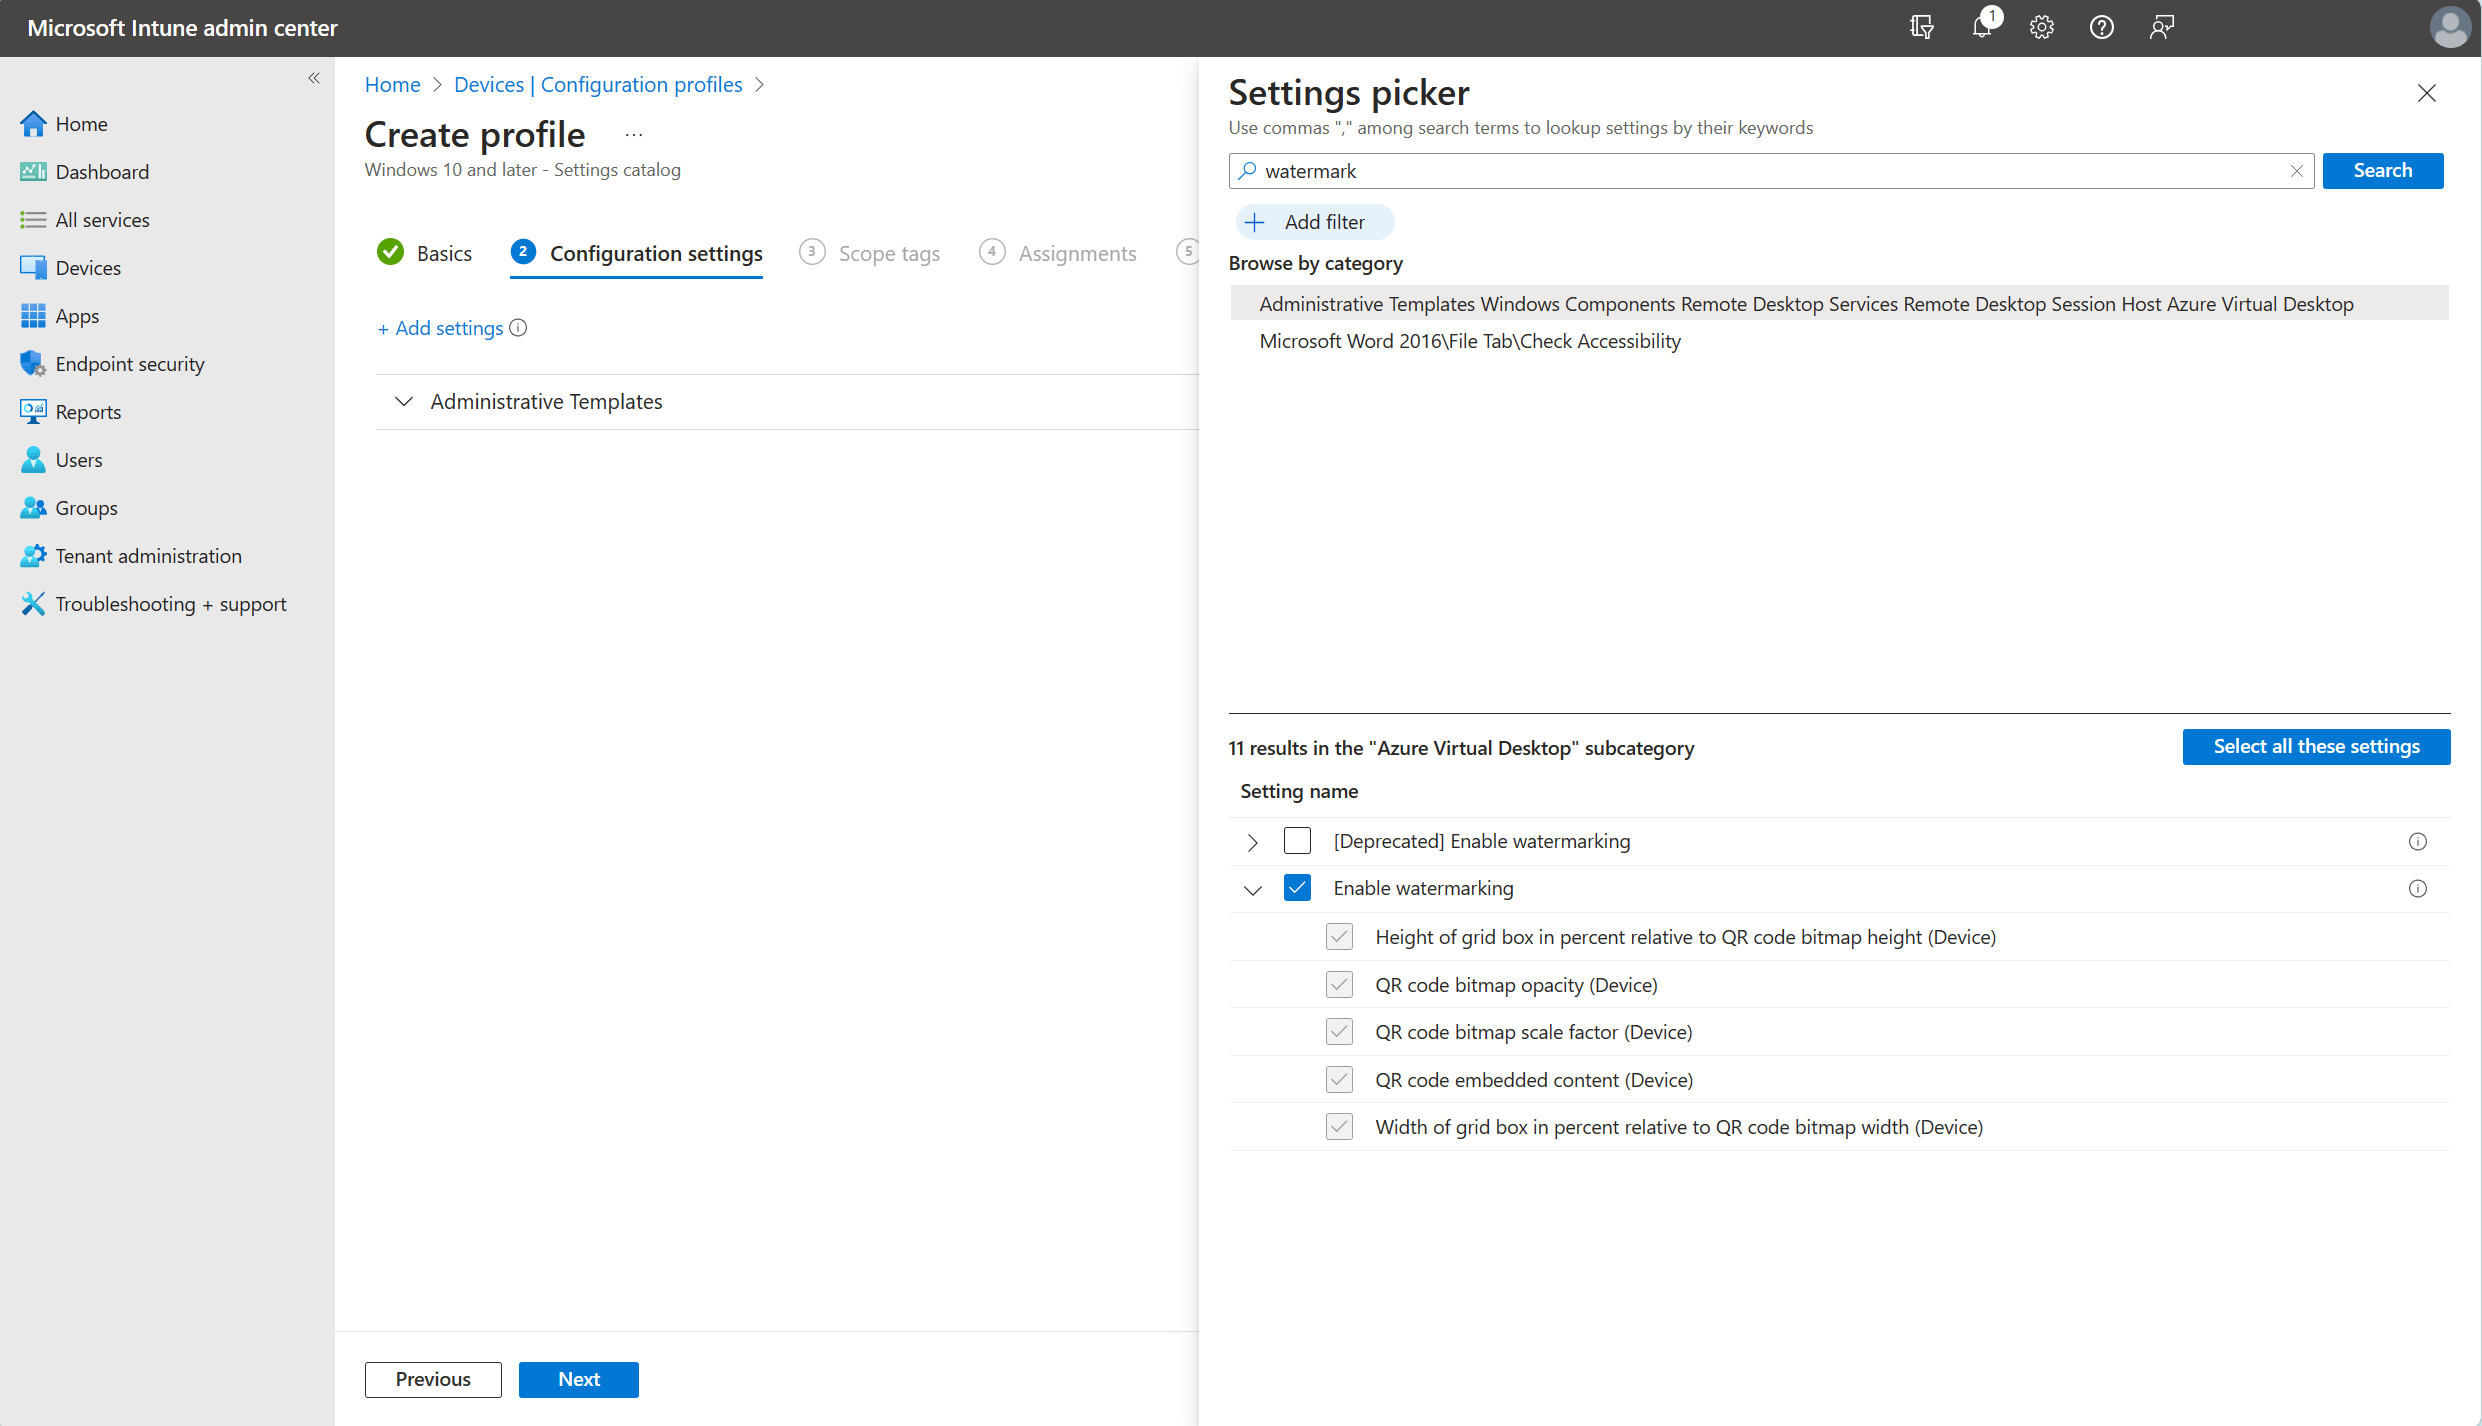
Now it’s time to add the relevant settings from the settings catalog to configure watermarking. Just click + Add settings and search for Watermarking in the settings picker. Click the Enable Watermarking section to add the relevant settings.
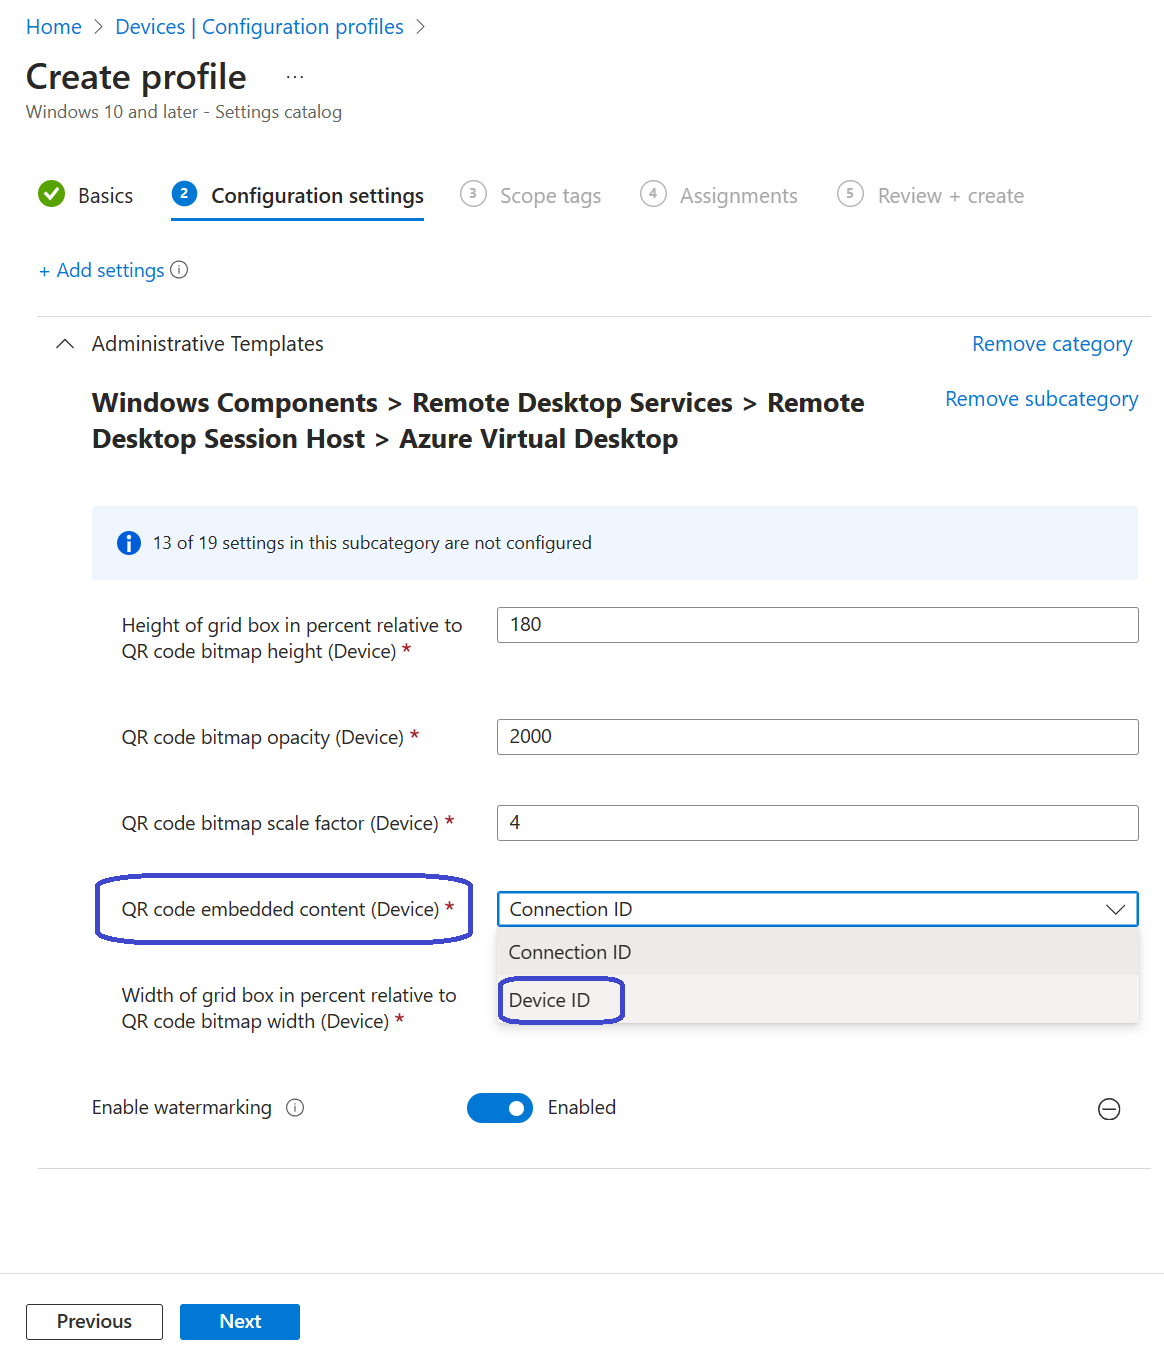
All you have to do is to open the Administrative templates to get access to the settings. Toggle the Enable watermarking settings to Enabled. This will give you access to the individual settings. In short:
- Height of the grid box in percent relative to QR code bitmap: How much space do you want between the QR codes on screen?
- QR code bitmap opacity: How much do you want to annoy your users with the QR codes? You can use opacity to fade the QR codes to the back.
- QR code bitmap scale factor: The size in pixels per square dot.
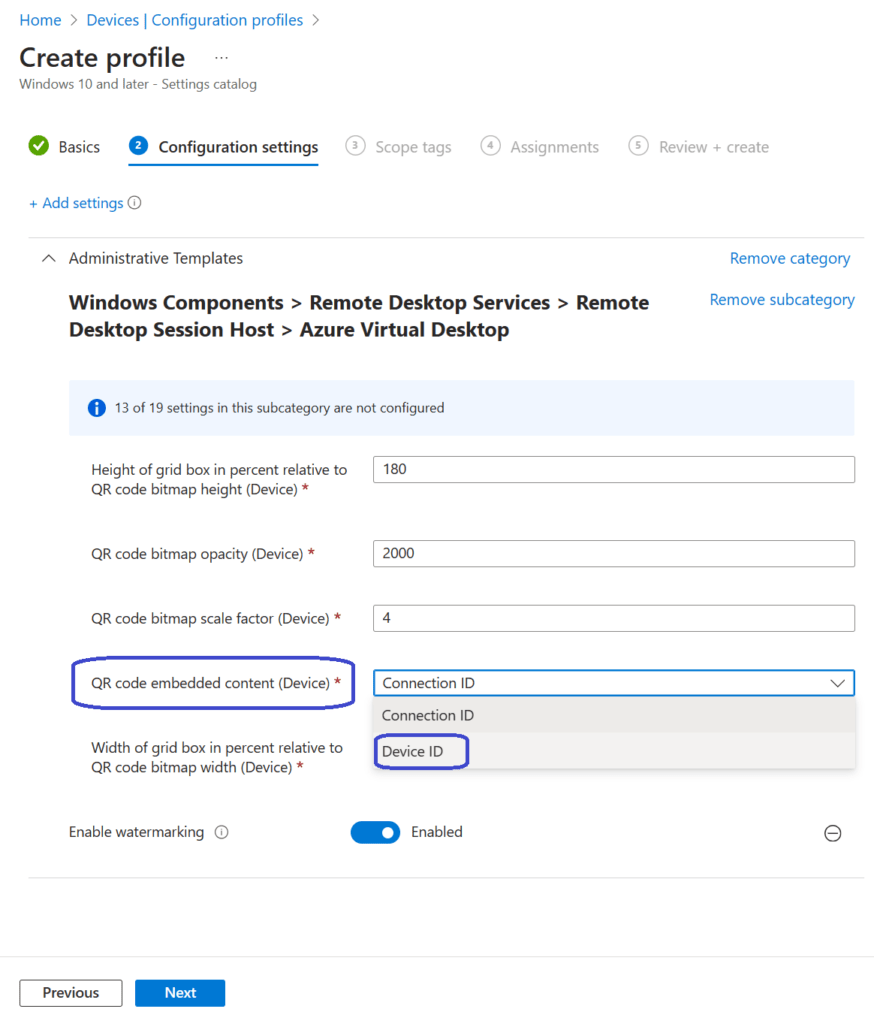
- QR code embedded content: Configure this setting to embed the Device ID instead of the Connection ID. You can’t use Connection ID’s for QR codes for Cloud PCs. You can use Connection IDs for AVD sessions.
- Width of grid box in percent relative to QR code bitmap width: Same as height, but horizontally this time.
Since this demo is all about QR codes on Windows 365, make sure to change the default value of Connection ID to Device ID.
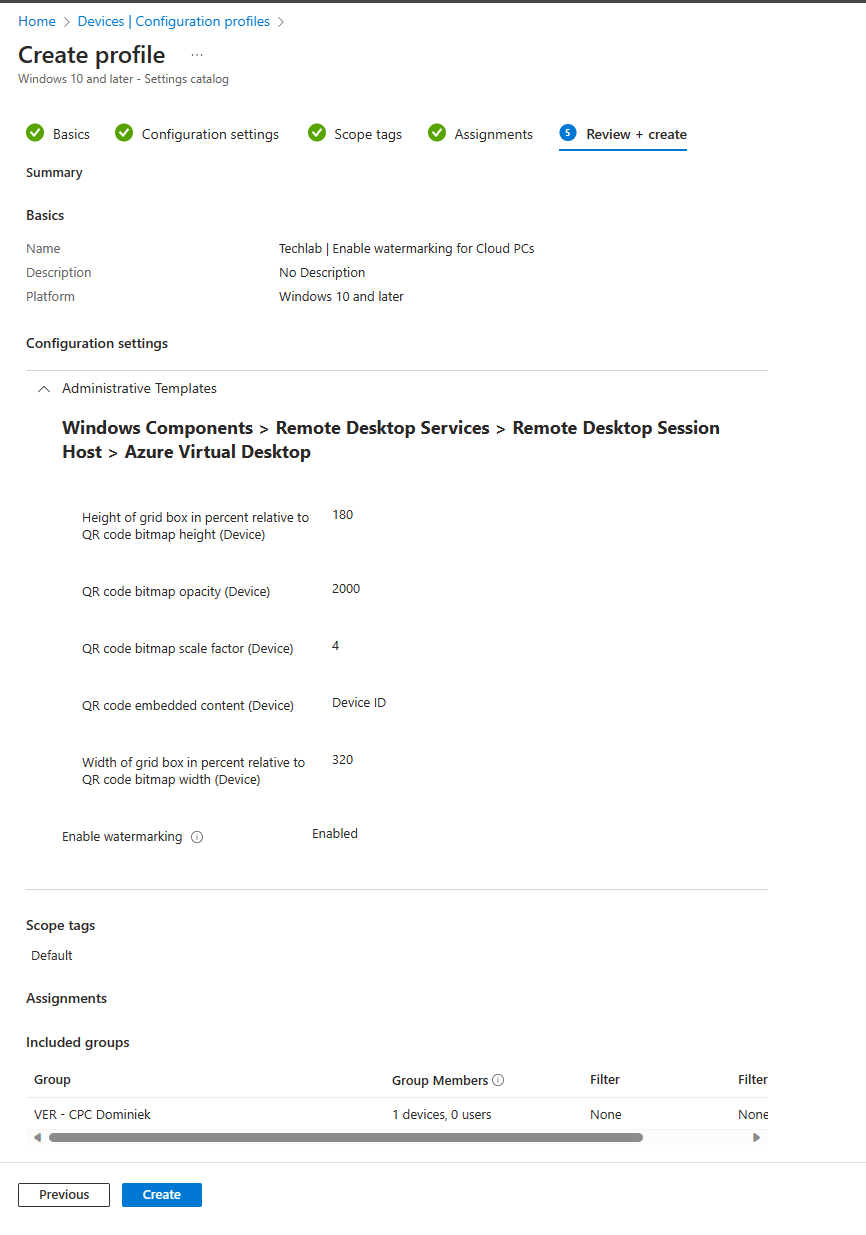
All that’s left to do is add scope tags if you want and assign the configuration profile to the desired Cloud PCs. I ended up with something like this:
The QR code will become visible after the configuration profile is applied successfully and when you sign in again.
Step 2: Resolve the QR code
You can use a QR code scanner of your choice or just use the camera of a modern phone. Most will recognize QR codes as well. In my case my camera app saw the following;
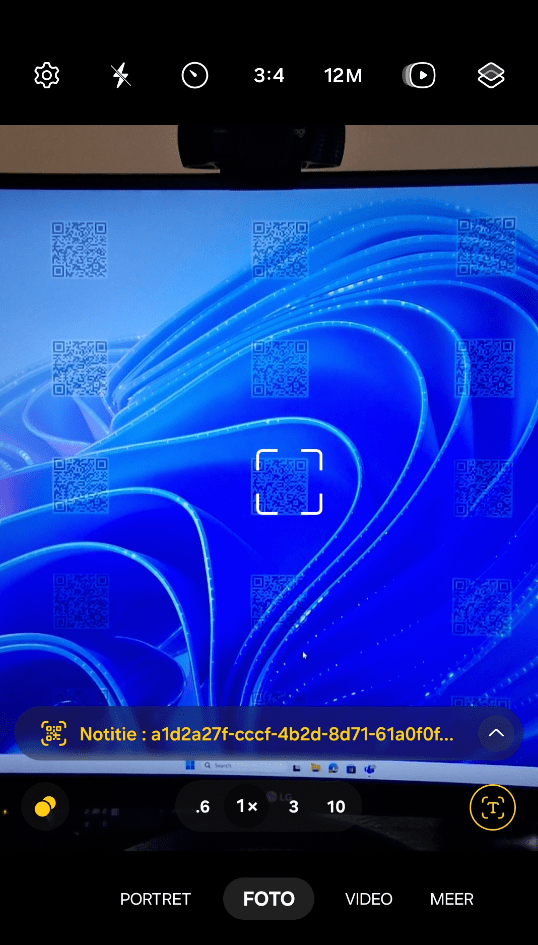
Now let’s see where we can resolve the device ID. Let’s start with Microsoft Intune. Navigate to Devices, All devices and search for a part of the device ID. We can see in the following screenshot that the QR contained the device ID of my own Cloud PC. Works great!
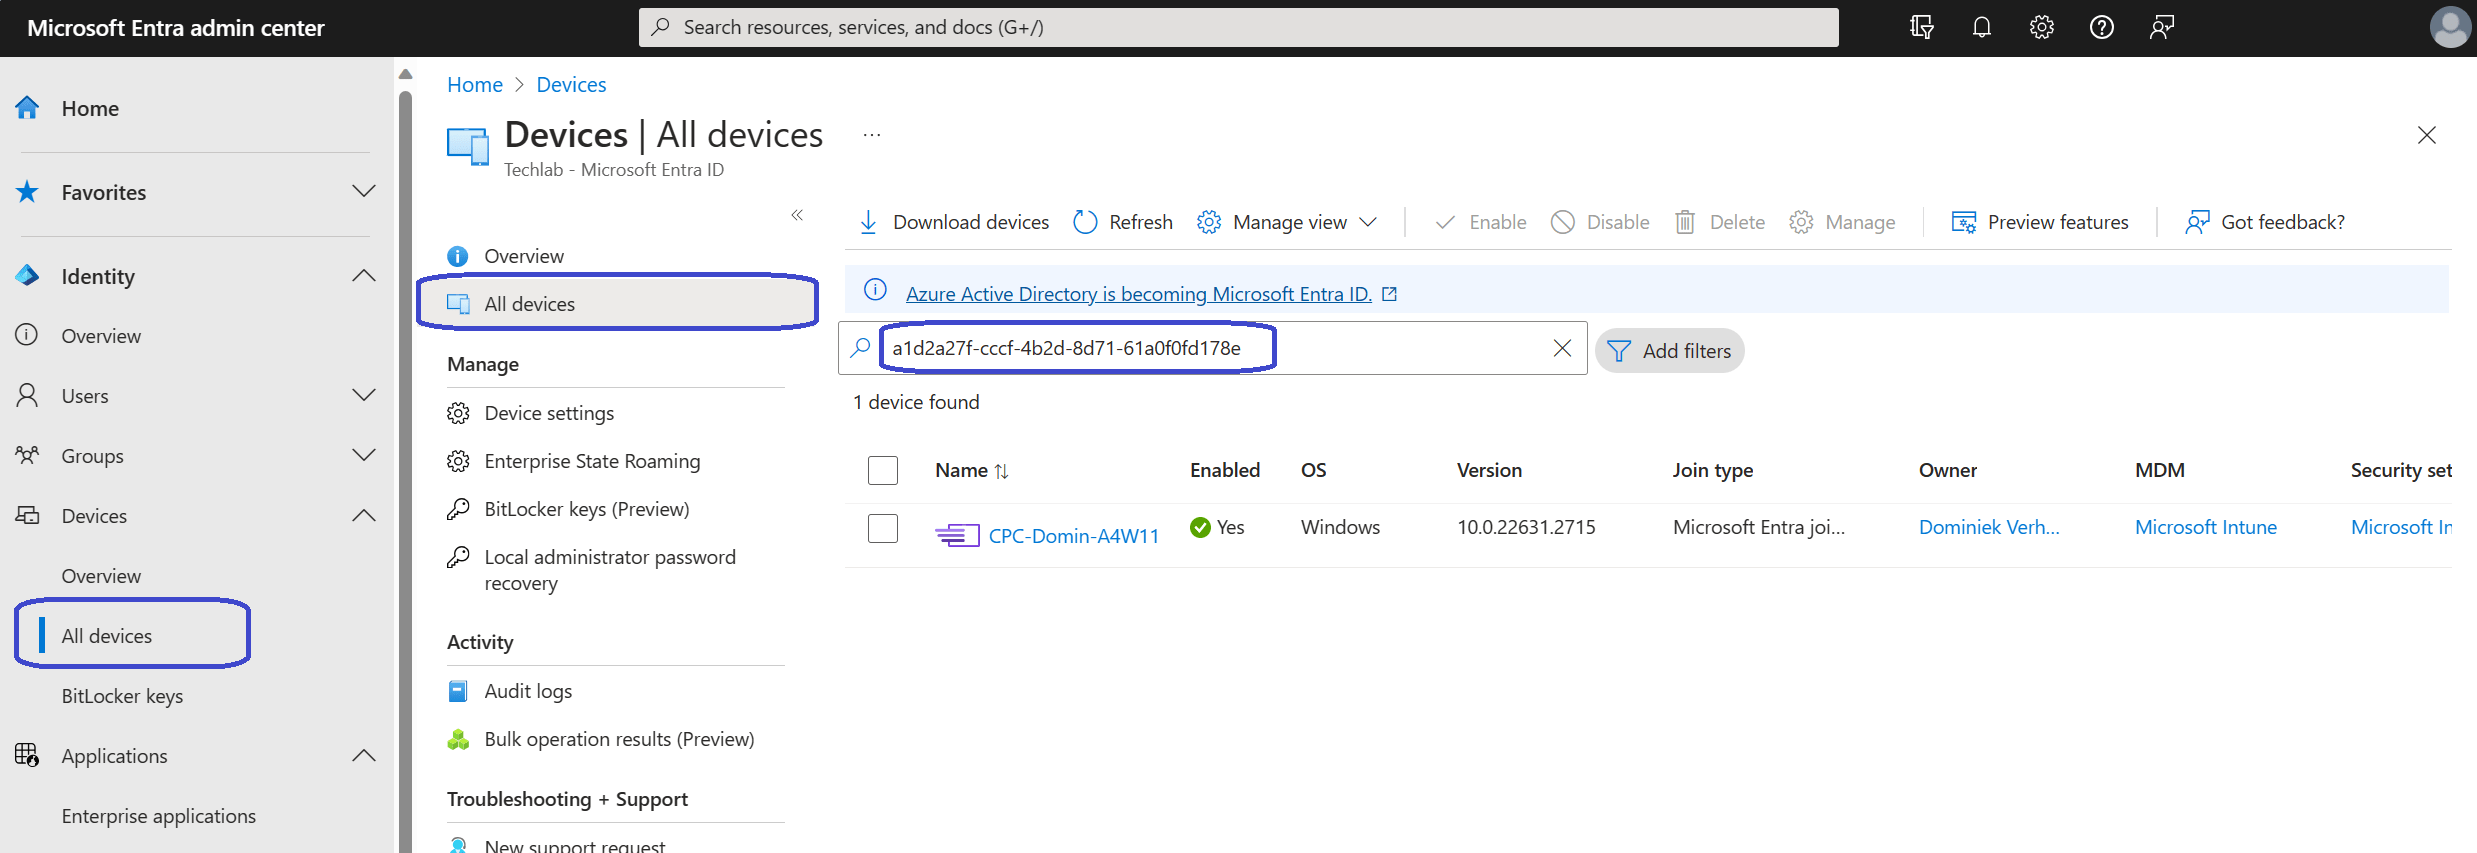
IT admins can also search the device ID in Microsoft Entra ID. Navigate to Devices, All devices and search for the full device ID. Part of the device ID will not generate any result.
Of course this is a demo with expected results. But translate this scenario to a real world one where an employee took a picture of sensitive data. Using a QR code on a Cloud PC will make sure that an IT admin can find out of which Cloud PC the picture was taken, and since Cloud PCs are personal, they know who is responsible for the data leakage.
Resources
Share this:
- Click to share on LinkedIn (Opens in new window) LinkedIn
- Click to share on X (Opens in new window) X
- Click to share on Facebook (Opens in new window) Facebook
- Click to share on WhatsApp (Opens in new window) WhatsApp
- Click to share on Telegram (Opens in new window) Telegram
- Click to print (Opens in new window) Print


