What’s up, everyone!
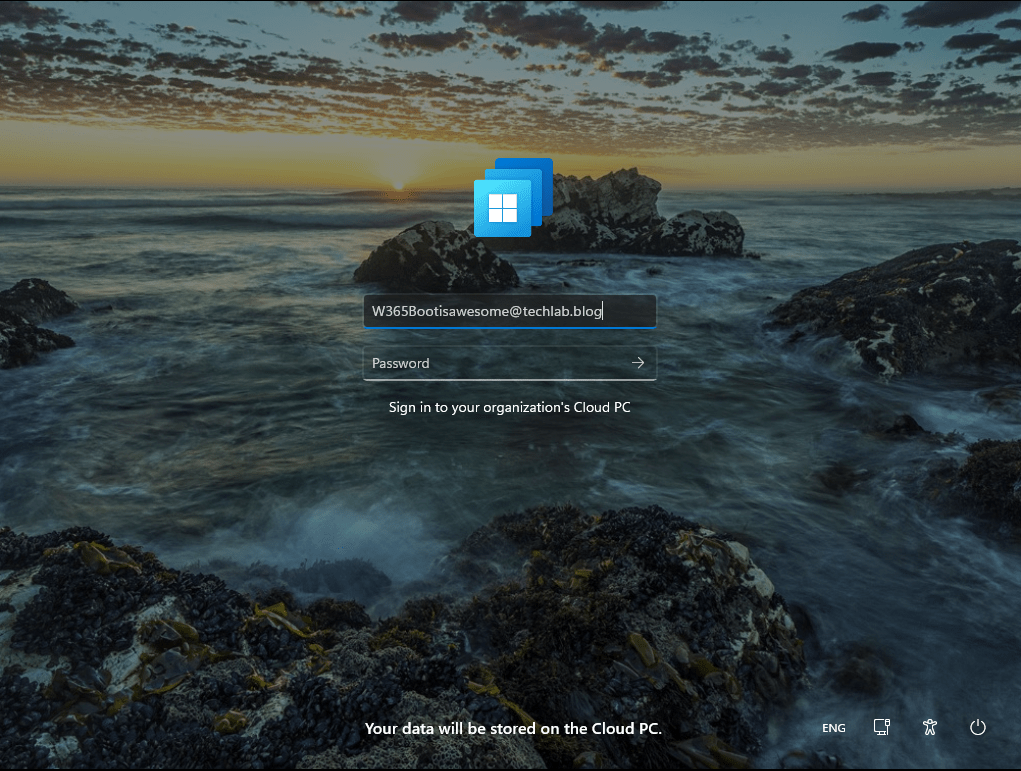
Microsoft released Windows 365 Boot into Public Preview. This is a feature that I am really excited about because it allows your Windows endpoint to boot directly into your Cloud PC! I can’t wait to get into the details on how to set it up and see the user experience in action. Is it a replacement for the kiosk mode or did the legends at Microsoft raise the bar? Let’s find out!
What is Windows 365 Boot?
Windows 365 enables you to run your personal PC in the Microsoft Cloud. You still need a local endpoint to connect to the Cloud PC. The great thing is that you can almost use any device to connect to Windows 365. I’ve written a couple of posts on how to setup and use a kiosk device based on Windows 10 using Azure AD accounts or Windows 11 using the Windows 365 App, or how to connect using a Samsung smartphone using DeX if you are interested.
The new Windows 365 Boot feature will allow admins to configure a Windows 11 22H2 endpoint to boot directly into the Cloud PC. Imagine being able to boot your local endpoint and sign-in just one time, directly to your Cloud PC. That’s just an awesome user experience!
What are use cases for Windows 365 Boot?
This feature works great for just about any persona who works on a Cloud PC from a local shared endpoint. A simple example; let’s say we have a company with a reception desk. There are 4 shared devices available to work with and they are shared by a user group of 10 employees. In this case any of the employees can sign into their personal Cloud PC from any of the available shared endpoints. The user experience would be the same across any of the devices and the users probably won’t even know they signed in directly to their Cloud PC.
Prerequisites
The following are prerequisites to use Windows 365 Boot:
- Windows 11 based Endpoints (Pro and Enterprise)
- Windows 11 22H2
- Enrolled into the Windows Insider Program and use the dev channel
- Cloud PC license
- Microsoft Intune Administrator rights
- Yes, you can test this feature on a VM 🙂
How to configure Windows 365 Boot
Admins can configure the Windows 365 Boot feature using a guided setup. Go to Devices, Provisioning, Windows 365 and start the Windows 365 Boot guide.
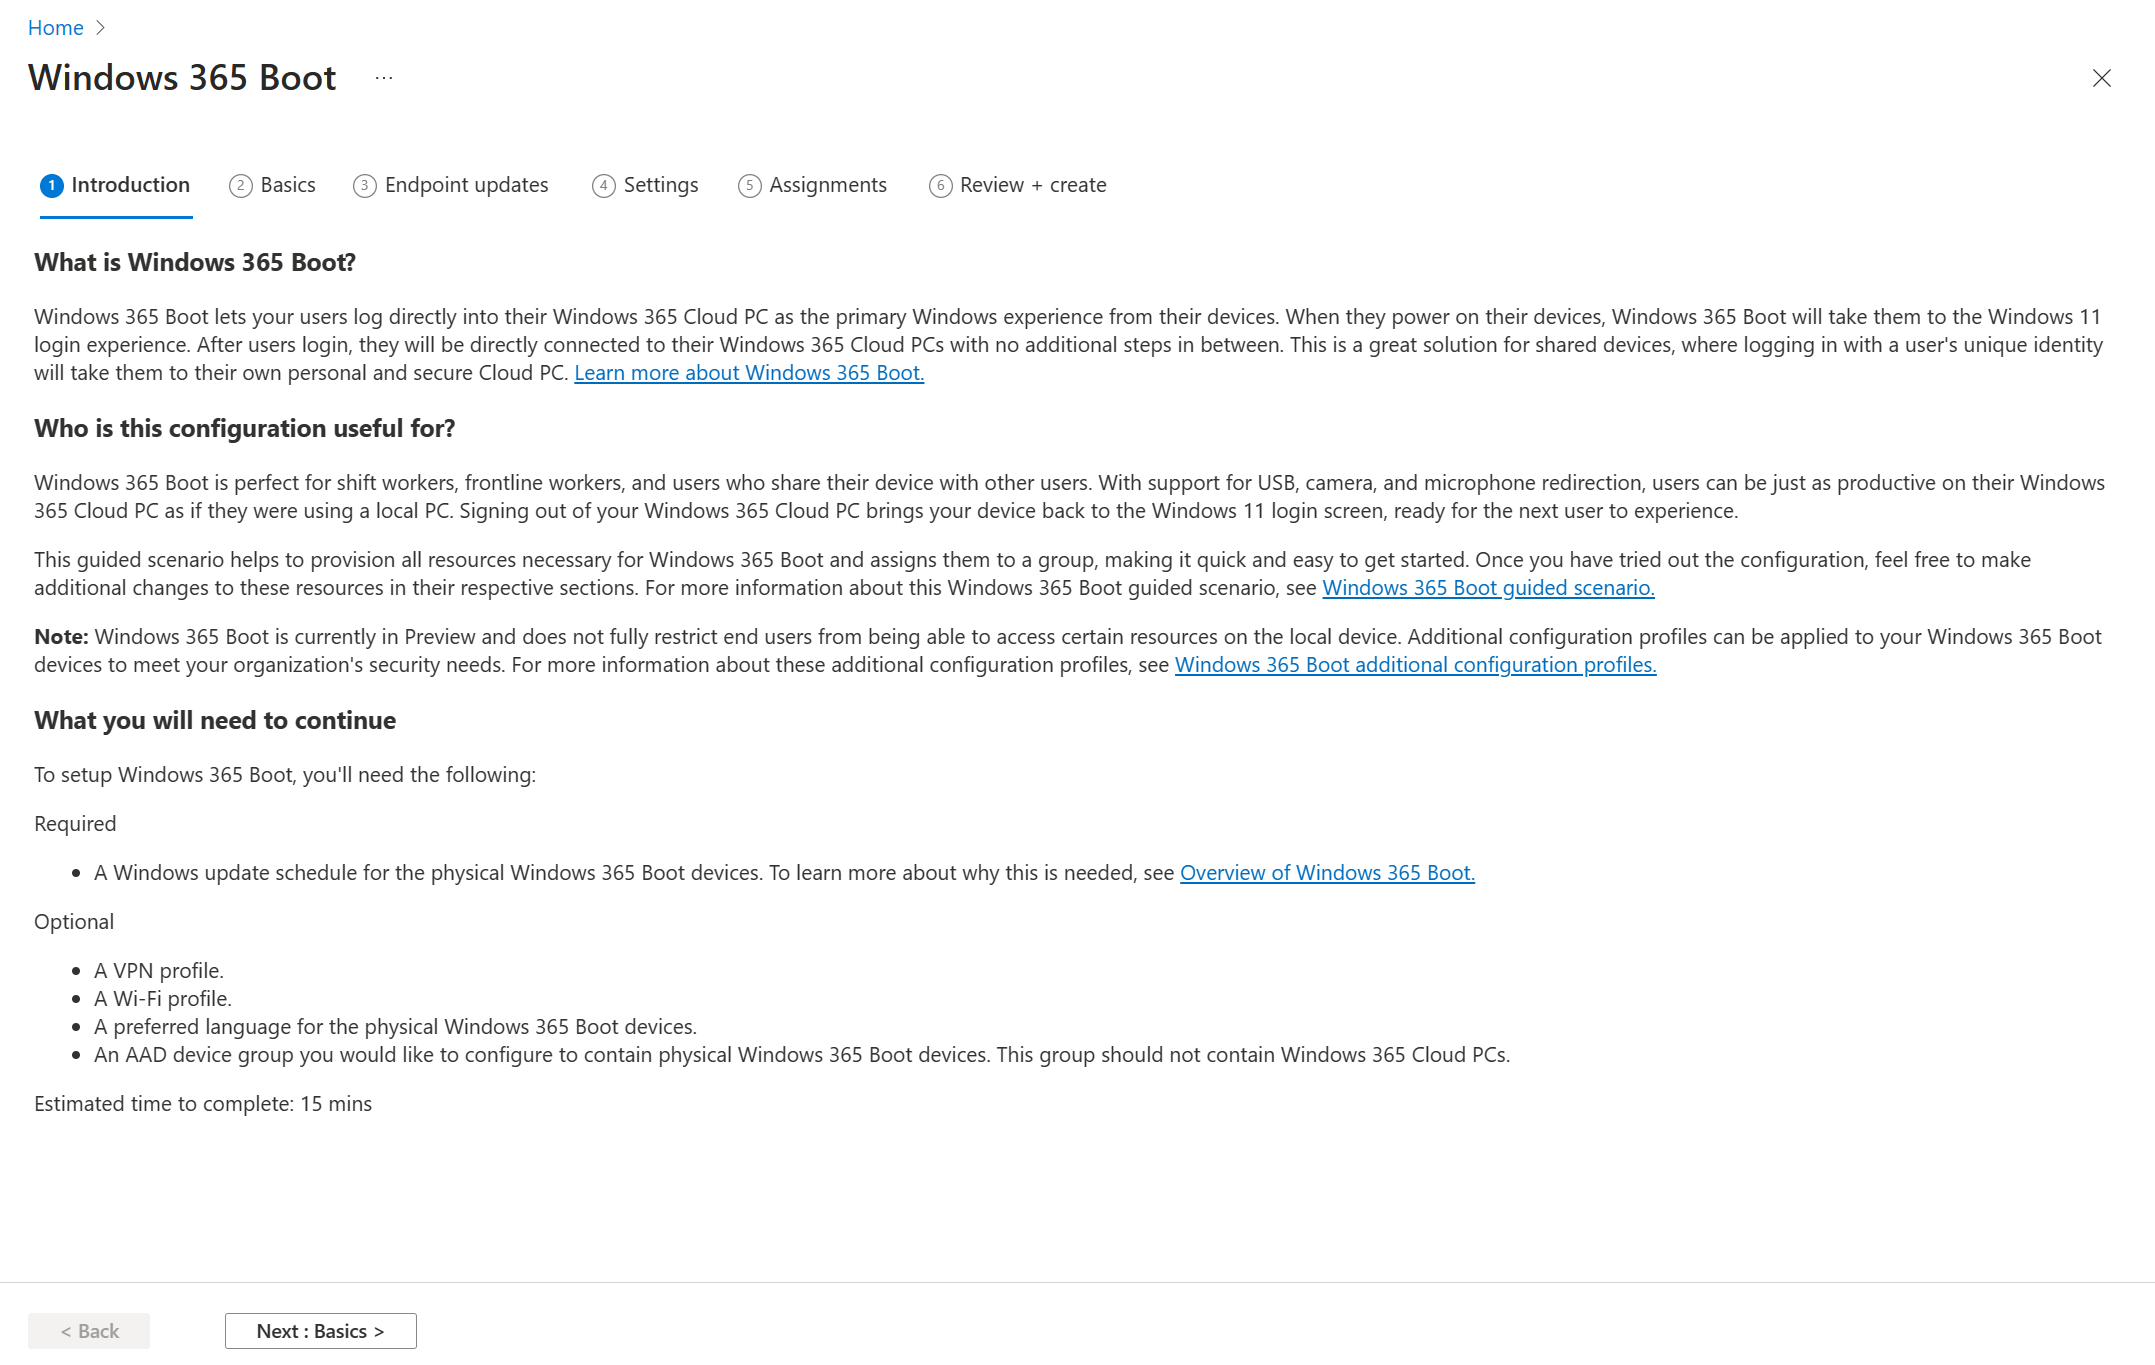
The guide starts with a introduction which looks like this:
Click Next to go to the Basics tab.
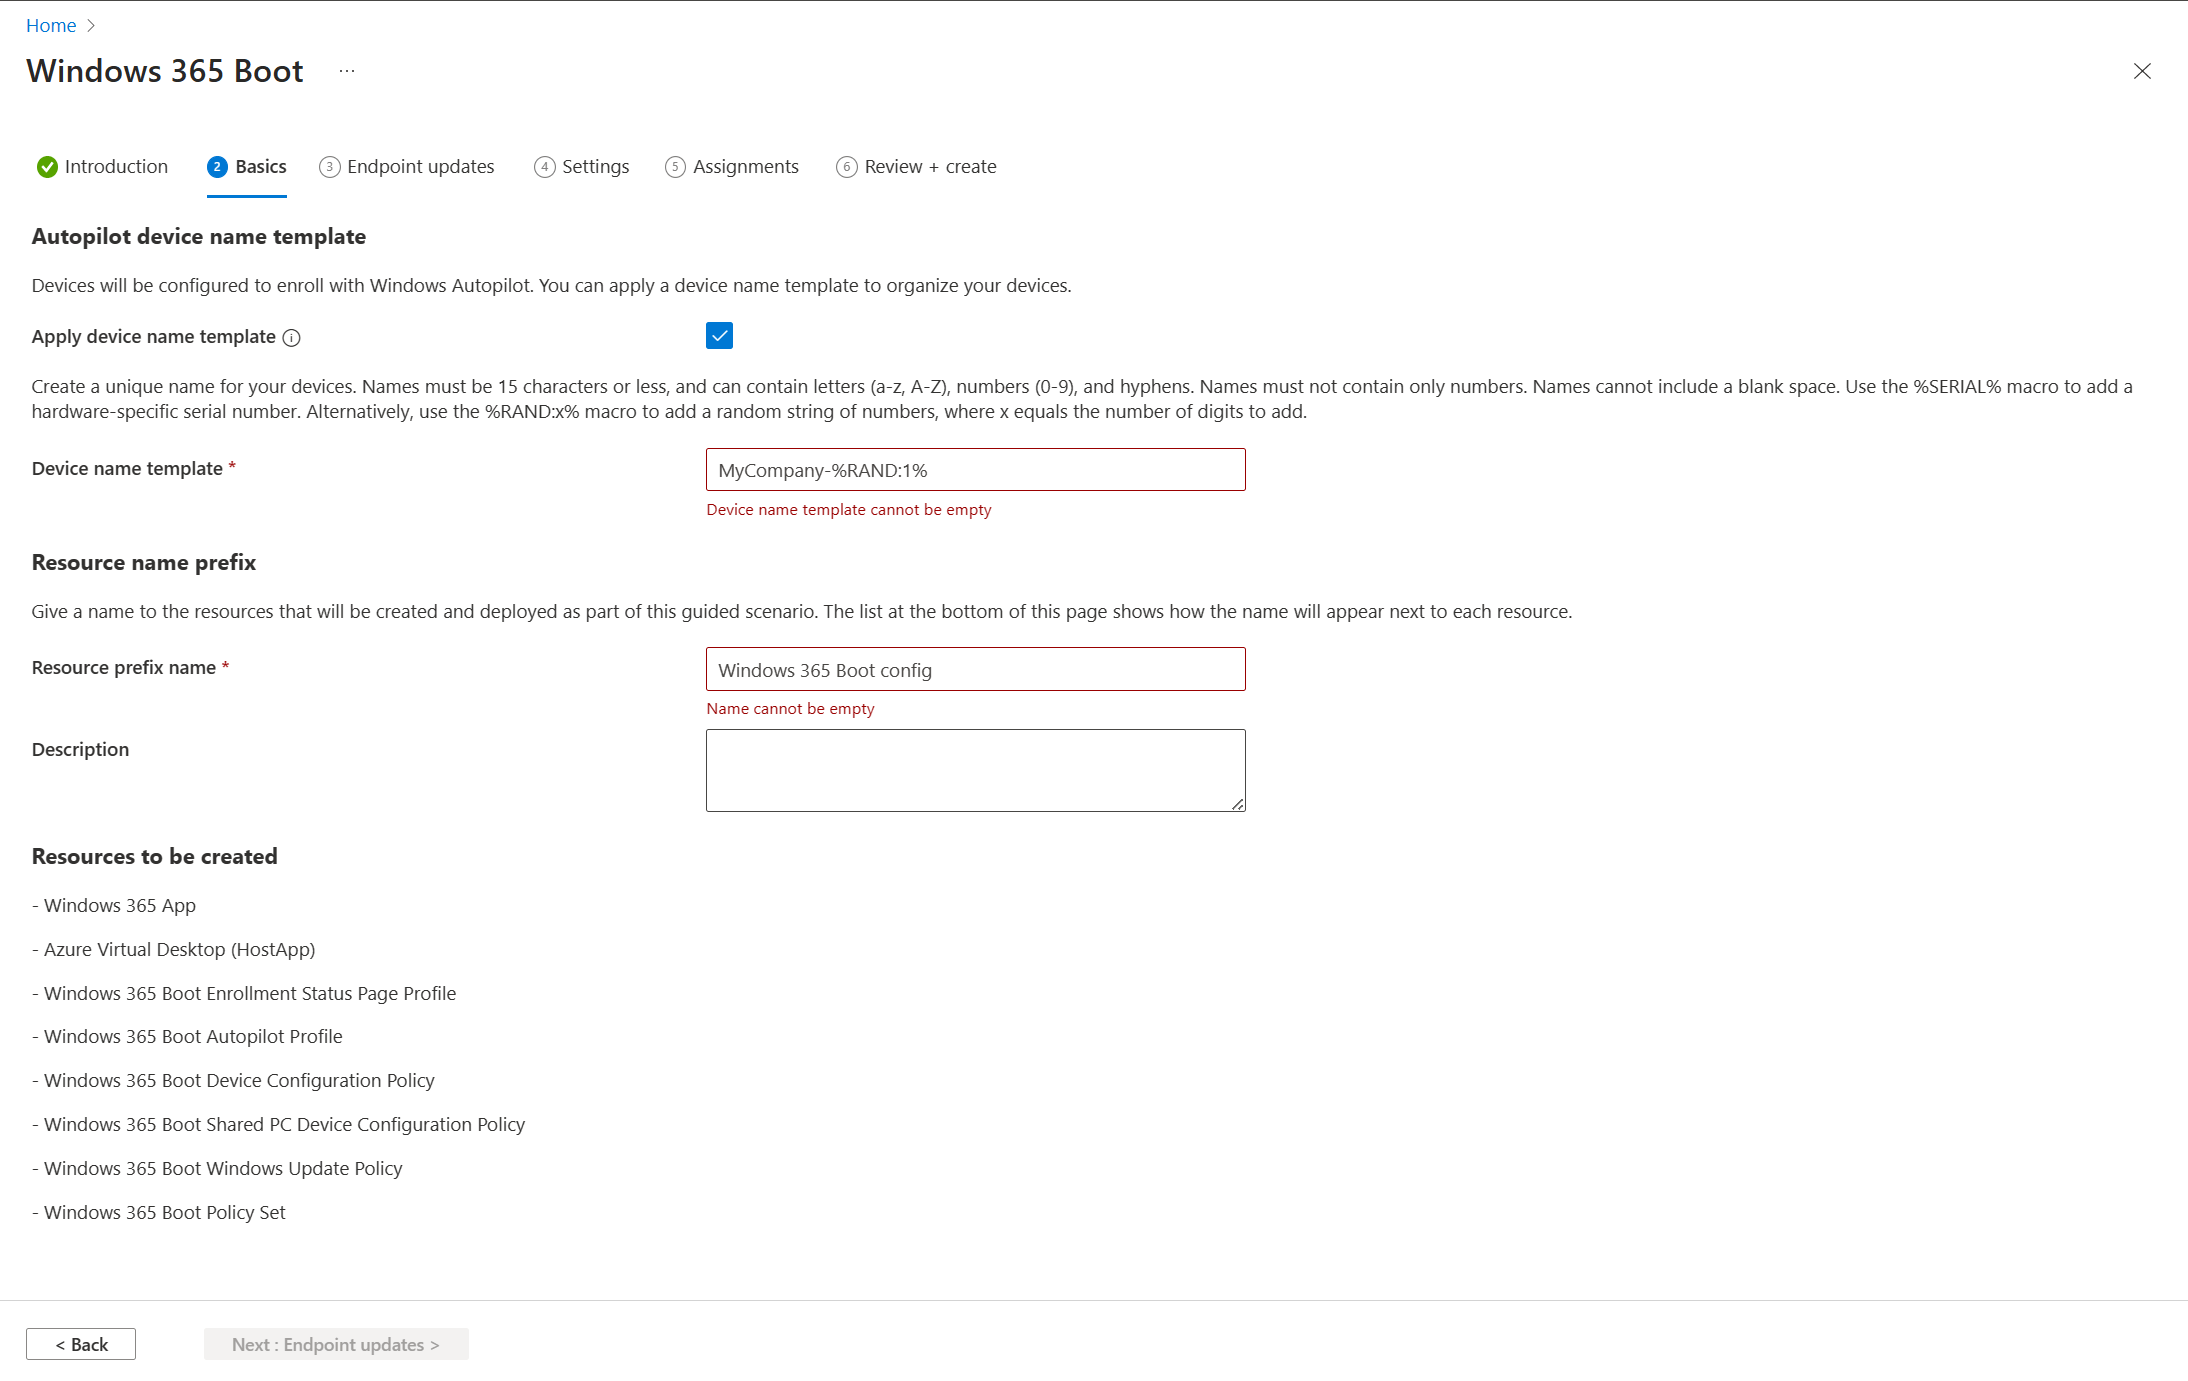
We can configure a couple of things here.
Autopilot device name template
Admins can configure a device name template which will generate a unique device name based on a template that you can specify. A great way to name your endpoints that are configured for Windows 365 Boot.
Resource name prefix
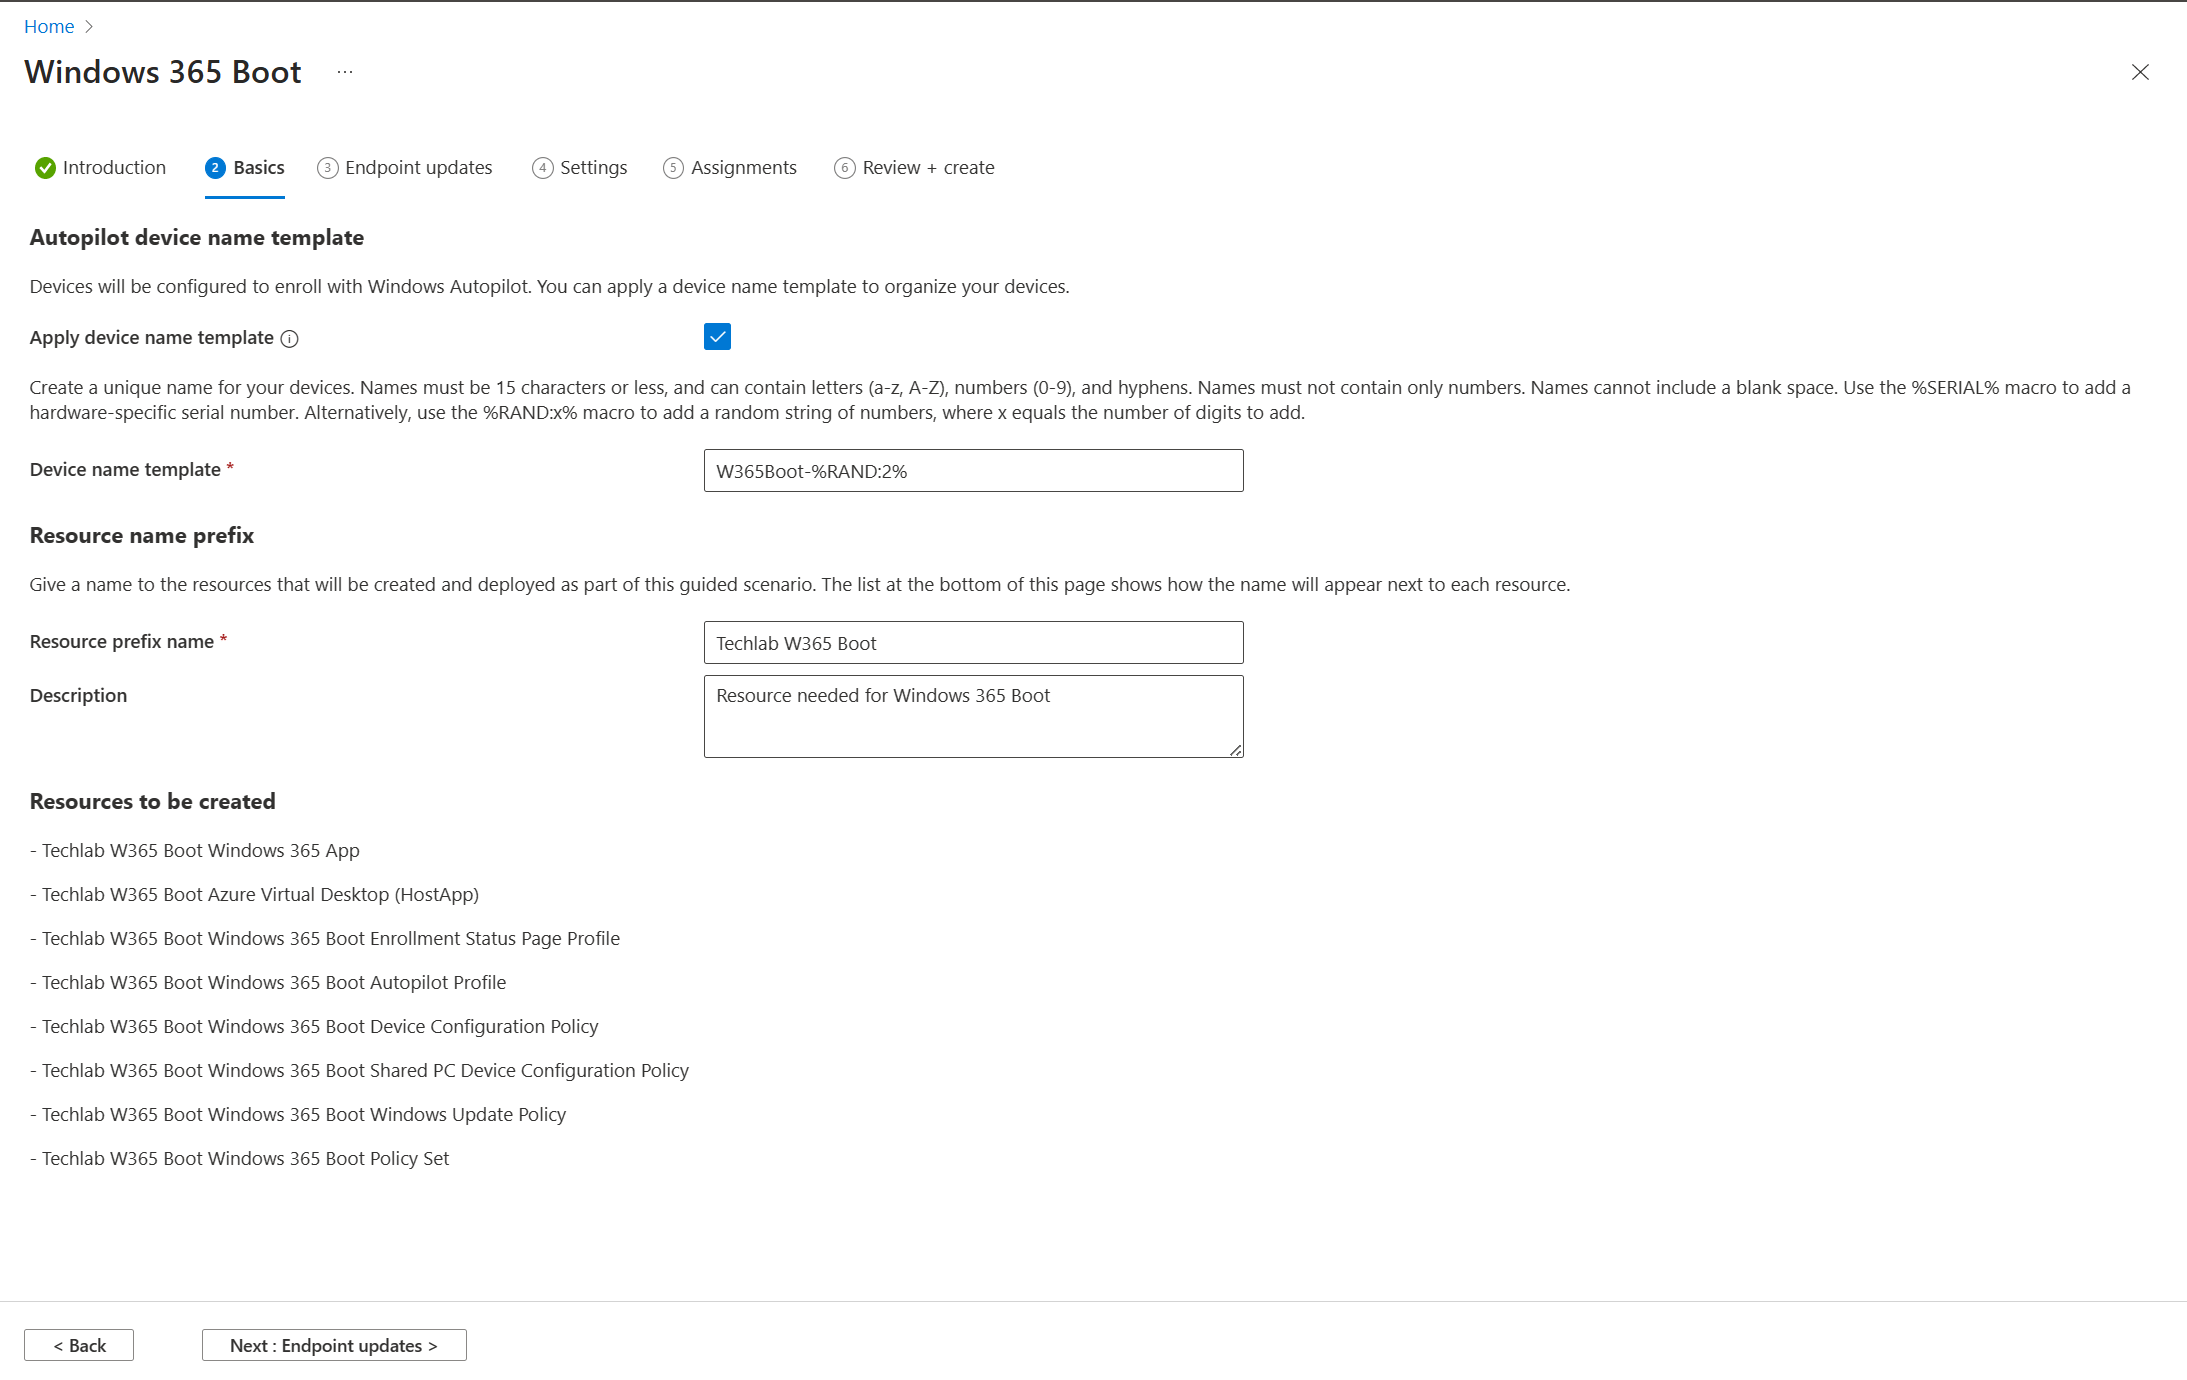
The guide will automatically create the necessary components which are listed in the screenshot above. Admins can configure a custom prefix. I like how the GUI will instantly update the names of the resources so you can see what exactly will be created.
Just provide the necessary info and you could end up with something like this:
Click Next to continue to the Endpoint Updates tab.
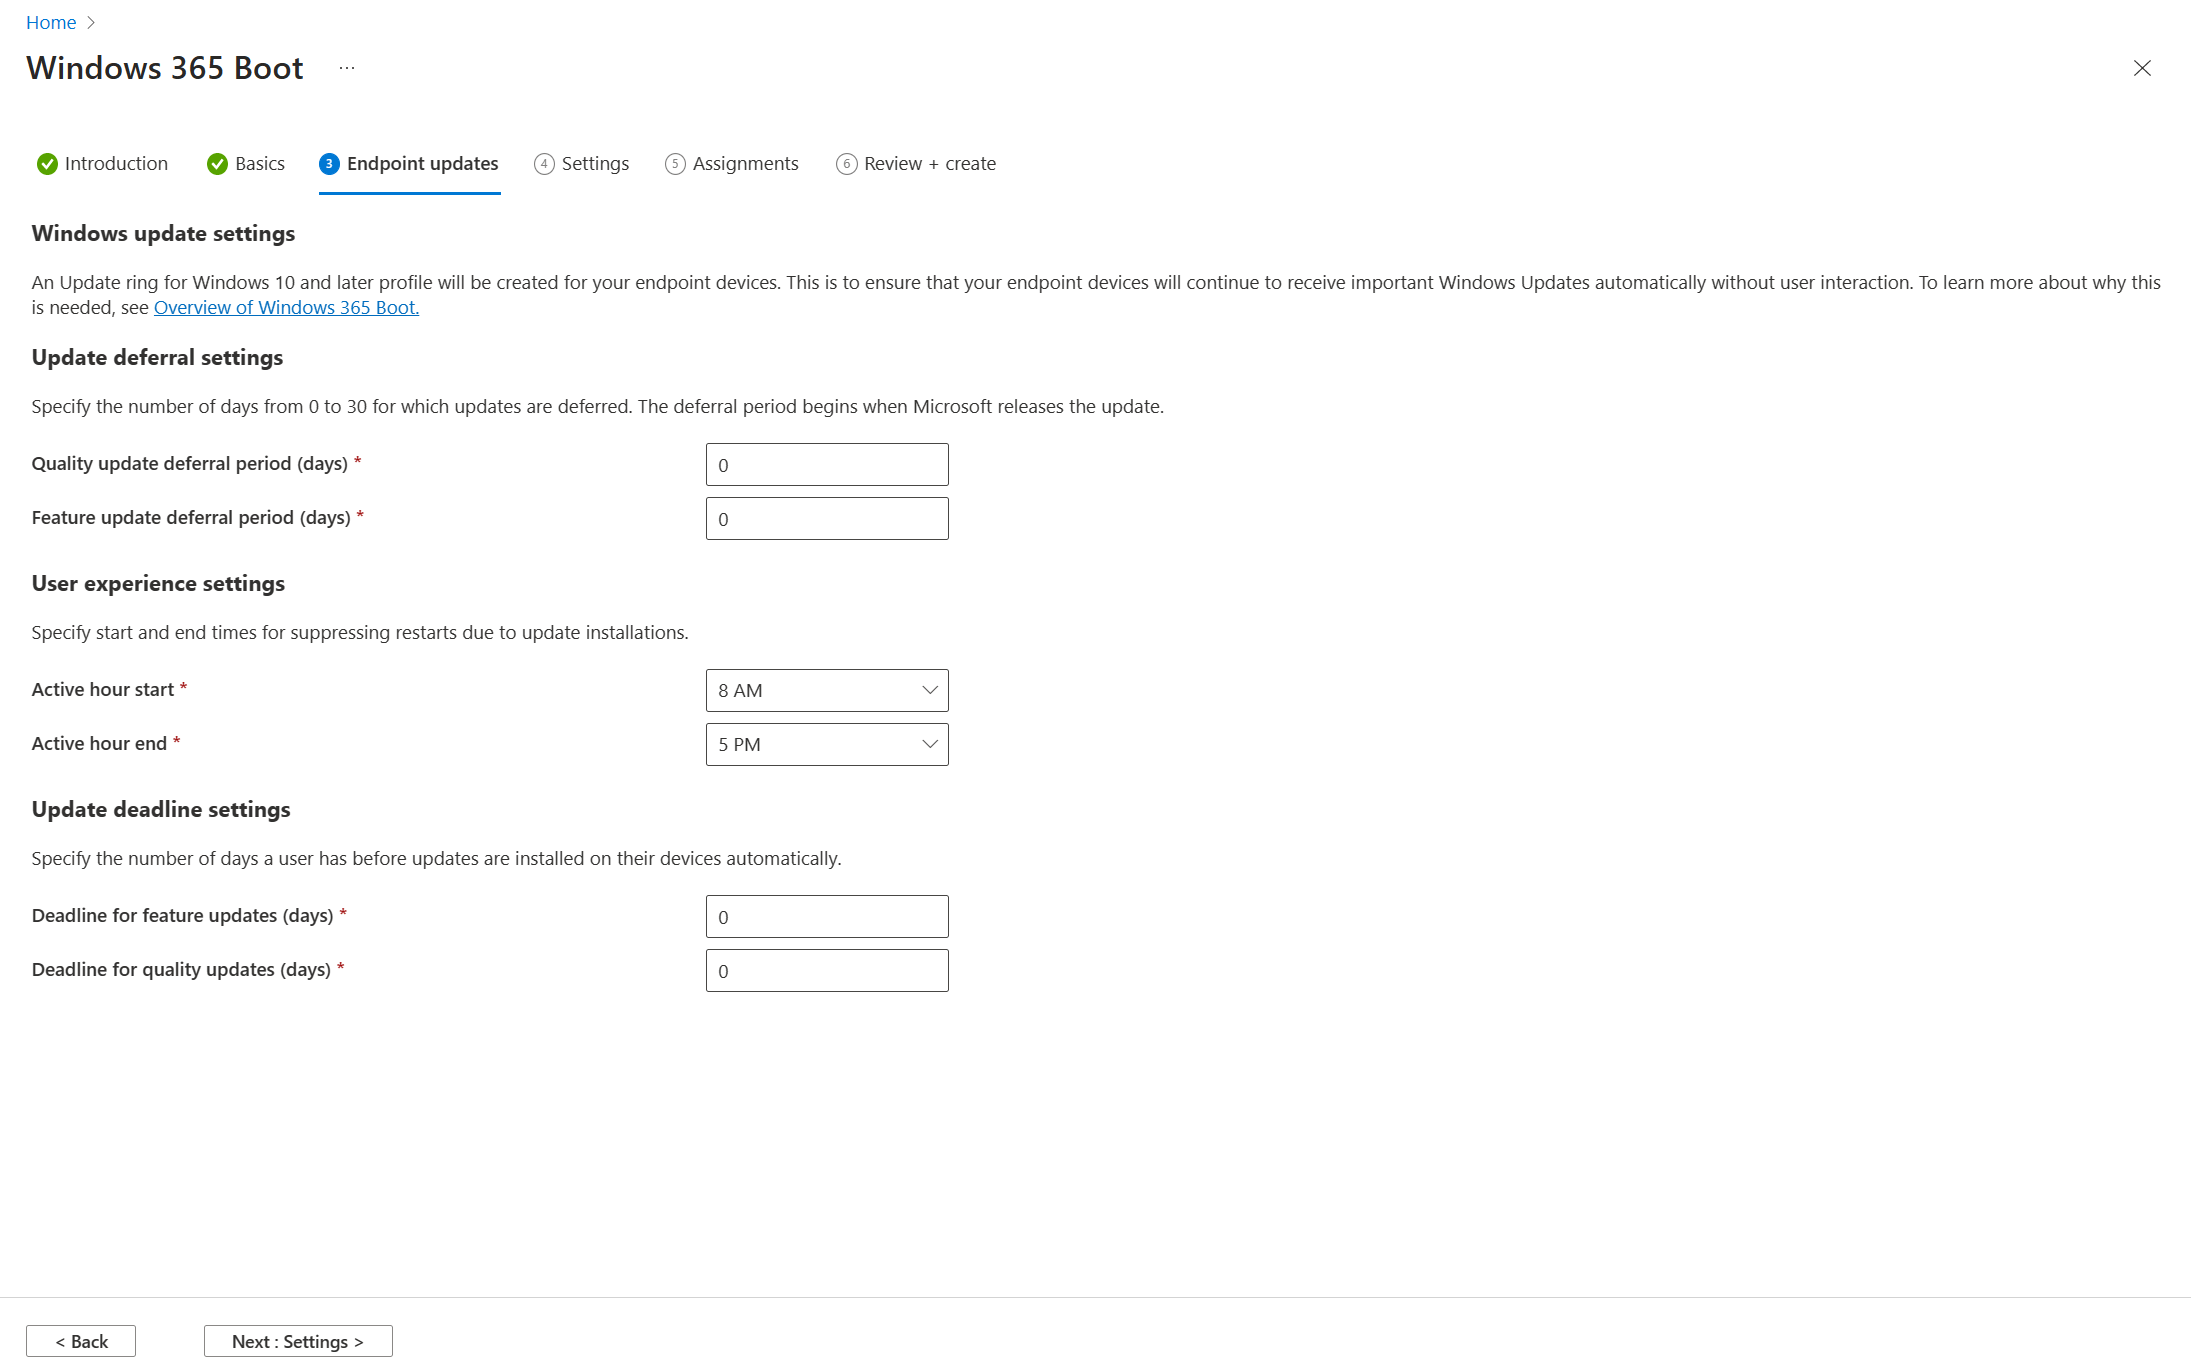
Admins can now specify the update settings. Just as a reminder, let’s take a quick look at each component:
Update deferral settings
You can specify the number of days before an update is available to a targeted endpoint. You can defer updates for quality and feature updates.
User experience settings
You can specify when the active hours of your users are. Updates can be installed during that time but the endpoint will not restart automatically during that time.
Update deadline settings
You can configure deadlines which means that updates will be installed automatically within the specified number of days.
Check this Microsoft URL if you want to learn more about these settings or recommendations.
For this demo I want things to move as fast as possible so all zeroes and defaults are good.
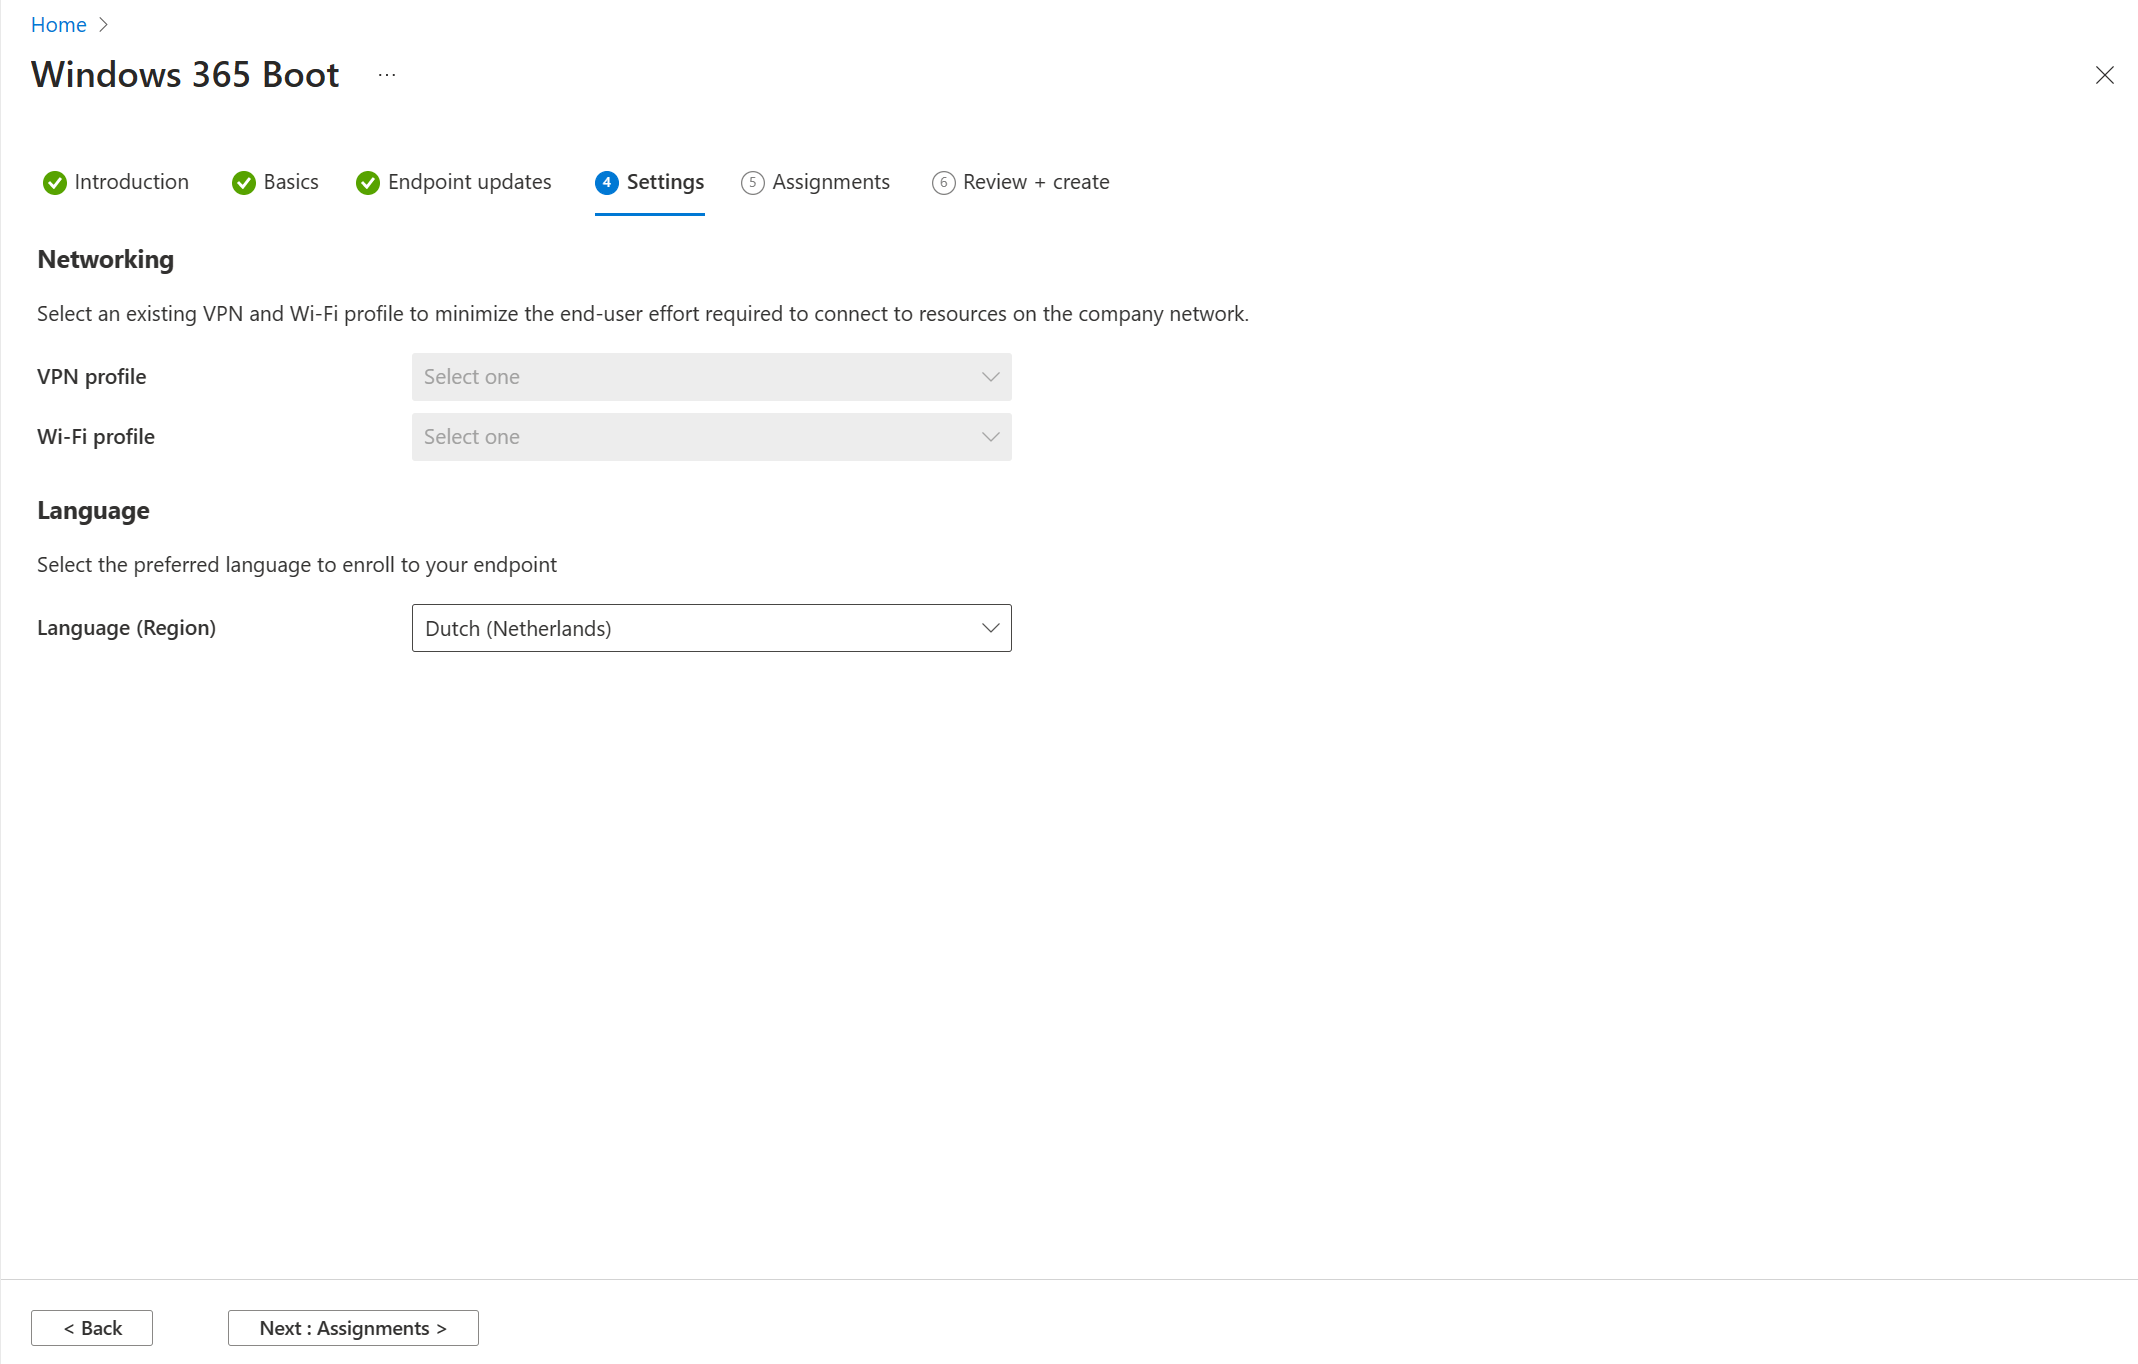
Click Next to continue to the Settings tab.
Here you can select the following;
- A VPN profile (if you have it preconfigured)
- A WiFi profile (if you have it preconfigured)
- Select your local language
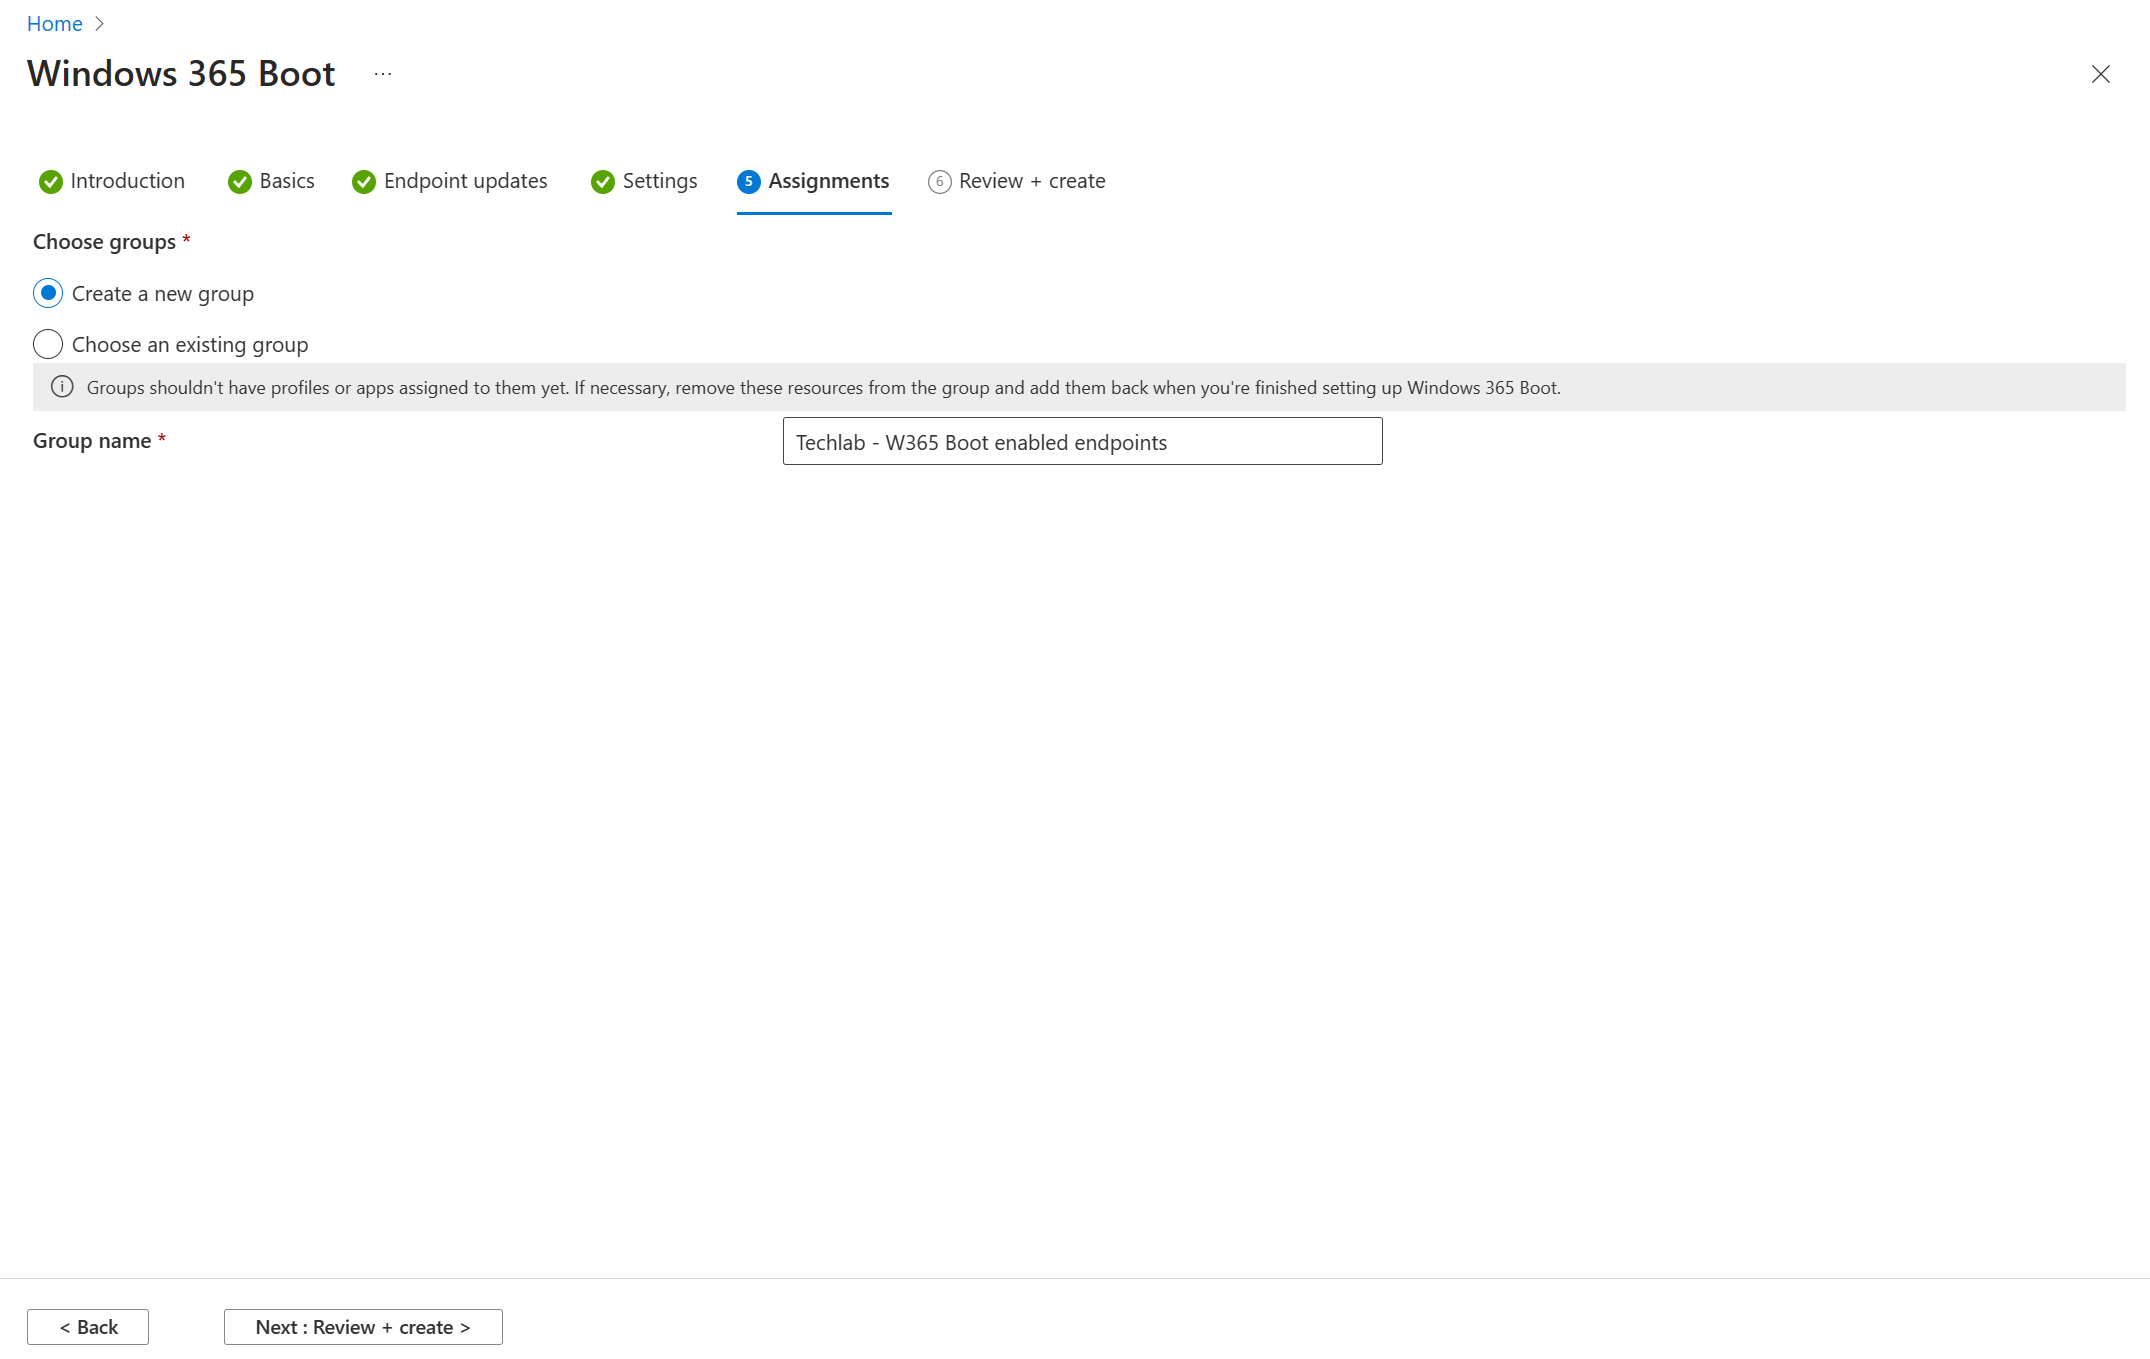
Click Next to continue to the Assignments tab. Admins can select an existing group with devices you want these settings to apply to. If you haven’t created a group before, just create a new one from this tab.
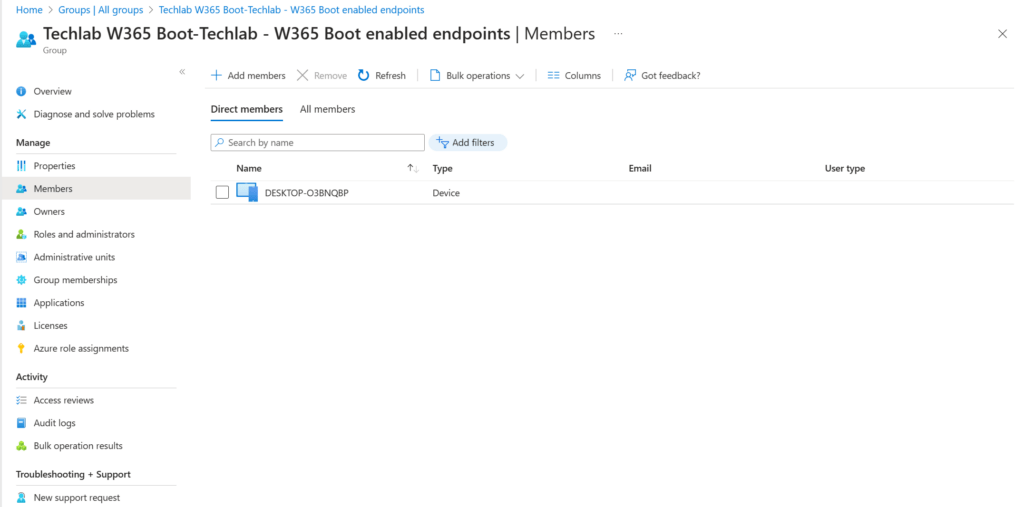
In this demo I haven’t create a group before so I created one.
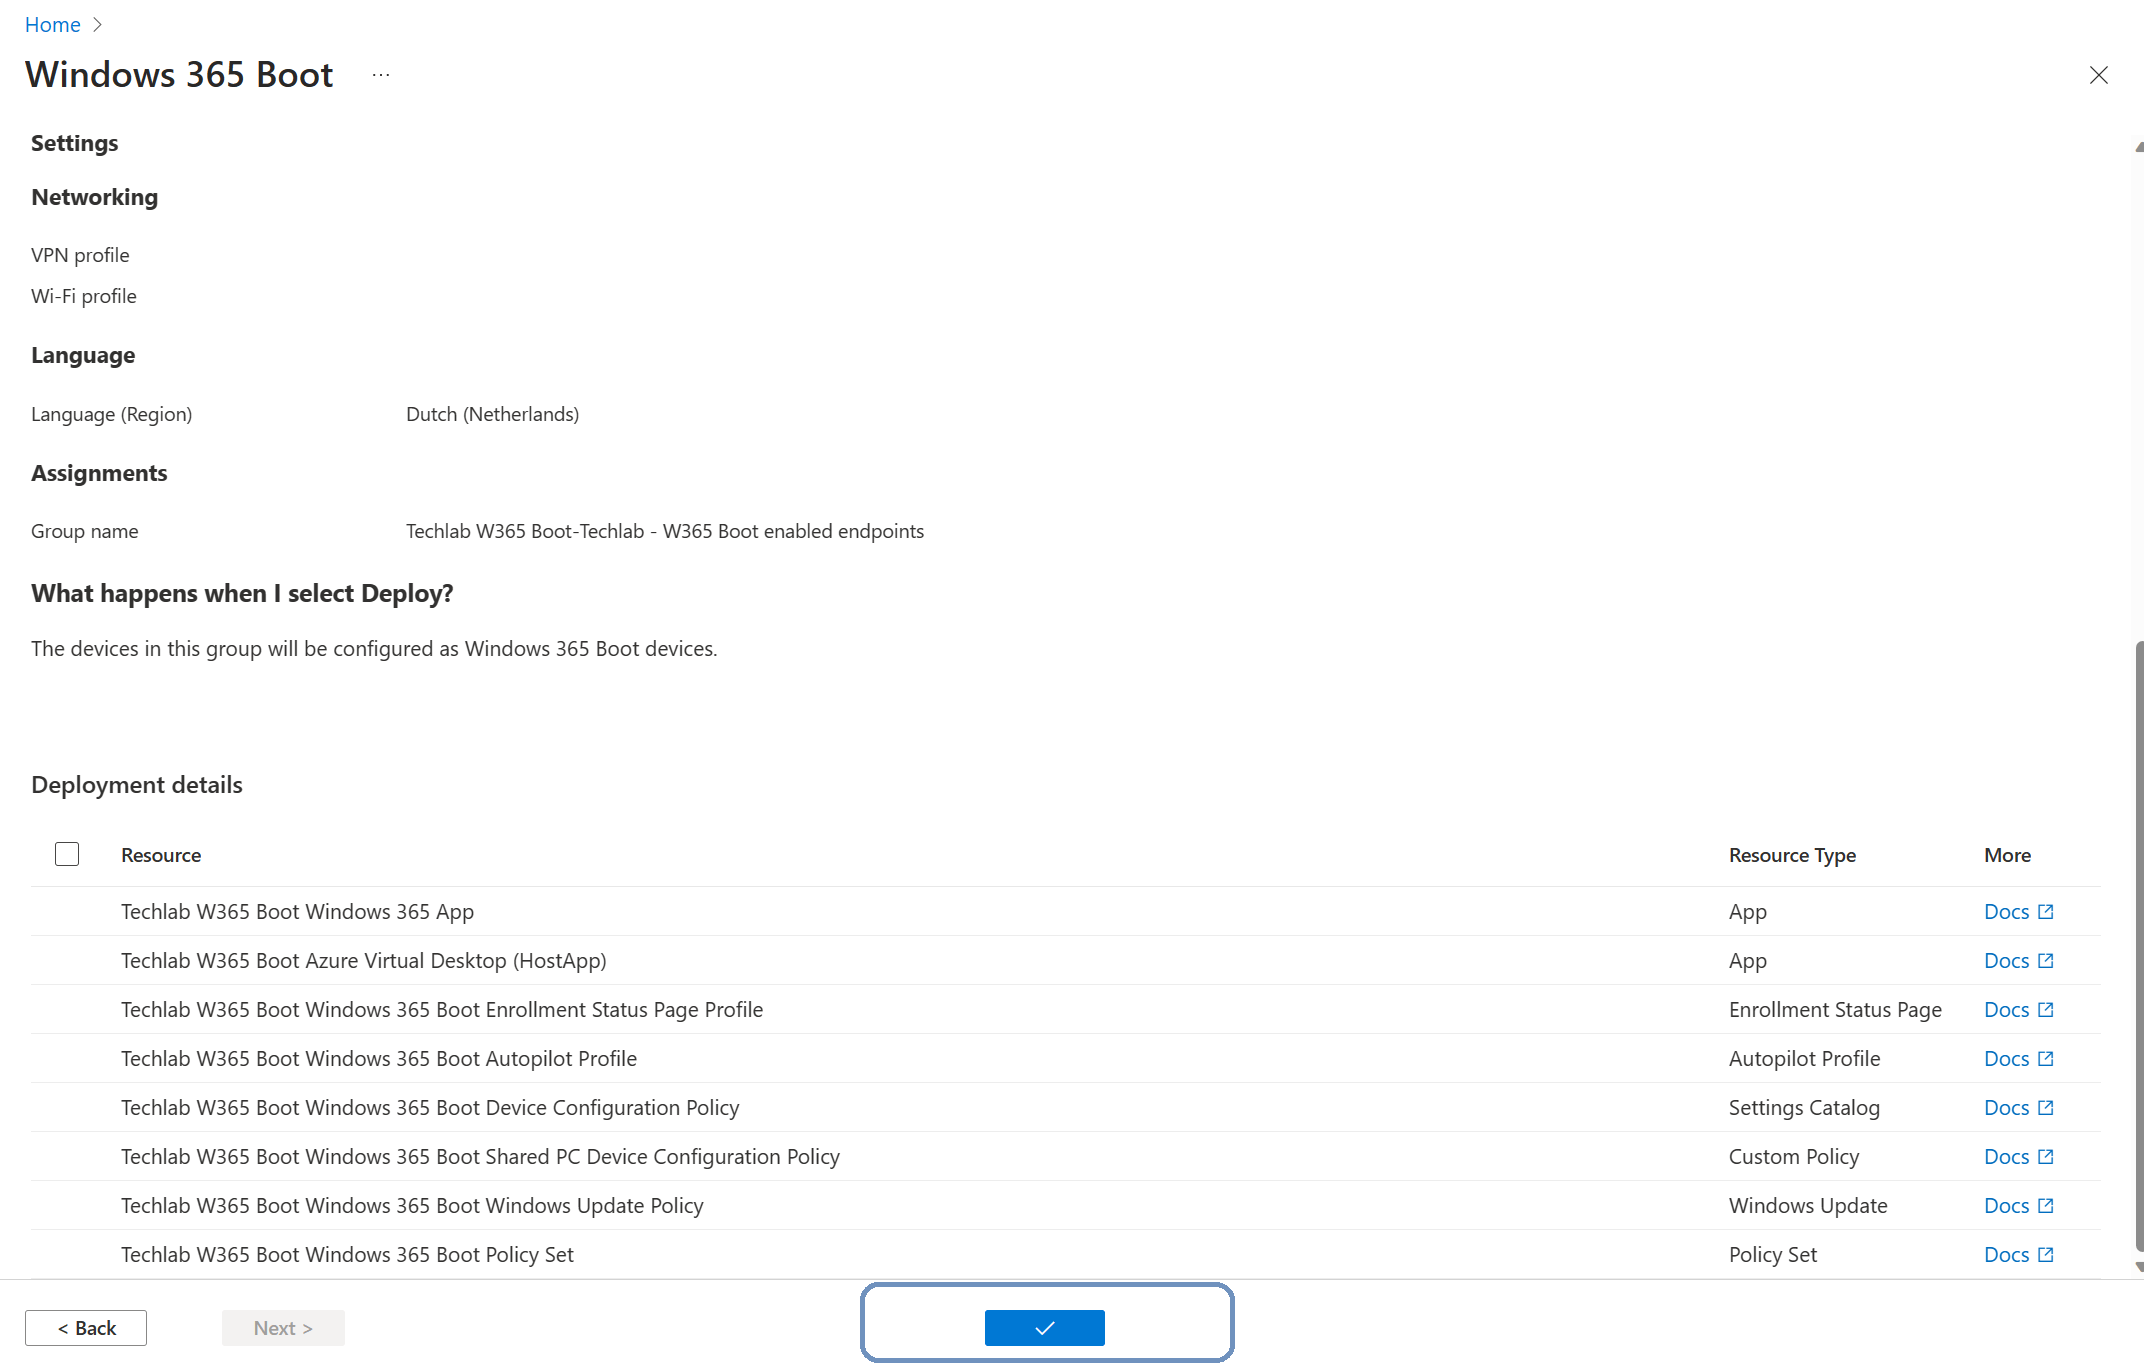
Clicking Next will bring you to the final tab. As always, take a minute to admire your awesome work! There’s a lot of information on this screen but I like how simple and complete this screen is.
Just click the blue checkbox to continue.
You will get a confirmation that the resources have been created successfully.
The first step of running the guided setup is now complete. Just remember to add an endpoint to the group you created earlier.
The second part is to make sure the endpoint is a member of the Windows Insider Program and is using the Dev channel.
There are a couple of ways to achieve this. If you are testing with just one device, you can just configure it on the local endpoint. The Microsoft documentation already got you covered, just search for Steps to perform on the Windows 11 local endpoint.
But this isn’t a lot of fun if you want to use this for more endpoints. It makes lot more sense to use Microsoft Intune.
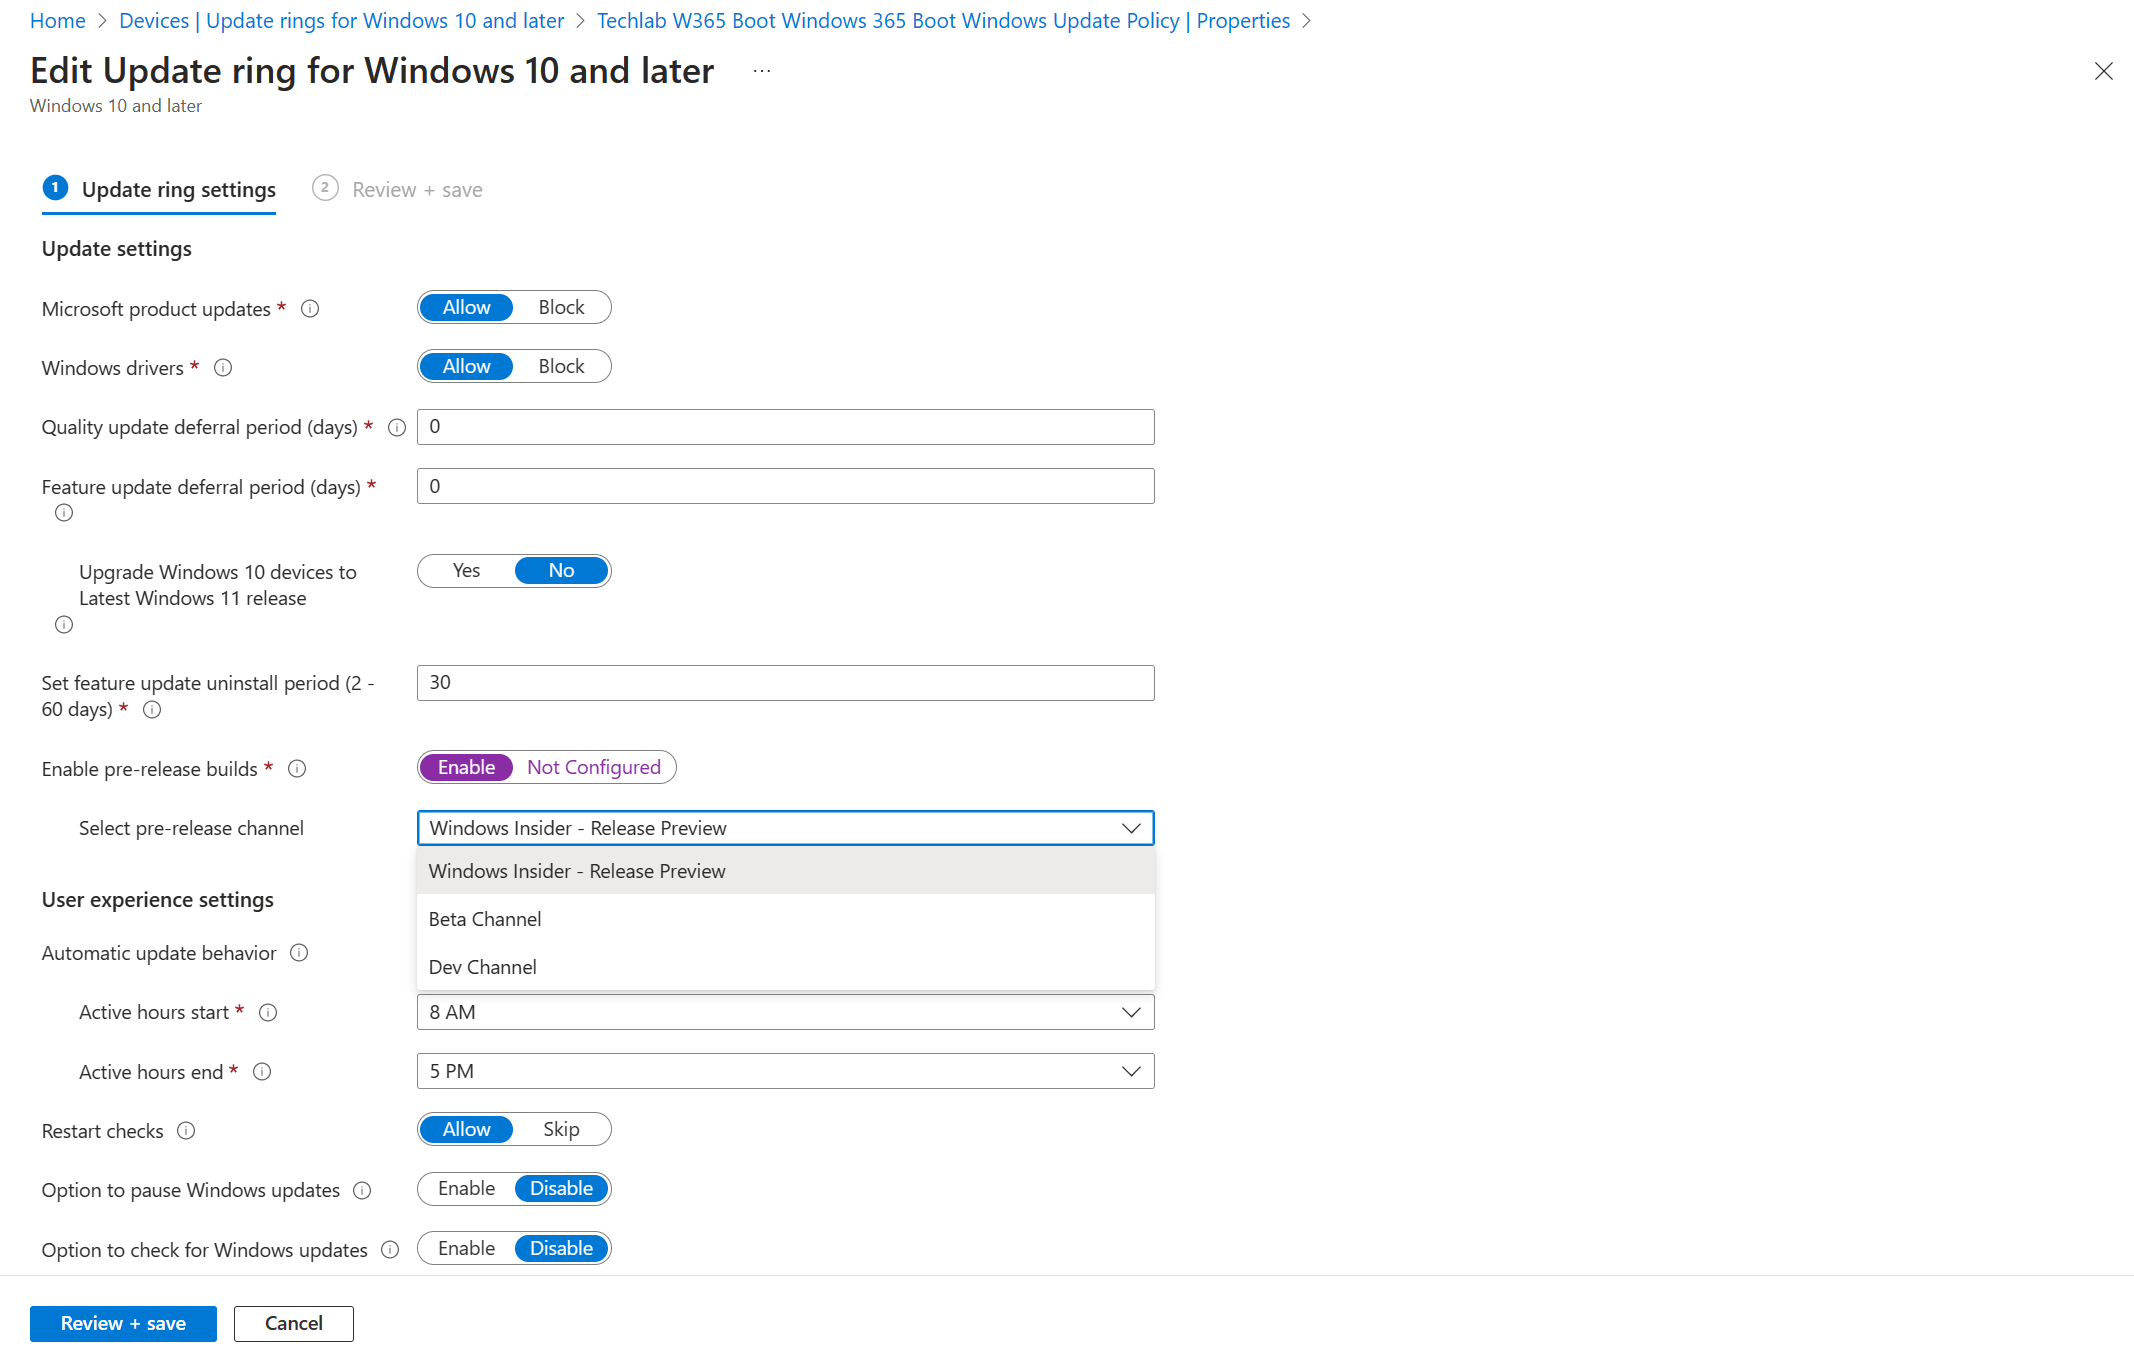
Go to Devices, Policy, Update rings for Windows 10 and later and edit the newly created update ring.
Make sure to enable the pre-release builds and select the Dev channel and save the update ring settings.
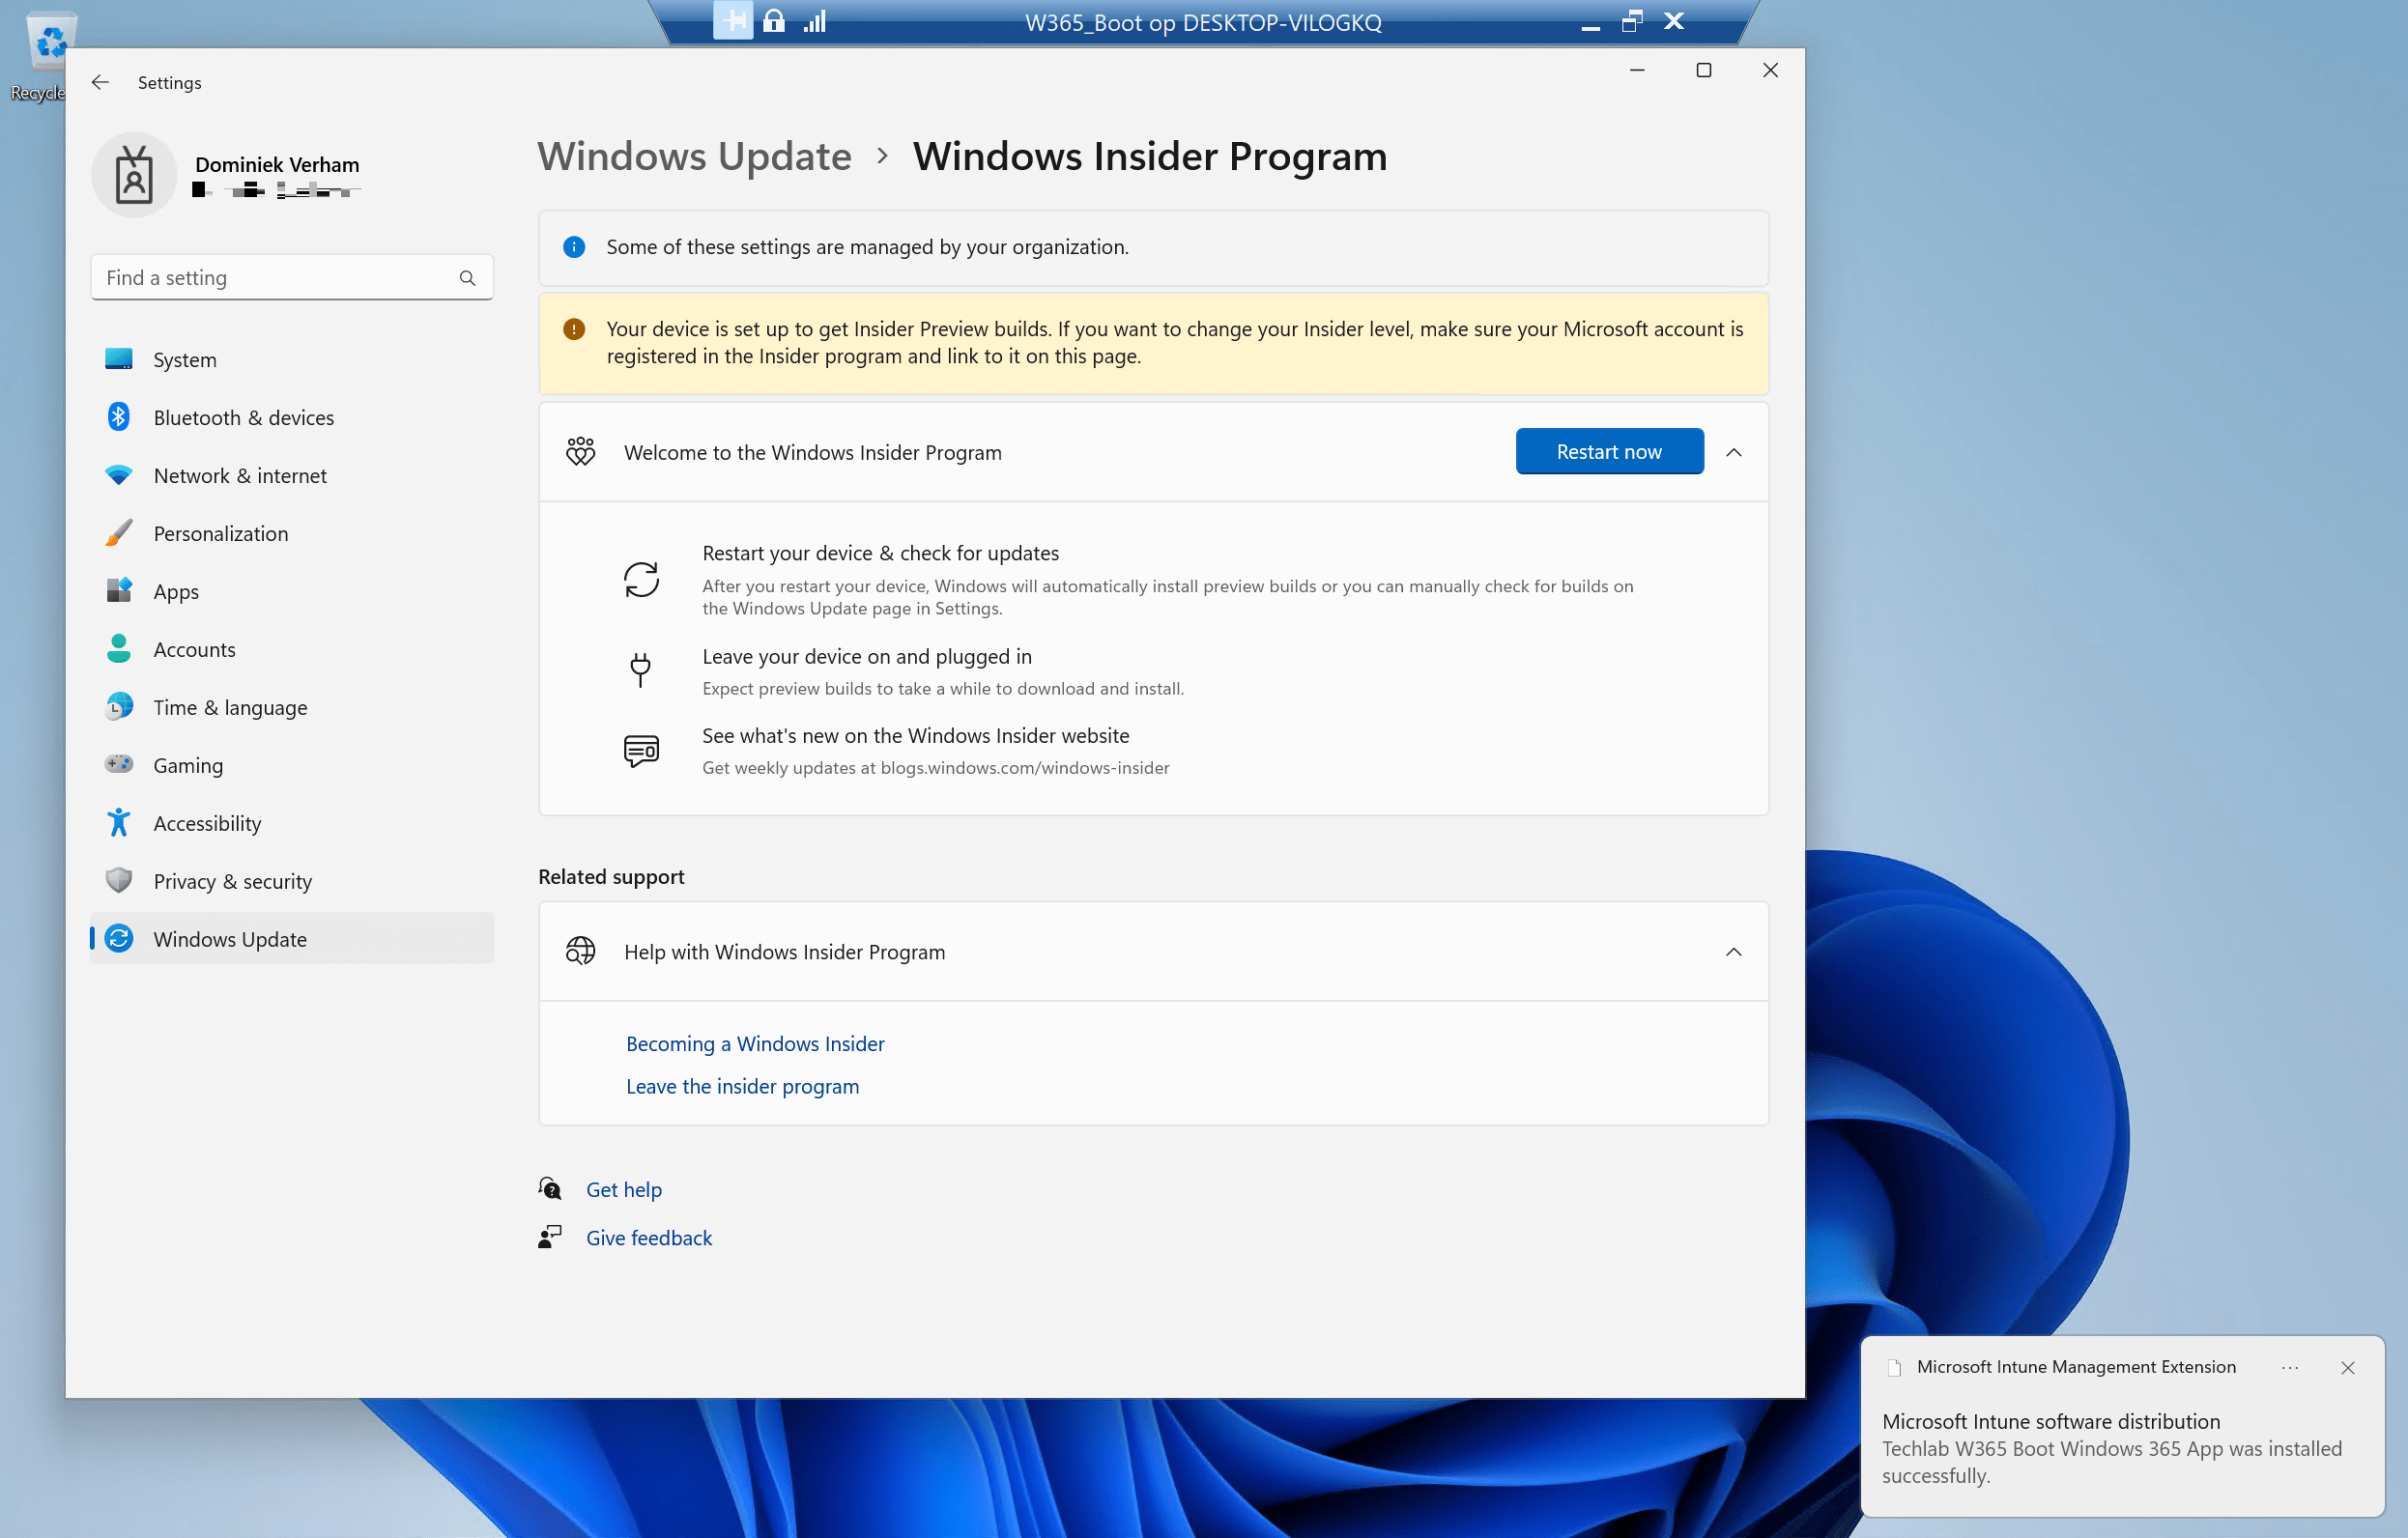
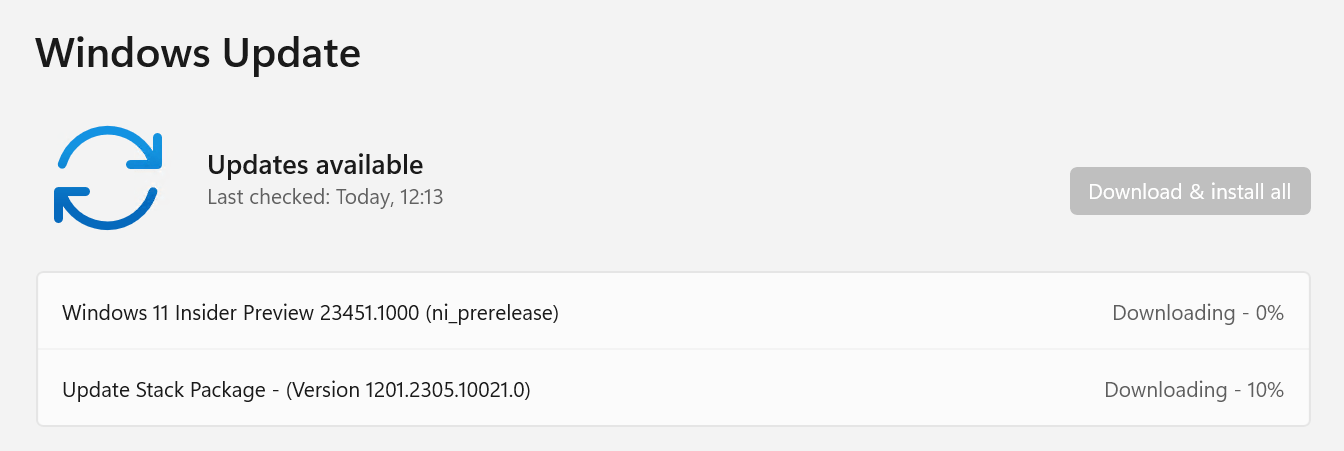
You guessed it, now it’s time to check if the update ring is properly configured and install all the updates that are available.
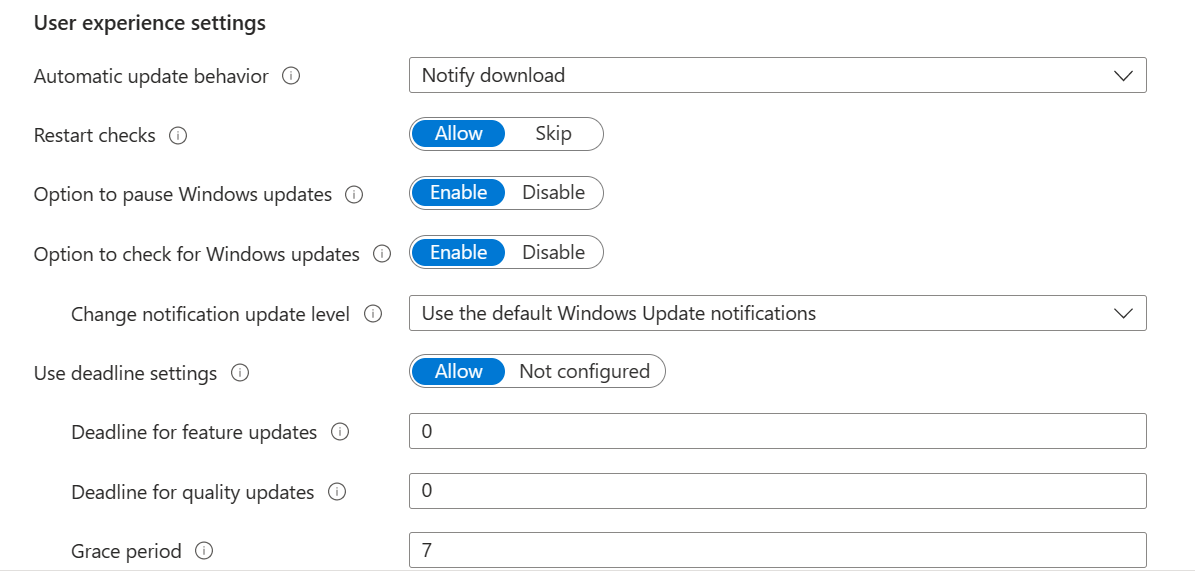
Things are looking pretty good on my demo endpoint. Some Windows 365 Boot goodies are being installed automatically. Just a tip; You can change the settings in the update ring if you are unable to manually check for updates:
The end user experience
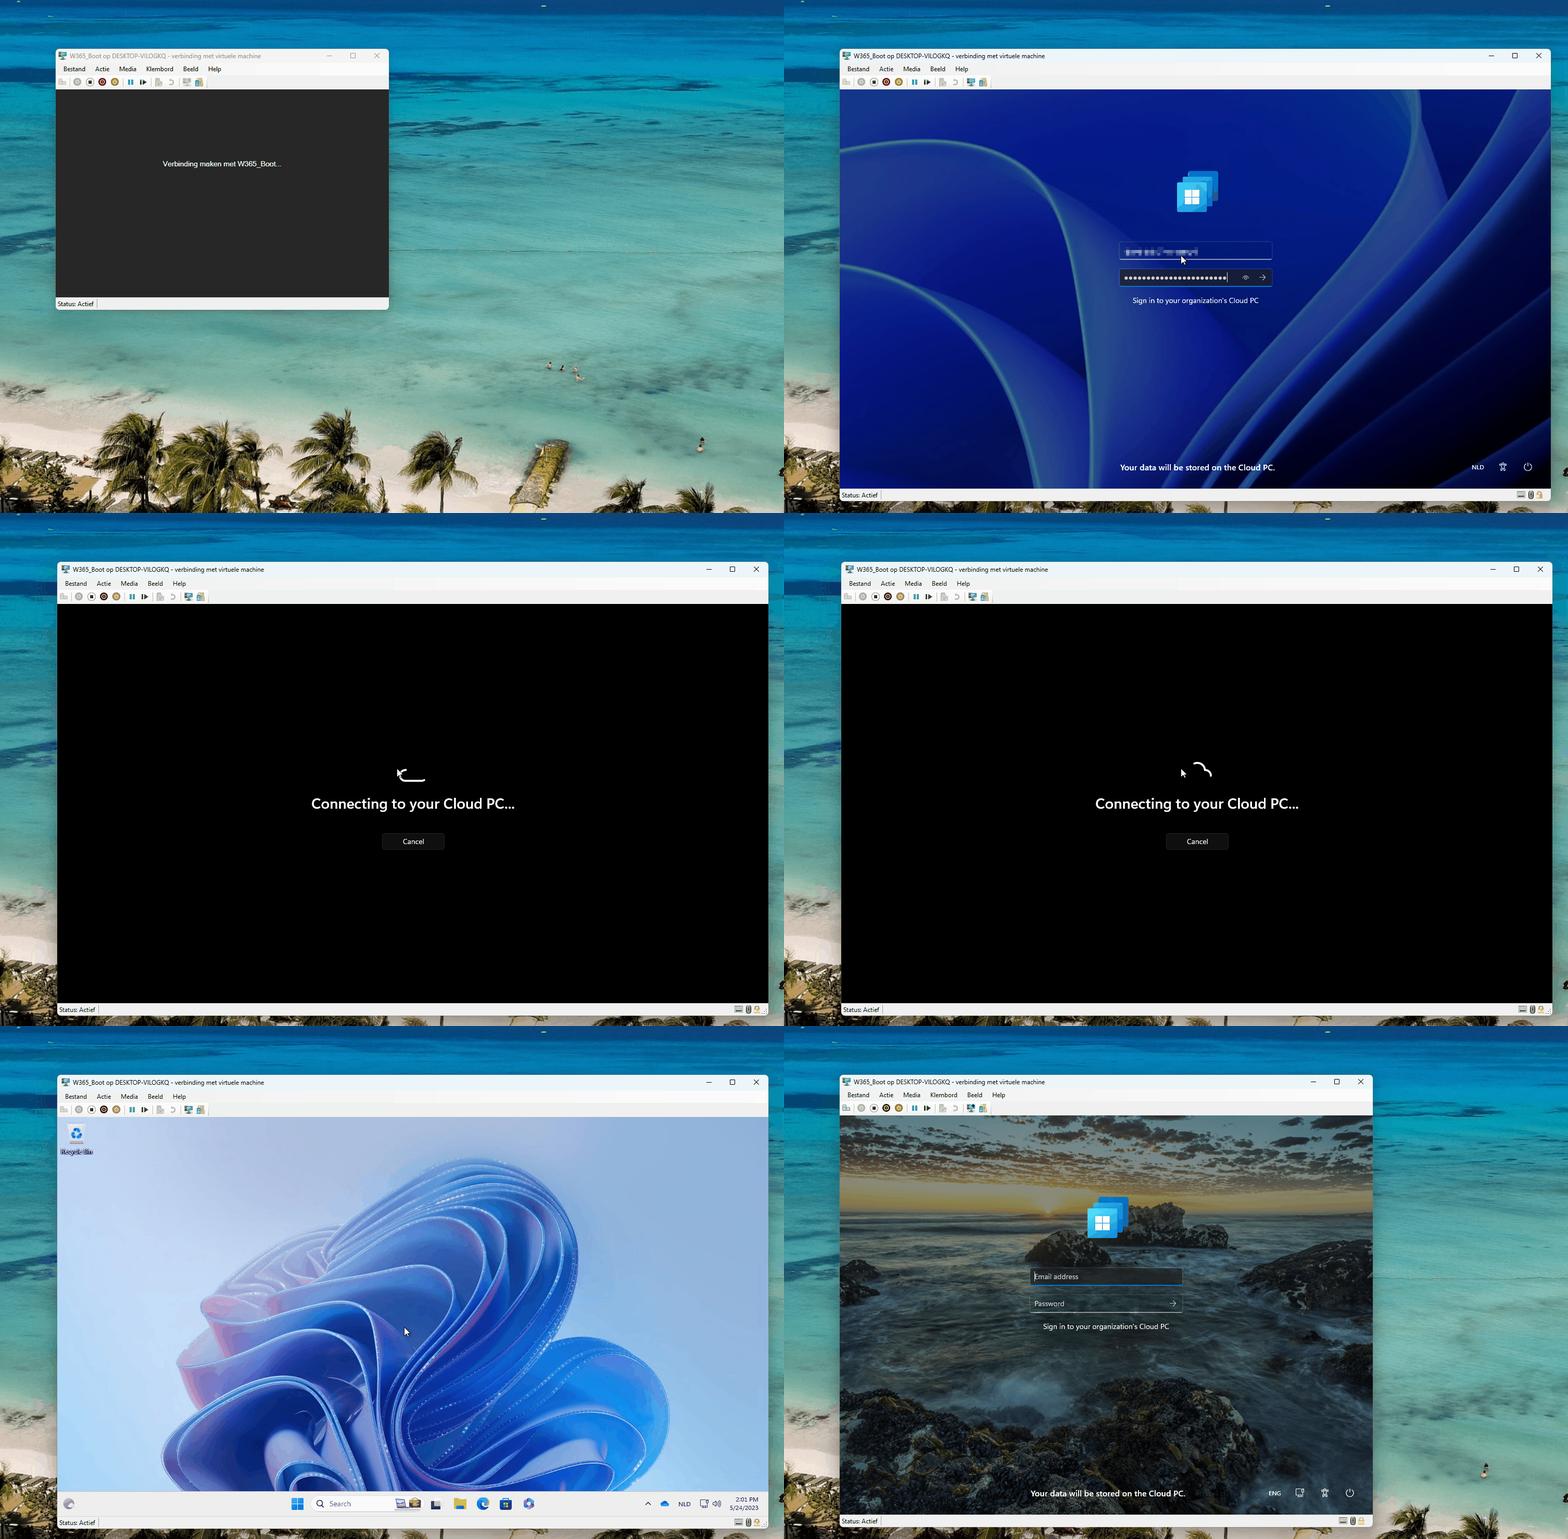
I’ve created a short GIF of the user experience of Windows 365 Boot on a VM. Let’s see what it looks like!
Troubleshooting info
Here are some tips and things to try if you are experiencing any problems with Windows 365 Boot.
- Make sure you are running Windows 11 22H2 Enterprise or Pro.
- Make sure you are enrolled into the Windows Insiders Program and are using the Dev channel.
- Check the build of your Windows version;
- Windows 11 22H2 build 10.0.22621.1702 is (at this moment) the latest release (but it is not a Dev channel release)
- You can test Windows 365 Boot in a VM. Make sure you have more than 64 GB of disk space or the upgrade to the insider preview build will fail.
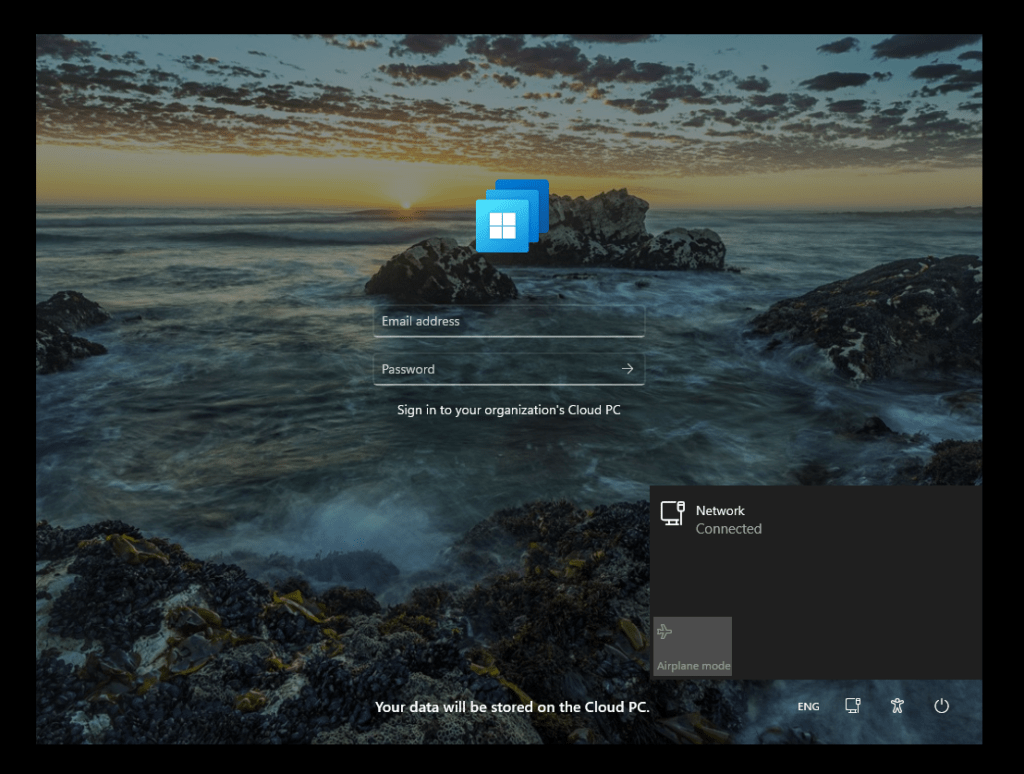
You can connect to a local wifi connection by click on the icon at the login page. This way you can get an internet connection up before you connect to the Cloud PC.
What happens if you give the endpoint an Autopilot reset?
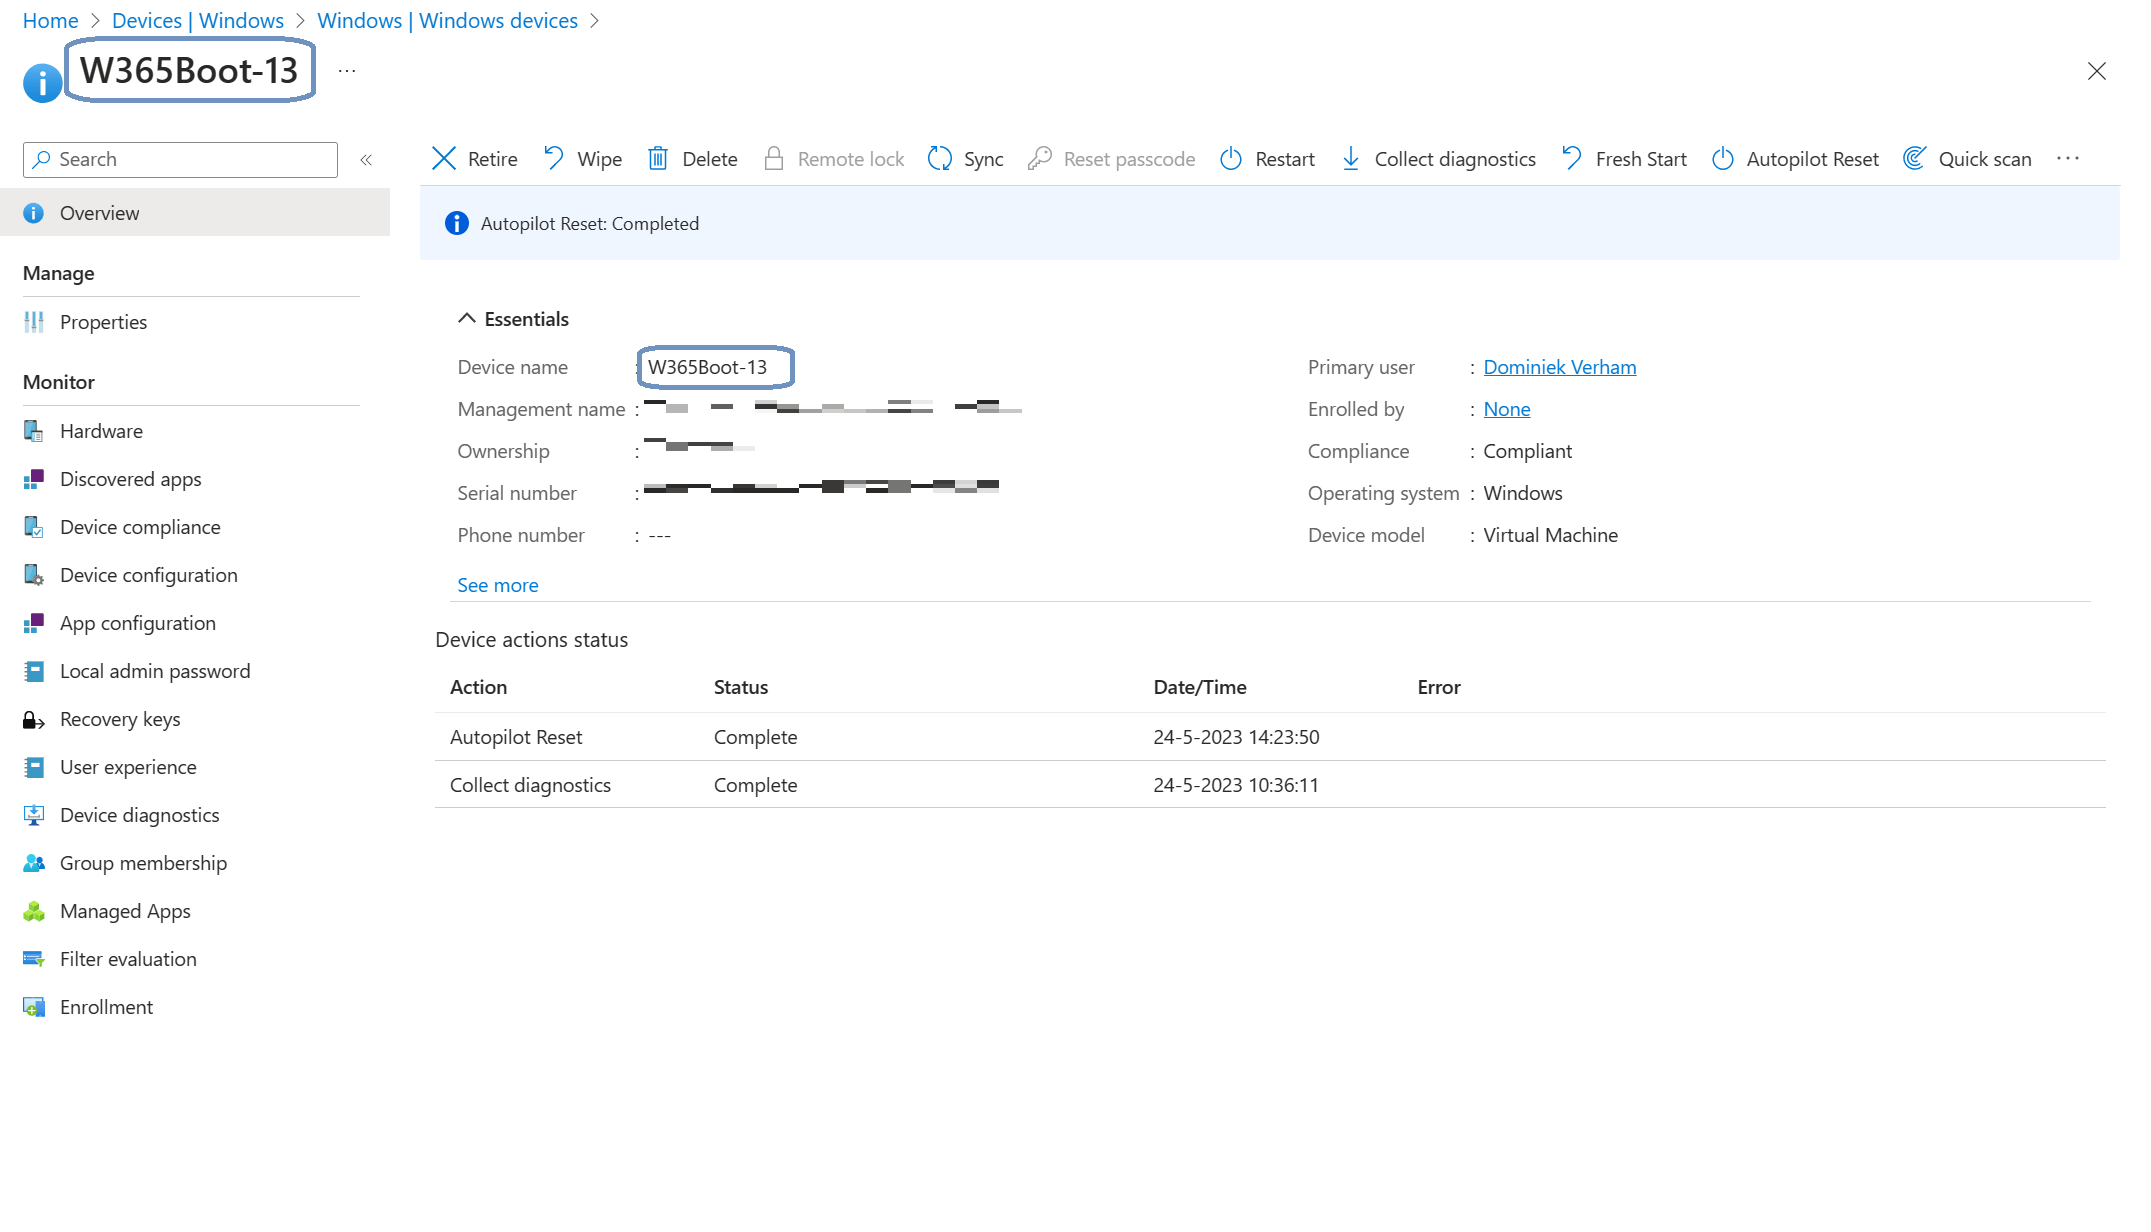
From the Microsoft Intune admin center, go to Devices, Windows and click on the device you want to redeploy using Autopilot, since you know, the guided setup made it possible to use Autopilot.
Click the Autopilot Reset button in the ribbon and wait until the process is complete.
When I tested it, I can see that the device has a different name now which makes sense. I chose to apply a device name template during the guided setup. So that looks good! The first login after the Autopilot process still brought me to the local desktop. After I rebooted the VM I was able to use Windows 365 Boot.
Resources
I used the following resource for this post:
Share this:
- Click to share on LinkedIn (Opens in new window) LinkedIn
- Click to share on X (Opens in new window) X
- Click to share on Facebook (Opens in new window) Facebook
- Click to share on WhatsApp (Opens in new window) WhatsApp
- Click to share on Telegram (Opens in new window) Telegram
- Click to print (Opens in new window) Print


