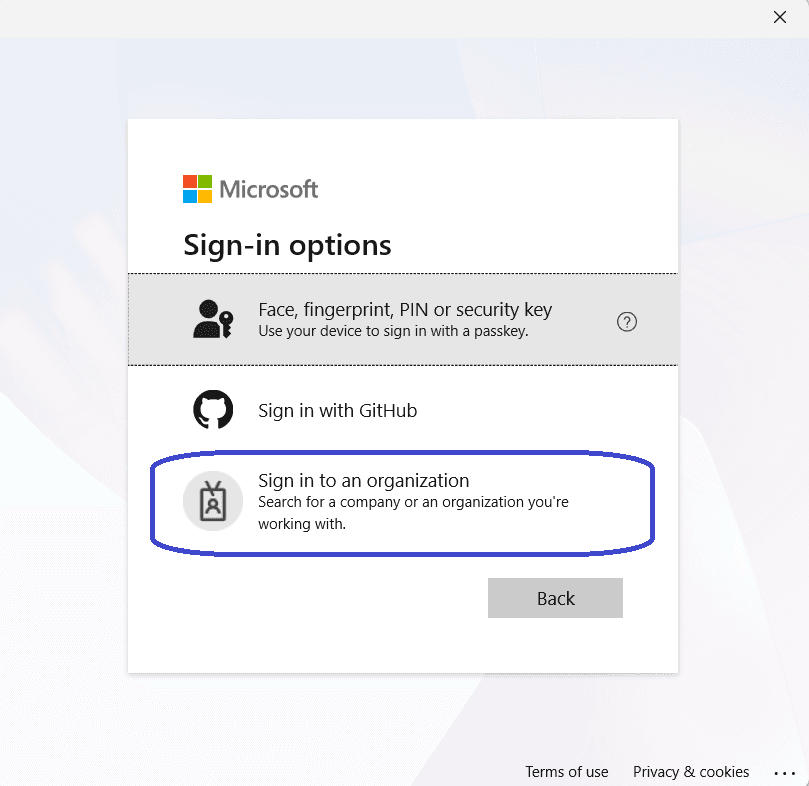
What’s up, everyone!
In this post I will show how to setup a deployment profile for autopilot, based on a user-driven profile which allows a pre-provisioned deployment. Pre-provisioning is formerly known as the white-glove process.
The idea was to demonstrate the deployment process on a Windows 10 system and a Windows 11 system for comparison. Unfortunately I never got the deployment process to complete successfully. I managed to get pretty far so I will post the screenshots so we can compare the experience. I will also describe what went wrong and why it was not possible to complete the deployment.
Enjoy!
Prerequisites
This demo contains;
- An active Microsoft tenant.
- A user named Autopilot which has a license that contains the Microsoft Intune right.
- A Windows 11 Pro physical machine
- A Windows 10 Pro physical machine
- This process is not supported in a virtualized environment.
- The physical devices need to support TPM 2.0 and device attestation.
- The devices need ethernet connectivity.
Step 1: Configure Microsoft Endpoint Manager
First we need to create a Windows Autopilot Deployment Profile. Log on to MEM, go to Devices, Device Enrollment, Enroll Devices. We can see two important boxes here;
- Deployment Profiles
- Enrollment Status Page
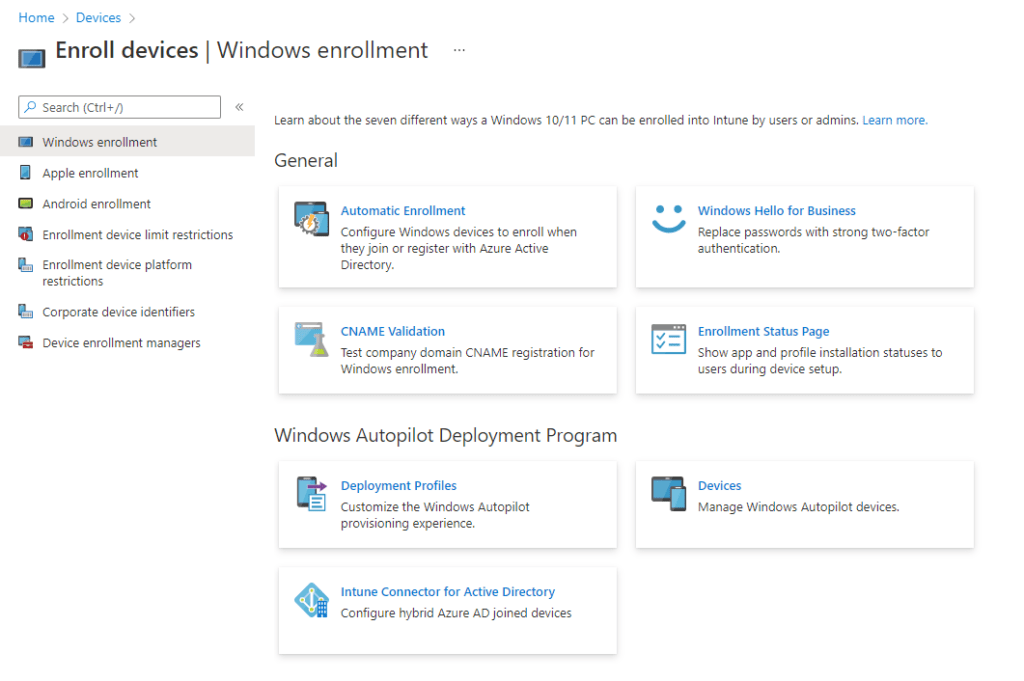
Click on the Deployment Profiles box.
This brings us to the Windows Autopilot Deployment Profiles page.
Click on + Create profile to create a new profile. I already created a profile. There are a couple of things to consider:
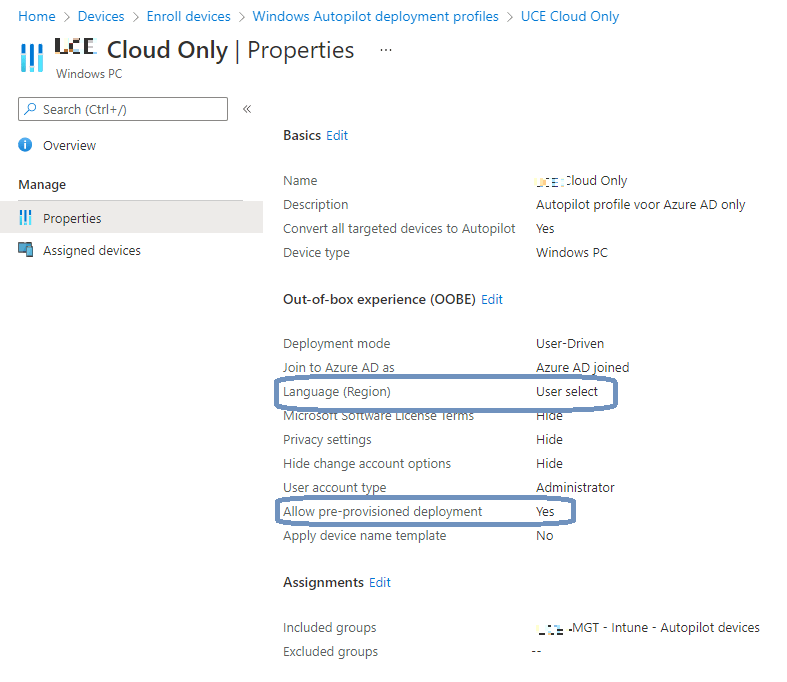
Set the language (Region) option to user select. This will pause the Autopilot process on the language tab which makes it easy to access the Autopilot Preprovisioning feature.
Set the Allow pre-provisioned deployment option to Yes.
Save the profile and click on the Enrollment Status Page box.

Click on the + Create button to create a new Enrollment Status Page.
I already created an ESP. Here are the options I set;
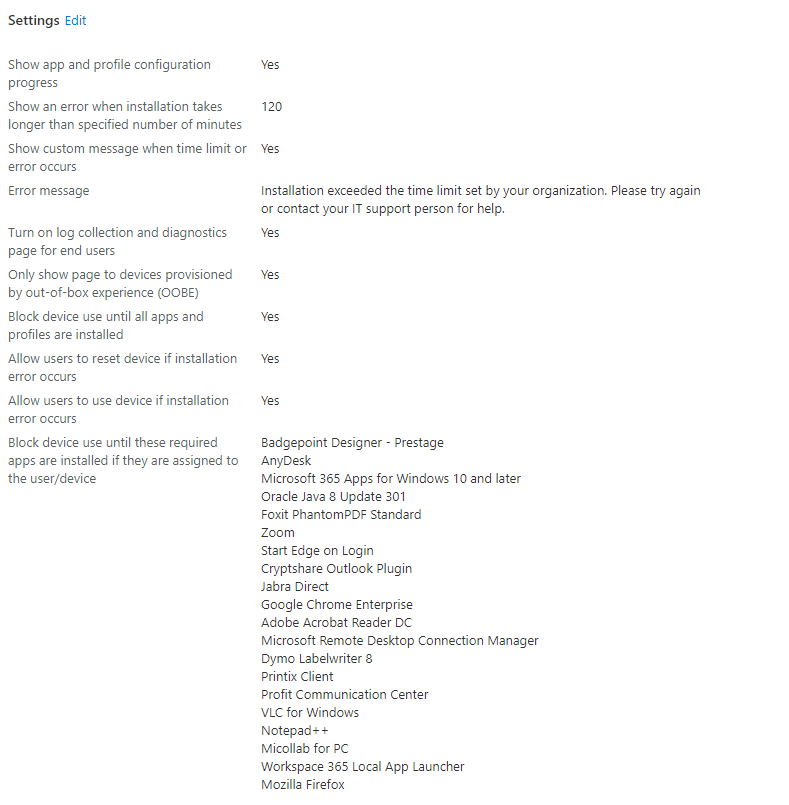
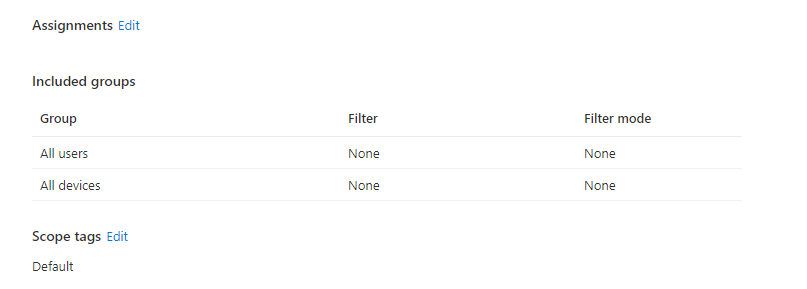
It might be a good idea to increase the number of minutes before the ESP shows an error, especially if you need to install many applications.
The autopilot pre-provisioning process will apply all device-targeted policies from Intune. That includes certificates, security templates, apps and more as long as they are targeting the device.
Any Win32 or LOB app will be installed if they meet the following conditions;
- Configured to install in the device context.
- Targeted to the user pre-assigned to the Autopilot device.
Step 2: Windows 10 Autopilot pre-provisioning process
In this step we will run a deployment on a machine running Windows 10. As mentioned before, I already uploaded the hardware hash to MEM.
I setup my test machine and connected it with an ethernet cable.
Power the machine and wait for the language selection screen.
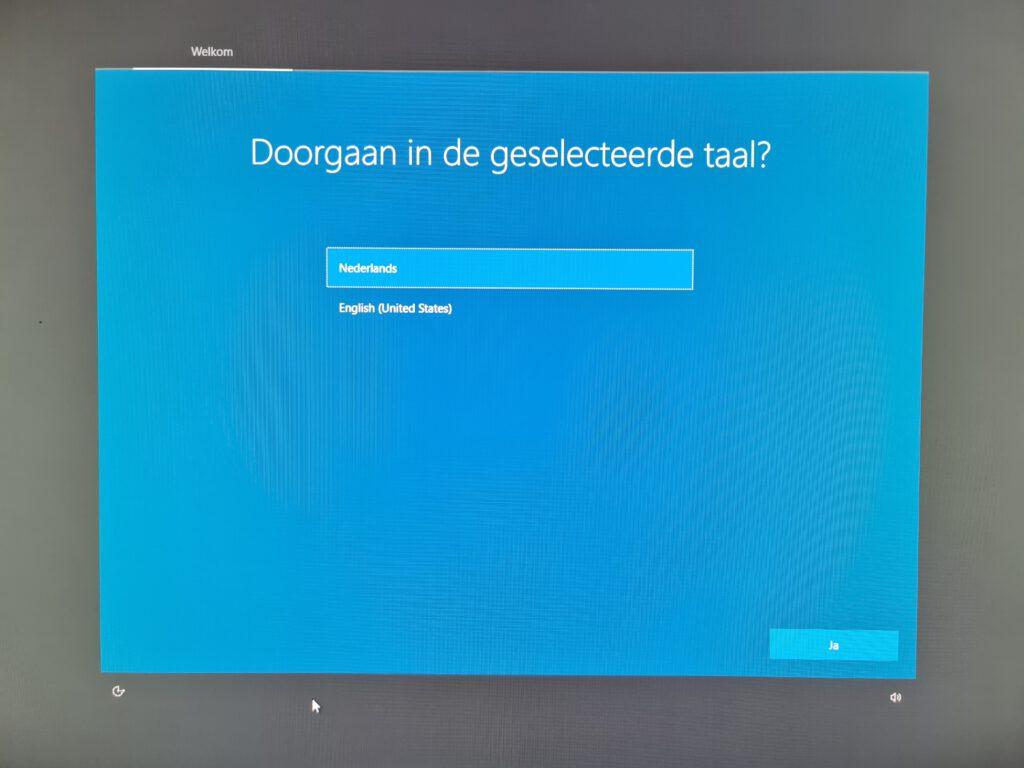
Press the Windows key 5 times. If nothing happens, click on the language so the preferred language highlights.
Press the Windows key again for 5 times.
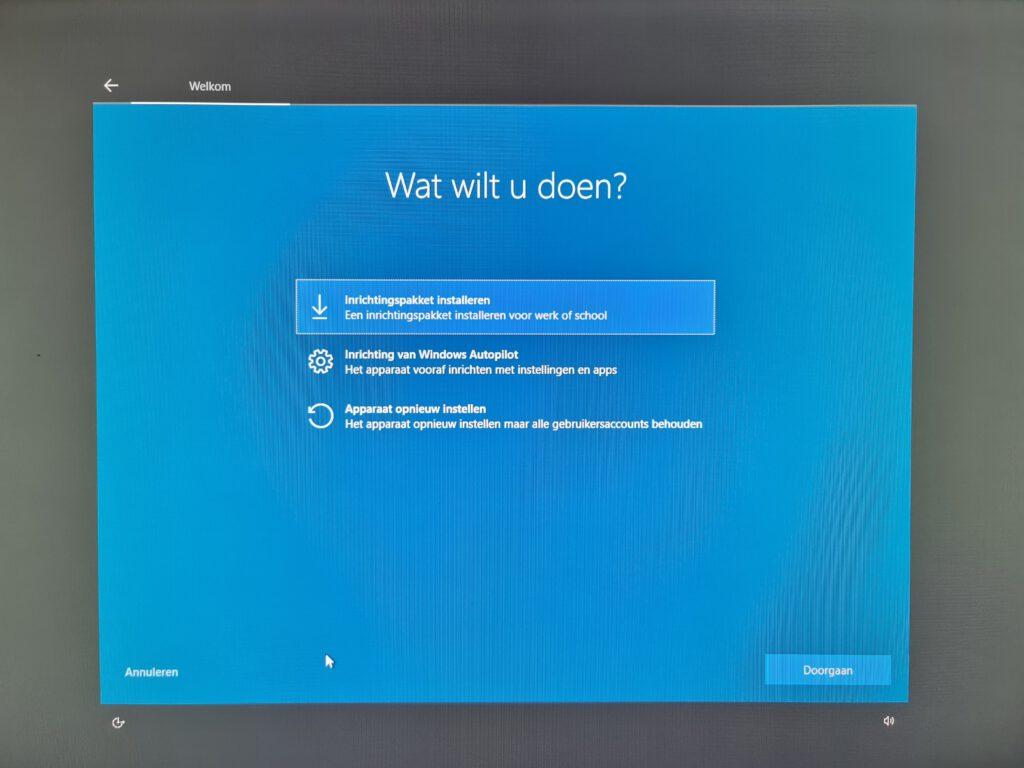
The second option starts the Autopilot pre-provisioning process.
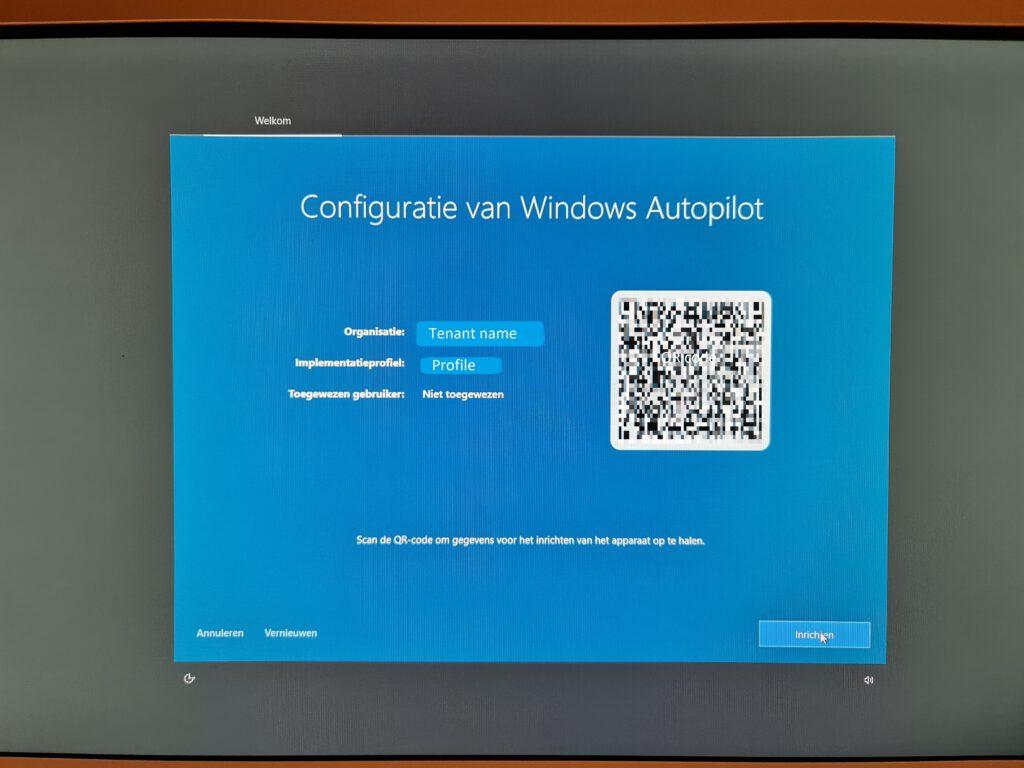
The following screen shows the Tenant and the deployment profile. Click on Deploy to start the provisioning process.
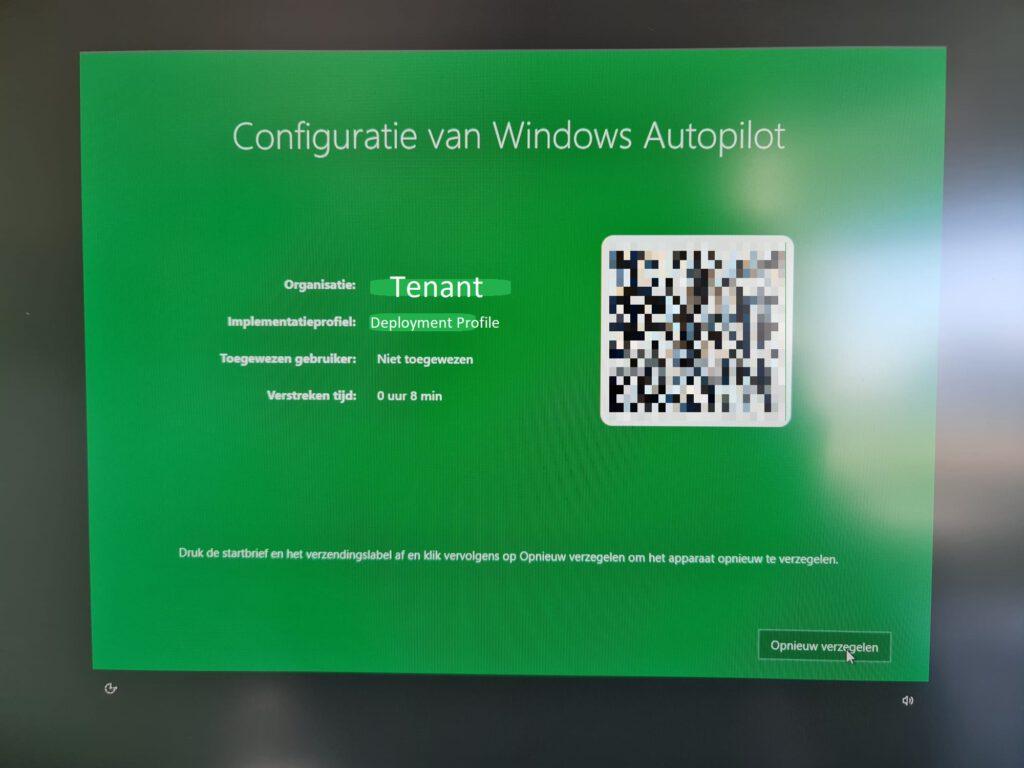
If the process completes succesfully, we see the green screen as shown above. Click on the reseal button to reseal the image and the system will automatically power off.
If an error occurs, we get a red screen. In this case we need to troubleshoot the issue. I found it particularly helpfull to check the Eventlogs. For instance the Microsoft-Windows-ModernDeployment-Diagnostics-Provider.
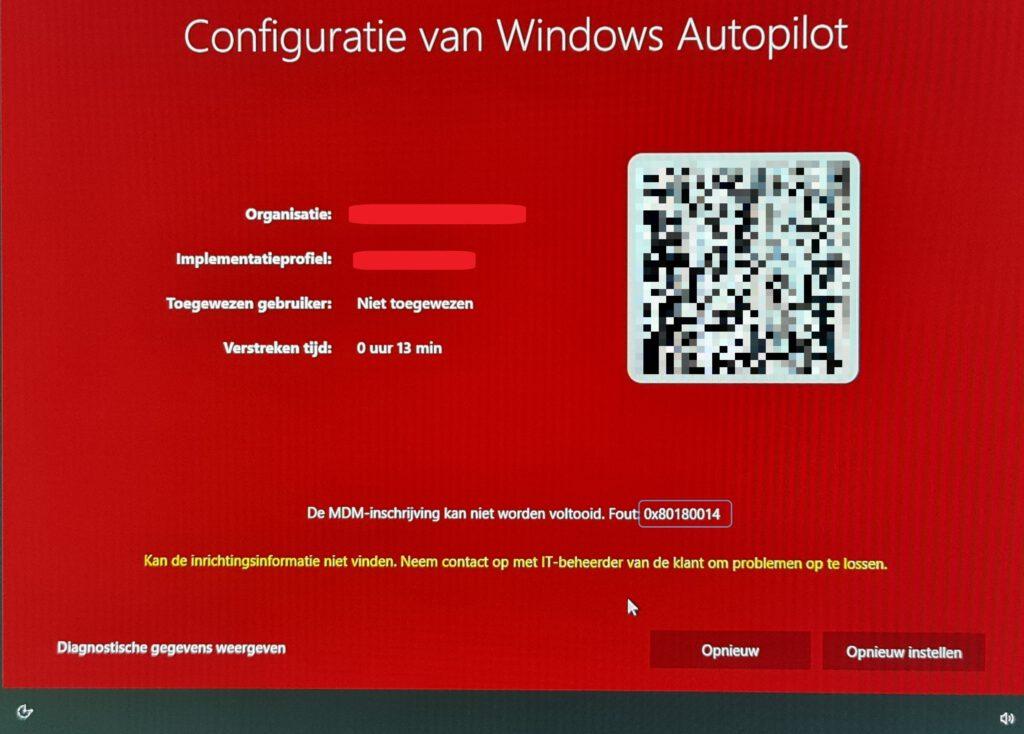
Step 3: Windows 11 Autopilot pre-provisioning process
In this step I tried to run the autopilot deployment on the same hardware box as before, but only after I upgraded the operating system to Windows 11 Pro. I will show the screenshots and explain where the deployment broke down.

This is the language screen, press the Windows key 5 times to start the pre-provisioning process.
If nothing happens, remember to select the desired language and press the Windows key 5 times.
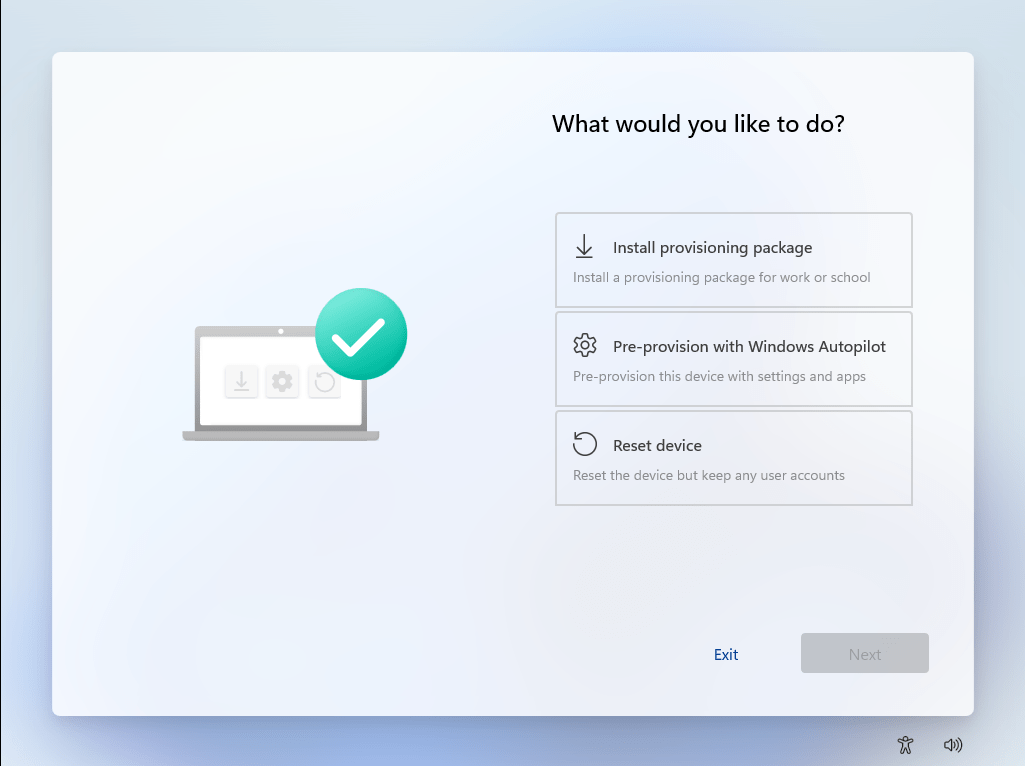
Click on Pre-provision with Windows Autopilot and click Next.
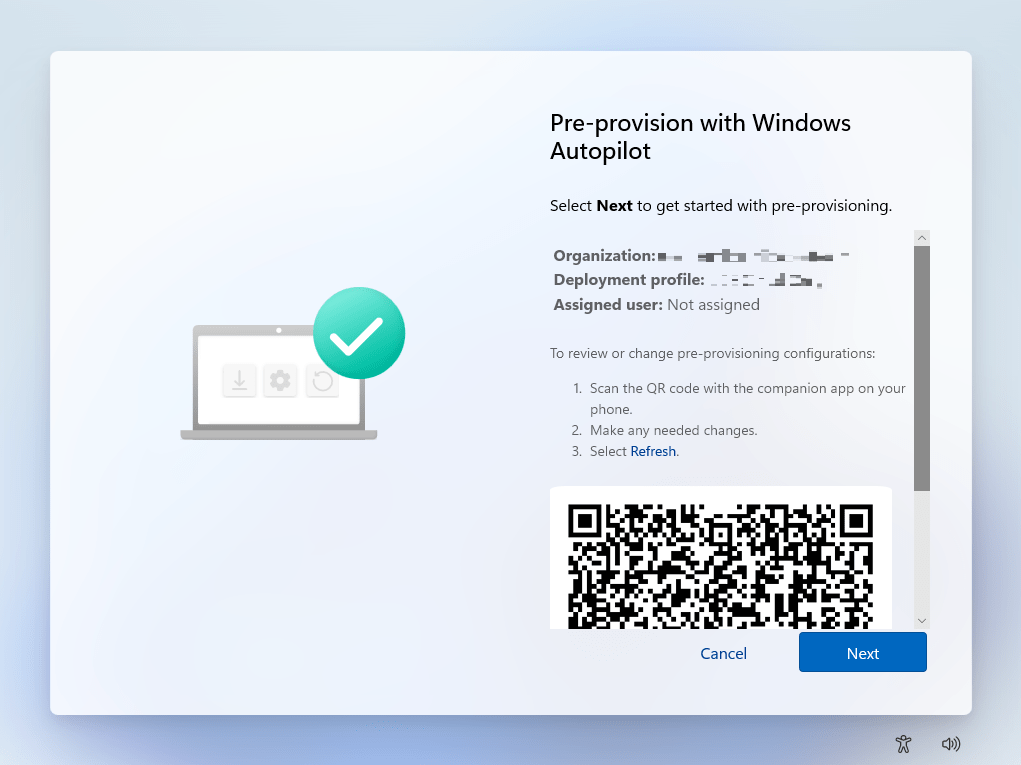
Windows will get the Deployment Profile from MEM and present the information in the Autopilot screen.
Click on Next.
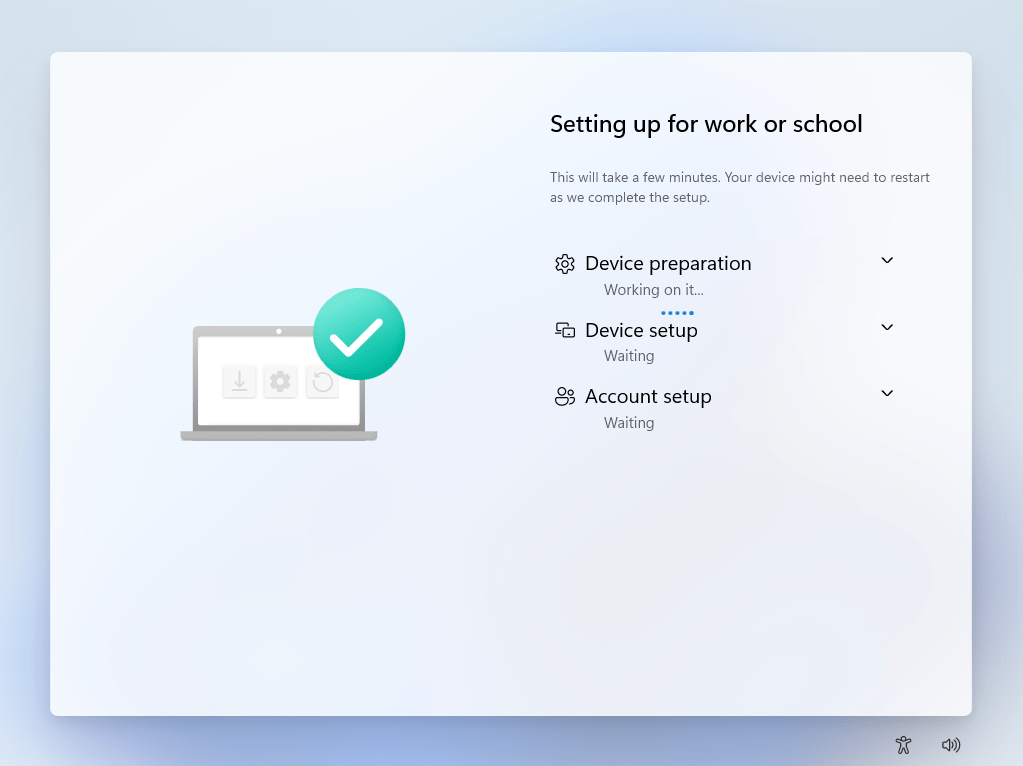
The Autopilot process will start.
But unfortunately this is where the problems started. The first problem I encountered was during the Device Preparation step. This had me puzzled for a while, but by checking the eventlogs I noticed there was an issue with the TPM.
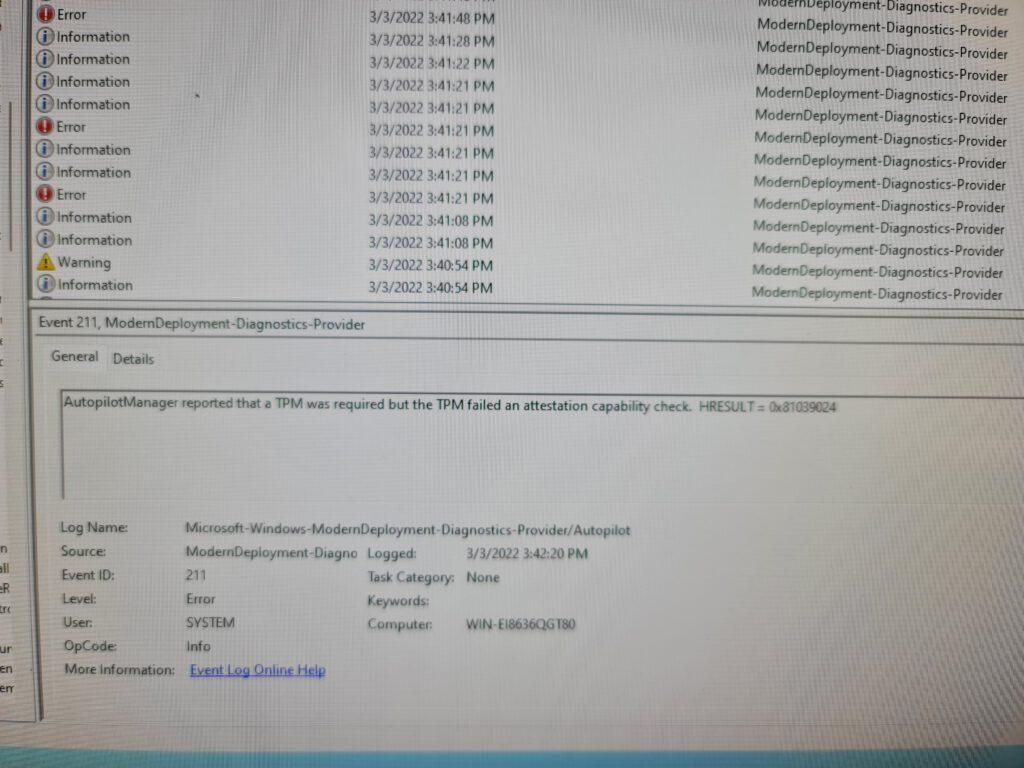
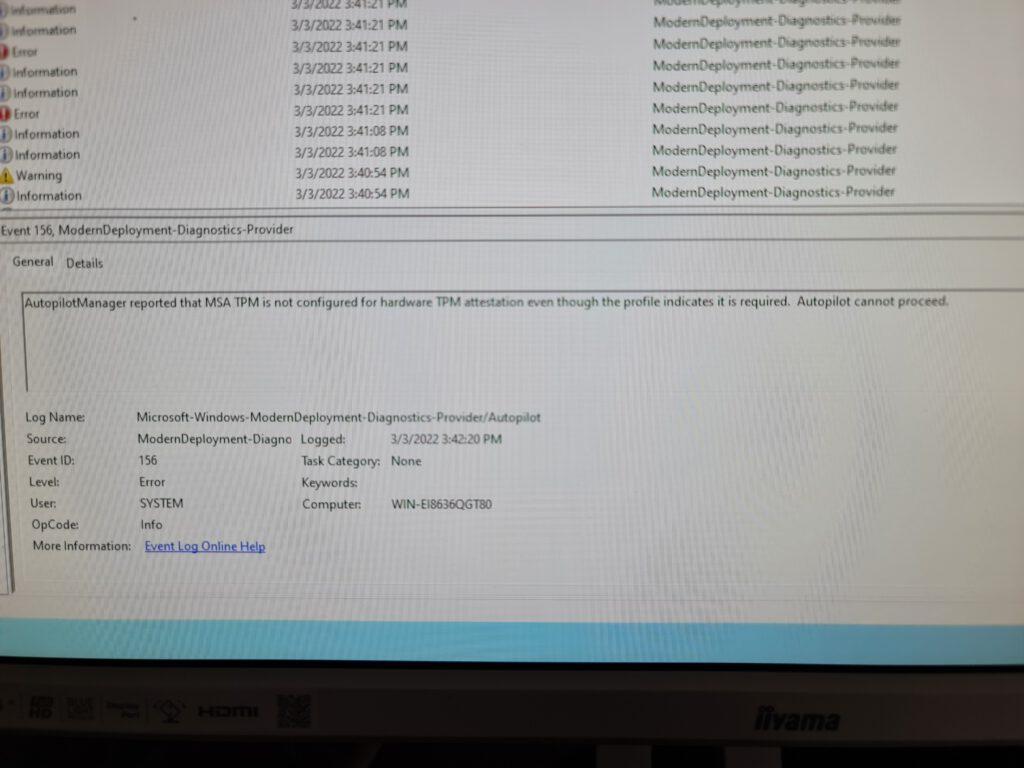
I was able to solve the issue by checking the Dell support site. There was a small firmware update for the TPM chip. After the upgrade process completed successfully, the issue was gone.
The deployment process seemed to fail, but there was no error. After installing the apps, I would have expected a screen to reseal the image. But the system rebooted automatically and it showed the normal Windows 11 login screen. At this point, multiple problems occured;
- I was unable to login (no accounts worked)
- I noticed the system did not report back to MEM. It lost connectivity somehow.
At this point, the only thing I could do was to reset the system to factory defaults. So I pressed the left SHIFT key and rebooted the system. Using the recovery environment, I was able to reset Windows 10. I tried redeploying a couple of times, but the result was always the same…. or worse. At one point I got an error which led to a known issue. And Microsoft does not have a solution at this point. So that was the end of the deployment on Windows 11.
If you tried this, please let me know how this worked out for you in the comments!
I did get to troubleshoot the process, so guess what the next part in this post is!
Troubleshooting
In this section I will cover some basics on how to troubleshoot when the deployment fails.
It will take time
Since the pre-provisioning process cannot be done within a virtual machine, we lose the advantage of snapshotting. Resetting Windows will take more time and can differ depending on the hardware performance.
Unable to run Autopilot for a second time
If our first deployment failed for some reason, chances are that the hardware registration process already completed. In this case Autopilot already created an object in Intune. We need to delete this object in Intune before we can run the deployment again. Here are a couple of ways to find out which object we need to delete.
On the affected machine, press shift+F10 to open a command prompt. Type in Hostname to find out which hostname is assigned to the machine. Look the hostname up in MEM and delete the object there.
If we are still testing with a single device, we could also go to MEM, Windows Devices and filter on Last Check-in. Make sure the last date is on top. The first row will display the object we are using for our test.
Windows is stuck and unusable after a failed deployment
I’ve seen Windows in a state where we are unable to log in and it does not respond to the reset command issued from MEM. In this case, try to open a command prompt and type Systemreset -factoryreset. This command will start the Windows reset procedure.
This will only work if we are still in the deployment process.
Known Issues
Microsoft publishes a list of known issues, so it’s always worth a try to check the known issue list.
Share this:
- Click to share on LinkedIn (Opens in new window) LinkedIn
- Click to share on X (Opens in new window) X
- Click to share on Facebook (Opens in new window) Facebook
- Click to share on WhatsApp (Opens in new window) WhatsApp
- Click to share on Telegram (Opens in new window) Telegram
- Click to print (Opens in new window) Print


