What’s up, everyone!
Let’s assume that you are using Azure Virtual Desktop, a great solution to provide virtual desktops to your end users. But as time flies by and technology evolves you might be asking yourself if AVD is still the right choice for your users. What if you want to simplify the management of your virtual desktop environment or want to provide self-service options to your end users? In that case you might consider to migrate to Windows 365. That means you are looking at a difficult migration,… or could it be more easy?
The good news is that the legends at Microsoft and Nerdio got you covered!
Microsoft released a migration API that enables migrations to Windows 365. This means you can migrate these workloads yourself using Graph API or use a partner like Nerdio. Nerdio has immense experience with Azure Virtual Desktop as well as Microsoft Intune, Windows 365 and even app management. It makes a lot of sense for Nerdio to build a solution that migrates AVD workloads to Windows 365.
Join me in this post as I will show what works, what does not , and how to move your desktops to Windows 365.
Enjoy!
Prerequisites
The following are prerequisites if you want to follow along:
- Nerdio Manager needs to be at version v7.4.1 or higher.
- Only AVD single-session desktop (personal) desktop experiences can be migrated to Windows 365.
- You can migrate individual session hosts to Windows 365 which gives you granular control.
- You can migrate session hosts in bulk to Windows 365.
- You can migrate either immediately or use a schedule.
- Create a group and assign Windows 365 licenses to it for group-based licensing.
The personal desktop in Azure Virtual Desktop
In my demo environment I’ve got an account (blackwidow) that is using a personal desktop in AVD. When she signs into the Windows app, she sees the following:

All users like to customize their desktop, right? In this case the wallpaper has changed and the taskbar has been customized to remove icons and the clock.
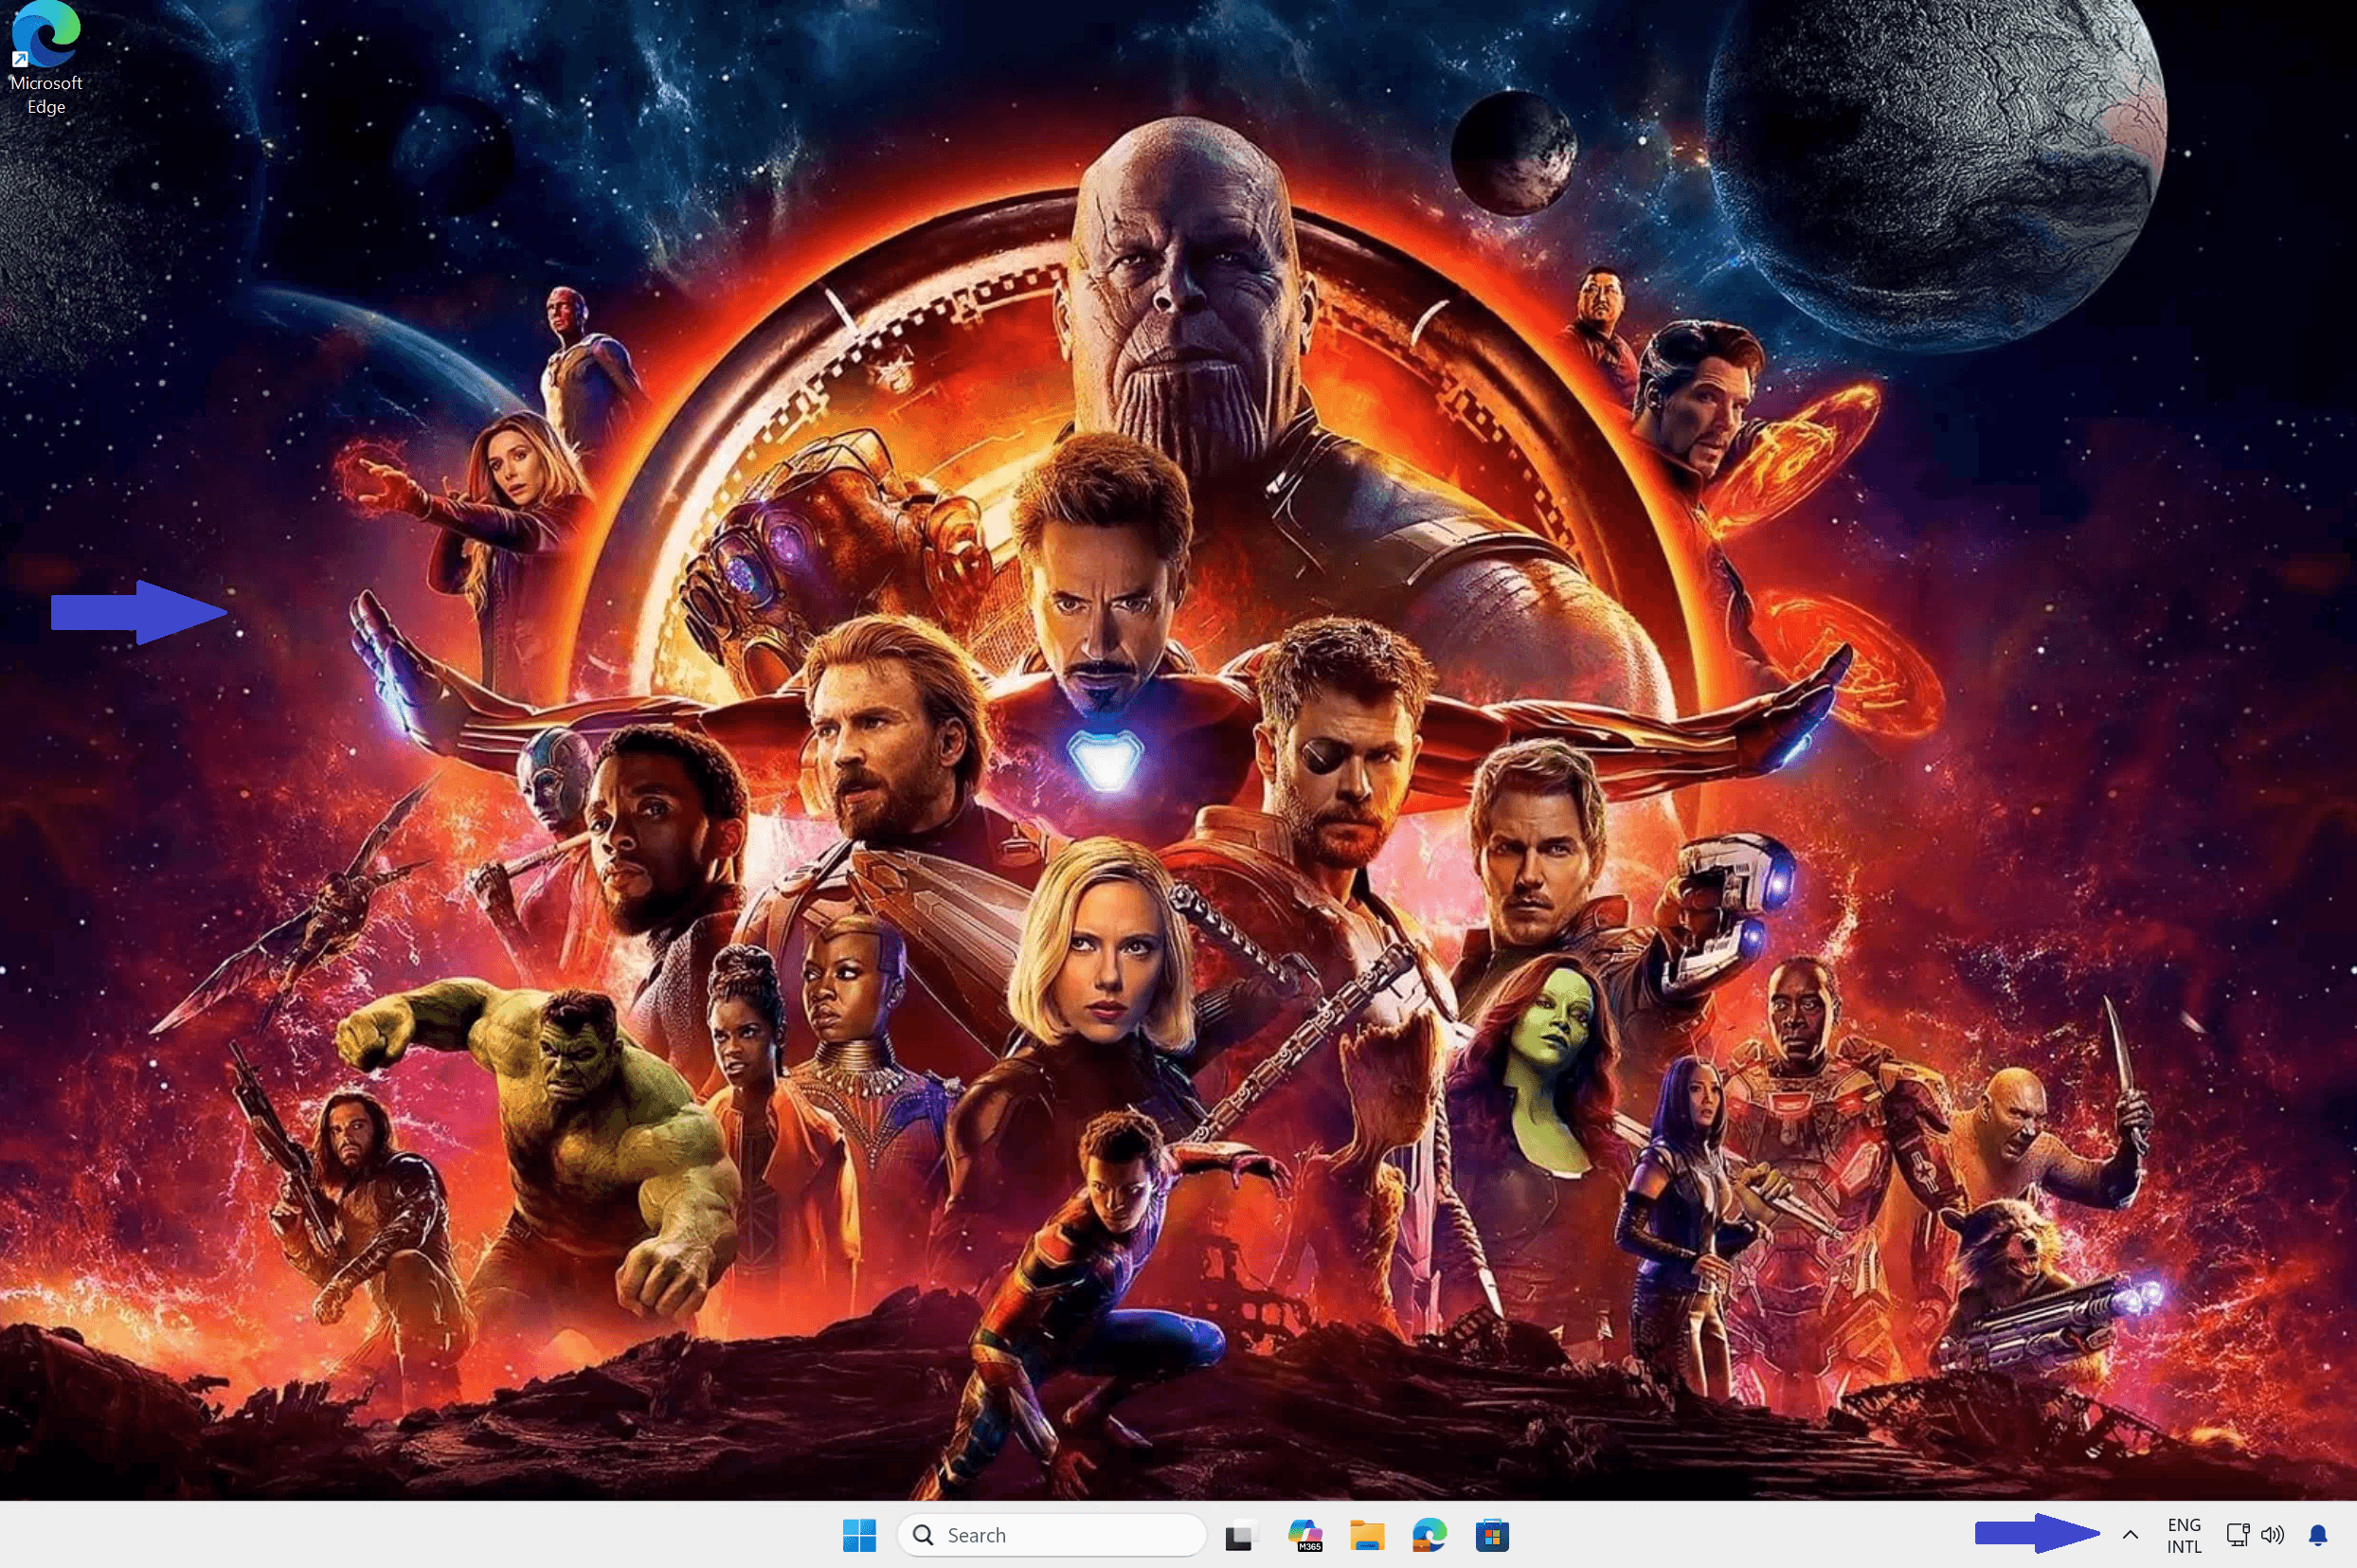
Now let’s find out how to migrate this desktop to Windows 365.
Migrating to Windows 365
Sign into Nerdio Manager for Enterprise and go to Workspaces, either dynamic or static. In my demo I will migrate from a static host pool.
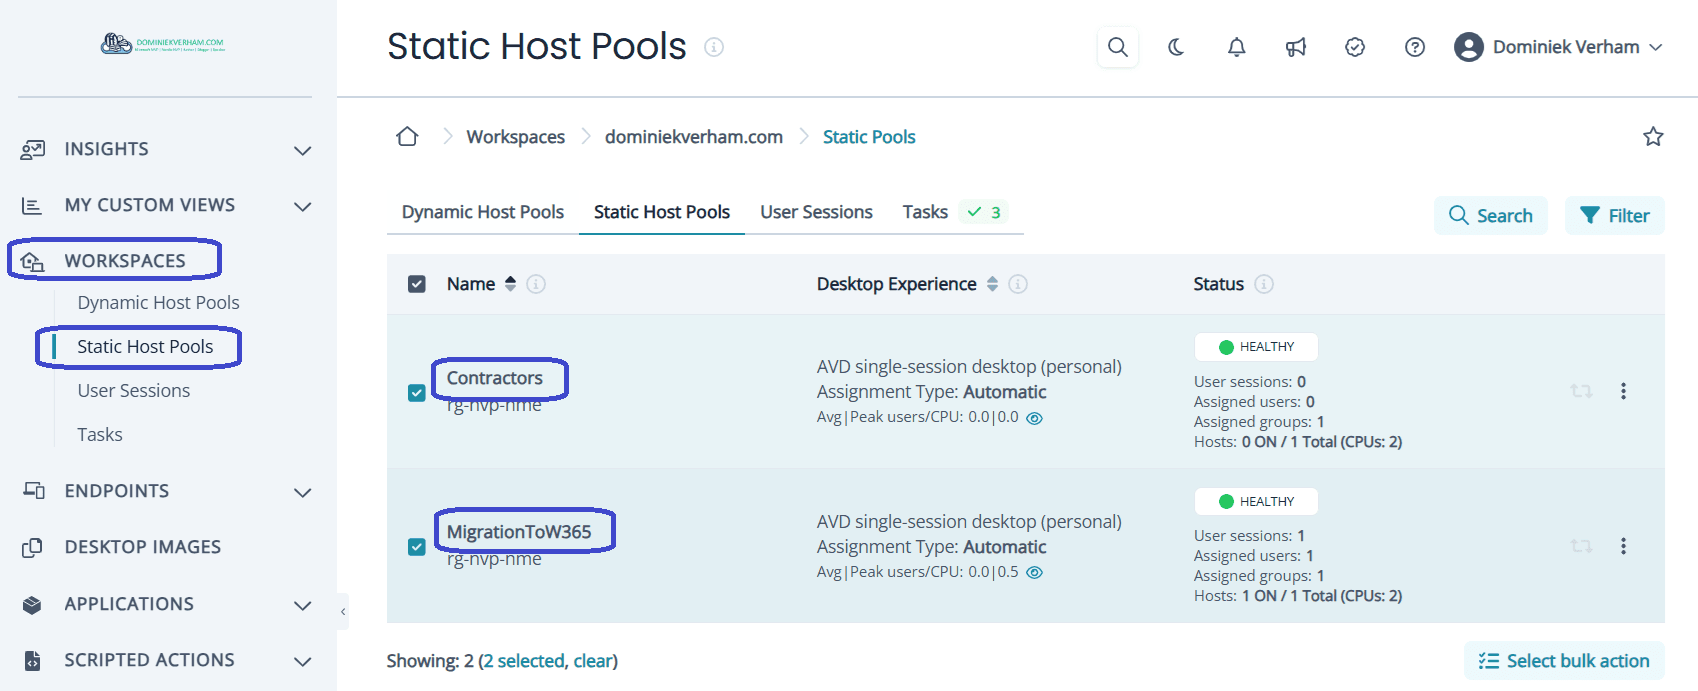
The Nerdio documentation states we should be able to migrate multiple host pools at the same time. Just select the host pools you want to migrate, click Select bulk action and Migrate to Windows 365 for selected.
In my case there was no Migrate to option in the dropdown list:
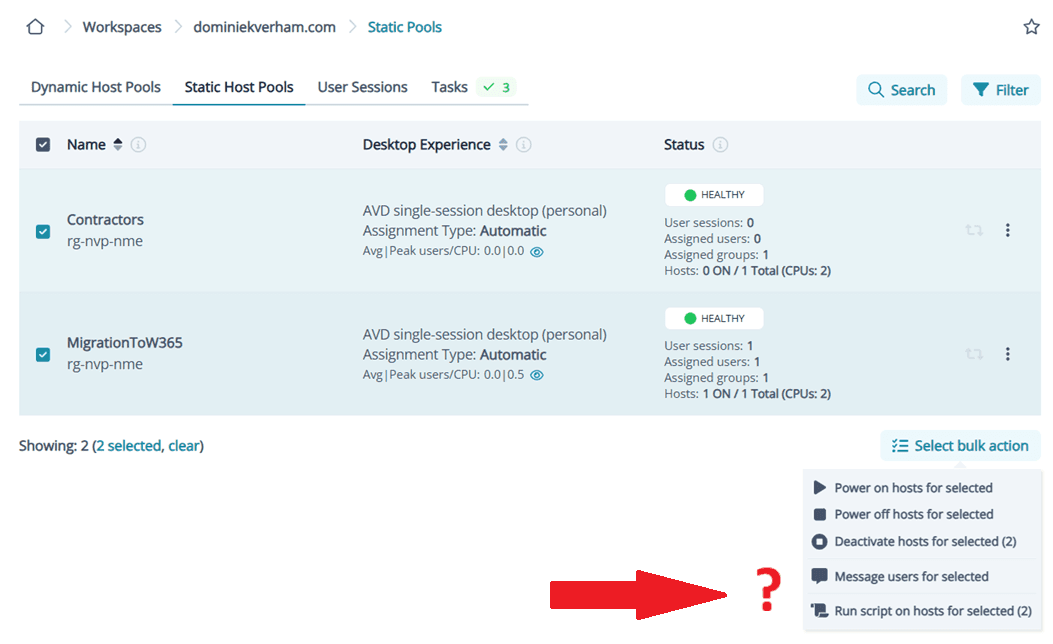
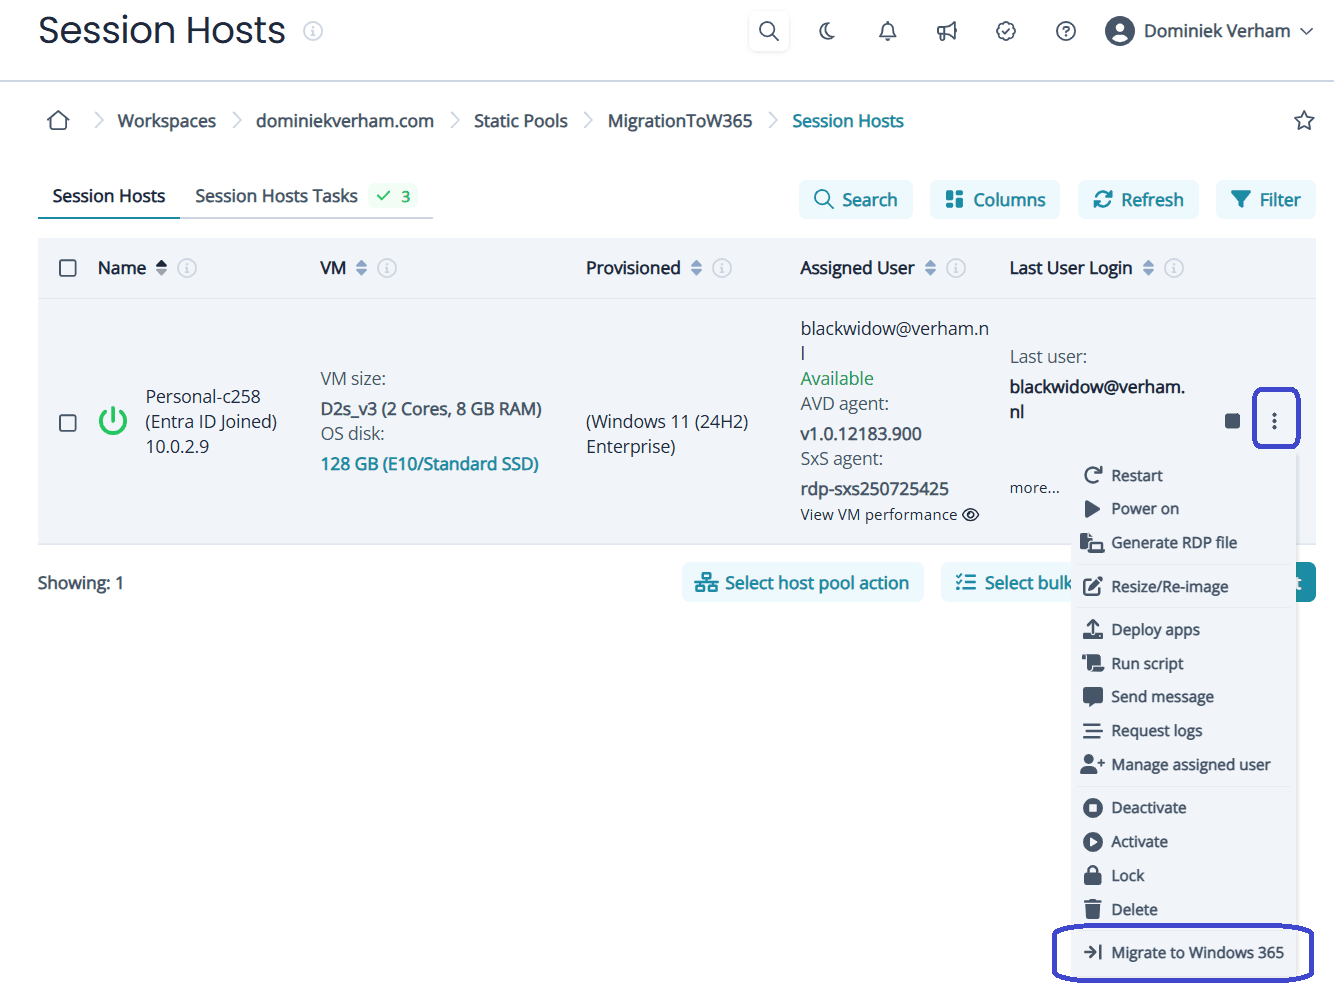
Let’s move on and continue with migrating the session host used by blackwidow. Select the host pool, click the three dots and select Migrate to Windows 365 to start the migration.
This gives us the first glimpse of the steps we need to perform:
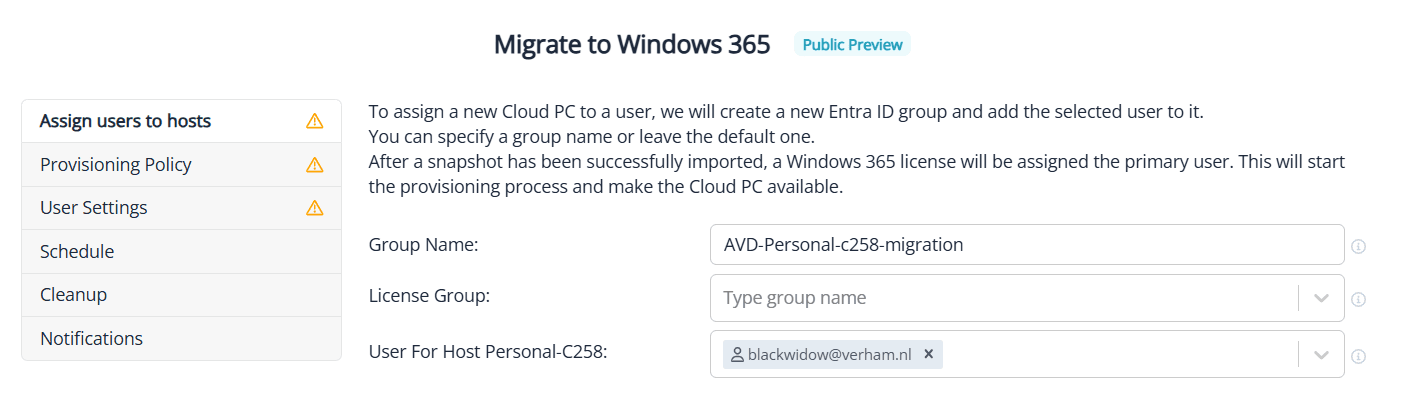
The first step is to add a license group. The group needs to have a Windows 365 Cloud PC sku assigned to it. Quick recap if you still need to create a group:
From the Microsoft 365 admin center, Teams & groups, Active teams & groups, Security groups. Add a security group or select an existing one. From the group itself, go to Licenses and apps. Check the box next to your Cloud PC licenses and make sure to save the changes.

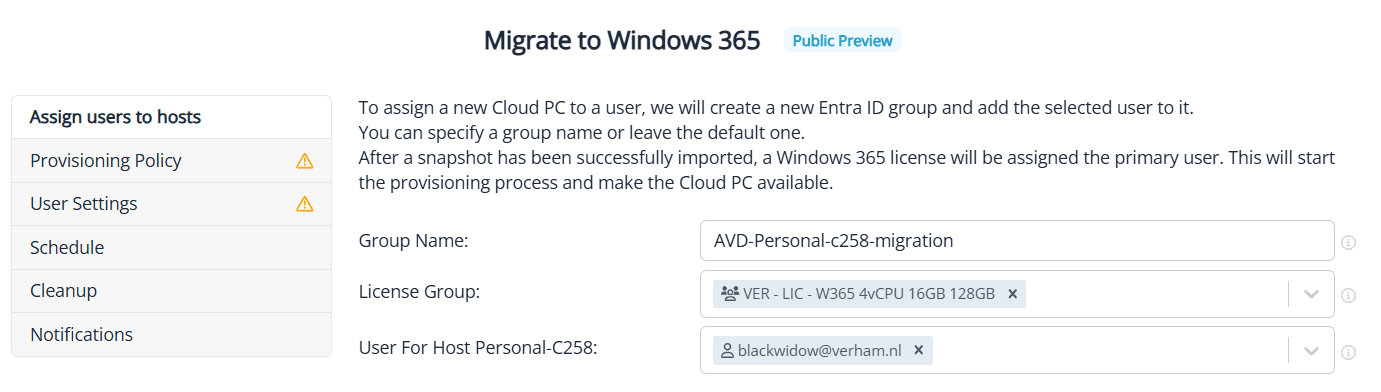
Add the group to the License group box and you are good to go to the next step.
In this step we can either assign an existing provisioning policy or create a new policy. I will use an existing one in my demo, but I do want to show the options of creating a new one:

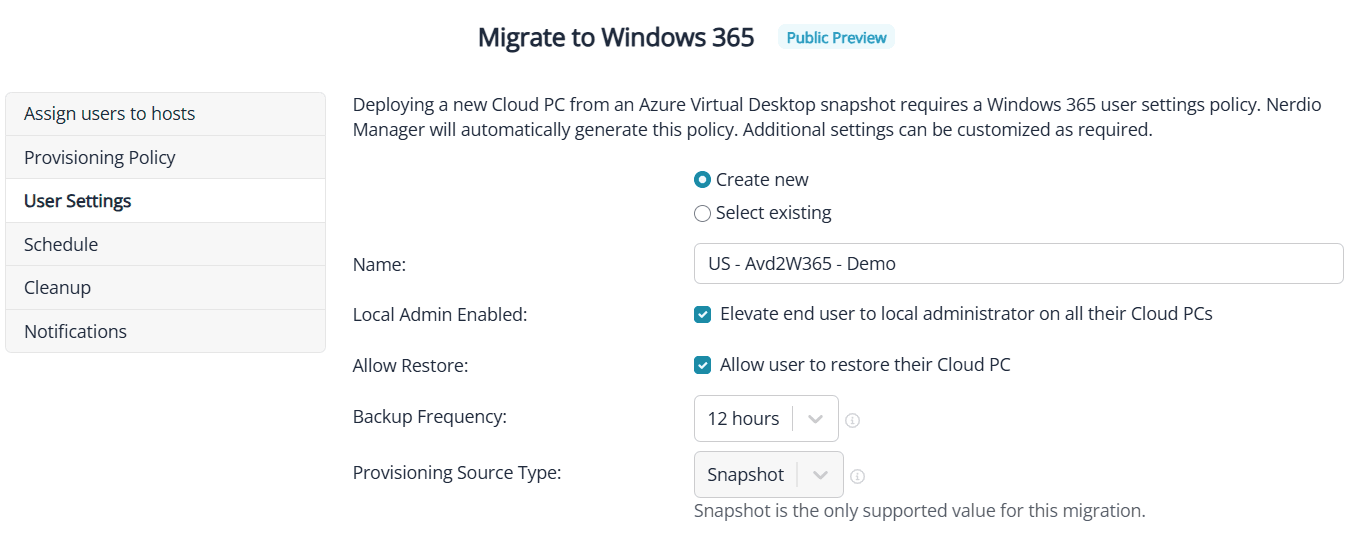
Next up is to select an existing user settings policy or create a new one. Let’s create a new one:
- Give the user settings policy a name
- Decide if you want hand out local admin rights on the Cloud PC or not…
- Decide if you want users to be able to restore their Cloud PC to an earlier point in time
- Select the desired interval when snapshots should be created
With that it’s time for the next step.
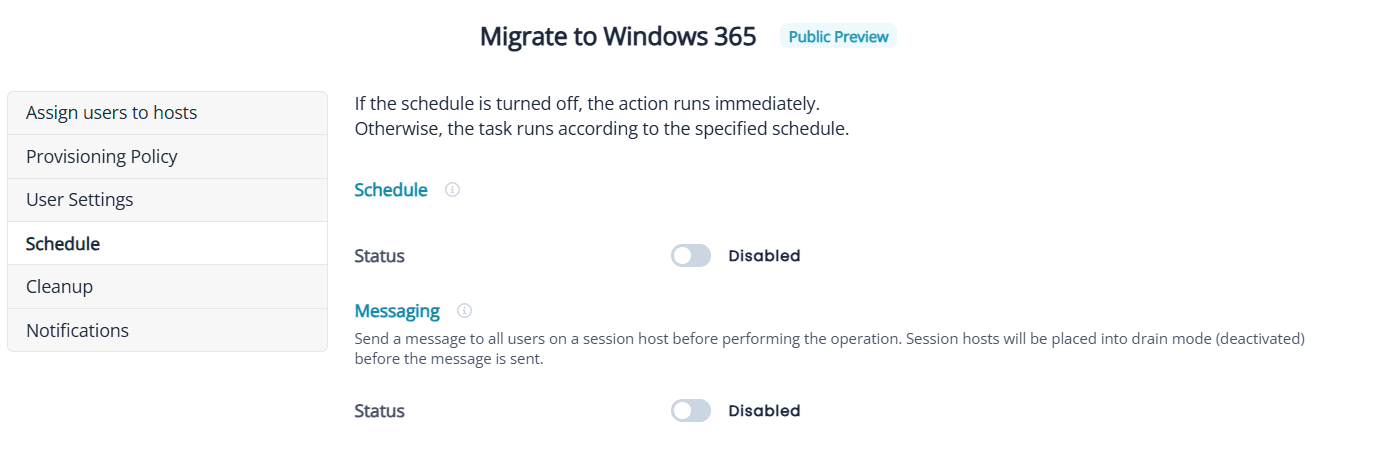
When do you want to migrate the session host to Windows 365? That’s exactly what’s next on our to do list.
- Schedule: If you are part of a project team and are migrating a large amount of session hosts to Windows 365, you might be happy to know that you can schedule the migration process. You also have the option to send a notification to the users informing them of the migration downtime. Nice touch, Nerdio!
- Immediately: if you leave everything to the defaults, NME will initiate the migration process immediately. Handy for testing, demos like this or simply a quick move for a desktop to Windows 365. This also supports sending a notification to the affected users.
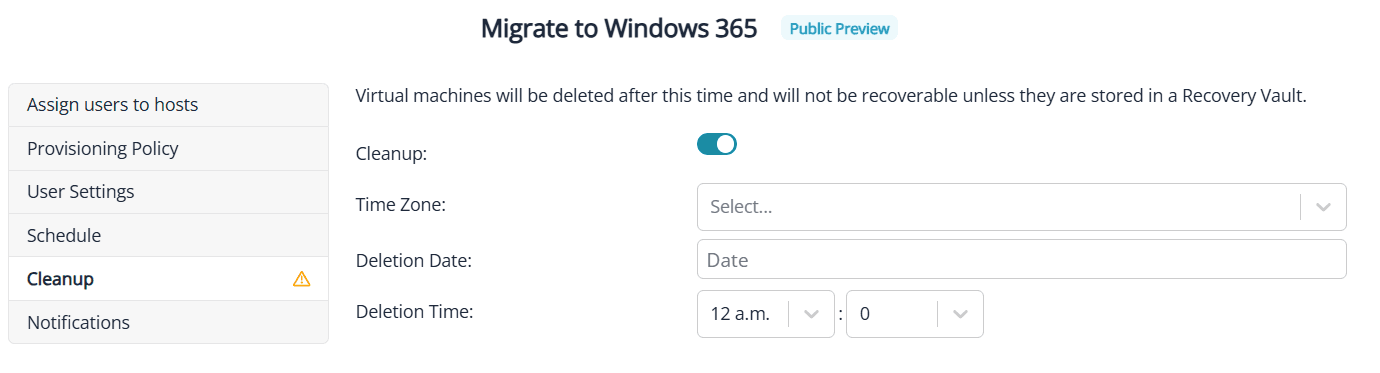
The migration process will use the snapshot to create a shiny new Cloud PC for your users. But what do you, as a Nerdio admin, want to with the session host object in Azure?
You can either:
- Keep it: leave the defaults and the session host will live on. Ideal for testing purposes but not so ideal from a cost perspective.
- Remove it: enable automatic cleanup by setting a time and date to delete the session host.
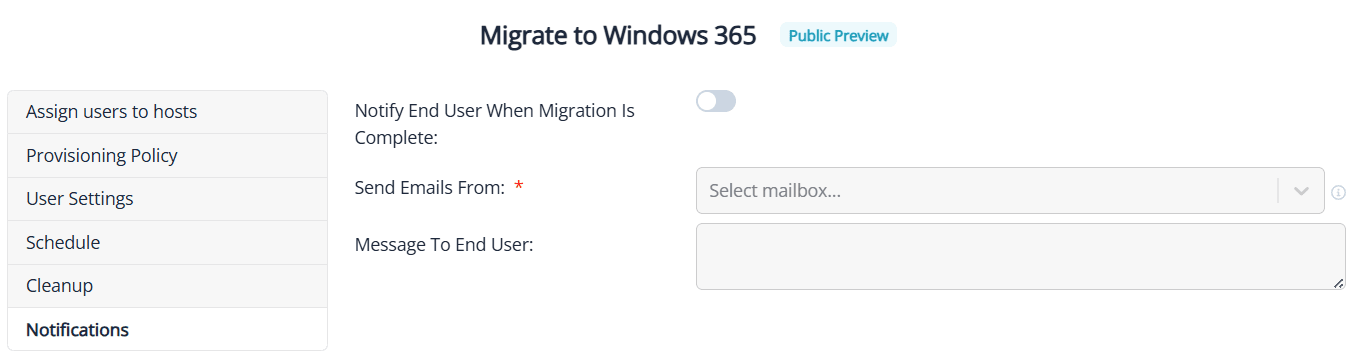
Last but not least you have the option to send a mail to the end user letting them know they can now sign into the Windows app and get access to a brand new Cloud PC.
To do so, you need to have configured environment settings in NME so you can select from which mailbox this message will be send. I haven’t done that in my demo environment so I will skip this part. I do want to show you the configuration step:
With all that work done, it’s high time to click the submit button to start the migration process. If you want to admire your awesome work, go to the Session Hosts Tasks list and click the Informational (I) button in the Migrate Session Host to Windows 365 task.
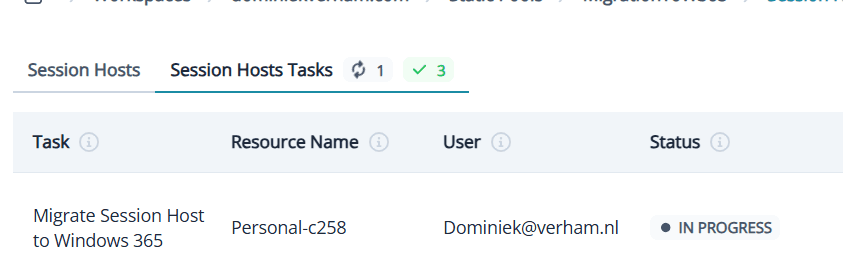
As you can imagine, this might take a bit of time…

In case you where wondering;
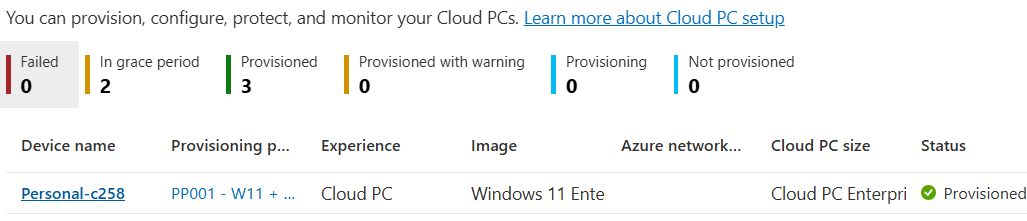
- There is no new Cloud PC in the All Cloud PCs overview in Microsoft Intune while this process is going on. It will appear somewhere at the end of the process.
- You can power off the session host before the migration starts. If you leave it on, the migration process will not power off that session host.
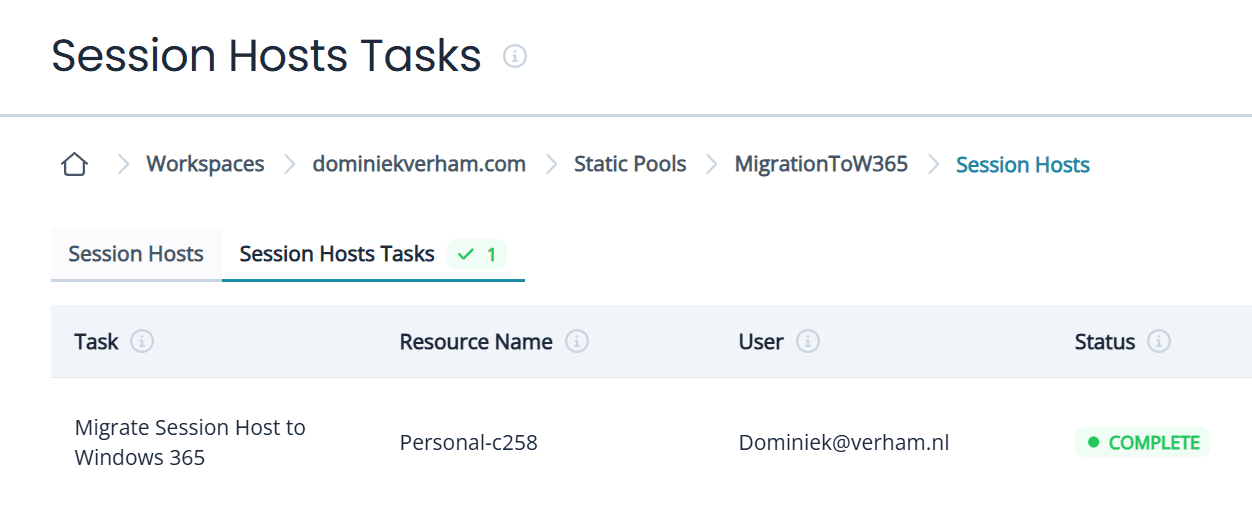
You know the process is complete if:
- The Cloud PC is provisioned in Microsoft Intune.
- The migration task in Nerdio Manager has a successful status.
- The user receives a mail informing them the Cloud PC is ready.
What happens if there is an issue?
- Always check the Session Host Tasks in Nerdio Manager. Review the log of the migration task. It will let you know here it failed. You can always retry the migration and NME will continue where it failed the previous time.
- Review the status of the Cloud PC in Microsoft Intune (All Cloud PCs tab). During my first try, Microsoft shut the frontdoor. Well they had an issue and a lot of services in Azure failed. This caused the migration to fail as well. The All Cloud PCs tab gave me a list of all the steps that did not complete. At this point I removed the licenses, deprovisioned the Cloud PC. Cleanup the migration groups and assignments and you guessed it, just try again!
- Remember the cleanup functionality? I would definitely use it in production scenarios but I would not schedule the cleanup close to the migration date / time. Give yourself enough time to perform a second try in case the first try failed.
With that out of the way, let’s find out what changed for the user.
Signing into the migrated Cloud PC
The user experience all starts with the Windows app, so let’s open it up and see if there is any difference:

We now have the option to connect to the existing desktop running in AVD and we have the option to connect to our brand new Cloud PC. When I connect to the Cloud PC I get the SSO question and can proceed to the desktop which looks like this:

This already looks familiar! Let’s check:
1: I didn’t expect a notification about the page file. If you click OK, you will get a window to configure the page file (see screenshot below).
Please note that accepting these settings will not solve the issue and the user will have get the same message next time they sign in.
So how do we solve this?
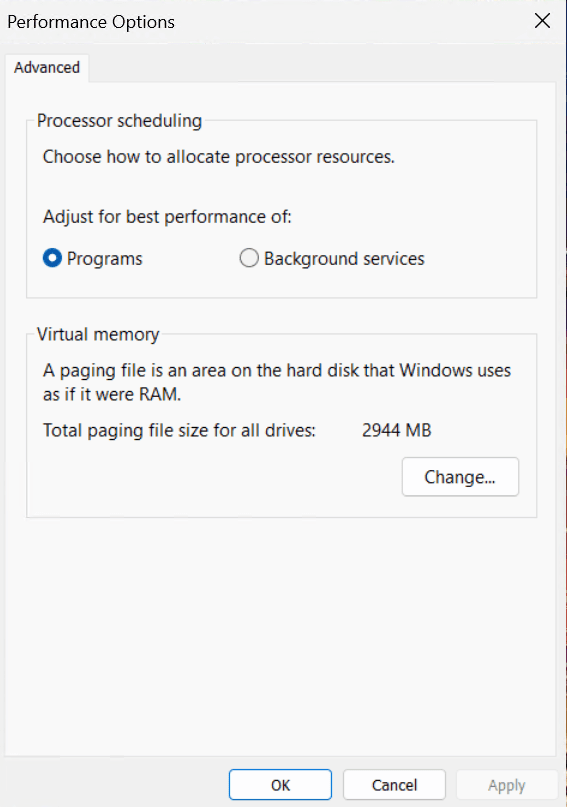
My first guess was to click the Change… button and have Windows manage the page file. This will actually solve the issue. But then I wondered what the default setting is. So I signed in to another Cloud PC, one that is not migrated. Then I looked up those settings and they look like:
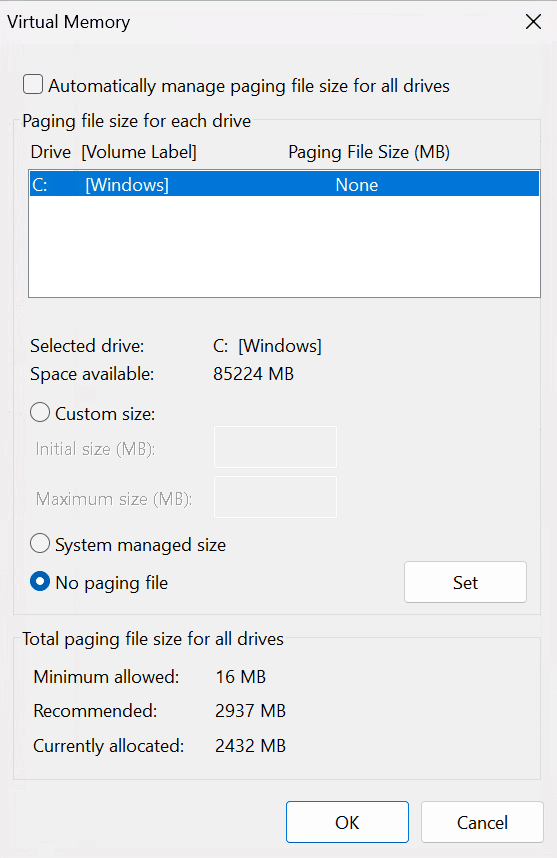
So the solution here is to stick to the default behavior and use the No paging file setting. This will require a reboot and the notification should be gone.
2: The wallpaper is still there. Looking good!
3: The taskbar customizations of icons and clock are still there.
4: I pinned the connection bar on top so you can see that this is now a Cloud PC.
5: I specified that blackwidow should be local admin via the user settings, which means she should be able to reboot the Cloud PC from the desktop. And that works!

And that is all there is to it. This is a really simple and fast way to migrate a lot of desktops from AVD to Windows 365. The only drawback that I had is the page file notification. Happy migrating!
Resources
I used the following resources for this post:
What’s new in Windows 365 Enterprise | Microsoft Learn
Release Notes – Nerdio Manager for Enterprise
Migrate from AVD to Windows 365 Cloud PCs – Nerdio Manager for Enterprise
Huge shoutout to Neil McLoughlin for his video on the subject!
Migrate Azure Virtual Desktop to Windows 365 — No Data Loss, No Reinstalls!